1. 图像的缩小
图像缩小分为按比例缩小和不按比例缩小两种。图像向缩小后,因为承载的信息量减少,所以画布可相应缩小。图像缩小实际上就是对原图数据进行挑选和处理,获得期望缩小尺寸的数据,并尽量保持原有特征不丢失。最简单的方法就是等间隔地选取数据。
设原始图像大小为MN,缩小为k1Mk2N,(k1,k2 均小于1)。
设原始图像为F(i,j),i=1,2,…,M j=1,2,…,N;
压缩后的图像为G(x,y),,x=1,2,…,k1M y=1,2,…,k2N;
则有G(x,y) = F(c1x,c2y),其中c1 = 1/k1,c2=1/k2;
示例:档F(i,j)为6X6,k1=0.6,k2=0.75时,有

那么,得到的G图像行和列数为x=[1,60.6]=[1,4],四舍五入,最后留下4行,y=[1,60.75]=[1,5],最后留下5列。而行列所对应的值为原始F保留的对应目标像素的值,即G(x,y) = F(c1x,c2y)。
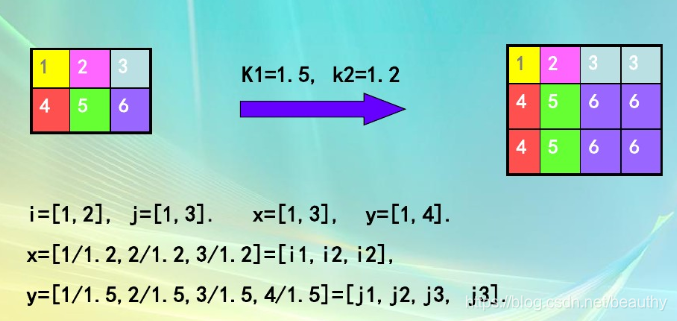
2. 图像的放大
图像放大从信息处理的角度来看,与图像缩小难易程度完全不一样,图像缩小是从众多信息中选出需要的信息,而图像放大则是需要对多出的空位填入适当的值,是信息的估计。
当放大倍数为整数时,最简单的方法是将原图像中的像素值,填在新图像中对应的kk大小的子块中。
设原始图像为F(i,j),i=1,2,…,M j=1,2,…,N;
放大后的图像为G(x,y),,x=1,2,…,k1M y=1,2,…,k1N;
则有G(x,y) = F(c1i,c2*j),其中c1 = 1/k1,c2=1/k2
3. 用python实现图像的缩放
3.1 方法一:PIL库实现
相关库PIL,PIL(Python Imaging Library,图像处理库)提供了通用的图像处理功能,主要包括图像存储、图像显示、格式转换以及基本的图像处理操作。
应用PIL下Image类:
| 变换结果 | 数据属性以及内存地址 |
|---|---|
| src | <PIL.PngImagePlugin.PngImageFile image mode=RGB size=512x512 at 0x20AF35975C8> |
| resized | resized: <PIL.Image.Image image mode=RGB size=307x384 at 0x20AF4266AC8> |
| thumbnail | thumbnail: <PIL.PngImagePlugin.PngImageFile image mode=RGB size=307x307 at 0x20AF35975C8> |
thumbnail 缩略图是网络开发或图像软件预览常用的一种基本技术。thumbnail 方法直接修改原图为缩略图,不会另外创建新内存。resized会在创建新的内存保存缩放数据。
代码实现:
def ChangeSizeofImg(imgDress,wRate=0.6,hRate=0.75):
img = Image.open(imgDress)
print("src:",img)
new_x, new_y = img.size
new_x, new_y = int(wRate*new_x),int(hRate*new_y)
# 得到修改数据
resized = img.resize((new_x, new_y),resample=Image.LANCZOS)
print("resized:",resized)
# 修改原始数据
img.thumbnail((new_x, new_y),resample=Image.LANCZOS)
print("thumbnail:",img)
return resized, img
if __name__ == "__main__":
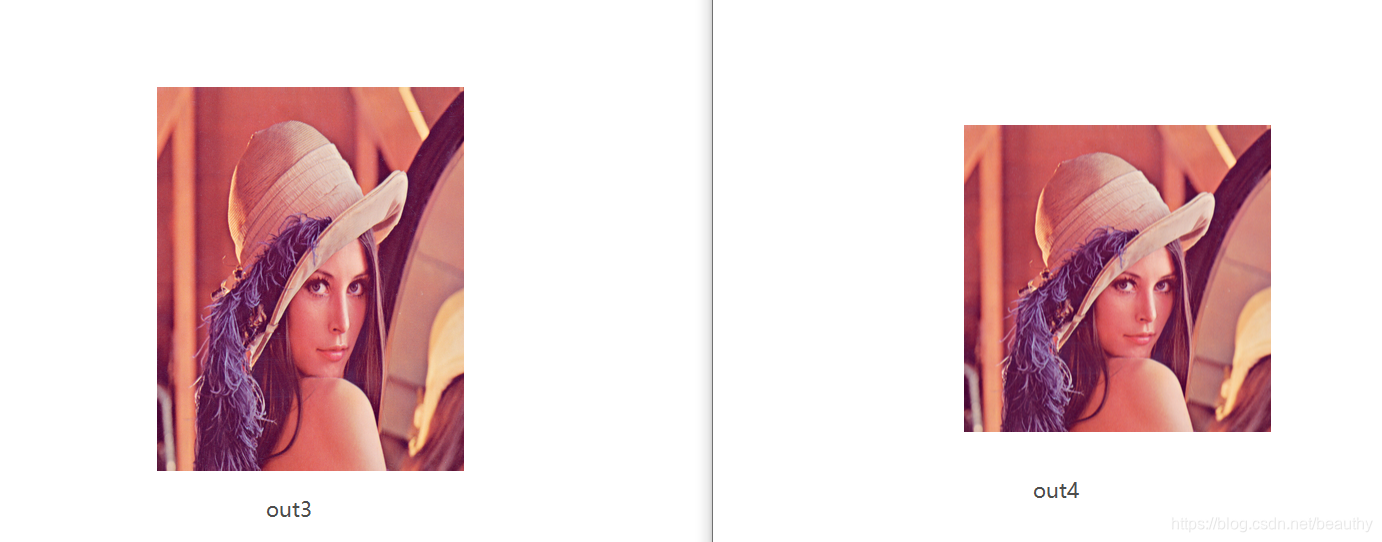
out3,out4 = ChangeSizeofImg("./data/lena.png")
# 数据格式非mat,不能有cv.show显示。out3与out4是PIL Image的实例,直接调用方法显示。
out3.show()
out4.show()
注意:返回的out3与out4是PIL Image的实例,直接调用show方法显示,不能和cv中的imshow混用。
3.2 方法二:cv库实现
cv2.resize(src,dsize[,dst[,fx[,fy[,interpolation]]]]) -> dst
interpolation - 插值方法。共有5种:
1)INTER_NEAREST - 最近邻插值法
2)INTER_LINEAR - 双线性插值法(默认)
3)INTER_AREA - 基于局部像素的重采样(resampling using pixel area relation)。对于图像抽取(image decimation)来说,这可能是一个更好的方法。但如果是放大图像时,它和最近邻法的效果类似。
4)INTER_CUBIC - 基于4x4像素邻域的3次插值法
5)INTER_LANCZOS4 - 基于8x8像素邻域的Lanczos插值
实现缩放:
代码:
#!/usr/bin/python
# -*- coding = utf-8 -*-
# author: beauthy
# date: 2020.3.27
# version: 1.0.0
"""
输出缩放图像OutResizeImage
"""
__author__ = 'beauthy'
import cv2
import os
def OutResizeImage(img,wRate=0.6,hRate=0.75):
"""
缩小图像比例为(0.6,0.75)
放大图像比例为(1.5,1.2)
"""
height, width = img.shape[:2]
if (wRate<1) & (hRate<1):
# 缩小图像
size = (int(width*wRate),int(height*hRate))
shrink = cv2.resize(img,size,interpolation=cv2.INTER_AREA)
return shrink
else:
# 放大图像
fx,fy = wRate,hRate
enlarge = cv2.resize(img,(0,0),fx=fx,fy=fy,interpolation=cv2.INTER_CUBIC)
return enlarge
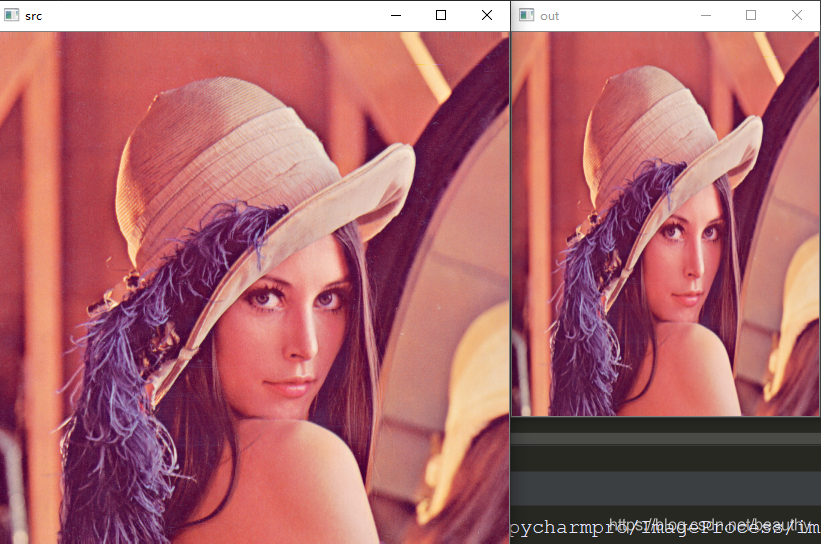
if __name__ == "__main__":
im = cv2.imread("./data/lena.png",-1)
# if im == None:
# print("Error:could not load image")
# os._exit(0)
# 缩小
out1 = OutResizeImage(im)
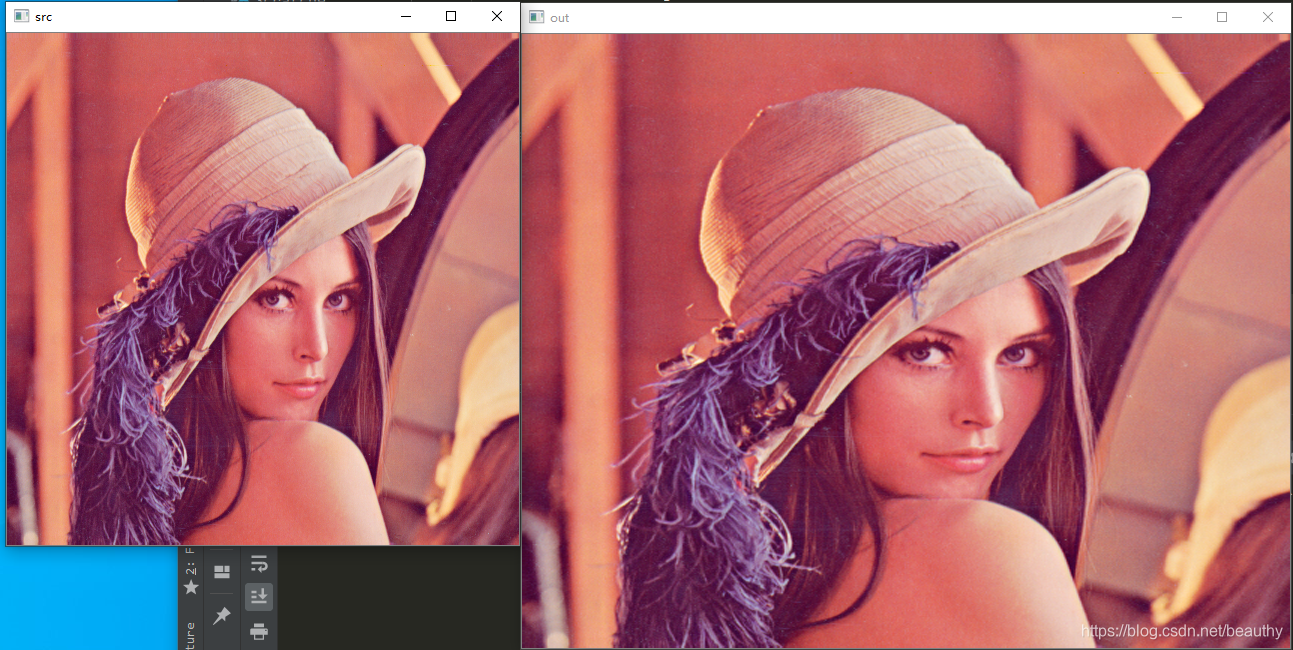
# 放大
out2 = OutResizeImage(im,1.5,1.2)
# 显示
cv2.imshow("src",im)
cv2.imshow("out1",out1)
cv2.imshow("out2",out2)
cv2.waitKey(0)