文章目录
前提条件:
1,Linux系统
3,关闭防火墙和SElinux
第1步:安装JDK(ES自带OpenJDK,安JDK这一步可以按需省略)
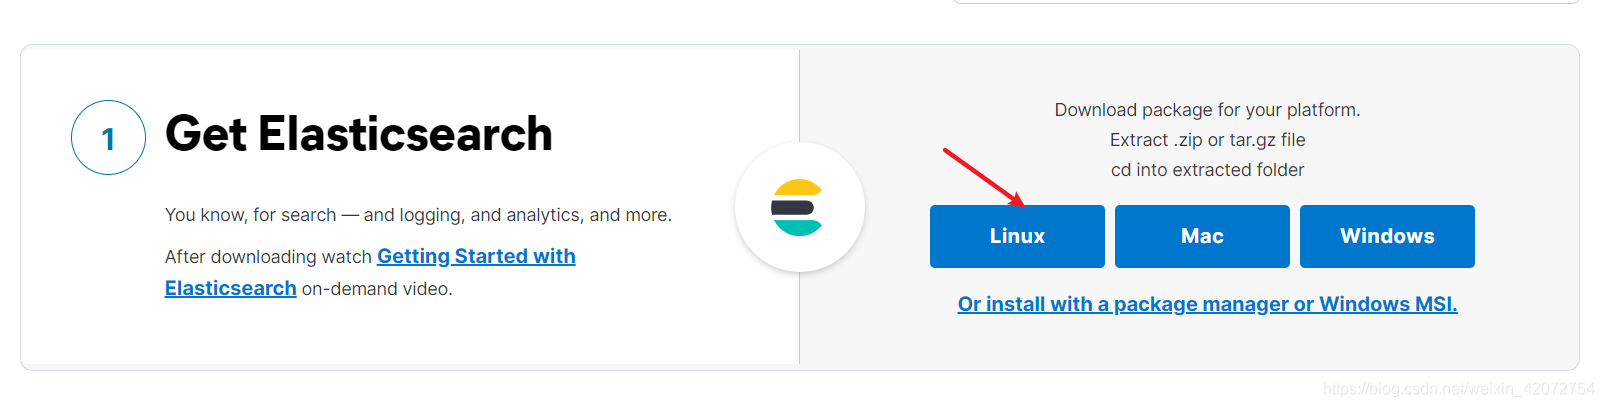
第2步:下载
https://www.elastic.co/cn/start
第3步:上传并解压
首先把它上传到一个目录,可以用lrzsz工具,如果没有(yum -y install lrzsz)用rz上传。
rz
tar -zxvf elasticsearch-7.11.1-linux-x86_64.tar.gz

第3.5步:权限问题
创建个新用户
useradd es
把目录的权限设置为新用户
chown -R es:es /test/elasticsearch-7.11.1/
切换到新用户进行后面的操作
(因为ES的运行不建议使用root用户)
第4步:改配置
cd elasticsearch-7.11.1/config/
vim elasticsearch.yml
这个配置文件默认全是注释的,需要把以下几项解除注释,并填入相应内容。
cluster.name  ES集群名称,随便填
node.name	ES安装的这台节点的主机名
http.port: 9200
network.host: 0.0.0.0   这个是让任意地址都能访问es
discovery.seed_hosts:["192.168.xx.xx"]   这里是这台机器的ip地址
cluster.initial_master_nodes:["xxx"]		这里xxx是node.name的值
保存退出
第5步:启动
克隆一个新窗口启动,方便查看启动日志,或者把日志写到某文件
cd /test/elasticsearch-7.11.1/bin/
./elasticsearch
第6步:验证是否安装成功
浏览器访问这台机器的ip地址的9200端口
扫描二维码关注公众号,回复:
12512546 查看本文章

http://192.168.xx.xxx:9200/
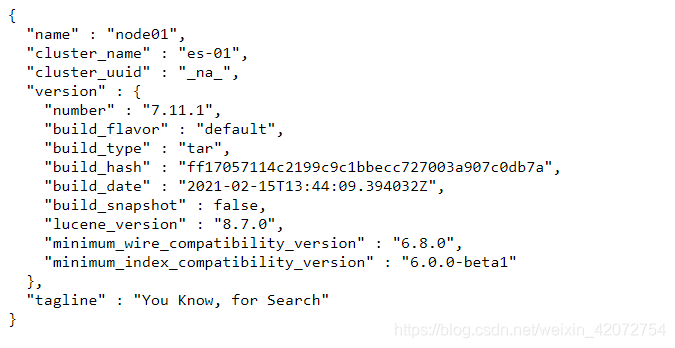
会返回一大段JSON格式代码
{


  "name" : "elk",
  "cluster_name" : "my-application",
  "cluster_uuid" : "-R6LYlMoS2qqMr6r3Ynb_g",
  "version" : {


    "number" : "7.11.1",
    "build_flavor" : "default",
    "build_type" : "tar",
    "build_hash" : "ff17057114c2199c9c1bbecc727003a907c0db7a",
    "build_date" : "2021-02-15T13:44:09.394032Z",
    "build_snapshot" : false,
    "lucene_version" : "8.7.0",
    "minimum_wire_compatibility_version" : "6.8.0",
    "minimum_index_compatibility_version" : "6.0.0-beta1"
  },
  "tagline" : "You Know, for Search"
}
这样就安装成功了。更多配置可以查官方文档。
https://www.elastic.co/guide/en/elasticsearch/reference/current/index.html
BUG整理
BUG01 vm.max_map_count [65530] is too low
安装后运行出现如下错误:
[2021-02-21T19:18:09,221][INFO ][o.e.b.BootstrapChecks    ] [node01] bound or publishing to a non-loopback address, enforcing bootstrap checks
ERROR: [1] bootstrap checks failed
[1]: max virtual memory areas vm.max_map_count [65530] is too low, increase to at least [262144]
ERROR: Elasticsearch did not exit normally - check the logs at /export/servers/elasticsearch-7.11.1/logs/elasticsearch.log
解决方案:
打开如下文件
vi /etc/sysctl.conf
添加或修改如下内容
vm.max_map_count=655360
执行
sysctl -p
重启ElasticSearch即可。
BUG02 在centos8上安装完成后无法在其它ip访问这个主机地址的9200端口
经过分析可能是防火墙和selinux没有关闭导致的。
首先考虑防火墙,但是一般centos8安装成功后不会带firewall防火墙服务,那么应该是selinux的问题
输入sestatus查看selinux状态。
[root@node01 bin]# sestatus
SELinux status:                 enabled
SELinuxfs mount:                /sys/fs/selinux
SELinux root directory:         /etc/selinux
Loaded policy name:             targeted
Current mode:                   enforcing
Mode from config file:          enforcing
Policy MLS status:              enabled
Policy deny_unknown status:     allowed
Memory protection checking:     actual (secure)
Max kernel policy version:      32
[root@node01 bin]#
发现的确开启了,只需要把它关闭了就行了。
- 命令:暂时关闭selinux
setenforce 0
修改配置,重启centos8即可
vi /etc/selinux/config
改这一行为disabled
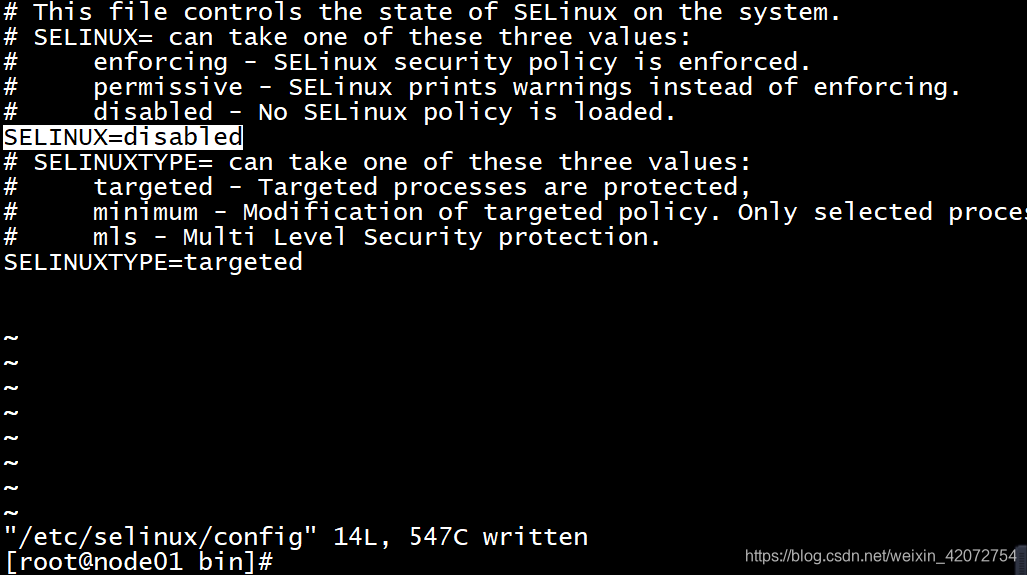
SELINUX=disabled
重启电脑后查看selinux状态:
[root@node01 ~]# sestatus
SELinux status:                 disabled
[root@node01 ~]#
这样就关闭成功了,现在再启动es,访问9200端口试一下。
启动成功!