文章目录
Anaconda的基本使用
Life is short. Use Python.
Ipython 解释器
通常我们并不使用Python自带的解释器,而是使用另一个比较方便的解释器——ipython解释器,命令行下输入:
ipython
即可进入ipython解释器。
所有在python解释器下可以运行的代码都可以在ipython解释器下运行:
ipython magic命令
ipython解释器提供了很多以百分号%开头的magic命令,这些命令很像linux系统下的命令行命令(事实上有些是一样的)。
查看所有的magic命令:
%lsmagic
结果:
Available line magics:
%alias  %alias_magic  %autocall  %automagic  %autosave  %bookmark  %cd  %clear  %cls  %colors  %config  %connect_info  %copy  %ddir  %debug  %dhist  %dirs  %doctest_mode  %echo  %ed  %edit  %env  %gui  %hist  %history  %killbgscripts  %ldir  %less  %load  %load_ext  %loadpy  %logoff  %logon  %logstart  %logstate  %logstop  %ls  %lsmagic  %macro  %magic  %matplotlib  %mkdir  %more  %notebook  %page  %pastebin  %pdb  %pdef  %pdoc  %pfile  %pinfo  %pinfo2  %popd  %pprint  %precision  %profile  %prun  %psearch  %psource  %pushd  %pwd  %pycat  %pylab  %qtconsole  %quickref  %recall  %rehashx  %reload_ext  %ren  %rep  %rerun  %reset  %reset_selective  %rmdir  %run  %save  %sc  %set_env  %store  %sx  %system  %tb  %time  %timeit  %unalias  %unload_ext  %who  %who_ls  %whos  %xdel  %xmode

Available cell magics:
%%!  %%HTML  %%SVG  %%bash  %%capture  %%cmd  %%debug  %%file  %%html  %%javascript  %%js  %%latex  %%markdown  %%perl  %%prun  %%pypy  %%python  %%python2  %%python3  %%ruby  %%script  %%sh  %%svg  %%sx  %%system  %%time  %%timeit  %%writefile

Automagic is ON, % prefix IS NOT needed for line magics.
line magic 以一个百分号开头,作用与一行;
cell magic 以两个百分号开头,作用于整个cell。
最后一行Automagic is ON, % prefix IS NOT needed for line magics.说明在此时即使不加上%也可以使用这些命令。
使用 whos 查看当前的变量空间:
%whos
Variable   Type      Data/Info
------------------------------
autopep8   module    <module 'autopep8' from '<...>e-packages\\autopep8.py'>
c          int       97
d          dict      n=52
i          int       25
json       module    <module 'json' from 'D:\\<...>\lib\\json\\__init__.py'>
s          str       Gur Mra bs Clguba, ol Gvz<...>- yrg'f qb zber bs gubfr!
this       module    <module 'this' from 'D:\\<...>Anaconda3\\lib\\this.py'>
trantab    dict      n=52
使用 reset 重置当前变量空间:
%reset -f
再查看当前变量空间:
%whos
Interactive namespace is empty.
使用 pwd 查看当前工作文件夹:
%pwd
'F:\\jupyter\\demo'
使用 mkdir 产生新文件夹:
%mkdir demo_test
使用 cd 改变工作文件夹:
%cd demo_test/
F:\jupyter\demo\demo_test
使用 writefile 将cell中的内容写入文件:
%%writefile hello_world.py
print("hello world")
Writing hello_world.py
使用 ls 查看当前工作文件夹的文件:
%ls
 驱动器 F 中的卷是 Seagate1.81TB
 卷的序列号是 EED2-3ECD

 F:\jupyter\demo\demo_test 的目录

2021/01/20  18:03    <DIR>          .
2021/01/20  18:03    <DIR>          ..
2021/01/20  18:03                20 hello_world.py
               1 个文件             20 字节
               2 个目录 1,346,270,302,208 可用字节
使用 run 命令来运行这个代码:
%run hello_world.py
hello world
删除这个文件:
import os
os.remove('hello_world.py')
查看当前文件夹,hello_world.py 已被删除:
%ls
 驱动器 F 中的卷是 Seagate1.81TB
 卷的序列号是 EED2-3ECD

 F:\jupyter\demo\demo_test 的目录

2021/01/20  18:03    <DIR>          .
2021/01/20  18:03    <DIR>          ..
               0 个文件              0 字节
               2 个目录 1,346,270,302,208 可用字节
返回上一层文件夹:
%cd ..
F:\jupyter\demo
使用 rmdir 删除文件夹:
%rmdir demo_test
使用 hist 查看历史命令:
%hist
%lsmagic
%whos
%reset -f
%whos
%pwd
%mkdir demo_test
%cd demo_test/
%%writefile hello_world.py
print("hello world")
%ls
%run hello_world.py
import os
os.remove('hello_world.py')
%ls
%cd ..
%rmdir demo_test
%hist
ipython 使用
使用 ? 查看函数的帮助:
sum?
使用 ?? 查看函数帮助和函数源代码(如果是用python实现的):
# 导入numpy和matplotlib两个包
%pylab
# 查看其中sort函数的帮助
sort??
Using matplotlib backend: TkAgg
Populating the interactive namespace from numpy and matplotlib
ipython 支持使用 <tab> 键自动补全命令。
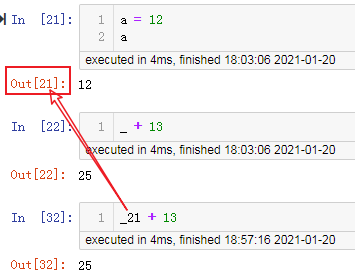
a = 12
a
12
使用 _ 使用上个cell的输出结果:
_ + 13
25
在jupyter notebook还可以使用_num使用指定编号单元格的输出:
可以使用 ! 来执行一些系统命令。
!ping baidu.com
正在 Ping baidu.com [220.181.38.148] 具有 32 字节的数据:
来自 220.181.38.148 的回复: 字节=32 时间=87ms TTL=44
来自 220.181.38.148 的回复: 字节=32 时间=70ms TTL=44
来自 220.181.38.148 的回复: 字节=32 时间=76ms TTL=44
来自 220.181.38.148 的回复: 字节=32 时间=74ms TTL=44

220.181.38.148 的 Ping 统计信息:
    数据包: 已发送 = 4,已接收 = 4,丢失 = 0 (0% 丢失),
往返行程的估计时间(以毫秒为单位):
    最短 = 70ms,最长 = 87ms,平均 = 76ms
当输入出现错误时,ipython会指出出错的位置和原因:
1 + "hello"
---------------------------------------------------------------------------

TypeError                                 Traceback (most recent call last)

<ipython-input-24-92709354cfb6> in <module>()
----> 1 1 + "hello"


TypeError: unsupported operand type(s) for +: 'int' and 'str'
Ipython notebook
在命令行下输入命令:
ipython notebook
会打开一个notebook本地服务器,一般地址是 http://localhost:8888
使用 Anaconda
Anaconda是一个很好用的Python IDE,它集成了很多科学计算需要使用的python第三方工具包。
conda 的使用
根据自己的操作系统安装好Anaconda后,在命令行下输入:
conda list
可以看已经安装好的python第三方工具包,这里我们使用 magic 命令 %%cmd 在 ipython cell 中来执行这个命令:
!conda list
# packages in environment at D:\Anaconda3:
#
# Name                    Version                   Build  Channel
_ipyw_jlab_nb_ext_conf    0.1.0                    py37_0    defaults
aiohttp                   3.7.1                    pypi_0    pypi
akshare                   0.7.68                   pypi_0    pypi
zlib                      1.2.11               h8395fce_2    defaults
....
第一次安装好 Anaconda 以后,可以在命令行输入以下命令使 Anaconda 保持最新:
conda update conda
conda update anaconda
conda 是一种很强大的工具,具体用法可以参照它的文档:http://conda.pydata.org/docs/。
也可以参考它的 cheat sheet(https://docs.conda.io/projects/conda/en/latest/_downloads/843d9e0198f2a193a3484886fa28163c/conda-cheatsheet.pdf)来快速查看它的用法。
可以使用它来安装,更新,卸载第三方的 python 工具包:
conda install <some package>
conda update <some package>
conda remove <some package>
在安装或更新时可以指定安装的版本号,例如需要使用 numpy 1.8.1:
conda install numpy=1.8.1
conda update numpy=1.8.1
查看 conda 的信息:
!conda info
     active environment : base
    active env location : D:\Anaconda3
       user config file : C:\Users\Think\.condarc
 populated config files : C:\Users\Think\.condarc
          conda version : 4.8.5
    conda-build version : 3.15.1
         python version : 3.7.0.final.0
       virtual packages : __cuda=8.0
       base environment : D:\Anaconda3  (writable)
           channel URLs : https://mirrors.tuna.tsinghua.edu.cn/anaconda/pkgs/main/win-64
                          https://mirrors.tuna.tsinghua.edu.cn/anaconda/pkgs/main/noarch
                          https://mirrors.tuna.tsinghua.edu.cn/anaconda/pkgs/free/win-64
                          https://mirrors.tuna.tsinghua.edu.cn/anaconda/pkgs/free/noarch
                          https://mirrors.tuna.tsinghua.edu.cn/anaconda/pkgs/r/win-64
                          https://mirrors.tuna.tsinghua.edu.cn/anaconda/pkgs/r/noarch
                          https://mirrors.tuna.tsinghua.edu.cn/anaconda/pkgs/pro/win-64
                          https://mirrors.tuna.tsinghua.edu.cn/anaconda/pkgs/pro/noarch
                          https://mirrors.tuna.tsinghua.edu.cn/anaconda/pkgs/msys2/win-64
                          https://mirrors.tuna.tsinghua.edu.cn/anaconda/pkgs/msys2/noarch
          package cache : D:\Anaconda3\pkgs
                          C:\Users\Think\.conda\pkgs
                          C:\Users\Think\AppData\Local\conda\conda\pkgs
       envs directories : D:\Anaconda3\envs
                          C:\Users\Think\.conda\envs
                          C:\Users\Think\AppData\Local\conda\conda\envs
               platform : win-64
             user-agent : conda/4.8.5 requests/2.25.1 CPython/3.7.0 Windows/7 Windows/6.1.7601
          administrator : True
             netrc file : None
           offline mode : False
虚拟环境
一个很棒的功能是 conda 可以产生一个自定义的环境,假设在安装的是 Python 2.7 的情况下,想使用 Python 3.4,只需要在命令行下使用 conda 产生一个新的环境:
conda create -n py34 python=3.4
这里这个环境被命名为 py34 ,可以根据喜好将 py34 改成其他的名字。
创建好以后可以在D:\Anaconda3\envs\(具体与安装的anaconda路径为准) 下找到新创建的环境
使用这个环境时,只需要命令行下输入:
conda activate py34
此时,我们的 Python 版本便是 **python 3.4**了。
查看当前的环境列表:
!conda env list
# conda environments:
#
base                  *  D:\Anaconda3
django                   D:\Anaconda3\envs\django
gui                      D:\Anaconda3\envs\gui
myqr                     D:\Anaconda3\envs\myqr
py37                     D:\Anaconda3\envs\py37
py38                     D:\Anaconda3\envs\py38
pyqt                     D:\Anaconda3\envs\pyqt
webssh                   D:\Anaconda3\envs\webssh
                         F:\envs\superset
退出环境: deactivate
删除环境: conda remove --name test --all
注意:新创建的虚拟环境,添加到jupyter后,一定要安装ipykernel库
conda install ipykernel
否则,将python解释器无法启动
将新的环境添加到jupyter中
python -m ipykernel install --user --name 环境名称 --display-name "在jupyter中显示的环境名称"
例如:
python -m ipykernel install --user --name py38 --display-name "py38"
jupyter安装拓展
命令行中执行:
pip install jupyter_contrib_nbextensions
pip install jupyter_nbextensions_configurator
jupyter contrib nbextension install --user
然后重启jupyter
关于插件的介绍:https://jupyter-contrib-nbextensions.readthedocs.io/en/latest/nbextensions/code_prettify/README_code_prettify.html
例如: Hinterland 代码提示
conda虚拟环境相关的一些常见操作
查阅anaconda的文档:
conda create --help
查看支持的Python版本:
conda search "^python$"
安装anaconda下的envs/py36目录下,python版本为3.6:
conda create -n py36 python=3.6
安装虚拟环境到指定路径下:
conda create --prefix=F:\pandas\py36 python=3.6
激活指定路径下的虚拟环境:
conda activate F:\pandas\py36
退出虚拟环境:
conda deactivate
删除指定路径下的虚拟环境:
conda remove --prefix=F:\pandas\py36 --all
克隆现有环境:
conda create --name python36 --clone F:\envs\py36
移动环境位置:
修改~\.conda\environments.txt文件
使用清华园镜像加速:
conda config --set show_channel_urls yes
然后执行vi ~/.condarc,修改为以下内容:
channels:
  - defaults
show_channel_urls: true
channel_alias: https://mirrors.tuna.tsinghua.edu.cn/anaconda
default_channels:
  - https://mirrors.tuna.tsinghua.edu.cn/anaconda/pkgs/main
  - https://mirrors.tuna.tsinghua.edu.cn/anaconda/pkgs/free
  - https://mirrors.tuna.tsinghua.edu.cn/anaconda/pkgs/r
  - https://mirrors.tuna.tsinghua.edu.cn/anaconda/pkgs/pro
  - https://mirrors.tuna.tsinghua.edu.cn/anaconda/pkgs/msys2
custom_channels:
  conda-forge: https://mirrors.tuna.tsinghua.edu.cn/anaconda/cloud
  msys2: https://mirrors.tuna.tsinghua.edu.cn/anaconda/cloud
  bioconda: https://mirrors.tuna.tsinghua.edu.cn/anaconda/cloud
  menpo: https://mirrors.tuna.tsinghua.edu.cn/anaconda/cloud
  pytorch: https://mirrors.tuna.tsinghua.edu.cn/anaconda/cloud
  simpleitk: https://mirrors.tuna.tsinghua.edu.cn/anaconda/cloud
再执行:
conda clean -i
警告
出现了一些需要让用户知道的问题,但又不想停止程序,这时候我们可以使用警告:
首先导入警告模块:
import warnings
在需要的地方,我们使用 warnings 中的 warn 函数:
warn(msg, WarningType = UserWarning)
def month_warning(m):
    if not 1<= m <= 12:
        msg = "month (%d) is not between 1 and 12" % m
        warnings.warn(msg, RuntimeWarning)

month_warning(13)
D:\Anaconda3\lib\site-packages\ipykernel_launcher.py:4: RuntimeWarning: month (13) is not between 1 and 12
  after removing the cwd from sys.path.
有时候我们想要忽略特定类型的警告,可以使用 warnings 的 filterwarnings 函数:
filterwarnings(action, category)
将 action 设置为 'ignore' 便可以忽略特定类型的警告:
warnings.filterwarnings(action = 'ignore', category = RuntimeWarning)

month_warning(13)
写入测试文件
%%writefile test.txt
this is a test file.
hello world!
python is good!
today is a good day.
Overwriting test.txt