文章结尾附本次项目素材资料及安装说明
一、基础准备
-
系统环境
CenterOs7.7 x64
-
软件准备
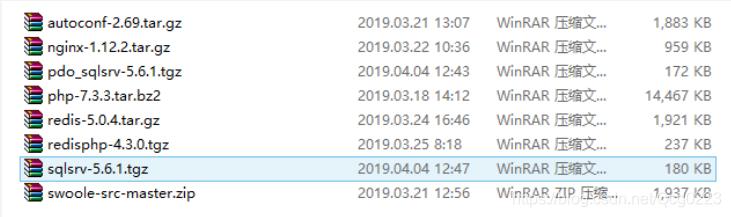
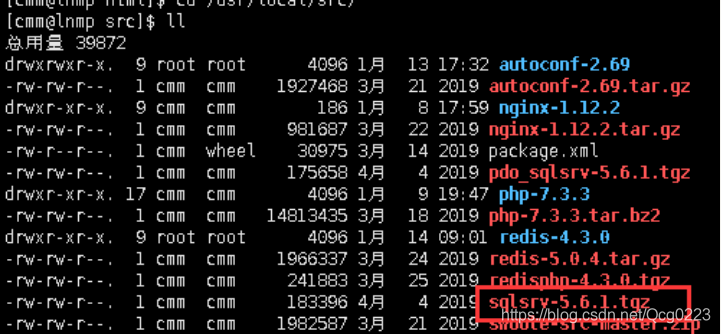
将如下文件上传至服务器 /usr/local/src目录下
-
配置web服务器基础库
执行如下命令安装web服务器常用依赖库。
   sudo yum -y install make apr* autoconf automake curl-devel gcc gcc-c++\
    zlib-devel openssl openssl-devel pcre-devel gd kernel keyutils\
     patch perl kernel-headers compat* mpfr cpp glibc libgomp libstdc++-devel\
      ppl cloog-ppl keyutils-libs-devel libcom_err-devel libsepol-devel \
      libselinux-devel krb5-devel zlib-devel libXpm* freetype libjpeg* \
      libpng* php-common php-gd ncurses* libtool* libxml2 libxml2-devel \
      patch cmake
完成提示 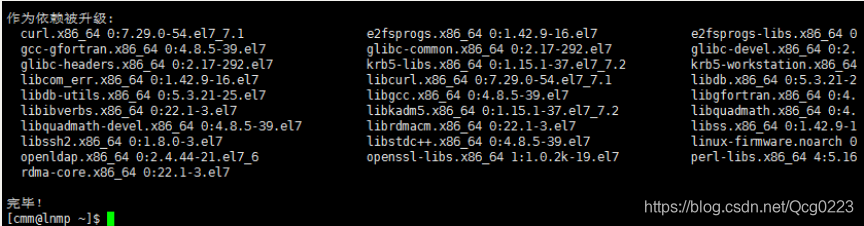
二、安装Mysql
处理下载缓慢问题更改yum源
备份源yum源
如果是国内下载的CentOS很可能国内YUM源已经设置好了。
备份/etc/yum.repos.d/下的*.repo文件。

在CentOS中配置使用网易和阿里的开源镜像
wget http://mirrors.aliyun.com/repo/Centos-7.repo
wget http://mirrors.163.com/.help/CentOS7-Base-163.repo
或者手动下载repo文件并上传到/etc/yum.repos.d/目录

清除系统yum缓存并生成新的yum缓存
yum clean all # 清除系统所有的yum缓存
yum makecache # 生成yum缓存

安装epel源
yum list | grep epel-release
yum install -y epel-release

再次清除系统yum缓存,并重新生成新的yum缓存
yum clean all
yum makecache

查看系统可用的yum源和所有的yum源
yum repolist enabled
yum repolist all

测试安装
yum install openssh-server
下载源
wget -i http://dev.mysql.com/get/mysql57-community-release-el7-7.noarch.rpm
安装rpm源
rpm -ivh mysql57-community-release-el7-7.noarch.rpm
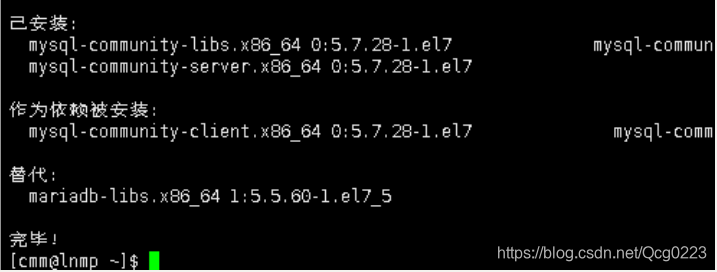
安装服务器
yum -y install mysql-community-server
启动数据库
systemctl start mysqld.service
获取随机密码
grep “password” /var/log/mysqld.log

修改密码

alter user ‘root’@‘localhost’ identified by ‘Cmm11111%%’;
刷新权限
flush privileges
完成提示
三、安装PHP
-
编译安装php
进入目录
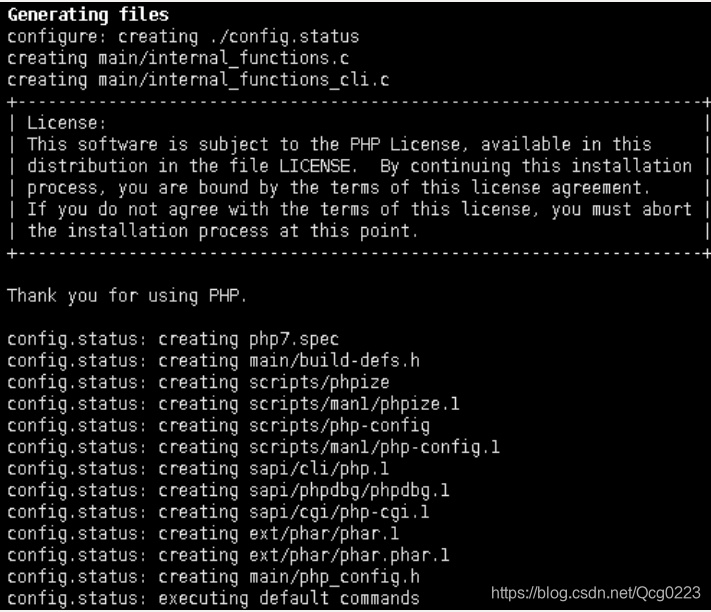
/usr/local/src执行解压tar -vxf php-7.3.3.tar.bz2cd cd php-7.3.3配置(根据自己实际需求选择相应参数,建议不动)
./configure --prefix=/usr/local/php --prefix=/usr/local/php --with-config-file-path=/usr/local/php/etc --with-mysql-sock=/var/lib/mysql/mysql.sock --with-libxml-dir=/usr --with-iconv-dir --with-mhash --with-openssl --with-mysqli=shared,mysqlnd --with-pdo-mysql=shared,mysqlnd --with-gd --with-iconv --enable-inline-optimization --disable-debug --disable-rpath --enable-shared --enable-xml --enable-fpm --enable-bcmath --enable-shmop --enable-sysvsem --enable-mbregex --enable-mbstring --enable-ftp --enable-pcntl --enable-sockets --with-xmlrpc --enable-soap --without-pear --with-gettext --enable-session --with-curl --with-jpeg-dir出现如下提示
-
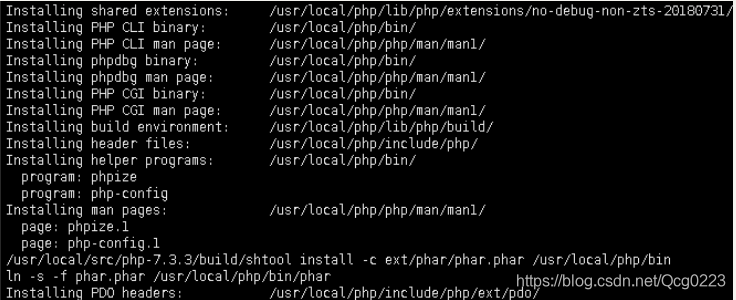
编译安装
sudo make&&make install如出现如下提示则说明安装成功

四、安装Nginx
-
安装步骤
依次执行如下步骤
cd /usr/local/src
tar -zxvf nginx-1.12.2.tar.gz
cd nginx-1.12.2
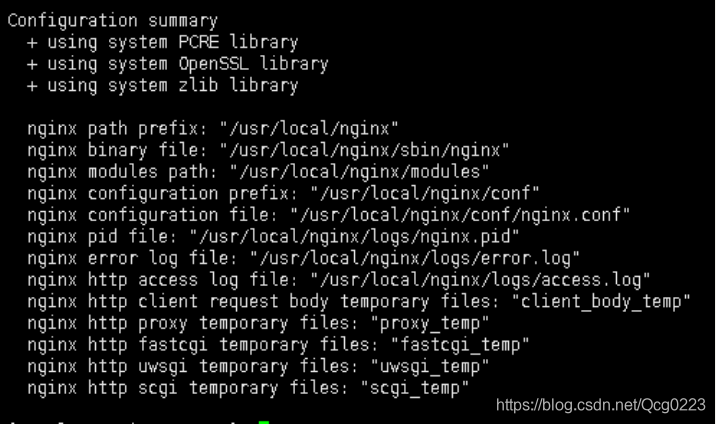
./configure --prefix=/usr/local/nginx --with-http_ssl_module
make && make install

启动nginx /usr/local/nginx/sbin/nginx
访问 (说明nginx安装成功!)

五、Nginx整合php
-
Nginx配置
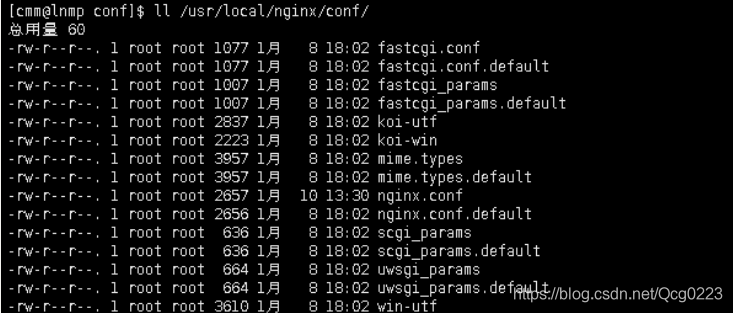
nginx配置目录展示
配置文件
/usr/local/nginx/conf/nginx.conf下配置如下
#user  nobody;
worker_processes  1;
#error_log  logs/error.log;
#error_log  logs/error.log  notice;
#error_log  logs/error.log  info;
#pid        logs/nginx.pid;
events {
    worker_connections  1024;
}
http {
    include       mime.types;
    default_type  application/octet-stream;

    #log_format  main  '$remote_addr - $remote_user [$time_local] "$request" '
    #                  '$status $body_bytes_sent "$http_referer" '
    #                  '"$http_user_agent" "$http_x_forwarded_for"';
    #access_log  logs/access.log  main;
    sendfile        on;
    #tcp_nopush     on;
    #keepalive_timeout  0;
    keepalive_timeout  65;
    #gzip  on;
    server {
        listen       80;
        server_name  localhost;

        #charset koi8-r;

        #access_log  logs/host.access.log  main;

        location / {
            root   html;
            index  index.html index.htm index.php;
        }

        #error_page  404              /404.html;

        # redirect server error pages to the static page /50x.html
        #
        error_page   500 502 503 504  /50x.html;
        location = /50x.html {
            root   html;
        }

        # proxy the PHP scripts to Apache listening on 127.0.0.1:80
        #
        #location ~ \.php$ {
        #    proxy_pass   http://127.0.0.1;
        #}

        # pass the PHP scripts to FastCGI server listening on 127.0.0.1:9000
        #
        location ~ \.php$ {
            root           html;
            fastcgi_pass   127.0.0.1:9000;
            fastcgi_index  index.php;
            fastcgi_param  SCRIPT_FILENAME  /scripts$fastcgi_script_name;
            include        fastcgi.conf;
        }

        # deny access to .htaccess files, if Apache's document root
        # concurs with nginx's one
        #
        #location ~ /\.ht {
        #    deny  all;
        #}
    }


    # another virtual host using mix of IP-, name-, and port-based configuration
    #
    #server {
    #    listen       8000;
    #    listen       somename:8080;
    #    server_name  somename  alias  another.alias;

    #    location / {
    #        root   html;
    #        index  index.html index.htm;
    #    }
    #}


    # HTTPS server
    #
    #server {
    #    listen       443 ssl;
    #    server_name  localhost;

    #    ssl_certificate      cert.pem;
    #    ssl_certificate_key  cert.key;

    #    ssl_session_cache    shared:SSL:1m;
    #    ssl_session_timeout  5m;

    #    ssl_ciphers  HIGH:!aNULL:!MD5;
    #    ssl_prefer_server_ciphers  on;

    #    location / {
    #        root   html;
    #        index  index.html index.htm;
    #    }
    #}

}
注:如果找不到nginx.conf和fastcgi.conf文件请直接复制其.default文件
操作如下;
cd /usr/local/nginx/conf
cp ./fastcgi.conf.default  ./fastcgi.conf
cp ./nginx.conf.default ./nginx.conf
-
PHP配置
配置文件(如不存在.conf文件则拷贝.default文件为.conf文件)


-
启动php-fpm 和nginx服务
启动php-fpm和nginx服务

-
测试效果
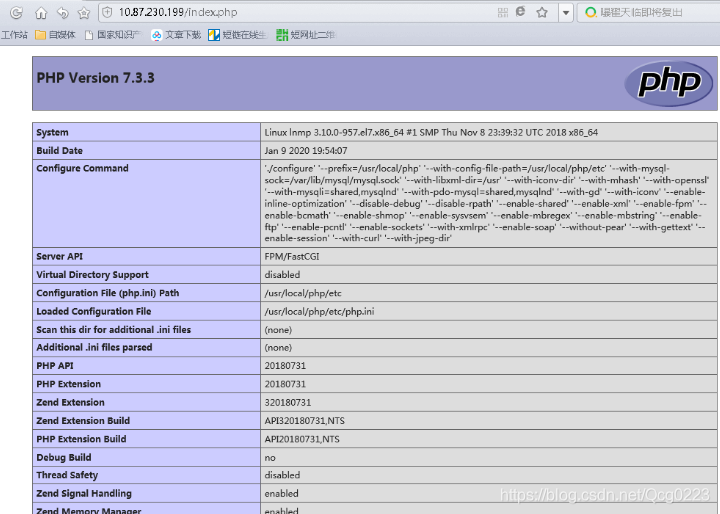
编写phpinfo文件

<?php
echo phpinfo();
?>
访问网址:服务器ip/index.php
出现如下效果则大吉大利
六、安装PHP扩展
为了更好的操作系统php经常要操作第三方扩展库,所以编译安装扩展技能是我等开发人员必备技能。
例1:安装微软数据库扩展示例
- 下载安装文件
sqlsrv-5.6.1.tgz
3. 操作:
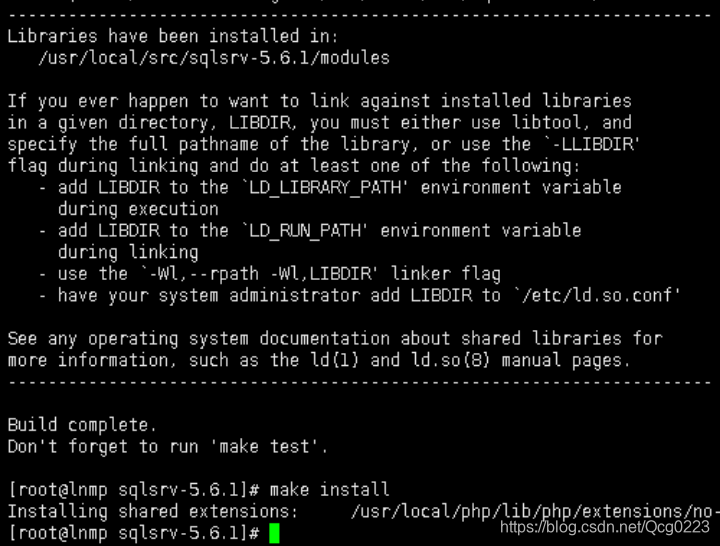
cd /usr/local/src
tar -zxvf sqlsrv-5.6.1.tgz
cd sqlsrv-5.6.1
/usr/local/php/bin/phpize
./configure --with-php-config=/usr/local/php/bin/php-config
- 错误处理提示缺少sql.h
提示缺少头文件,直接安装unixodbc的工具包即可,yum install unixODBC-devel。

再次编译安装即可
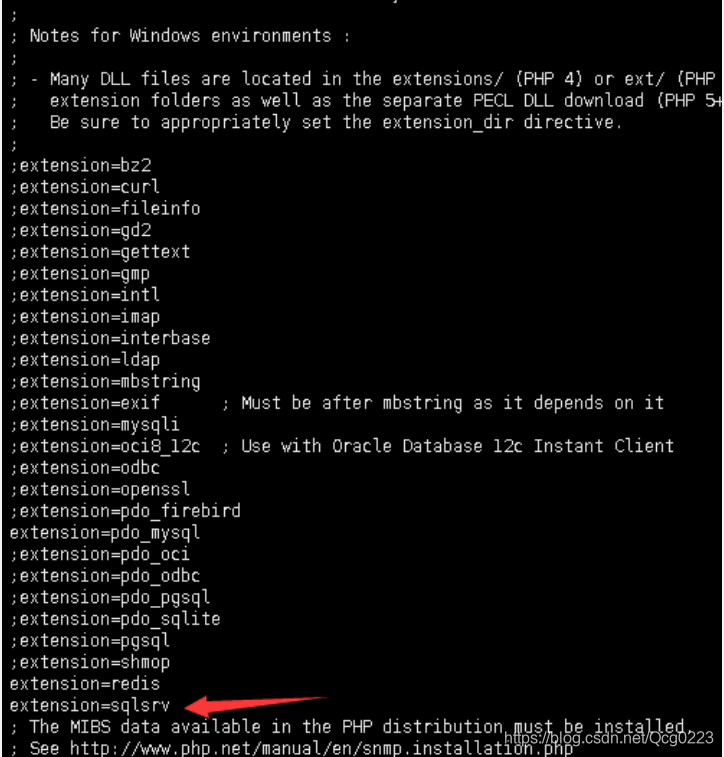
4. 修改php.ini文件加入sqlsrv扩展
vi /usr/local/php/etc/php.ini
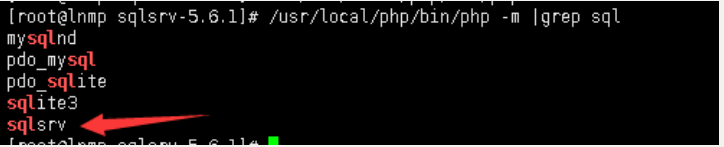
5. 查看效果
扩展已添加
通过页面查看phpinfo 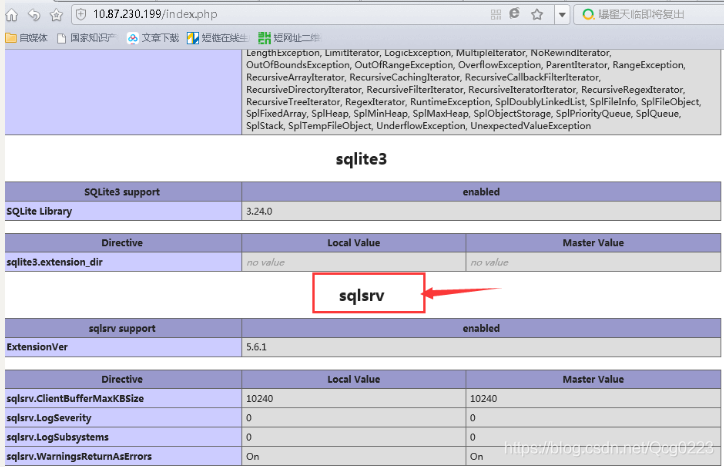
END
关注公众号 “扣丁曼” 回复LNMP 获取相关本次资料源码。