Swift5学习之旅----UITextView和UITextField
UITextView和UITextField最大的区别是:UITextView支持多行输入,而UITextField只能单行输入。
UITextField可以使用密码
UITextView是UIScrollView类型属于view类型,UITextField是UIControl
UIControl默认情况下不会将自己捕获的时间传给superview,而UIView会将事件传给superview
- UITextView
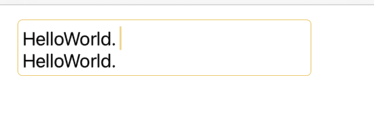
UITextView的相关功能代码
import UIKit

class MyTextView: UITextView,UITextViewDelegate {


    var maxHeight: CGFloat = 60 //定义最大高度
    override init(frame: CGRect, textContainer: NSTextContainer?){


        super.init(frame: frame, textContainer: textContainer)
        self.delegate = self
        self.layer.borderColor = #colorLiteral(red: 0.9607843161, green: 0.7058823705, blue: 0.200000003, alpha: 1)
        self.layer.borderWidth = 0.5
        self.layer.cornerRadius = 5
    }

    required init?(coder: NSCoder) {


        fatalError("init(coder:) has not been implemented")
    }
    //根据字数的多少改变textView的大小
    func textViewDidChange(_ textView: UITextView) {


        let frame = textView.frame
        textView.tintColor = #colorLiteral(red: 0.9529411793, green: 0.6862745285, blue: 0.1333333403, alpha: 1)
//        textView.isEditable = true
        //定义一个size值用于计算textview的高度
        let Size = CGSize(width: frame.size.width, height: CGFloat(MAXFLOAT))

        //定义trueHeight获取textview 的真实高度
        var trueHeight = textView.sizeThatFits(Size)

        //如果textview的高度大于最大高度就位最大高度并可以滚动,否则不能滚动
        if trueHeight.height >= maxHeight{


            trueHeight.height = maxHeight
            //设置滚动
            textView.isScrollEnabled = true
        }else{


            textView.isScrollEnabled = false
        }
        //设置文本字体
        textView.font = UIFont.systemFont(ofSize: 20)
        textView.frame.size.height=trueHeight.height
//        键盘的类型
//        textView.keyboardType = UIKeyboardType.URL
//        let attributeString:NSMutableAttributedString=NSMutableAttributedString(string: "富文本")
//
//        textView.attributedText = attributeString

    }
}
- UITextField
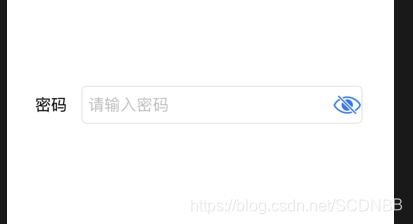
相关功能的实现
import UIKit

class MyTextField: UITextField,UITextFieldDelegate {


    override init(frame: CGRect){


        super.init(frame: frame)
                self.backgroundColor = UIColor.white
        self.textColor = #colorLiteral(red: 0.09019608051, green: 0, blue: 0.3019607961, alpha: 1)
        self.delegate = self

    }

    required init?(coder: NSCoder) {


        fatalError("init(coder:) has not been implemented")
    }

    //        //        设置边框样式为圆角矩形
    //        //        其中,文本输入框的边框样式有以下几种:
    //        //
    //        //        public enum UITextBorderStyle : Int {


    //        //
    //        //        case none  无边框
    //        //
    //        //        case line 直线边框
    //        //
    //        //        case bezel 圆角矩形边框
    //        //
    //        //        case roundedRect 边线+阴影
    func textFieldShouldReturn(_ textField: UITextField) -> Bool {


        textField.resignFirstResponder()
        print(textField.text!)
        return true
    }


    func password(){


        //设置键盘的输入 显示便于输入数字的虚拟键盘
//        textfield.keyboardType = UIKeyboardType.numberPad
        self.keyboardType = .asciiCapable
        self.placeholder = "请输入密码"
        self.isSecureTextEntry = true
        self.clearButtonMode = .never
        //增加清除按钮
//        self.clearButtonMode = .whileEditing
        //最小可缩小的字号
        self.minimumFontSize = 14
        //圆角边距
        self.borderStyle = .roundedRect
        //在textfield的右边添加了button按钮来显示是否显示密码
        self.createEyeBtn()
    }

}
extension MyTextField{


    func createEyeBtn() {


        let eyesButton = UIButton(type: .system)
        eyesButton.frame = CGRect(x: -50, y: 0, width: 16, height: 16)
        let eyeImageFalse = UIImage(systemName: "eye.slash")
        eyesButton.setImage(eyeImageFalse, for: .normal)
//        eyesButton.backgroundColor = UIColor.gray
//        eyesButton.tintColor = UIColor.black

        rightView = eyesButton
        rightViewMode = .always
        eyesButton.addTarget(self, action: #selector(action(btn:)), for: .touchUpInside)
        eyesButton.tag = 1

    }

    @objc func action(btn:UIButton) {


        let eyeImageFalse = UIImage(systemName: "eye.slash")
        let eyeImageTrue = UIImage(systemName: "eye")
        if btn.tag == 0 {


            btn.setImage(eyeImageFalse, for: .normal)
            self.isSecureTextEntry = true
            btn.tag = 1
        }else{


            btn.setImage(eyeImageTrue, for: .normal)
            self.isSecureTextEntry = false
            btn.tag = 0
        }
    }

    override func rightViewRect(forBounds bounds: CGRect) -> CGRect {


        var rect = super.rightViewRect(forBounds: bounds)
        rect.origin.x = self.frame.size.width - 32 // 要往右偏多少根据自己需求,改变这个数字就好
        return rect
    }

}
- 整体代码
GitHub还没上传,用着Dropbox
Dropbox可能要翻墙才能用
https://www.dropbox.com/sh/1zohbbm3ywddmm3/AACESL8ED7sBfOJaHWN5G2zHa?dl=0
Dropbox UITextView、UITextField