目录
实验环境
| web1 | 192.168.1.20 |
|---|---|
| web2 | 192.168.1.21 |
| mysql | 192.168.1.22 |
| php | 192.168.1.23 |
| lb1 | 192.168.1.24 |
| lb2 | 192.168.1.25 |
| nfs | 192.168.1.26 |
所有关闭防火墙和selinux并修改主机名
[root@localhost ~]# hostnamectl set-hostname ***
[root@localhost ~]# bash
[root@php ~]# systemctl stop firewalld
[root@php ~]# systemctl disable firewalld
[root@php ~]# setenforce 0
一、搭建web1节点(nginx):192.168.1.20
1.配置nginx官方源
[root@web1 ~]# vim /etc/yum.repos.d/nginx.repo
添加:
[nginx-stable]
name=nginx stable repo
baseurl=http://nginx.org/packages/centos/7/$basearch/
gpgcheck=0
enabled=1
2.yum安装nginx,启动并开机自启
[root@web1 ~]# yum -y install nginx
[root@web1 ~]# systemctl start nginx
[root@web1 ~]# systemctl enable nginx
二、搭建web2节点(nginx):192.168.1.21
1.配置nginx官方源
[root@web2 ~]# vim /etc/yum.repos.d/nginx.repo
添加:
[nginx-stable]
name=nginx stable repo
baseurl=http://nginx.org/packages/centos/7/$basearch/
gpgcheck=0
enabled=1
2.yum安装nginx,启动并开机自启
[root@web2 ~]# yum -y install nginx
[root@web2 ~]# systemctl start nginx
[root@web2 ~]# systemctl enable nginx
三、搭建mysql服务器:192.168.1.22
1.下载mysql,启动并开机自启
[root@mysql ~]# rpm -ivh http://repo.mysql.com/yum/mysql-5.6-community/el/7/x86_64/mysql-community-release-el7-5.noarch.rpm
[root@mysql ~]# yum -y install mysql-community-server
[root@mysql ~]# systemctl start mysqld
[root@mysql ~]# systemctl enable mysqld
四、搭建php服务器:192.168.1.23
1.下载mysql,启动并开机自启
[root@php ~]# rpm -Uvh https://dl.fedoraproject.org/pub/epel/epel-release-latest-7.noarch.rpm
[root@php ~]# rpm -Uvh https://mirror.webtatic.com/yum/el7/webtatic-release.rpm
[root@php ~]# yum -y install php72w php72w-cli php72w-common php72w-devel \php72w-embedded php72w-gd php72w-mbstring php72w-pdo \php72w-xml php72w-fpm php72w-mysqlnd php72w-opcache
[root@php ~]# systemctl start php-fpm
[root@php ~]# systemctl enable php-fpm
五、web1安装wordpress和zh
安装wordpress
1.下载wordpress源码包
2.复制wordpress安装包,到虚拟机/,解压并赋权
[root@web1 ~]# yum -y install unzip
[root@web1 ~]# unzip wordpress-4.9.4-zh_CN.zip
[root@web1 ~]# chmod -R 777 /wordpress
3.创建虚拟主机配置文件
[root@web1 ~]# vim /etc/nginx/conf.d/blog.conf
添加:
server {


        listen 80;
        server_name blog.benet.com;
        root /wordpress;
        index index.php index.html;

        location ~ \.php$ {


                root /wordpress;
                fastcgi_pass 192.168.1.23:9000;  指定phpIP地址
                fastcgi_index index.php;
                fastcgi_param SCRIPT_FILENAME $document_root$fastcgi_script_name;
                include fastcgi_params;
        }
}
4.在mysql服务器上创建blog数据库和用户
初始化密码
[root@mysql ~]# mysql_secure_installation
登录数据库,创建数据库,创建远程管理用户
mysql > mysql -uroot -p123.com
mysql > create database blog;
mysql > grant all on blog.* to lisi@'%' identified by '123.com';
5.在web1复制wordpress目录到php的根目录
[root@web1 ~]# scp -rp /wordpress [email protected]:/
6.修改php服务器的配置文件
[root@php ~]# vim /etc/php-fpm.d/www.conf
修改:
listen = 192.168.1.23:9000 php自己的ip
listen.allowed_clients = 192.168.1.20,192.168.1.21 web1,web2的ip
重启php:systemctl restart php-fpm
安装zh
1.下载wecenter源码包
2.复制wecenter安装包,到虚拟机/zh目录下,赋权
[root@web1 ~]# mkdir /zh
[root@web1 ~]# cd /zh/
[root@web1 ~]# unzip WeCenter_3-3-4.zip
[root@web1 ~]# chmod -R 777 /zh
3.创建虚拟主机配置文件
[root@web1 ~]# vim /etc/nginx/conf.d/zh.conf
添加:
server {


        listen 80;
        server_name zh.benet.com;
        root /zh;
        index index.php index.html;

        location ~ \.php$ {


                root /zh;
                fastcgi_pass 192.168.1.23:9000;
                fastcgi_index index.php;
                fastcgi_param SCRIPT_FILENAME $document_root$fastcgi_script_name;
                include fastcgi_params;
        }
	}
重载:systemctl reload nginx
4.在mysql服务器创建zh数据库和管理用户
登录数据库:mysql -uroot -p123.com
创建数据库:create database zh;
设置管理用户及密码:grant all on zh.* to wangwu@'%' identified by '123.com';
5.在web1复制zh目录到php的根目录
[root@web1 ~]# scp -rp /zh [email protected]:/
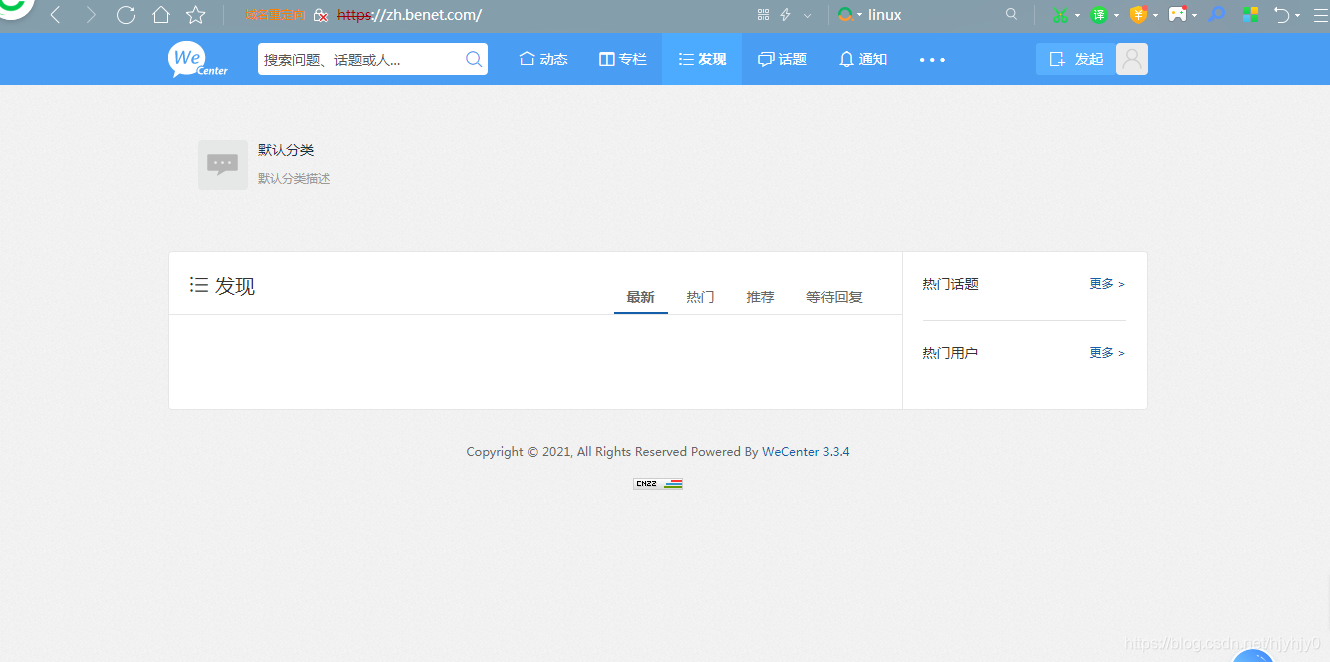
6.域名解析,浏览器访问blog,zh安装配置
六、配置web2节点服务器
1.在web1归档压缩wordpress和zh目录,复制到web2根目录解压
[root@web1 ~]# cd /
[root@web1 /]# tar zcf blog_zh.tar.gz /wordpress /zh/
[root@web1 /]# scp blog_zh.tar.gz [email protected]:/
2.复制web1的nginx配置文件到web2
[root@web1 ~]# scp -rp /etc/nginx/conf.d/* [email protected]:/etc/nginx/conf.d/
3.web2解包
[root@web2 ~]# cd /
[root@web2 /]# tar zxf blog_zh.tar.gz
在web2重启nginx服务: systemctl restart nginx
七、配置负载均衡服务器lb1:192.168.1.24
1.安装nginx
[root@lb1 ~]# vim /etc/yum.repos.d/nginx.repo
添加:
[nginx-stable]
name=nginx stable repo
baseurl=http://nginx.org/packages/centos/7/$basearch/
gpgcheck=0
enabled=1
下载,开启并开机自启
[root@lb1 ~]# yum -y install nginx
[root@lb1 ~]# systemctl start nginx
[root@lb1 ~]# systemctl enable nginx
2.添加优化项
[root@lb1 ~]# vim /etc/nginx/nginx_params
添加:
proxy_set_header Host $http_host;
proxy_set_header X-Real-IP $remote_addr;
proxy_set_header X-Forwarded-For $proxy_add_x_forwarded_for;

proxy_connect_timeout 30;
proxy_send_timeout 60;
proxy_read_timeout 60;

proxy_buffering on;
proxy_buffer_size 32k;
proxy_buffers 4 128k;
3.创建lb配置文件
[root@lb1 ~]# vim /etc/nginx/conf.d/lb1.conf
添加:
upstream web_cluster {


        server 192.168.1.20:80;
        server 192.168.1.21:80;
}

server {


        listen 80;
        server_name blog.benet.com;

        location / {


                proxy_pass http://web_cluster;
                include nginx_params;
        }
}
server {


        listen 80;
        server_name zh.benet.com;

        location / {


                proxy_pass http://web_cluster;
                include nginx_params;
        }
}
检查配置,重启
[root@lb1 ~]# nginx -t
[root@lb1 ~]# systemctl restart nginx
八、配置负载均衡lb2:192.168.1.25
1.安装nginx
[root@lb2 ~]# vim /etc/yum.repos.d/nginx.repo
添加:
[nginx-stable]
name=nginx stable repo
baseurl=http://nginx.org/packages/centos/7/$basearch/
gpgcheck=0
enabled=1
下载,开启并开机自启
[root@lb2 ~]# yum -y install nginx
[root@lb2 ~]# systemctl start nginx
[root@lb2 ~]# systemctl enable nginx
2.添加优化项
[root@lb2 ~]# vim /etc/nginx/nginx_params
添加:
proxy_set_header Host $http_host;
proxy_set_header X-Real-IP $remote_addr;
proxy_set_header X-Forwarded-For $proxy_add_x_forwarded_for;

proxy_connect_timeout 30;
proxy_send_timeout 60;
proxy_read_timeout 60;

proxy_buffering on;
proxy_buffer_size 32k;
proxy_buffers 4 128k;
3.创建lb配置文件
[root@lb2 ~]# vim /etc/nginx/conf.d/lb1.conf
添加:
upstream web_cluster {


        server 192.168.1.20:80;
        server 192.168.1.21:80;
}

server {


        listen 80;
        server_name blog.benet.com;

        location / {


                proxy_pass http://web_cluster;
                include nginx_params;
        }
}
server {


        listen 80;
        server_name zh.benet.com;

        location / {


                proxy_pass http://web_cluster;
                include nginx_params;
        }
}
检查配置,重启
[root@lb2 ~]# nginx -t
[root@lb2 ~]# systemctl restart nginx
配置两台负载均衡服务器高可用
1.安装keepalived(两台都装)
[root@lb1 ~]# yum -y install keepalived
[root@lb2 ~]# yum -y install keepalived
2.配置keepalived
主服务器:lb1
[root@lb1 ~]# vim /etc/keepalived/keepalived.conf
修改为:
global_defs {


   router_id lb1
}

vrrp_instance VI_1 {


    state MASTER
    interface ens33
    virtual_router_id 51
    priority 100
    advert_int 1
    authentication {


        auth_type PASS
        auth_pass 1111
    }
    virtual_ipaddress {


        192.168.1.254
    }
}
备服务器:lb2
[root@lb2 ~]# vim /etc/keepalived/keepalived.conf
修改为:
global_defs {


   router_id lb2	#路由id号,和主服务器必须不同
}

vrrp_instance VI_1 {


    state BACKUP		#状态:BACKUP备   MASTER主
    interface ens33
    virtual_router_id 51
    priority 99			#优先级:备比主要小
    advert_int 1
    authentication {


        auth_type PASS
        auth_pass 1111
    }
    virtual_ipaddress {


        192.168.1.254	#虚拟路由ip,公共ip
    }
}
启动keepalived:systemct start keepalived
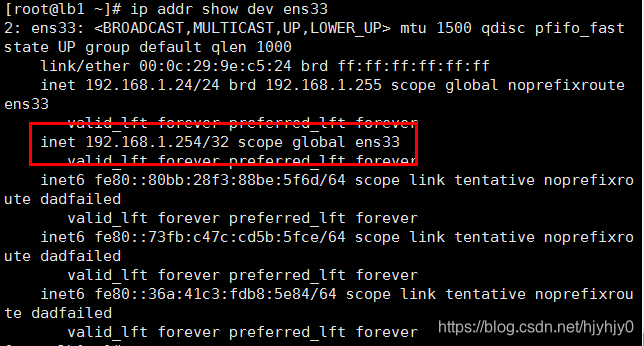
3.查看漂移地址
[root@lb1 ~]# ip addr show dev ens33
解决nginx故障造成群集无法工作
编辑nginx监控脚本
vim /sh/check_nginx_proxy.sh
添加:
#!/bin/bash
killall  -0  nginx
if  [ $? -ne 0 ];then
  systemctl stop keepalived
fi
授权
[root@lb1 ~]# chmod +x /sh/check_nginx_proxy.sh
添加脚本追踪模块到keepalived配置文件
vim /etc/keepalived/keepalived.conf
修改:
global_defs {


   router_id lb1
}
vrrp_script check_nginx_proxy {


        script "/sh/check_nginx_proxy.sh"
        interval 2
        weight 5
        }
vrrp_instance VI_1 {


    state MASTER
    interface ens33
    virtual_router_id 51
    priority 100
    advert_int 1
    authentication {


        auth_type PASS
        auth_pass 1111
    }
    virtual_ipaddress {


        192.168.1.254
    }
    track_script {


        check_nginx_proxy
    }
}
重启服务:systemctl restart keepalived
九、配置nfs共享:192.168.1.26
1.安装nfs-utils、rpcbind
[root@nfs ~]# yum -y install nfs-utils rpcbind
2.创建挂载点
[root@nfs ~]# mkdir -p /nfs/{blog,zh}
3.发布共享目录
[root@nfs ~]# vim /etc/exports
添加:
/nfs/blog       192.168.1.0/24(rw,sync,no_root_squash)
/nfs/zh         192.168.1.0/24(rw,sync,no_root_squash)
4.重启nfs服务
[root@nfs ~]# systemctl restart rpcbind
[root@nfs ~]# systemctl restart nfs
5.在nginx服务器上查看nfs共享目录
[root@web1 ~]# showmount -e 192.168.1.26
6.把wordpress的内容目录挂载到nfs
[root@web1 ~]# cd /wordpress/
[root@web1 wordpress]# cp -rp wp-content/ wp-contentbak
[root@web1 wordpress]# mount -t nfs 192.168.1.26:/nfs/blog wp-content
[root@web1 wordpress]# cp -rp wp-contentbak/* wp-content/
7.设置永久挂载
[root@web1 wordpress]# vim /etc/fstab
添加:
192.168.1.26:/nfs/log  /wordpress/wp-content   nfs     defaults        0 0
十、配置https
1.在web1安装openssl
[root@web1 ~] yum -y install openssl
2.创建ssl密钥目录,并进入目录
[root@web1 ~]# mkdir -p /etc/nginx/ssl_key
[root@web1 ~]# cd /etc/nginx/ssl_key
3.本机当CA:证书颁发机构,创建私钥
[root@web1 ssl_key]# openssl genrsa -idea -out server.key 2048
4.生成证书,去掉私钥的密码
[root@web1 ssl_key]# openssl req -days 3650 -x509 -sha256 -nodes -newkey rsa:2048 -keyout server.key -out server.crt
5.配置web1的blog(web2同样步骤)
[root@web1 ~]# vim /etc/nginx/conf.d/blog.conf
添加:
server {


        listen 443 ssl;
        server_name blog.benet.com;
	ssl_certificate ssl_key/server.crt;
        ssl_certificate_key ssl_key/server.key;
        root /wordpress;
        index index.php index.html;

        location ~ \.php$ {


                root /wordpress;
                fastcgi_pass 192.168.1.23:9000;
                fastcgi_index index.php;
                fastcgi_param SCRIPT_FILENAME $document_root$fastcgi_script_name;
                include fastcgi_params;
        }
}
server {


        listen 80;
        server_name blog.benet.com;
#       rewrite .* https://blog.benet.com;
#       rewrite .* https://$host$request_uri redirect;
#       rewrite .* https://$server_name$request_uri redirect;
        rewrite .* https://$server_name$1 redirect;
}
6.配置web1的zh
[root@web1 ~]# vim /etc/nginx/conf.d/zh.conf
添加:
server {


        listen 443 ssl;
        server_name zh.benet.com;
	ssl_certificate ssl_key/server.crt;
        ssl_certificate_key ssl_key/server.key;
        root /zh;
        index index.php index.html;

        location ~ \.php$ {


                root /zh;
                fastcgi_pass 192.168.1.23:9000;
                fastcgi_index index.php;
                fastcgi_param SCRIPT_FILENAME $document_root$fastcgi_script_name;
                include fastcgi_params;
        }
}
server {


        listen 80;
        server_name zh.benet.com;
#       rewrite .* https://zh.benet.com;
#       rewrite .* https://$host$request_uri redirect;
#       rewrite .* https://$server_name$request_uri redirect;
        rewrite .* https://$server_name$1 redirect;
}
7.配置负载均衡lb1
[root@lb1 ~]# vim /etc/nginx/conf.d/lb1.conf
添加:
upstream web_cluster {


        server 192.168.1.20:80;
        server 192.168.1.21:80;
}

server {


        listen 80;
        server_name blog.benet.com;

        location / {


                proxy_pass http://web_cluster;
                include nginx_params;
        }
}
server {


        listen 80;
        server_name zh.benet.com;

        location / {


                proxy_pass http://web_cluster;
                include nginx_params;
        }
}
server {


        listen 80;
        server_name blog.benet.com;
        return 302 https://$server_name$1;
}
server {


        listen 80;
        server_name zh.benet.com;
        return 302 https://$server_name$1;
}
8.配置负载均衡lb2
[root@lb2 ~]# vim /etc/nginx/conf.d/lb2.conf
添加:
upstream web_cluster {


        server 192.168.1.20:80;
        server 192.168.1.21:80;
}

server {


        listen 80;
        server_name blog.benet.com;

        location / {


                proxy_pass http://web_cluster;
                include nginx_params;
        }
}
server {


        listen 80;
        server_name zh.benet.com;

        location / {


                proxy_pass http://web_cluster;
                include nginx_params;
        }
}
server {


        listen 80;
        server_name blog.benet.com;
        return 302 https://$server_name$1;
}
server {


        listen 80;
        server_name zh.benet.com;
        return 302 https://$server_name$1;
}
浏览器访问查看
https://blog.benet.com

https://zh.benet.com