完成项目的创建信息
浏览器打开SPRING INITIALIZR网址:
http://start.spring.io/ 如下图所示完成配置:
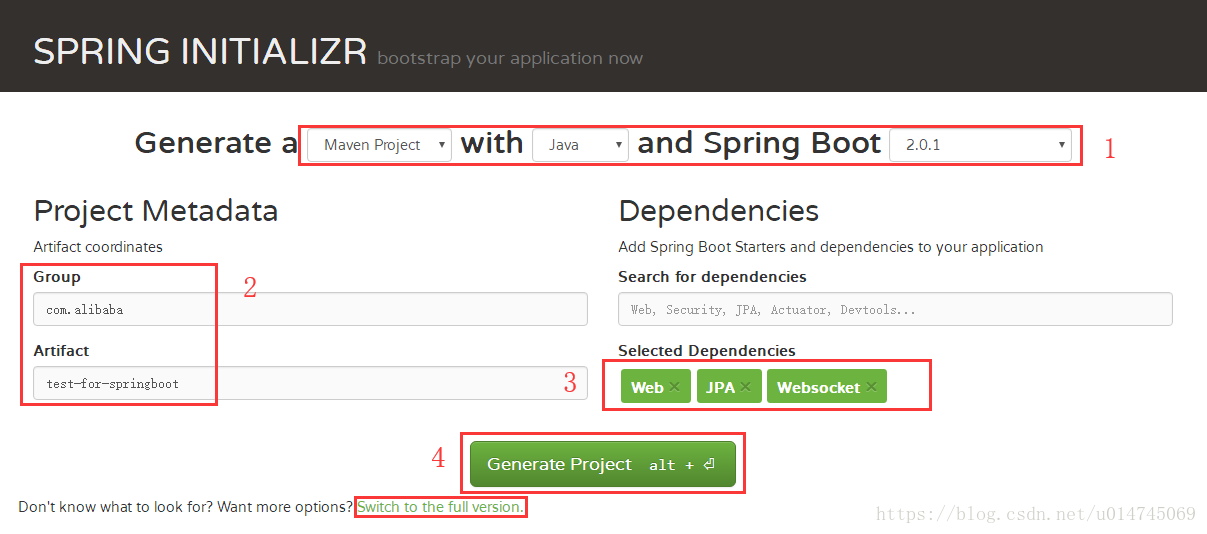
1.完成基础项目配置
2.相关名称
3.依赖jar包,如果是web项目,那么这里选择的Web依赖已经包含了开发web项目所必须的服务器以及Spring MVC框架;JPA是持久层API,其中包含HIbernate,但是如果使用MyBatis需要另行添加,不过JdbcTemplate也是不错的。

4.生成项目zip压缩包
(Switch to full version是切换到完整的配置表单,如果你是认真的,可以切换到完整版)
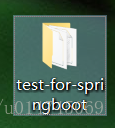
最终的压缩包是这个样子:

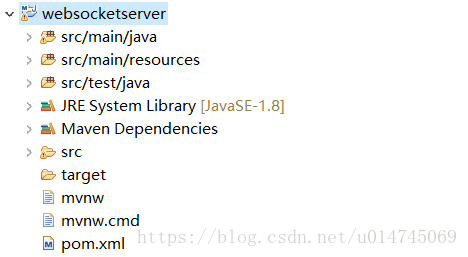
IDE项目导入
1.将压缩包直接当前目录解压
2.导入项目
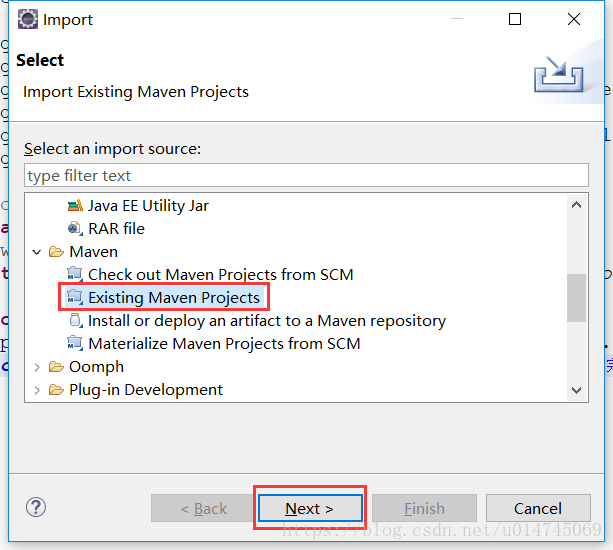
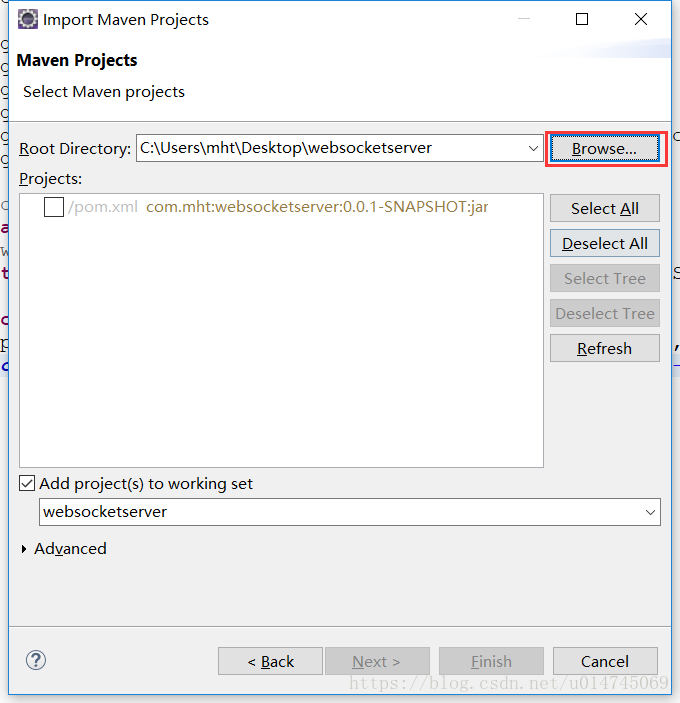
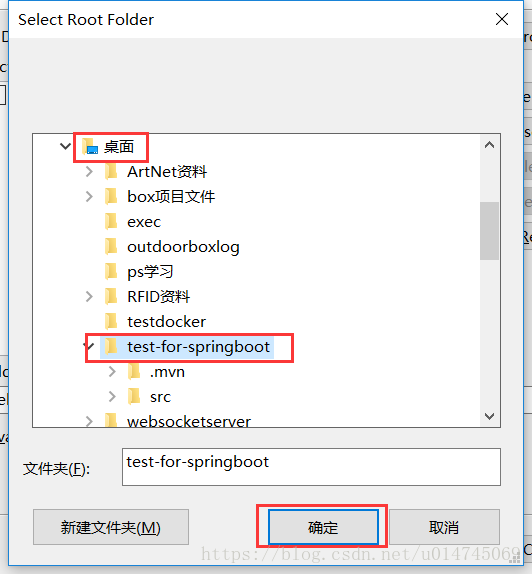
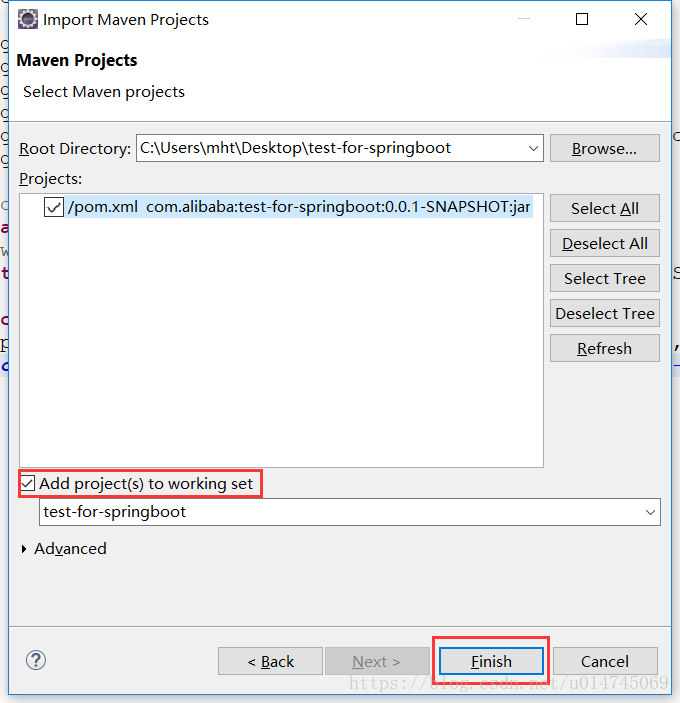
3.完成
测试项目
1.设置项目端口
打开application.properties文件,并添加端口号:
server.port=8080
#these 3 words are Chinese characters encoded by the file default encoding = "ISO-8859-1"
visitor.name=\u5B59\u609F\u7A7A
2.编写controller
package com.alibaba.controller;

import org.springframework.beans.factory.annotation.Value;
import org.springframework.web.bind.annotation.PathVariable;
import org.springframework.web.bind.annotation.RequestMapping;
import org.springframework.web.bind.annotation.RequestMethod;
import org.springframework.web.bind.annotation.RestController;

import com.alibaba.fastjson.JSONObject;

@RestController
@RequestMapping("/demo")
public class DemoController {
    // 配置文件中以ISO-8859-1编码的汉字是:孙悟空。
    // 虽然配置文件中并不是以utf-8编码的汉字,但是这里并不影响@Value取得正确的汉字
    @Value("${visitor.name}")
    private String visitorName;

    @RequestMapping(value = "/say/{name}", method = RequestMethod.GET)
    public JSONObject sayHello(@PathVariable String name) {
        JSONObject result = new JSONObject();
        if (!visitorName.equals(name)) {
            result.put("data", "对不起,你不是孙悟空!");
            return result;
        } else {
            result.put("data", "你好啊," + name + "先生");
        }
        return result;
    }
}
3.浏览器验证

注意:在pom中引入jpa的时候,由于是数据源组件,因此会去配置文件中加载数据库相关的配置信息,如果暂时还没有填写这部分的信息,那么会导致项目启动失败,并提示一个datasource相关的信息,可以暂时在pom中注掉数据源相关组件的依赖。