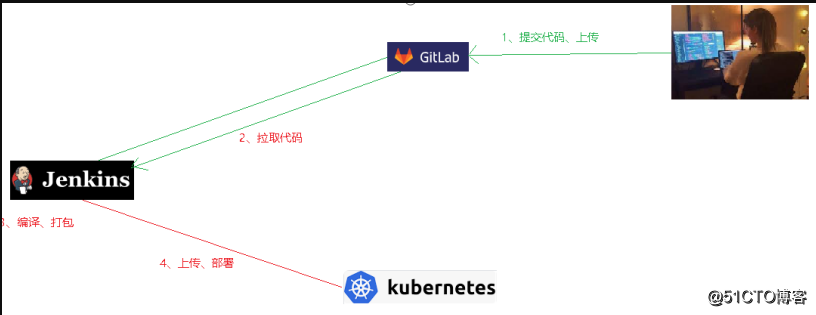
一、基础环境、流程图
1)流程图
2)、jenkins上安装kubectl
#主节点上查看kubectl位置
[root@k8s01 ~]# which kubectl
/usr/bin/kubectl
#将k8s节点的kubectl文件cp至jenkins
scp 10.0.0.101:/usr/bin/kubectl .
cp ./kubectl /usr/local/bin/
kubectl version
Client Version: version.Info{Major:"1", Minor:"17", GitVersion:"v1.17.9", GitCommit:"4fb7ed12476d57b8437ada90b4f93b17ffaeed99", GitTreeState:"clean", BuildDate:"2020-07-15T16:18:16Z", GoVersion:"go1.13.9", Compiler:"gc", Platform:"linux/amd64"}
#将k8s节点的config配置文件cp 至jenkins[root@localhost kubectl-install]# touch /root/.kube/config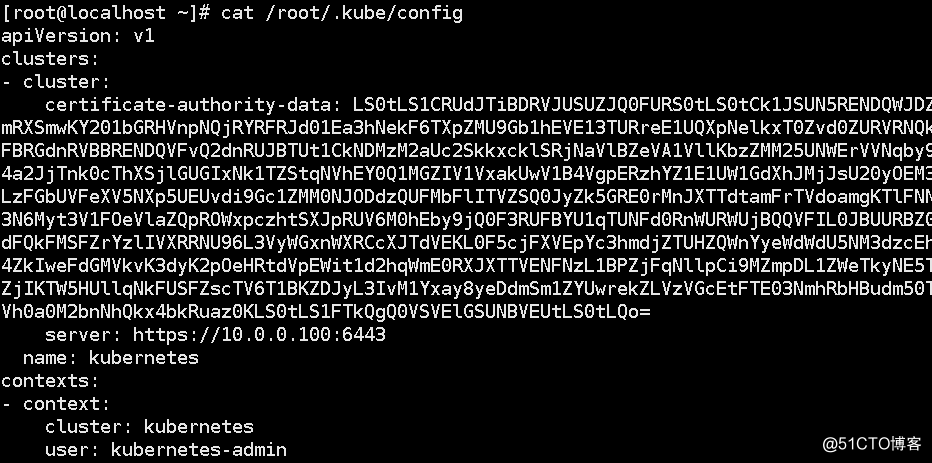
#执行命令查看结果 
3)gitlab创建项目benzhupro,并且jenkins使用用户名密码可拉取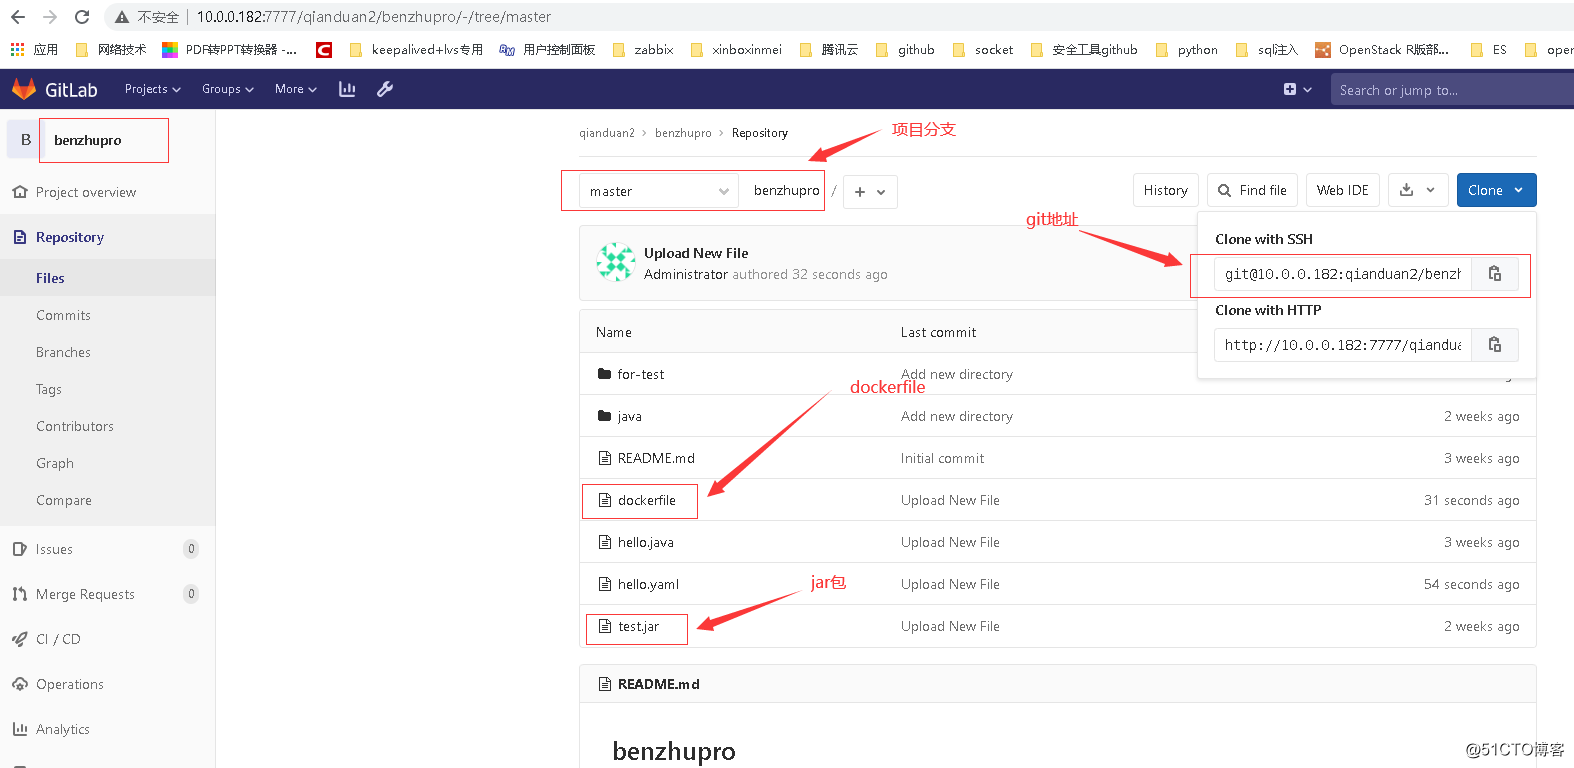
4) harbor环境准备
#harbor 建好仓库,并且jenkins 可以免密登陆具体可参考: https://blog.51cto.com/keep11/2620067
二、jenkins创建pipeline项目
#创建流水线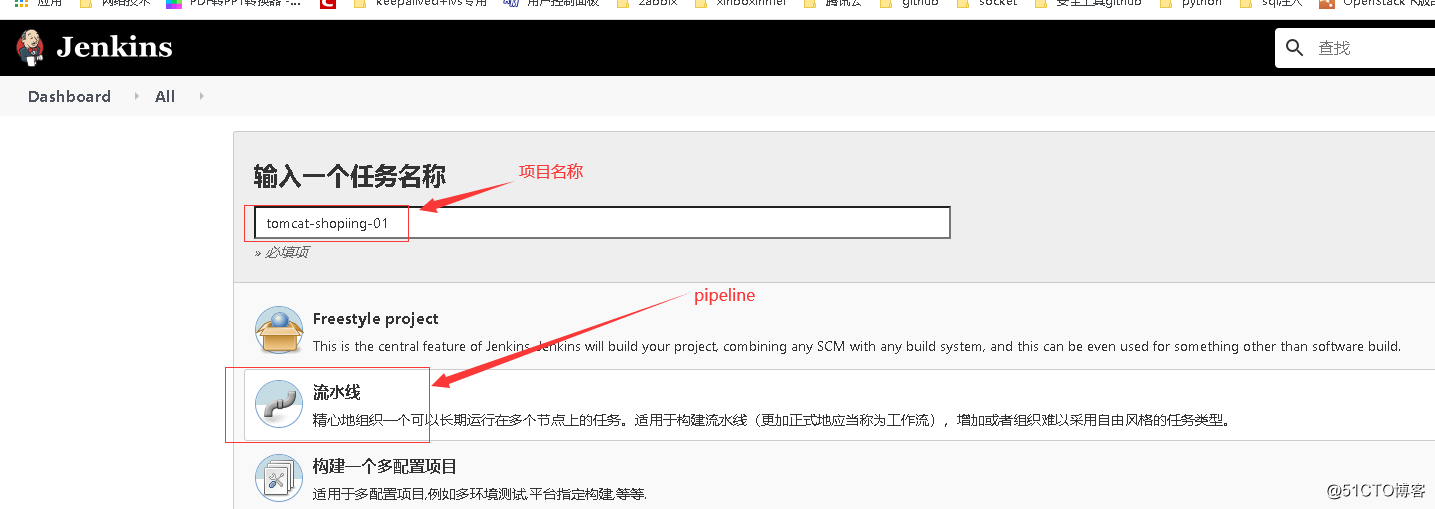
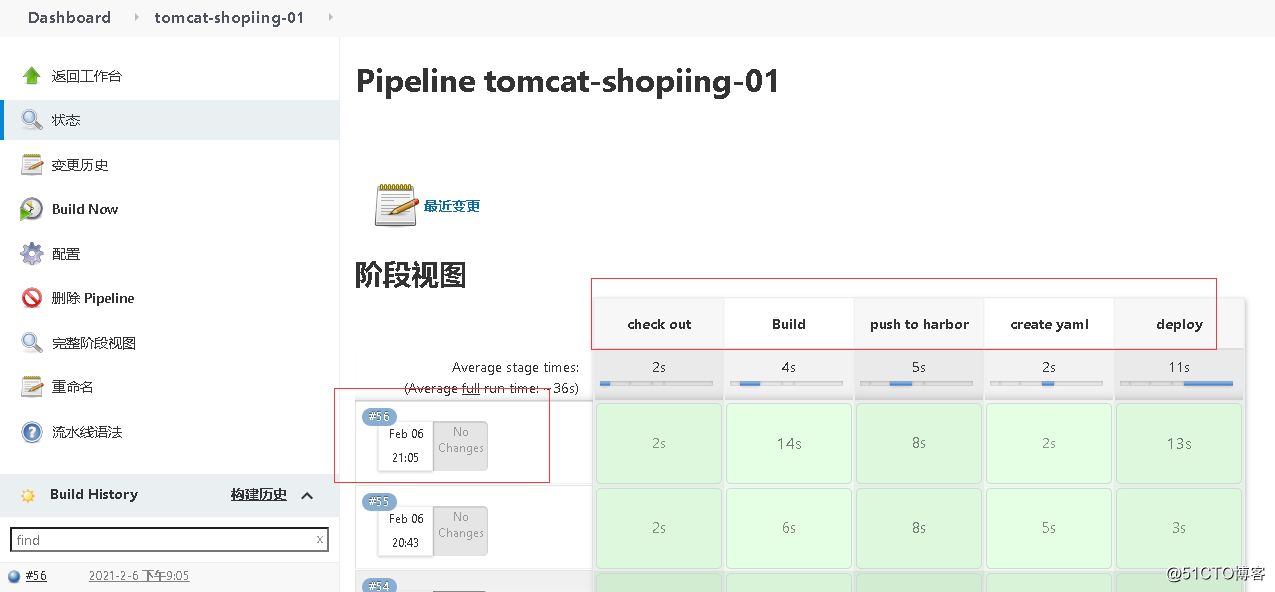
#pipeline 构建
此处构建比较简单,实际中会更加详细。比如设置参数,打包编译、yaml文件清理、镜像清理都省略。
后续再继续添加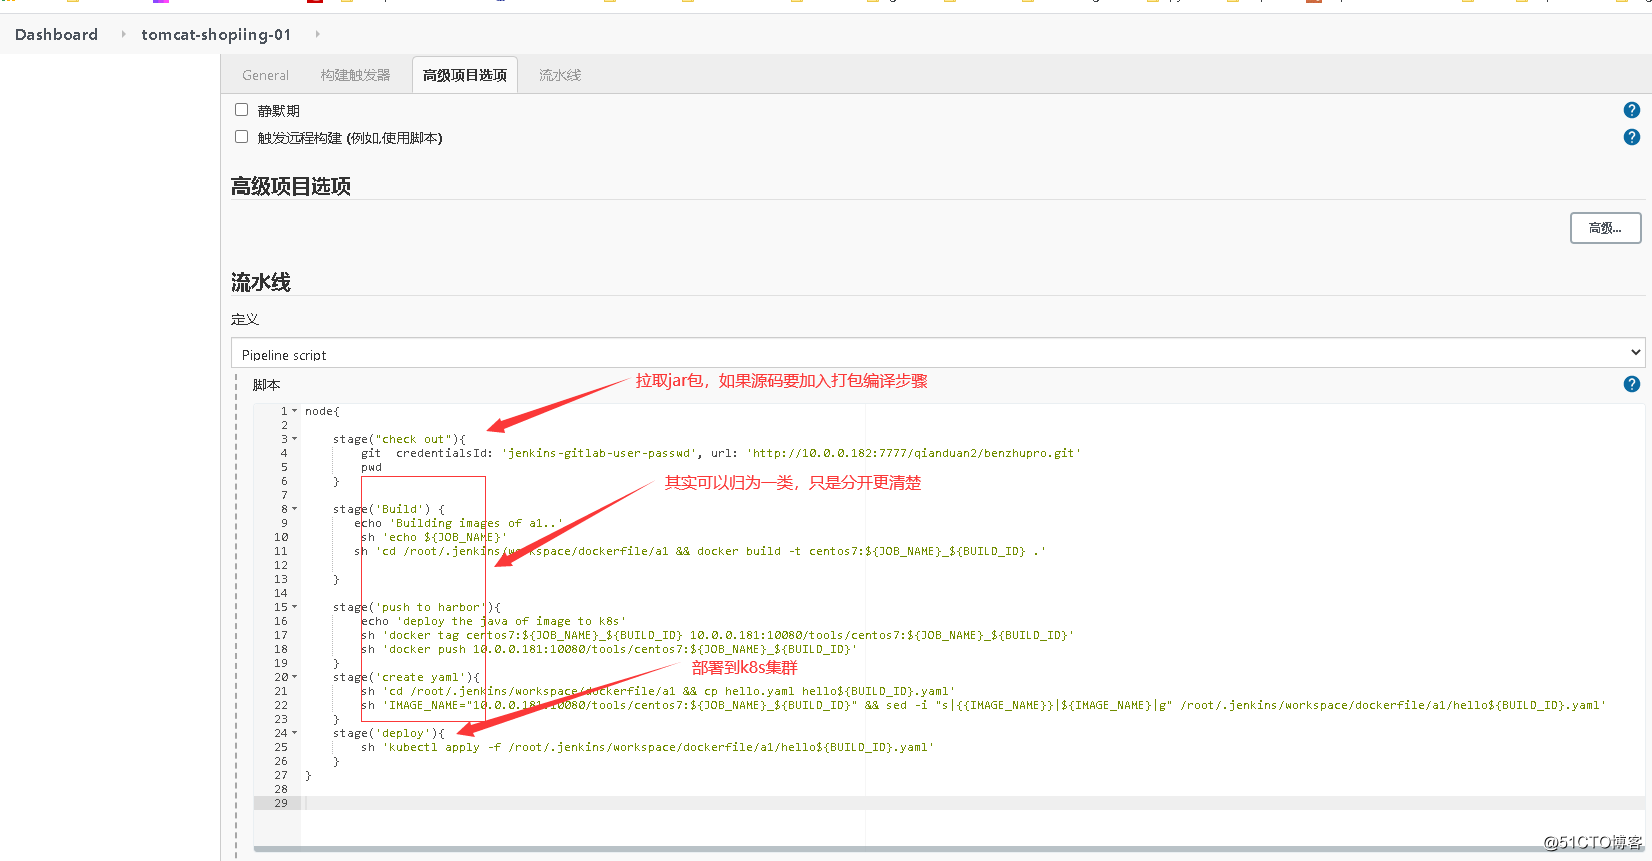
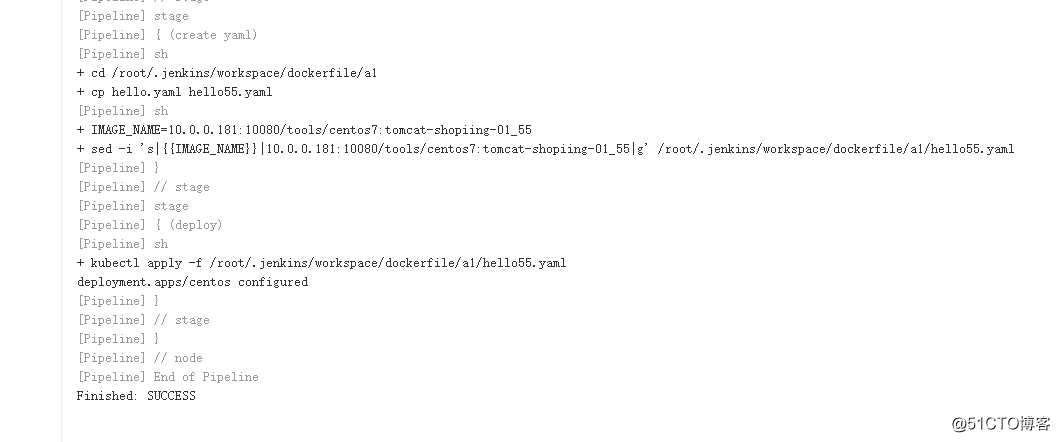
#yaml的配置文件
[root@localhost a1]# cat hello52.yaml
apiVersion: apps/v1
kind: Deployment
metadata:
name: centos
labels:
app: centos
spec:
replicas: 3
selector:
matchLabels:
app: centos
template:
metadata:
labels:
app: centos
spec:
containers:
- name: centos
image: 10.0.0.181:10080/tools/centos7:pipeline_1_52
imagePullPolicy: Always
ports:
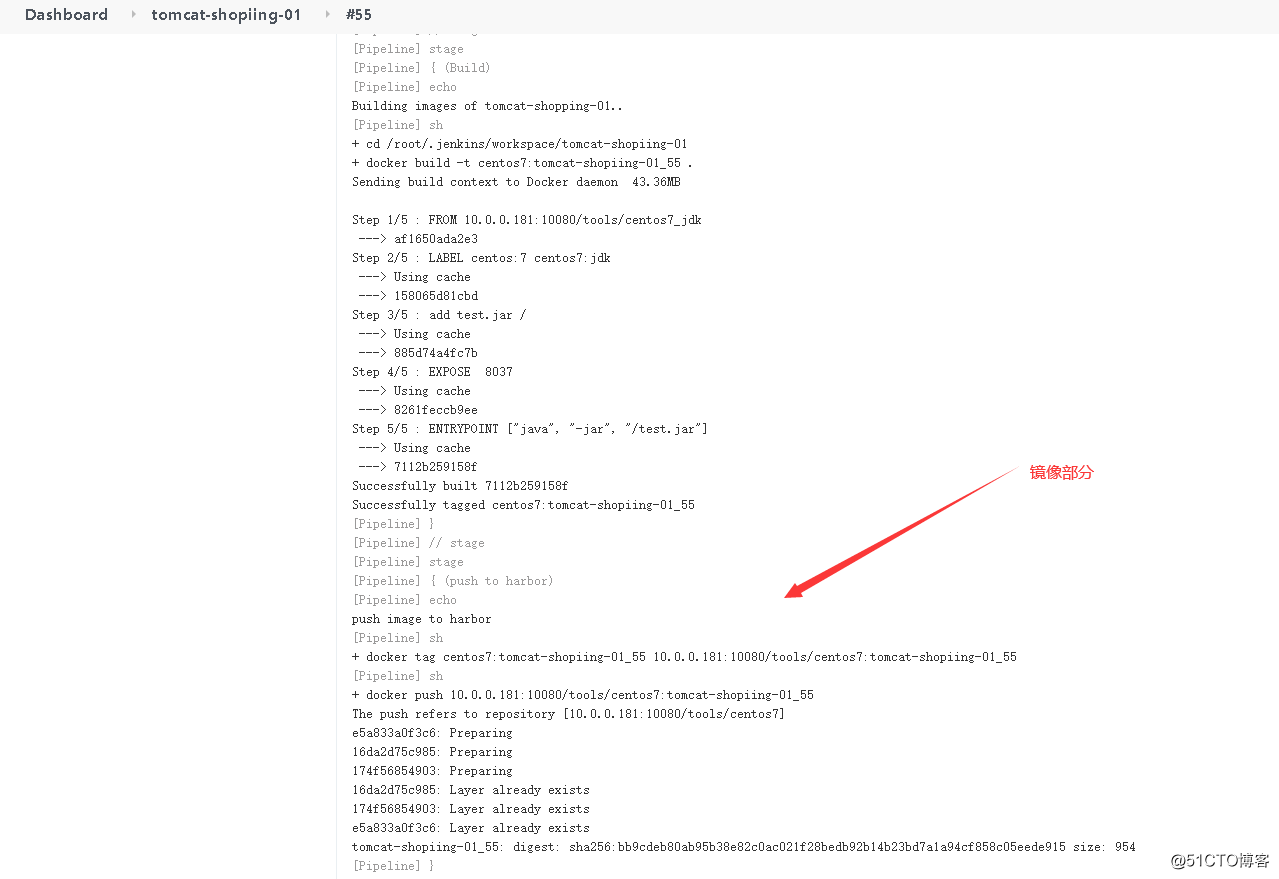
- containerPort: 8037# dockerfile 文件
#原镜像
FROM 10.0.0.181:10080/tools/centos7_jdk
#定义标签
LABEL centos:7 centos7:jdk
#解压缩文件到/usr/local
add test.jar /
#变量设置
EXPOSE  8037
ENTRYPOINT ["java", "-jar", "/test.jar"]
三、发布结果验证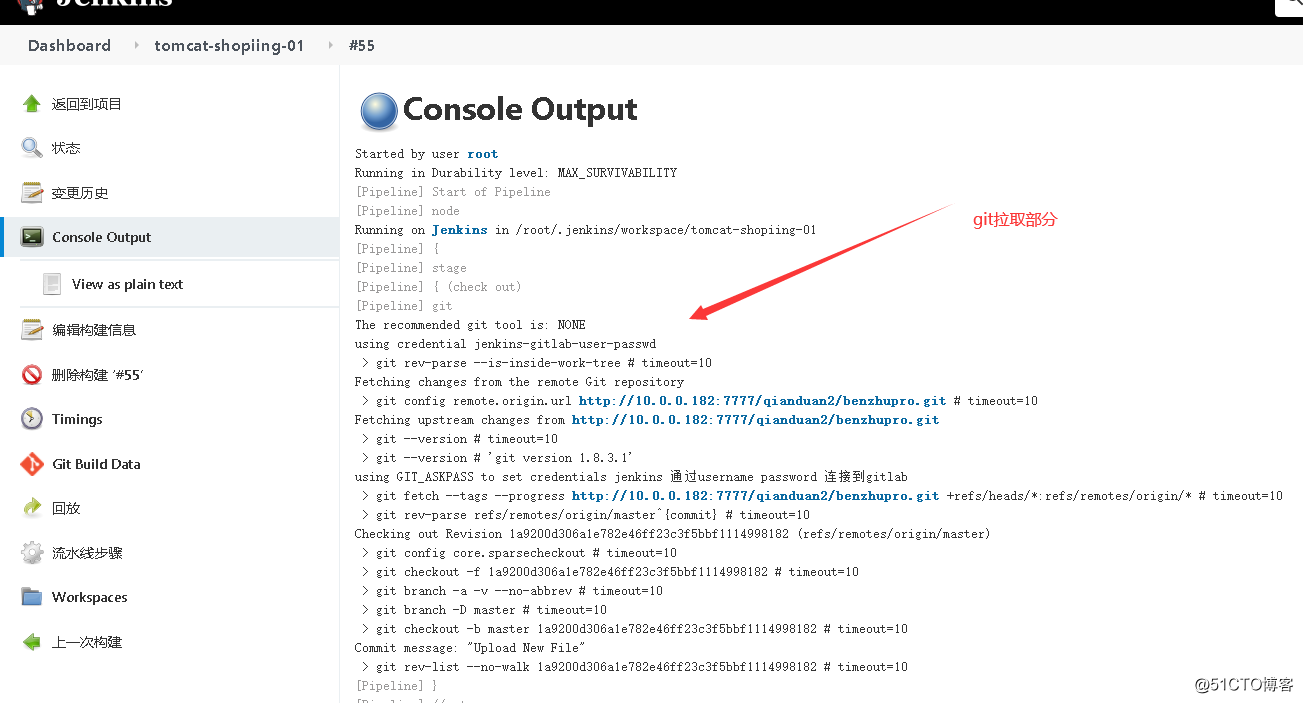
2)
node节点查看拉取的镜像
3)pod运行状态