前言
Go作为新生的语言,由于其速度快,以及一系列有点越来越流行。
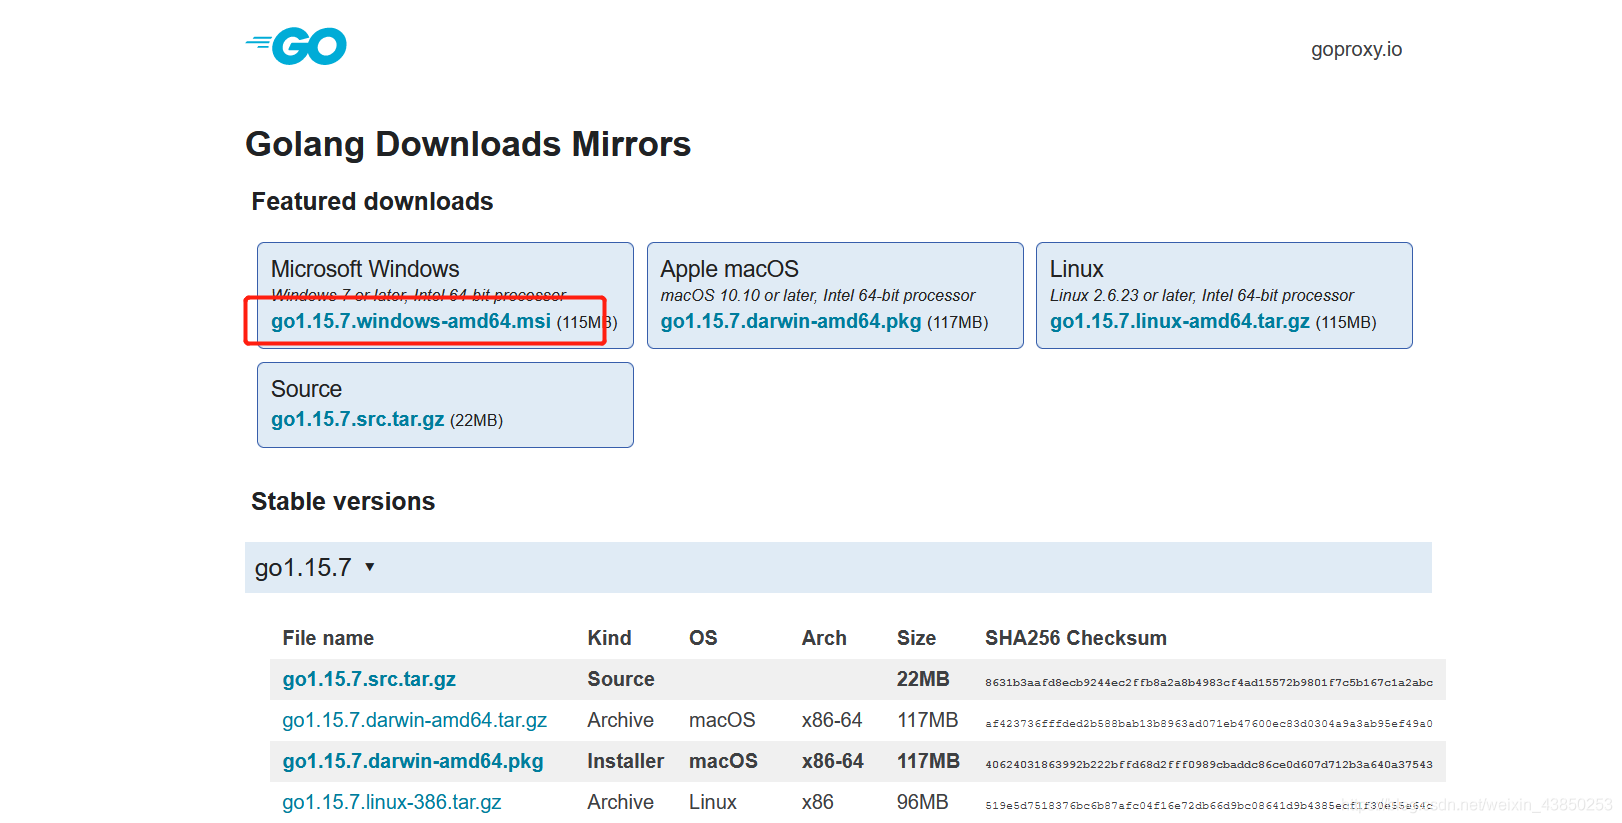
下载
windows用户点击这个即可:
配置镜像
参考这篇文章: go module基本使用 亲测可行。
简要步骤如下:
set GO111MODULE=on
不过在下载beego(go get github.com/beego/beego/[email protected])的时候,上面这个我觉得好像没有下面这句管用
go env -w GO111MODULE=on
设置七星云镜像:
go env -w GOPROXY=https://goproxy.cn,direct
- 阿里云镜像: https://mirrors.aliyun.com/goproxy/
- 中国golang镜像: https://goproxy.io
初始化:
go mod init 【项目名字】
go mod tidy  // 更新依赖文件
go mod download  // 下载依赖文件
go mod vendor  // 将依赖转移至本地的vendor文件
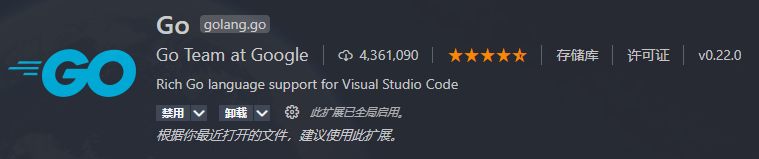
如果使用vscode进行开发的话,再下载多一个插件即可:
推荐教程
- (中英字幕) Go语言基础课程(Golang Tutorial) 第一集暂时没有字幕好像,当练习听力吧,第一集也没有什么重点内容。然后下面一些语句记录很多来源于这里。
- Go 语言教程(菜鸟教程)
一些语句记录
来源于(中英字幕) Go语言基础课程(Golang Tutorial) 的学习记录。不过不会完全一致,敲得时候比较随意hhh,想着只要get到大意即可。

读取键盘输入
package main

import (
	"bufio"
	"fmt"
	"os"
	"strconv"
)

func main() {


	scanner := bufio.NewScanner(os.Stdin)
	fmt.Print("When were you born?(type year): ")
	scanner.Scan()
	input, _ := strconv.ParseInt(scanner.Text(), 10, 64)
	fmt.Printf("You are %d years old when 2020", 2020-input)
}
output:(键盘输入2005)
When were you born?(type year): 2005
You are 15 years old when 2020
函数
多个返回值:
package main

import (
	"fmt"
)

func add(x, y, z int) (int, int) {


	return x + y, y + z
}

func main() {


	ans, ans2 := add(6, 7, 8)
	fmt.Println(ans, ans2)
}
output:
13 15
一个其他语言不常见的写法:
package main

import (
	"fmt"
)

func add(x, y, z int) (a, b int) {


	// 延迟到return在执行,可用于关闭文件等操作
	defer fmt.Println("hello")
	a = x + y
	b = y + z
	fmt.Println("Before return")
	return
}

func main() {


	ans, ans2 := add(6, 7, 8)
	fmt.Println(ans, ans2)
}
output:
Before return
hello
13 15
高级函数
package main

import (
	"fmt"
)

func returnFunc(x string) func() {


	return func() {


		fmt.Println(x)
	}
}

func main() {


	returnFunc("hello")()
	returnFunc("goodbye")()
}

package main

import (
	"fmt"
)

func test2(myFunc func(int) int) {


	fmt.Println(myFunc(7))
}

func main() {


	test := func(x int) int {


		return x * -1
	}
	test2(test)
}
output:
-7
“引用”
从输出发现会改变传入的数组的值:
package main

import "fmt"

func changeList(list []int) {


	list[0] = 250
}

func main() {


	a := []int{

    1, 2}
	fmt.Println(a)
	changeList(a)
	fmt.Println(a)
}
output:
[1 2]
[250 2]
package main

import "fmt"

func main() {


	var x map[string]int = map[string]int{

    "hello": 3}
	y := x
	y["y"] = 100
	x["7"] = 7
	fmt.Println(x, y)
}
output:
map[7:7 hello:3 y:100] map[7:7 hello:3 y:100]
package main

import "fmt"

func main() {


	var x []int = []int{

    3, 4, 5}
	y := x
	x[0] = 250
	fmt.Println(x, y)
}
output:
[250 4 5] [250 4 5]
指针
package main

import "fmt"

func main() {


	x := 7
	y := &x
	fmt.Println(x, y)
	*y = 8
	fmt.Println(x, y)
}
output:
7 0xc000014080
8 0xc000014080
package main

import "fmt"

func changeValue(str *string) {


	*str = "bye!"
}

func changeValue2(str string) {


	str = "goodbye!"
}

func main() {


	strValue, strValue2 := "hello", "hello"
	changeValue(&strValue)
	fmt.Println(strValue)
	changeValue2(strValue2)
	fmt.Println(strValue2)
}
output:
bye!
hello
结构体
package main

import "fmt"

type Point struct {


	x float64
	y float64
}

type Circle struct {


	radius float64
	center Point
}

func main() {


	p1 := &Point{

    y: 3}
	c1 := Circle{

    4.56, *p1}
	fmt.Println(c1)
	fmt.Println(p1.x, p1.y)
	fmt.Println(c1.center.x)
}
output:
{

    4.56 {

    0 3}}
0 3
0
package main

import "fmt"

type Student struct {


	name   string
	grades []int
	age    int
}

func (s Student) getAge() int {


	return s.age
}

func (s *Student) setAge(age int) {


	(*s).age = age
}

func (s Student) getAverageGrade() float64 {


	sum := 0
	for _, v := range s.grades {


		sum += v
	}
	return float64(sum) / float64(len(s.grades))
}

func (s *Student) getMaxGrade() int {


	curMax := 0

	for _, v := range s.grades {


		if v > curMax {


			curMax = v
		}
	}
	return curMax
}

func main() {


	s1 := Student{

    "Andy", []int{

    94, 95, 96}, 20}
	fmt.Println(s1)
	s1.setAge(9)
	fmt.Println(s1)
	fmt.Println(s1.getAverageGrade())
	fmt.Println(s1.getMaxGrade())
}
output:
{

    Andy [94 95 96] 20}
{

    Andy [94 95 96] 9}
95
96
接口
package main

import (
	"fmt"
	"math"
)

type shape interface {


	area() float64
}

type circle struct {


	radius float64
}

type rect struct {


	width  float64
	height float64
}

func (r rect) area() float64 {


	return r.width * r.height
}

func (c circle) area() float64 {


	return math.Pi * c.radius * c.radius
}

func getArea(s shape) float64 {


	return s.area()
}

func main() {


	c1 := circle{

    4.5}
	r1 := rect{

    5, 7}
	shapes := []shape{

    c1, r1}

	for _, shape := range shapes {


		fmt.Println(getArea(shape))
	}
}
output:
63.61725123519331
35
Beego初步探索
参考视频资料: Go语言web框架Beego
简单小例子
首先,配置好代理。然后创建一个文件夹,用vscode打开,新建一个文件main.go, 在main.go添加一下代码:
package main

import (
	"github.com/astaxie/beego"

	"github.com/astaxie/beego/context"
)

func main() {


}
然后再终端中输入
go mod init 【随便起个名字】
比如 go mod init mybeegotest
,然后输入
go tidy
go download
此时项目结构如下:
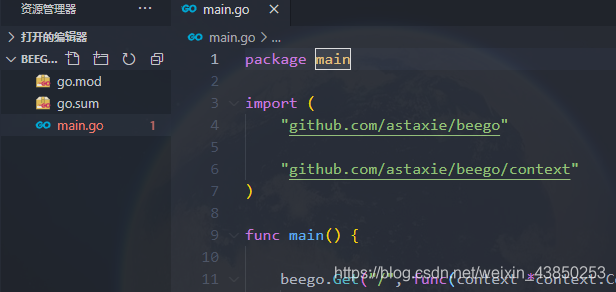
输入一下代码即完成第一个beego应用啦
package main

import (
   "github.com/astaxie/beego"

   "github.com/astaxie/beego/context"
)

func main() {


   beego.Get("/", func(context *context.Context) {


   	context.Output.Body([]byte("<h1>hello beego</h1>"))
   })

   beego.Get("/hello", func(c *context.Context) {


   	type Person struct {


   		Name string
   	}
   	c.Output.JSON(&Person{

    Name: "hello from json"}, true, true)
   })

   beego.Run("localhost:8089")
}
然后控制台输入下列命令即可运行。
go run main.cpp
在浏览器输入 http://127.0.0.1:8089 或 http://127.0.0.1:8089/hello 可以看到返回结果。
MVC
当然,我们实际开发肯定不会这么搞,一般会分离数据,逻辑和页面,这里采取MVC的模式重构一下。
在项目更目录新建一个views的文件夹, 并新建一个名为main.html的文件(不一定叫main, 也可以其他,与下面绑定模板的地方对应即可)
<!DOCTYPE html>
<html lang="en">
<head>
    <meta charset="UTF-8">
    <meta name="viewport" content="width=device-width, initial-scale=1.0">
    <title>Beego</title>
</head>
<body>
    <h1>beego hello world</h1>
</body>
</html>
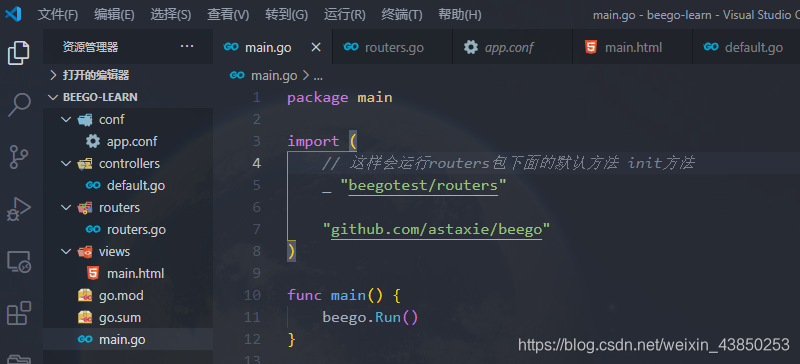
main.go 修改为:
package main

import (
	// 这样会运行routers包下面的默认方法 init方法
	_ "beegotest/routers"

	"github.com/astaxie/beego"
)

func main() {


	beego.Run()
}
新建一个conf目录, 在该目录下新建一个app.conf文件, 这个是配置文件
appname = mybeegotest
runmode = dev

[dev]
httpport = 8089
新建一个routers目录,在该目录下新建一个routers.go文件,这个是路由文件
package routers

import (
	"beegotest/controllers"

	"github.com/astaxie/beego"
)

func init() {


	// get方法: controllers中的Get函数
	beego.Router("/", &controllers.MainController{

    }, "get:Get")
}
新建一个controllers目录,在该目录下新建一个default.go文件,这个是控制器文件
package controllers

import "github.com/astaxie/beego"

type MainController struct {


	beego.Controller // 继承 Controller interface
}

func (m *MainController) Get() {


	m.TplName = "main.html"
}