spring-cloud-config源码分析
1. Spring Environment
运行环境,表示整个spring应用的运行环境信息
- profiles
- properties
spring根据profile对bean进行逻辑分组
可以在配置文件中设置: spring.profile.active=dev/prd/test ,需要在classpath下有对应的 application-dev.yml /application-prd.yml /application-test.yml 配置文件;
第二个,可以在项目启动时添加JVM参数来设置当前生效的profile
2.Environment实现
2.1 Environment初始化
2.1.1 springApplication.run -> prepareEnvironment

	private ConfigurableEnvironment prepareEnvironment(SpringApplicationRunListeners listeners,
			ApplicationArguments applicationArguments) {


		// Create and configure the environment 创建环境,决定用哪个environment,默认是StandardEnvironment
		ConfigurableEnvironment environment = getOrCreateEnvironment();
		// applicationArguments.getSourceArgs 读取命令行参数
		configureEnvironment(environment, applicationArguments.getSourceArgs());
		ConfigurationPropertySources.attach(environment);
		listeners.environmentPrepared(environment);
		bindToSpringApplication(environment);
		if (!this.isCustomEnvironment) {


			environment = new EnvironmentConverter(getClassLoader()).convertEnvironmentIfNecessary(environment,
					deduceEnvironmentClass());
		}
		ConfigurationPropertySources.attach(environment);
		return environment;
	}
2.1.2 getOrCreateEnvironment
根据当前的webApplication类型匹配对应的environment,默认是StandardServletEnvironment ,如果是spring webflux,则是
StandardReactiveWebEnvironment .
private ConfigurableEnvironment getOrCreateEnvironment() {


		if (this.environment != null) {


			return this.environment;
		}
		switch (this.webApplicationType) {


		case SERVLET:
			return new StandardServletEnvironment();
		case REACTIVE:
			return new StandardReactiveWebEnvironment();
		default:
			return new StandardEnvironment();
		}
	}
StandardEnvironment 类图如下:

2.1.3 StandardServletEnvironment初始化
这里StandardServletEnvironment 的初始化时会配置基本的属性来源,StandardServletEnvironment 继承自StandardEnvironment,它在创建时,自然会先调用父类 AbstractEnvironment 的构造方法, 这个构造方法中又调用了一个自定义配置文件的方法customizePropertySources,如下:
public class StandardEnvironment extends AbstractEnvironment {


	/** System environment property source name: {@value}. */
	public static final String SYSTEM_ENVIRONMENT_PROPERTY_SOURCE_NAME = "systemEnvironment";

	/** JVM system properties property source name: {@value}. */
	public static final String SYSTEM_PROPERTIES_PROPERTY_SOURCE_NAME = "systemProperties";
	/**
	 * Customize the set of property sources with those appropriate for any standard Java environment:
	 */
	@Override
	protected void customizePropertySources(MutablePropertySources propertySources) {


		propertySources.addLast(
				new PropertiesPropertySource(SYSTEM_PROPERTIES_PROPERTY_SOURCE_NAME, getSystemProperties()));
		propertySources.addLast(
				new SystemEnvironmentPropertySource(SYSTEM_ENVIRONMENT_PROPERTY_SOURCE_NAME, getSystemEnvironment()));
	}
}
上面的初始化过程中,
- SYSTEM_PROPERTIES_PROPERTY_SOURCE_NAME
系统变量,通过System.setProperty设置的变量,默认可以看到 java.version 、 os.name 等参数 - SYSTEM_ENVIRONMENT_PROPERTY_SOURCE_NAME
系统环境变量,也就是我们配置JAVA_HOME的地方。
而StandardServletEnvironment 重写了customizePropertySources,先去加载servlet配置,jndi配置,然后再调用父类加载系统变量的配置:
public class StandardServletEnvironment extends StandardEnvironment implements ConfigurableWebEnvironment {


    public static final String SERVLET_CONTEXT_PROPERTY_SOURCE_NAME = "servletContextInitParams";
    public static final String SERVLET_CONFIG_PROPERTY_SOURCE_NAME = "servletConfigInitParams";
    public static final String JNDI_PROPERTY_SOURCE_NAME = "jndiProperties";

    public StandardServletEnvironment() {


    }

    protected void customizePropertySources(MutablePropertySources propertySources) {


    // 装载servlet配置
        propertySources.addLast(new StubPropertySource("servletConfigInitParams"));
        propertySources.addLast(new StubPropertySource("servletContextInitParams"));
        if (JndiLocatorDelegate.isDefaultJndiEnvironmentAvailable()) {


            propertySources.addLast(new JndiPropertySource("jndiProperties"));
        }
		// 调用父类的方法,装载公共配置,也就是 StandardEnvironment 类中的 customizePropertySources 方法。
        super.customizePropertySources(propertySources);
    }
customizePropertySources 这个方法被 StandardServletEnvironment 重写了,所以会调用StandardServletEnvironment 中的 customizePropertySources 方法,这里是将几个不同的配置源封装成 StubPropertySource 添加到MutablePropertySources 中,调用 addLast 是表示一直往最后的位置添加。4
SERVLET_CONFIG_PROPERTY_SOURCE_NAME:servlet的配置信息,也就是在xml中配置的
SERVLET_CONTEXT_PROPERTY_SOURCE_NAME: 这个是servlet初始化的上下文,也就是以前我们
在web.xml中配置的 context-param 。
JNDI_PROPERTY_SOURCE_NAME: 加载jndi.properties配置信息
添加PropertySource的目的是要告诉Environment,解析哪些位置的属性文件进行加载。而在这个添加过程中,所有的添加都是基于 addLast ,也就是最早添加的PropertySource会放在最前面。 systemEnvironment 是在 systemProperties 前面,这点很重要。因为前面的配置会覆盖后面的配置,也就是说系统变量中的配置比系统环境变量中的配置优先级更高
2.1.4 MutablePropertySources
在上面的代码中可以看到,所有的外部资源配置都是添加到了一个MutablePropertySources对象中,这个对象封装了属性资源的集合。
而从 MutablePropertySources 命名来说,Mutable是一个可变的意思,也就是意味着它动态的管理了PropertySource的集合。
public class MutablePropertySources implements PropertySources {


	private final List<PropertySource<?>> propertySourceList = new CopyOnWriteArrayList<>();
}
MutablePropertySources 这个类的实例在AbstractEnvironment中作为参数传递给了ConfigurablePropertyResolver配置解析器的实例:
public abstract class AbstractEnvironment implements ConfigurableEnvironment {


	public static final String IGNORE_GETENV_PROPERTY_NAME = "spring.getenv.ignore";

	//Name of property to set to specify active profiles: {@value}. Value may be comma delimited.
	public static final String ACTIVE_PROFILES_PROPERTY_NAME = "spring.profiles.active";

	// Name of property to set to specify profiles active by default: {@value}. Value may be comma delimited.
	public static final String DEFAULT_PROFILES_PROPERTY_NAME = "spring.profiles.default";

	/**
	 * Name of reserved default profile name: {@value}. If no default profile names are
	 * explicitly and no active profile names are explicitly set, this profile will
	 * automatically be activated by default.
	 * @see #getReservedDefaultProfiles  @see ConfigurableEnvironment#setDefaultProfiles
	 * @see ConfigurableEnvironment#setActiveProfiles @see AbstractEnvironment#DEFAULT_PROFILES_PROPERTY_NAME
	 * @see AbstractEnvironment#ACTIVE_PROFILES_PROPERTY_NAME
	 */
	protected static final String RESERVED_DEFAULT_PROFILE_NAME = "default";
	private final Set<String> activeProfiles = new LinkedHashSet<>();
	private final Set<String> defaultProfiles = new LinkedHashSet<>(getReservedDefaultProfiles());
	private final MutablePropertySources propertySources = new MutablePropertySources();
	private final ConfigurablePropertyResolver propertyResolver =
			new PropertySourcesPropertyResolver(this.propertySources);

	/** Create a new {@code Environment} instance, calling back to {@link #customizePropertySources(MutablePropertySources)} during construction to allow subclasses to contribute or manipulate {@link PropertySource} instances as appropriate.	 */
	public AbstractEnvironment() {


		customizePropertySources(this.propertySources);
	}
在2.1.2 StandardEnvironment的类图关系中,可以看到AbstractEnvironment实现了文件解析器的接口ConfigurablePropertyResolver,而上面代码中把MutablePropertySources传递给PropertySourcesPropertyResolver,这样AbstractEnvironment 就具备了文件解析的功能,只是这个功能委托给了PropertySourcesPropertyResolver 来实现。
Environment初始化步骤:
org.springframework.core.env.AbstractEnvironment -》
org.springframework.web.context.support.StandardServletEnvironment#customizePropertySources -》
super.customizePropertySources(propertySources) ,即:org.springframework.core.env.StandardEnvironment#customizePropertySources
StandardServletEnvironment 构造中所做的事情就是把web.xml
中的下面配置作为属性封装到MutablePropertySources:
注意上面代码中都是propertySources.addLast ,最先读取的添加到最前面
2.1.5 SpringApplication.configureEnvironment
上面的代码,spring构造了一个 StandardServletEnvironment 对象并且初始化了一些需要解析的propertySource;
回到org.springframework.boot.SpringApplication#prepareEnvironment 中的configureEnvironment:
,这个方法有两个作用
- addConversionService 添加类型转化的服务,我们知道properties文件中配置的属性都是String类型的,而转化为Java对象之后要根据合适的类型进行转化,而 ConversionService 是一套通用的转化方案,这里把这个转化服务设置到当前的Environment,很显然是为Environment配置解析时提供一个类型转化的解决方案。
- configurePropertySources 配置Environment中的propertysources,configureProfiles 配置profiles
protected void configureEnvironment(ConfigurableEnvironment environment, String[] args) {


		if (this.addConversionService) {


		// 统一的类型转化器,配置文件中会配置不同的类型,需要根据当前类型去适配,使environment加载属性时具备适配能力
			ConversionService conversionService = ApplicationConversionService.getSharedInstance();
			environment.setConversionService((ConfigurableConversionService) conversionService);
		}
		configurePropertySources(environment, args);   // 设置默认属性
		// 配置当前激活的profiles;将当前激活的profiles设置到environment中,实现不同环境下的配置读取。
		configureProfiles(environment, args);
	}
- configurePropertySources
(1)设置 defaultProperties 属性来源
(2)设置commandLineProperties来源,如果设置了命令行参数,则会加载SimpleCommandLinePropertySource 作为propertySource
protected void configurePropertySources(ConfigurableEnvironment environment, String[] args) {


		MutablePropertySources sources = environment.getPropertySources();
		if (this.defaultProperties != null && !this.defaultProperties.isEmpty()) {


		   // 设置默认属性:
		  /*SpringApplication springApplication=new SpringApplication(SpringCloudEurekaServerApplication.class);
			Map<String, Object> pro = new HashMap<>();
			pro.put("key", "value");springApplication.setDefaultProperties(pro);
			springApplication.run(args);*/
			sources.addLast(new MapPropertySource("defaultProperties", this.defaultProperties));
		}
		if (this.addCommandLineProperties && args.length > 0) {


			String name = CommandLinePropertySource.COMMAND_LINE_PROPERTY_SOURCE_NAME;
			if (sources.contains(name)) {


				PropertySource<?> source = sources.get(name);
				// 创建复合的PropertySource
				CompositePropertySource composite = new CompositePropertySource(name);
				composite.addPropertySource(
						new SimpleCommandLinePropertySource("springApplicationCommandLineArgs", args));
				composite.addPropertySource(source);
				sources.replace(name, composite);
			}
			else {


			// 默认情况下走这个分支
				sources.addFirst(new SimpleCommandLinePropertySource(args));
			}
		}
	}
- configureProfiles
配置当前激活的profiles,将当前的activeProfiles设置到enviroment中,这样就能够使得我们获取不同环境下的配置。
protected void configureProfiles(ConfigurableEnvironment environment, String[] args) {


		Set<String> profiles = new LinkedHashSet<>(this.additionalProfiles);
		profiles.addAll(Arrays.asList(environment.getActiveProfiles()));
		// 设置当前生效的profile
		environment.setActiveProfiles(StringUtils.toStringArray(profiles));
	}
2.1.6 listeners.environmentPrepared(environment)
发布一个environmentPrepared环境准备就绪的通知,回到org.springframework.boot.SpringApplication#prepareEnvironment:

void environmentPrepared(ConfigurableEnvironment environment) {


		for (SpringApplicationRunListener listener : this.listeners) {


		// 发布environmentPrepared环境准备就绪的通知
			listener.environmentPrepared(environment);
		}
	}

listener.environmentPrepared(environment); 把事件监听交给了EventPublishingRunListener去处理:
	public void environmentPrepared(ConfigurableEnvironment environment) {

       // EventPublishingRunListener中的方法
		this.initialMulticaster
				.multicastEvent(new ApplicationEnvironmentPreparedEvent(this.application, this.args, environment));
	}
public void multicastEvent(ApplicationEvent event) {


		multicastEvent(event, resolveDefaultEventType(event));
	}

	@Override
	public void multicastEvent(final ApplicationEvent event, @Nullable ResolvableType eventType) {


		ResolvableType type = (eventType != null ? eventType : resolveDefaultEventType(event));
		Executor executor = getTaskExecutor();
		for (ApplicationListener<?> listener : getApplicationListeners(event, type)) {


			if (executor != null) {


			// 遍历所有监听器,发布广播事件
				executor.execute(() -> invokeListener(listener, event));
			}
			else {


				invokeListener(listener, event);
			}
		}
	}
2.2 配置加载过程
2.2.1 ConfigFileApplicationListener.onApplicationEvent
getApplicationListeners中,会返回一个ConfigFileApplicationListener(这里是读取配置文件,返回的是这个实现类的实例), 其中有一个onApplicationEvent方法来监听到之前发布的环境准备就绪事件的通知,然后执行onApplicationEnvironmentPreparedEvent
@Override
	public void onApplicationEvent(ApplicationEvent event) {


		if (event instanceof ApplicationEnvironmentPreparedEvent) {


		// 前面发布的是一个EnvironmentPreparedEvent,这里会进入onApplicationEnvironmentPreparedEvent方法
			onApplicationEnvironmentPreparedEvent((ApplicationEnvironmentPreparedEvent) event);
		}
		if (event instanceof ApplicationPreparedEvent) {


			onApplicationPreparedEvent(event);
		}
	}

	private void onApplicationEnvironmentPreparedEvent(ApplicationEnvironmentPreparedEvent event) {


	// 拿到不同的环境处理器
		List<EnvironmentPostProcessor> postProcessors = loadPostProcessors();
		// 添加当前实现,因为当前这个类ConfigFileApplicationListener 实现了EnvironmentPostProcessor接口
		postProcessors.add(this);
		AnnotationAwareOrderComparator.sort(postProcessors);
		for (EnvironmentPostProcessor postProcessor : postProcessors) {


		// 遍历,实现EnvironmentPostProcessor 接口定义的抽象方法postProcessEnvironment :
			postProcessor.postProcessEnvironment(event.getEnvironment(), event.getSpringApplication());
		}
	}

// SPINRG SPI机制,在 加载默认的EnvironmentPostProcessor
	List<EnvironmentPostProcessor> loadPostProcessors() {


		return SpringFactoriesLoader.loadFactories(EnvironmentPostProcessor.class, getClass().getClassLoader());
	}
loadPostProcessors()方法中,通过spring的SPI机制加载各种默认的EnvironmentPostProcessor, 在springboot jar包中的spring.factories文件中,可以找到它默认加载的EnvironmentPostProcessor的具体实现是下面图中的四个具体实现类:(也就是说,EnvironmentPostProcessor是一种扩展机制,我们可以利用SPI机制来扩展它的实现)

回到postProcessor.postProcessEnvironment , 这个方法是在具体的实现类中重写的:

2.2.2 ConfigFileApplicationListener.addPropertySources
上面的代码,最终的具体实现为 ConfigFileApplicationListener.addPropertySources ,也就是在这里进行了配置的加载,
这里做了两件事情:
- 添加一个RandomValuePropertySource到Environment的MutablePropertySources中
- 加载spring boot中的配置信息,比如application.yml或者application.properties
// 实现EnvironmentPostProcessor 接口定义的抽象方法postProcessEnvironment
@Override
	public void postProcessEnvironment(ConfigurableEnvironment environment, SpringApplication application) {


	// 添加配置文件属性源到指定的environment环境
		addPropertySources(environment, application.getResourceLoader());
	}

/**
	 * Add config file property sources to the specified environment.
	 * @param environment the environment to add source to
	 * @param resourceLoader the resource loader
	 * @see #addPostProcessors(ConfigurableApplicationContext)
	 */
	protected void addPropertySources(ConfigurableEnvironment environment, ResourceLoader resourceLoader) {


	  // 添加一个RandomValuePropertySource到Environment的MutablePropertySources中
	  // spirngboot默认支持随机数源,可以通过在配置文件中获取一个随机数 比如: env: ${random.long}
		RandomValuePropertySource.addToEnvironment(environment);
		//  加载spring boot中的配置信息,比如application.yml或者application.properties,这里使用了一个内部类Loader 来读取配置文件
		new Loader(environment, resourceLoader).load();
	}
2.2.3 Loader.load:加载所有可能的profiles
Loader是ConfigFileApplicationListener中的一个内部类,Loader.loa实际上是调用了 FilteredPropertySource.apply 方法。然后传递了一个lambda
表达式到apply方法中。
		Loader(ConfigurableEnvironment environment, ResourceLoader resourceLoader) {


		// 保存所有的propertysource,最终是把propertysource都放到environment中
			this.environment = environment;
			// 占位符解析处理器
			this.placeholdersResolver = new PropertySourcesPlaceholdersResolver(this.environment);
			// 处理配置文件路径
			this.resourceLoader = (resourceLoader != null) ? resourceLoader
					: new DefaultResourceLoader(getClass().getClassLoader());
		    // 通过SPI机制获取加载文件的加载器,加载配置文件
			this.propertySourceLoaders = SpringFactoriesLoader.loadFactories(PropertySourceLoader.class,
					getClass().getClassLoader());
		}
// 解析配置文件,使用了匿名内部类,
void load() {


			FilteredPropertySource.apply(this.environment, DEFAULT_PROPERTIES, LOAD_FILTERED_PROPERTY,
					(defaultProperties) -> {


						this.profiles = new LinkedList<>(); // 未处理的数据集合
						this.processedProfiles = new LinkedList<>();  // 已处理的数据集合
						this.activatedProfiles = false;
						this.loaded = new LinkedHashMap<>();
						/**初始化默认的profile,没有设置的haul使用默认的,初始化之后保存到private Deque<Profile> profiles中,这是一个LIFO队列,后进先出,因此先加载profile为null的配置文件,也就是匹配application.properties, application.yml 	**/
						initializeProfiles(); // 加载已激活的profiles
						// profile不为空,则遍历加载每个profile中的配置,如application-dev.yml, application-prd.yml中的配置 ,调用load进行加载
						while (!this.profiles.isEmpty()) {


						// Deque<Profile> profiles;  profiles是一个LIFO的队列
							Profile profile = this.profiles.poll();
							if (isDefaultProfile(profile)) {


								addProfileToEnvironment(profile.getName());
							}
							// 获取对应的配置文件名,使用相应加载器进行加载
							load(profile, this::getPositiveProfileFilter,
									addToLoaded(MutablePropertySources::addLast, false));
						// 处理完的profile添加到processedProfiles中
							this.processedProfiles.add(profile);
						}
						// profile为空,则加载默认的配置:application.yml   bootstrap.yml(如果有配置)
						load(null, this::getNegativeProfileFilter, addToLoaded(MutablePropertySources::addFirst, true));
						addLoadedPropertySources();
						applyActiveProfiles(defaultProperties); //更新activeProfiles列表
					});
		}
上面this.propertySourceLoaders = SpringFactoriesLoader.loadFactories(PropertySourceLoader.class,
getClass().getClassLoader()); 可以在springboot jar包的spring.factories文件中找到 PropertySourceLoader的具体扩展,它有两个默认的实现,一个是properties文件的加载器,一个是yaml文件的加载器,springboot能默认根据 .properties文件或.yaml文件去解析配置项,就是因为springboot中会去判断配置文件的后缀,通过相应的解析器去解析配置文件。

FilteredPropertySource.apply 方法中做了什么:
入参里面传了一个Consumer<PropertySource<?>> operation 对象, 在apply方法中去调用了operation.accept(original); 方法,它实际调用的就是上面load方法中传递的那个匿名内部类lambda表达式,也就是说,在调用accept方式时,会进入load方法中的(defaultProperties) -> { } 这段代码里面
	static void apply(ConfigurableEnvironment environment, String propertySourceName, Set<String> filteredProperties,	Consumer<PropertySource<?>> operation) {


		MutablePropertySources propertySources = environment.getPropertySources();
		PropertySource<?> original = propertySources.get(propertySourceName); // 传参propertySourceName是 DEFAULT_PROPERTIES,默认配置
		if (original == null) {


			operation.accept(null); // 加载默认配置
			return;
		}
		propertySources.replace(propertySourceName, new FilteredPropertySource(original, filteredProperties));
		try {


			operation.accept(original); // 执行 传递进来的匿名内部类中的逻辑
		}
		finally {


			propertySources.replace(propertySourceName, original);
		}
	}
- Load.initializeProfiles
加载存在已经激活的profiles
	/**
		 * Initialize profile information from both the {@link Environment} active
		 * profiles and any {@code spring.profiles.active}/{@code spring.profiles.include}
		 * properties that are already set.
		 */
		private void initializeProfiles() {


			// The default profile for these purposes is represented as null. We add it
			// first so that it is processed first and has lowest priority.
			this.profiles.add(null);
			Binder binder = Binder.get(this.environment);
			Set<Profile> activatedViaProperty = getProfiles(binder, ACTIVE_PROFILES_PROPERTY);
			Set<Profile> includedViaProperty = getProfiles(binder, INCLUDE_PROFILES_PROPERTY);
			List<Profile> otherActiveProfiles = getOtherActiveProfiles(activatedViaProperty, includedViaProperty);
			this.profiles.addAll(otherActiveProfiles);
			// Any pre-existing active profiles set via property sources (e.g.
			// System properties) take precedence over those added in config files.
			this.profiles.addAll(includedViaProperty);
			addActiveProfiles(activatedViaProperty);
			if (this.profiles.size() == 1) {

     // only has null profile
				for (String defaultProfileName : this.environment.getDefaultProfiles()) {


					Profile defaultProfile = new Profile(defaultProfileName, true);
					this.profiles.add(defaultProfile);
				}
			}
		}
**load(profile, this::getPositiveProfileFilter, addToLoaded(MutablePropertySources::addLast, false));**
private void load(Profile profile, DocumentFilterFactory filterFactory, DocumentConsumer consumer) {


//  getSearchLocations() 获取需要遍历的目标路径
			getSearchLocations().forEach((location) -> {


				boolean isDirectory = location.endsWith("/");
				// 拼接对应路径,选择合适的yml或者properties解析器进行解析
				Set<String> names = isDirectory ? getSearchNames() : NO_SEARCH_NAMES;
				names.forEach((name) -> load(location, name, profile, filterFactory, consumer));
			});
		}
load方法中通过 getSearchLoacations 进行搜索,并且进行迭代。getSearchLocations的主要功能,就是获取需要遍历的目标路径,默认情况下,会去DEFAULT_SEARCH_LOCATIONS中查找:
private Set<String> getSearchLocations() {


			Set<String> locations = getSearchLocations(CONFIG_ADDITIONAL_LOCATION_PROPERTY);
			if (this.environment.containsProperty(CONFIG_LOCATION_PROPERTY)) {


				locations.addAll(getSearchLocations(CONFIG_LOCATION_PROPERTY));
			}
			else {


				locations.addAll(
						asResolvedSet(ConfigFileApplicationListener.this.searchLocations, DEFAULT_SEARCH_LOCATIONS));
			}
			return locations;
		}
整理流程:
1)获取默认的配置文件路径,有4种。 2)遍历所有的路径,拼装配置文件名称。 3)再遍历解析器,
选择yml或者properties解析,将解析结果添加到集合MutablePropertySources当中。springBoot中的资源文件加载完,解析顺序从上到下,所以前面的配置文件会覆盖后面的配置文件,并且 application.properties 的优先级最低,系统变量和环境变量的优先级相对较高。
2.3 如何将远程配置信息加载到Environment中
前面分析的都是我们写在本地的配置,那么通过git拉取的配置,是如何被加载到Environment中的?需要考虑以下几个问题
- 如何将配置加载到 Environment
- 配置变更时,如何控制 Bean 是否需要 create,重新触发一次 Bean 的初始化,才能将 @Value 注解指定的字段从 Environment 中重新注入。
- 配置变更时,如何控制新的配置会更新到 Environment 中,才能保证配置变更时可注入最新的值。
为了解决这三个问题,Spring Cloud Config规范中定义了三个核心的接口:
- PropertySourceLocator
让用户可定制化的将一些配置加载到Environment。这部分的配置获取遵循了 Spring Cloud Config 的理念,即希望能从外部储存介质中来 loacte。 - RefreshScope
扩展 Spring 原有的 Scope 类型。用来标识当前这个 Bean 是一个refresh 类型的 Scope。其主要作用就是可以控制 Bean 的整个生命周期。 - ContextRefresher
抽象出这个 Class,是让用户自己按需来刷新上下文(比如当有配置刷新时,希望可以刷新上下文,将最新的配置更新到 Environment,重新创建 Bean 时,就可以从Environment 中注入最新的配置)。
2.4 Config Client 配置加载
前面的分析过程中,Environment中所有外部化配置,针对不同类型的配置都会有与之对应的PropertySource,比如(SystemEnvironmentPropertySource、CommandLinePropertySource),以及PropertySourcesPropertyResolver来进行解析。那Config Client在启动的时候,必然也会需要从远程服务器上获取配置加载到Environment中,这样才能使得应用程序通过@value进行属性的注入,而且我们一定可以猜测到的是,这块的工作一定又和spring中某个机制有关系。
2.4.1 SpringApplication.run
回到springboot的run方法,prepareContext会回调所有实现了ApplicationContextInitializer的实例,来完成一些初始化工作。
public ConfigurableApplicationContext run(String... args) {


			prepareContext(context, environment, listeners, applicationArguments, printedBanner);
			refreshContext(context);
			afterRefresh(context, applicationArguments);
		return context;
	}
2.4.2 PropertySourceBootstrapConfiguration.initialize
PropertySourceBootstrapConfiguration 实现了 ApplicationContextInitializer 接口,其目的就是在应
用程序上下文初始化的时候做一些额外的操作, 根据默认的 AnnotationAwareOrderComparator 排序规则对propertySourceLocators数组进行排序,获取运行的环境上下文ConfigurableEnvironment,遍历propertySourceLocators时
调用 locate 方法,传入获取的上下文environment:
- 将source添加到PropertySource的链表中
- 设置source是否为空的标识标量empty
- source不为空的情况,才会设置到environment中
- 返回Environment的可变形式,可进行的操作如addFirst、addLast
- 移除propertySources中的bootstrapProperties
- 根据config server覆写的规则,设置propertySources
- 处理多个active profiles的配置信息
org.springframework.boot.SpringApplication#prepareContext -》 org.springframework.boot.SpringApplication#applyInitializers

public void initialize(ConfigurableApplicationContext applicationContext) {


		List<PropertySource<?>> composite = new ArrayList<>();
		//对propertySourceLocators数组进行排序,根据默认的AnnotationAwareOrderComparator
		AnnotationAwareOrderComparator.sort(this.propertySourceLocators);
		boolean empty = true;
	// 获取运行的环境上下文
		ConfigurableEnvironment environment = applicationContext.getEnvironment();
		for (PropertySourceLocator locator : this.propertySourceLocators) {


		// 回调所有实现PropertySourceLocator接口实现的locate方法
			Collection<PropertySource<?>> source = locator.locateCollection(environment);
			if (source == null || source.size() == 0) {


				continue;
			}
			List<PropertySource<?>> sourceList = new ArrayList<>();
			for (PropertySource<?> p : source) {


				sourceList.add(new BootstrapPropertySource<>(p));
			}
			logger.info("Located property source: " + sourceList);
			composite.addAll(sourceList); // 将source添加到数组
			empty = false;
		}
		if (!empty) {

      // propertsource不为空时,设置到environment中
			MutablePropertySources propertySources = environment.getPropertySources();
			String logConfig = environment.resolvePlaceholders("${logging.config:}");
			LogFile logFile = LogFile.get(environment);
			for (PropertySource<?> p : environment.getPropertySources()) {


				if (p.getName().startsWith(BOOTSTRAP_PROPERTY_SOURCE_NAME)) {


					propertySources.remove(p.getName());
				}
			}
			insertPropertySources(propertySources, composite);
			reinitializeLoggingSystem(environment, logConfig, logFile);
			setLogLevels(applicationContext, environment);
			handleIncludedProfiles(environment);
		}
	}
2.4.3 ConfigClent具体实现:ConfigServicePropertySourceLocator.locate
从 locator.locateCollection(environment); (PropertySourceLocator#locateCollection)进入locate方法,看看它做了什么
这段代码中会通过RestTemplate调用一个远程地址获得配置信息,getRemoteEnvironment 。然后把这个配置PropertySources,然后将这个信息包装成一个OriginTrackedMapPropertySource,设置到 Composite 中
@Retryable(interceptor = "configServerRetryInterceptor")
	public org.springframework.core.env.PropertySource<?> locate(org.springframework.core.env.Environment environment) {


		ConfigClientProperties properties = this.defaultProperties.override(environment);
		CompositePropertySource composite = new OriginTrackedCompositePropertySource("configService");
		RestTemplate restTemplate = this.restTemplate == null? getSecureRestTemplate(properties) : this.restTemplate;
		Exception error = null;
		String errorBody = null;
		try {


			String[] labels = new String[] {

     "" };
			if (StringUtils.hasText(properties.getLabel())) {


				labels = StringUtils.commaDelimitedListToStringArray(properties.getLabel());
			}
			String state = ConfigClientStateHolder.getState();
			// Try all the labels until one works
			for (String label : labels) {


				Environment result = getRemoteEnvironment(restTemplate, properties,label.trim(), state);
				if (result != null) {


					log(result);
					// result.getPropertySources() can be null if using xml
					if (result.getPropertySources() != null) {


						for (PropertySource source : result.getPropertySources()) {


							@SuppressWarnings("unchecked")
							Map<String, Object> map = translateOrigins(source.getName(),
									(Map<String, Object>) source.getSource());
							composite.addPropertySource(new OriginTrackedMapPropertySource(source.getName(),map));
						}
					}

					if (StringUtils.hasText(result.getState())|| StringUtils.hasText(result.getVersion())) {


						HashMap<String, Object> map = new HashMap<>();
						putValue(map, "config.client.state", result.getState());
						putValue(map, "config.client.version", result.getVersion());
						composite.addFirstPropertySource(new MapPropertySource("configClient", map));
					}
					return composite;
				}
			}
			errorBody = String.format("None of labels %s found", Arrays.toString(labels));
		}
		catch (HttpServerErrorException e) {


			error = e;
			if (MediaType.APPLICATION_JSON.includes(e.getResponseHeaders().getContentType())) {


				errorBody = e.getResponseBodyAsString();
			}
		}
		catch (Exception e) {


			error = e;
		}
		if (properties.isFailFast()) {


			throw new IllegalStateException(
					"Could not locate PropertySource and the fail fast property is set, failing"
							+ (errorBody == null ? "" : ": " + errorBody),error);
		}
		logger.warn("Could not locate PropertySource: "+ (error != null ? error.getMessage() : errorBody));
		return null;
	}
2.5 ConfigServer获取配置
服务器端去远程仓库加载配置的流程就比较简单了,核心接口是: EnvironmentRepository ,提供了
配置读取的功能,从请求入口开始:
2.5.1 EnvironmentController
Spring Cloud Config Server提供了EnvironmentController,这样通过在浏览器访问即可从git中获取配
置信息在这个controller中,提供了很多的映射,最终会调用的是 getEnvironment()
public Environment getEnvironment(String name, String profiles, String label,
			boolean includeOrigin) {


		name = Environment.normalize(name);
		label = Environment.normalize(label);
		Environment environment = this.repository.findOne(name, profiles, label,
				includeOrigin);
		if (!this.acceptEmpty
				&& (environment == null || environment.getPropertySources().isEmpty())) {


			throw new EnvironmentNotFoundException("Profile Not found");
		}
		return environment;
	}
this.repository.findOne ,调用某个repository存储组件来获得环境配置信息进行返回。repository是一个 EnvironmentRepository 对象,它有很多实现,其中就包含RedisEnvironmentRepository 、 JdbcEnvironmentRepository 等。默认实现是MultipleJGitEnvironmentRepository ,表示多个不同地址的git数据源。
2.5.2 MultipleJGitEnvironmentRepository.findOne
MultipleJGitEnvironmentRepository 代理遍历每个 JGitEnvironmentRepository,JGitEnvironmentRepository 下使用 NativeEnvironmentRepository 代理读取本地文件
	@Override
	public Environment findOne(String application, String profile, String label, boolean includeOrigin) {


		for (PatternMatchingJGitEnvironmentRepository repository : this.repos.values()) {


			if (repository.matches(application, profile, label)) {


				for (JGitEnvironmentRepository candidate : getRepositories(repository,application, profile, label)) {


					try {


						if (label == null) {


							label = candidate.getDefaultLabel();
						}
						Environment source = candidate.findOne(application, profile,label, includeOrigin);
						if (source != null) {


							return source;
						}
					}
					catch (Exception e) {


						if (this.logger.isDebugEnabled()) {


							this.logger.debug("Cannot load configuration from " + candidate.getUri()
											+ ", cause: (" + e.getClass().getSimpleName() + ") " + e.getMessage(),e);
						}
						continue;
					}
				}
			}
		}
		JGitEnvironmentRepository candidate = getRepository(this, application, profile,label);
		if (label == null) {


			label = candidate.getDefaultLabel();
		}
		if (candidate == this) {


			return super.findOne(application, profile, label, includeOrigin);
		}
		return candidate.findOne(application, profile, label, includeOrigin);
	}
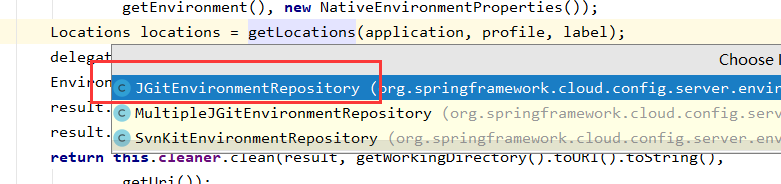
2.5.3 AbstractScmEnvironmentRepository.findOne
调用抽象类的findOne方法,主要有两个核心逻辑
- 调用getLocations从GIT远程仓库同步到本地
- 使用 NativeEnvironmentRepository 委托来读取本地文件内容
@Override
	public synchronized Environment findOne(String application, String profile,
			String label, boolean includeOrigin) {


		NativeEnvironmentRepository delegate = new NativeEnvironmentRepository(
				getEnvironment(), new NativeEnvironmentProperties());
		Locations locations = getLocations(application, profile, label);
		delegate.setSearchLocations(locations.getLocations());
		Environment result = delegate.findOne(application, profile, "", includeOrigin);
		result.setVersion(locations.getVersion());
		result.setLabel(label);
		return this.cleaner.clean(result, getWorkingDirectory().toURI().toString(),
				getUri());
	}
2.5.4
Locations locations = getLocations(application, profile, label); 找到它的实现:
@Override
	public synchronized Locations getLocations(String application, String profile,
			String label) {


		if (label == null) {


			label = this.defaultLabel;
		}
		String version = refresh(label);
		return new Locations(application, profile, label, version,
				getSearchLocations(getWorkingDirectory(), application, profile, label));
	}
/**
	 * Get the working directory ready.
	 * @param label label to refresh
	 * @return head id
	 */
	public String refresh(String label) {


		Git git = null;
		try {


			git = createGitClient();
			if (shouldPull(git)) {


				FetchResult fetchStatus = fetch(git, label);
				if (this.deleteUntrackedBranches && fetchStatus != null) {


					deleteUntrackedLocalBranches(fetchStatus.getTrackingRefUpdates(),git);
				}
				// checkout after fetch so we can get any new branches, tags, ect.
				checkout(git, label);
				tryMerge(git, label);
			}
			else {


				// nothing to update so just checkout and merge.
				// Merge because remote branch could have been updated before
				checkout(git, label);
				tryMerge(git, label);
			}
			// always return what is currently HEAD as the version
			return git.getRepository().findRef("HEAD").getObjectId().getName();
		}
		catch (Exception e) {


			throw new IllegalStateException("Cannot load environment", e);
		}
		finally {


			try {


				if (git != null) {

    git.close();}
			}
			catch (Exception e) {


				this.logger.warn("Could not close git repository", e);
			}
		}
	}