ASP.NET Core 是一个跨平台,开源的,轻量级,高性能 并且高度模块化的web框架,同时扩展性也是非常强,你可以在 request -> response 请求管道中安插各种中间件来根据自己的场景定制化,比如说:监视,路由,修改 request 或 response 消息体,这篇文章我们就来讨论 ASP.NET Core 中间件以及如何使用。
ASP.NET Core 中存在一条 中间件 链条,这条链是由一组 委托方法 组成,这些委托方法会一个接一个的被执行,request 请求会从这些中间件链条中流转,被流转到的组件,要么处理这个请求,要么将请求传给下一个中间件。
配置 中间件管道
中间件的管道配置是在 Startup.Configure 方法中 ,准确的说这里就是组装你的 ASP.Net Core 请求管道,ASP.Net运行时会自动调用这个 Configure 方法,代码如下:
    public void Configure(IApplicationBuilder app, IHostingEnvironment env, ILoggerFactory loggerFactory, IdentityDbContext dbContext)
    {
        app.UseDeveloperExceptionPage();
        app.UseStaticFiles();
        app.UseMvcWithDefaultRoute();
    }
上面的代码展示了如何将 mvc 添加到 ASP.Net Core 的 请求处理管道 中,接下来准备实现自定义中间件。
创建自定义中间件
可以利用 IApplicationBuilder 接口的扩展方法来构建你的中间件,为了代码可维护性,建议将自定义的中间件逻辑单独放在一个类中,或者一个单独的项目中,这样你在更新这些代码的时候不需要更新业务逻辑层的代码。
有多种方法可以构建自定义中间件,我准备来演示那最简单的一种,首先创建一个名为 MyCustomMiddleware 的cs类,骨架代码大概是这样:
    public class MyCustomMiddleware
    {
        //This is our custom middleware
    }
接下来在类的构造函数中新增一个 RequestDelegate 参数,这个 RequestDelegate 委托的签名是接收 HttpContext 参数 并返回 Task,下面是修改后的 MyCustomMiddleware。
    public class MyCustomMiddleware
    {
        private readonly RequestDelegate _next;
        public MyCustomMiddleware(RequestDelegate next)
        {
            _next = next;
        }
    }
执行 自定义中间件
现在需要给 MyCustomMiddleware 提供一个可执行的方法,供 处理流 执行到这个类时执行此方法,就是下面的 Invoke ,有些朋友可能要问了,为啥一定是 Invoke 方法,可以是其他的吗? 不可以的,这是 ASP.Net Core 中间件中约定的方法名, Invoke 方法中你可以实现监视或者修改 Request 或 Resposne。
    public class MyCustomMiddleware
    {
        private readonly RequestDelegate _next;
        public MyCustomMiddleware(RequestDelegate next)
        {
            _next = next;
        }
        public async Task Invoke(HttpContext httpContext)
        {
            if (!httpContext.Request.Headers.Keys.Contains("Authentication-Key"))
            {
                httpContext.Response.StatusCode = 400;
                await httpContext.Response.WriteAsync("Authentication key is missing...");
                return;
            }
            else
            {
                //Write code here to validate the authentication key.
            }
            await _next.Invoke(httpContext);
        }
    }
参考上面的代码,中间件的作用就是判断 request header 中有没有有效的 authentication key,如果没有就会返回具体的错误信息给客户端。
创建扩展方法
接下来为刚才创建的 自定义中间件 创建一个扩展方法,这么做的目的就是可以方便将 中间件 注入到 pipeline 中,官方的推荐做法就是在 IApplicationBuilder 接口上进行扩展,下面的代码展示了如何去实现。
    public static class MyCustomMiddlewareExtensions
    {
        public static IApplicationBuilder UseMyCustomMiddleware(this IApplicationBuilder builder)
        {
            return builder.UseMiddleware<MyCustomMiddleware>();
        }
    }
最后要做的就是在 Configure 方法下进行配置,在 app 参数下使用 UseMyCustomMiddleware() 即可,如下代码所示:
        public void Configure(IApplicationBuilder app, IHostingEnvironment env)
        {
            app.UseMyCustomMiddleware();
        }
最后将程序跑起来,如下图:
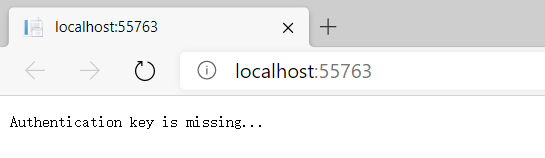
从上面输出中可以看到,我的自定义中间件起作用了,可以看出中间件的做法让 web程序 扩展性大大提高,如果你想了解更多中间件的知识,可参考: https://docs.microsoft.com/en-us/aspnet/core/fundamentals/middleware/?tabs=aspnetcore2x&view=aspnetcore-5.0
译文链接:https://www.infoworld.com/article/3247624/how-to-build-custom-middleware-in-aspnet-core.html