一.配置
1.1.app
1…wxss
page,view,image,swiper,swiper-item,navigator,video{


  box-sizing: border-box;
}
2.js
App({


  /**
   * 当小程序初始化完成时,会触发 onLaunch(全局只触发一次)
   */
  onLaunch: function () {


  },

  /**
   * 当小程序启动,或从后台进入前台显示,会触发 onShow
   */
  onShow: function (options) {


  },

  /**
   * 当小程序从前台进入后台,会触发 onHide
   */
  onHide: function () {


  },

  /**
   * 当小程序发生脚本错误,或者 api 调用失败时,会触发 onError 并带上错误信息
   */
  onError: function (msg) {


  }
})
1.2.全部清空index
1.js
敲入Page会自动生成的
Page({


  /**
   * 页面的初始数据
   */
  data: {


  },

  /**
   * 生命周期函数--监听页面加载
   */
  onLoad: function (options) {


  },

  /**
   * 生命周期函数--监听页面初次渲染完成
   */
  onReady: function () {


  },

  /**
   * 生命周期函数--监听页面显示
   */
  onShow: function () {


  },

  /**
   * 生命周期函数--监听页面隐藏
   */
  onHide: function () {


  },

  /**
   * 生命周期函数--监听页面卸载
   */
  onUnload: function () {


  },

  /**
   * 页面相关事件处理函数--监听用户下拉动作
   */
  onPullDownRefresh: function () {


  },

  /**
   * 页面上拉触底事件的处理函数
   */
  onReachBottom: function () {


  },

  /**
   * 用户点击右上角分享
   */
  onShareAppMessage: function () {


  }
})
二.公共头部组件
2.1.创建组件
1.创建我的标题
2.index.json
{


  "navigationBarTitleText": "bilibili",
  "usingComponents":{


    "MyTitle":"../../components/MyTitle/MyTitle"
  }
}
3.index.wxml使用组件
<view class="main">
<!-- 公共头部 -->
<MyTitle></MyTitle>
</view>
4.MyTitle.wxml
<view class="my_title">

  <!--logo-->
  <navigator class="logo">
    <image class="logo_image"
    style="width:120rpx;height:60rpx"
    src="../../icons/logo.jpg"></image>
  </navigator>

  <!--搜索-->
  <view class="search_icon">
    <image class="search_icon_image"
     style="width:60rpx;height:60rpx" src="../../icons/search_icon.jpg"></image>
  </view>

  <!--用户-->
  <view class="user_icon">
    <image class="user_icon_image"
     style="width:60rpx;height:60rpx" src="../../icons/user_icon.jpg"></image>
  </view>

  <!--下载按钮-->
  <view class="down_app">
    APP下载
  </view>

</view>
5.MyTitle.wxss
.my_title{


    /* 伸缩紧贴的 */
 display: flex;
 /* 垂直居中 */
 align-items: center;
 padding:10rpx;
 background-color: white;
}

.logo{


    /* 比例是7份 */
    flex: 7;
}

.search_icon{


    flex: 1;
    display: flex;
    /* 内容水平居中 */
    justify-content: center;
    align-items: center;
}

.user_icon{


    flex: 2;
    display: flex;
    justify-content: center;
    align-items: center;
}

.down_app{


    flex: 3;
    font-size: 30rpx;
    display: flex;
    justify-content: center;
    align-items: center;
    background-color: pink;
    color: #fff;
    /* 边框 */
    border-radius: 10rpx;
    padding: 10rpx;
}
2.2.效果
三.头部导航栏
3.1.接口
https://mockapi.eolinker.com/7b7NMB9c75d613bc39c8f16e4e03a3d4a8f951750079dc5/navList
3.2.设置request域名
1.官网设置
1’进入官方设置
2’配置
2.临时设置
3.3.设置首页
1.index.js
  data: {


    //首页导航数据
    navList:[],
    //设置选中某个标签item时候,下面是粉色的下边框
    //点击首页的导航菜单索引
    currentIndexNav:0
  },

 //点击首页导航的按钮
// 参数为e
// 转为不同按钮
activeNav(e){


  // console.log(123);
  this.setData({


    // 参数
    currentIndexNav:e.target.dataset.index
  })
},
// 下面是函数
getNavList(){


  //利用发送请求方法
  //声明this
  let that = this;
  wx.request({


    url: 'https://mockapi.eolinker.com/7b7NMB9c75d613bc39c8f16e4e03a3d4a8f951750079dc5/navList',
    //回调函数
    success(res) {


      console.log(res);
      //如果请求成功
      if(res.data.code == 0){


        that.setData({


          //根据返回的dom树标签获取的
          navList: res.data.data.navList
        })
      }
    }
  })
},


  /**
   * 生命周期函数--监听页面加载
   */
  onLoad: function (options) {


    // 1.获取首页导航数据
    this.getNavList();
  },
2.index.wxml
<view class="main">
<!-- 公共头部 -->
<MyTitle></MyTitle>

<!--首页导航 -->
<view class="nav_wrap">
<!-- 自己滚动 -->
<!-- 设置滚动 ,沿着x轴滚动-->
<scroll-view class="nav" scroll-x>
<!-- 这里要设置好nav_item_active -->
<!-- active开启 -->
<!-- 注意要用三元表达式 -->

<view
bindtap="activeNav"
data-index="{

     {index}}"
class="nav_item {

     {index === currentIndexNav? 'active':''}}"
wx:for="{

     {navList}}"
wx:key="index">
<!-- 显示navList的标题 -->
{

   {item.text}}
</view>

</scroll-view>

</view>
</view>
3.index.wxss
/* 整个页面的字体 */
page{


    color: #666;
}

/* 首页导航 */

.nav_wrap{


}

.nav{


    /* 不换行 */
    white-space: nowrap;
    padding: 5rpx 0;

}
/* 每一个显示的,要设置好 */
.nav_item{


    /* 在一行显示 */
    display: inline-block;
    font-size: 35rpx;
    /* padding 的参数没有空格 */
    padding: 20rpx 30rpx;
}


/* 选中时候有下边框颜色 */
/* 注意后面是 . */

.nav_item.active{


    border-bottom: 5rpx solid #de688b;
}
3.4.效果
四.轮播图
4.0.接口
https://mockapi.eolinker.com/7b7NMB9c75d613bc39c8f16e4e03a3d4a8f951750079dc5/swiper
4.1.index.js
  data: {


    // 轮播图数据
    swiperList:[]
  },

  // 获取轮播图数据
getSwiperList(){


  let that = this;
  wx.request({


    url: 'https://mockapi.eolinker.com/7b7NMB9c75d613bc39c8f16e4e03a3d4a8f951750079dc5/swiper',
    success(res){


      // console.log(res);
      if(res.data.code == 0){


        that.setData({


          // 根据dom结构
          swiperList:res.data.data.swiperList
        })
      }
    }
  })
},

/**
   * 生命周期函数--监听页面加载
   */
  onLoad: function (options) {


    // 2.获取轮播图数据
    this.getSwiperList();
  },
4.2.index.wxml
<!-- 轮播图 -->
<view class="slider">
	<!-- 自动播放 autoplay -->
	<!-- 有点点  indicator-dots -->
	<!-- 图片轮播有连接  circular-->
	<swiper autoplay indicator-dots circular>
		<swiper-item wx:for="{

     {swiperList}}" wx:key="index">
			<!-- 高是自适应 -->
			<image src="{

     {item.imgSrc}}" mode="widthFit">

			</image>
		</swiper-item>

	</swiper>


</view>
4.3.index.wxss
/* 轮播图 */
.slides{


}
/* 滑动的 */
/* 滑动下面的swiper */
.slides swiper{


    height: 220rpx;
}

.slides navigator{


    width: 100%;
    height: 100%;
}

.slides image{


    width: 100%;
    height: 100%;
}
4.4.效果
五.视频列表
5.1.接口
5.2.数据提取
1.数据dom
2.视频列表界面
5.3.导入app.wxss
@import "styles/font-awesome.wxss"
5.4.index.wxss
/* 视频列表 */
.video_wrap{


    /* 可以伸缩*/
    display: flex;
    /* 换行 */
    flex-wrap: wrap;
    padding: 5rpx;
    /* 对齐 */
    justify-content: space-between;
}

/* 每个视频 */
.video_item{


    width: 48%;
    margin-bottom: 20rpx;
}


.video_img{


}

.video_img image{


    width: 100%;
}

 .video_img .video_info{


    font-size: 30rpx;
    bottom: 25rpx;
    left: 0;
    width:100%;
    display: flex;
    justify-content: space-around;/*元素中的各项周围留有空白*/
  }

/* 只显示两行 */
.video_title{


    font-size: 24rpx;
    display: -webkit-box;
    overflow: hidden;
    white-space: normal;
    text-overflow: ellipsis;
    word-wrap: break-word;
    -webkit-line-clamp: 2;
    -webkit-box-orient: vertical;
}
5.5.index.wxml
	<!-- 视频列表 -->
	<view class="video_wrap">
		<!-- 这里要遍历链接 -->
		<navigator class="video_item" wx:for="{

     {videosList}}" wx:key="index">
			<!-- 图片容器 -->
			<!-- 首先是图片 -->
			<view class="video_img">
				<image mode="widthFix" src="{

     {item.imgSrc}}"></image>
				<!-- 播放量 -->
				<view class="video_info">
					<!-- 左侧是播放量 -->
					<view class="play_count">
						<!-- 图标 -->
						<text class="fa fa-play-circle-o"></text>
						<!-- 数值 -->
						<text class="play_count">{

   {item.playCount}}</text>
					</view>

					<!-- 右侧是评论数量 -->
					<view class="comment_count">

						<view class="play_count_row">
							<!-- 图标 -->
							<text class="fa fa-commenting-o"></text>
							<!-- 数值 -->
							<text class="comment_count">{

   {item.commentCount}}</text>
						</view>


					</view>
				</view>
			</view>
			<!-- 标题 -->
			<!-- 根据dom的 -->
			<view class="video_title">{

   {item.desc}}</view>
		</navigator>

	</view>
5.6.index.js
  data: {


    // 视频列表
    videosList:[],
  },


// 获取视频列表
getVideosList(){


  let that = this;
  wx.request({


    url:    'http://mock-api.com/mnEe4VnJ.mock/videoList',
    // url: 'https://mockapi.eolinker.com/7b7NMB9c75d613bc39c8f16e4e03a3d4a8f951750079dc5/videoList',
    success(res){


      console.log(res);
      if(res.data.code == 0){


        that.setData({


          // 注意细节不是videosList
          videosList:res.data.data.videoList
        })
      }
    }
  })
},

  /**
   * 生命周期函数--监听页面加载
   */
  onLoad: function (options) {


    // 3.获取视频列表的函数
    this.getVideosList();
  },
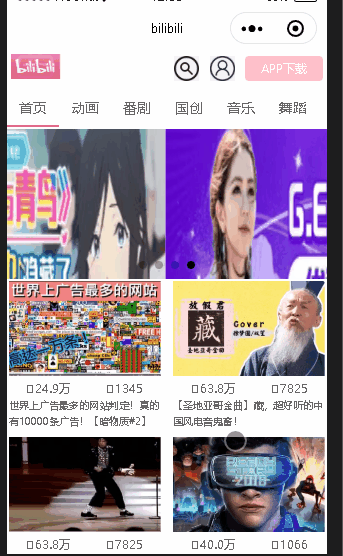
5.7.效果
六.视频详情
6.1.新建写入json
6.2.detail.js
  data: {


    // 视频详情
    videoInfo:null,
  },

  // 获取视频的详情
getCurrentVideo(vidoeId){


  let that = this ;
  wx.request({


    url: 'http://mock-api.com/mnEe4VnJ.mock/videoDetail?id='+vidoeId,
    success(res) {


      // console.log(res);
      if(res.data.code == 0){


        that.setData({


          videoInfo:res.data.data.videoInfo
        })
      }
    }
  })
},

  /**
   * 生命周期函数--监听页面加载
   */
  onLoad: function (options) {


      let vidoeId = options.id;
      this.getCurrentVideo(vidoeId);
  },
6.3.detail.wxml
<view class="main">
	<!-- 公共的头部 -->
	<MyTitle>
	</MyTitle>

	<!-- 视屏详情 -->
	<view class="video_info">
		<!-- 视频标签 -->
		<!-- 根据request后的解析 -->
		<video src="http://wxsnsdy.tc.qq.com/105/20210/snsdyvideodownload?filekey=30280201010421301f0201690402534804102ca905ce620b1241b726bc41dcff44e00204012882540400&bizid=1023&hy=SH&fileparam=302c020101042530230204136ffd93020457e3c4ff02024ef202031e8d7f02030f42400204045a320a0201000400" controls></video>
		<view class="video_title">{

   {videoInfo.videoTitle}}</view>
		<!-- 视频作者 -->
		<view class="video_detail">
			<!-- 作者 -->
			<text class="author">
			{

   {videoInfo.author}}
			</text>
			<!-- 播放量 -->
			<text class="play_count">{

   {videoInfo.playCount}}</text>

			<!-- 评论量 -->
			<text class="comment_count">{

   {videoInfo.commentCount}}</text>

			<!-- 时间 -->
			<text class="date">{

   {videoInfo.date}}</text>


		</view>
	</view>


</view>
6.4.detail.wxss
/* pages/detail/detail.wxss */
.main{


    padding: 10rpx;
    color: #666;
}
/* 视频详情 */
.video_info{


    margin-top: 10rpx;
}

.video_info video{


    width: 100%;
}

.video_title {


    display: flex;
    justify-content: space-between;
    font-size: 35rpx;
}

.video_detail {


    margin-top: 5rpx;
    font-size: 28rpx;
}

.video_detail .author{


    color: #666;
}
6.5.效果
七.推荐视频
7.1.接口
http://mock-api.com/mnEe4VnJ.mock/otherList?id=
7.2.detail.js
Page({


  /**
   * 页面的初始数据
   */
  data: {


    //推荐视频
    otherList:[],
  },


  // 获取其他视频
getOthersList(videoId){


  let that = this;
  wx.request({


    url: 'http://mock-api.com/mnEe4VnJ.mock/otherList?id='+videoId,
    success(res){


      console.log(res);
      if(res.data.code == 0){


        that.setData({


          otherList:res.data.data.otherList
        })
      }
    }
  })
},

  /**
   * 生命周期函数--监听页面加载
   */
  onLoad: function (options) {


      this.getOthersList(videoId);
  },
7.3.detail.wxml
<!-- 推荐视频 -->
	<view class="other_list">
		<!-- 这里是遍历wx:for得列表otherList -->
		<navigator wx:for="{

     {otherList}}" wx:key="index" class="item_other">
			<!-- 图片容器 -->
			<view class="other_img_wrap">
				<image src="{

     {item.imgSrc}}" mode="widthFix">
				</image>
				<!-- 视屏详情 -->
				<view class="other_info">
					<!-- 标题 -->
					<view class="other_title">
						{

   {item.title}}
					</view>
					<!-- 详情 -->
					<view class="other_detail">
						<!-- 播放量 -->
						<text class="play_count">
						{

   {item.playMsg}}万次观看
						</text>

						<!-- 评论 -->
						<text class="comment_count">
						{

   {item.commentCount}}次评论
						</text>
					</view>
				</view>

			</view>
		</navigator>
	</view>
7.4.detail.wxss
/* 推荐视频 */
/* .other_list{

}
.item_other{
  display: flex;
  justify-content: space-between;
}
.other_img_wrap{
  width: 40%;
  display: flex;
  justify-content: center;
  align-items: center;
  padding: 10rpx 0;
}
.other_img_wrap image{
  width: 100%;
  border-radius: 8rpx;
}
.other_info{
  padding: 10rpx 0;
  width: 60%;
  font-size: 30rpx;
  margin-left: 15rpt;
  display: flex;
  flex-direction: column;
  justify-content: space-around;
}
.other_title{
  color: palevioletred;
  font-size: 32rpx;
} */
7.5.效果
八.评论模块
8.1.接口
http://mock-api.com/mnEe4VnJ.mock/commentList
8.2.detail.js
  data: {


    //评论数据
    commentData:null,
  },

  //获取评论模块
  getCommentList(videoId){


    let that = this;
    wx.request({


      url: 'http://mock-api.com/mnEe4VnJ.mock/commentList?id='+videoId,
      success(res){


        console.log(res);
        if(res.data.code == 0){


          that.setData({


            commentData:res.data.data.commentData
          })
        }
      }
    })
  },

    /**
   * 生命周期函数--监听页面加载
   */
  onLoad: function (options) {


      let videoId = options.id;
      this.getCommentList(videoId);
  },
8.3.detail.wxml
<!-- 评论模块 -->
	<view class="comment_wrap">
		<!-- 标题 -->
		<view class="comment_title">
			<!-- 首先是评论数量 -->
			评论数量:{

   {commentData.commentTotalCount}}
		</view>
		<!-- 评论详情 -->
		<view class="comment_list" wx:for="{

     {commentData.commentList}}" wx:key="index">
		<!-- 左边是头像 -->
		<view class="comment_user">
			<image  src="{

     {item.userIconSrc}}" mode="widthFit"></image>
		</view>
		<!-- 右边是内容 -->
		<view class="comment_info">

			<view class="comment_detail">
	<!-- 作者 -->
	<view class="author">用户名:{

   {item.username}}</view>

			<!-- 时间 -->
			<view class="date">发表时间:{

   {item.commentDate}}</view>
			</view>
			<!-- 内容 -->
			<text class="comment_content">详情:{

   {item.commentInfo}}</text>
		</view>
		</view>
	</view>
8.4.detail.wxss
/* 评论列表 */
.comment_title{


    padding: 15rpx 0;
  }
  .comment_list{


    font-size: 30rpx;
    display: flex;
    align-items: center;
    flex-wrap: wrap;/* 换行显示 */
    border-bottom: 0.5px solid rgb(201, 196, 196);
    margin: 15rpx 0;
  }
  .comment_user{


     flex: 4;
     padding-right: 20rpx;
  }
  .comment_user image{


      /* display: flex;
      width: 5rpx;
      height: 5rpx; */
    /* width:40%; */
    /* border-radius: 50%; */
  }
  .comment_info{


    flex: 10;
  }
  /** 平分 伸缩盒子 */
  .comment_detail{


    display: flex;
    justify-content: space-between;
  }
  .username{


    color: #000;
    padding-bottom: 10rpx;
  }