绪论
vsftp被公认目前最好的ftp之一,所以,搭建它还是很有意义的,有了它,我们可以让虚拟机与主机更加方便的通信。root用户,在默认的情况下,是不允许做为ftp用户登录的,但是我们可以通过一些配置,来解禁。下面正是这些操作的详细讲解,适当的时候并贴上相应的脚本。
1.安装vsftp
用yum命令查找到了我们想要的vsftpd,开始安装。
[root@localhost ftp]# yum search vsftpd
Loaded plugins: fastestmirror
Loading mirror speeds from cached hostfile
 * base: mirrors.163.com
 * extras: mirrors.163.com
 * updates: mirrors.163.com
============================= N/S matched: vsftpd ==============================
vsftpd-sysvinit.x86_64 : SysV initscript for vsftpd daemon
vsftpd.x86_64 : Very Secure Ftp Daemon
安装:yuminstall -y vsftpd
2.防火墙设置
如果防火墙把ftp的端口给拦截了,我们是无法访问到ftp服务的。我们可以选择把ftp的端口给关闭,但是个人不推荐。防火墙还是开着吧,虽然麻烦了一点。我比较喜欢用到哪个端口用开启哪个端口。
当然如果不想麻烦,也提供CentOS7中关闭防火墙的方法:
#关闭防火墙(重启后不生效)
systemctl stop firewalld.service

#禁用防火墙(永久关闭)
systemctl disable firewalld.service
如果不关闭防火墙的话,我们可以把ftp服务添加了防火墙外:
#开放ftp服务添加到防火墙外
firewall-cmd --permanent --add-service=ftp

#使其生效
firewall-cmd --reload

#重启防火墙
systemctl restart firewalld.service
3.设置SELinux
为什么要设置SELinux?
SELinux(Security-Enhanced Linux)是美国国家安全局(NSA)对于强制访问控制的实现,是 Linux历史上最杰出的新安全子系统。NSA是在Linux社区的帮助下开发了一种访问控制体系,在这种访问控制体系的限制下,进程只能访问那些在他的任务中所需要文件。
SELinux旨在提高Linux系统的安全性,提供强健的安全保证,可防御未知攻击。
大部分情况下,我们访问ftp的时候会被SELinux拦截,当然如果你没也设置SELiunx也能正常访问,此步可以跳过。
大家通常的作法是关闭SELiunx,这样做会引起其它安全问题,嫌麻烦的可以直接关闭:
vi /etc/selinux/config

#SELINUX=enforcing #注释掉

#SELINUXTYPE=targeted #注释掉

SELINUX=disabled #增加

:wq! #保存退出

setenforce 0 #让SELinux进入Permissive模式(宽容模式)
SELiunx一共有三种模式:
- enforcing(强制模式 ):开始限制domain/type
- permissive(宽容模式) :仅会有警告信息
- disabled(关闭):关闭SELinux
设置SELiunx:
[root@localhost ~]# /usr/sbin/sestatus -v     #查看SELinux状态
SELinux status:                 enabled    #启用
SELinuxfs mount:                /sys/fs/selinux
SELinux root directory:         /etc/selinux
Loaded policy name:             targeted
Current mode:                   enforcing
setenforce 0 #暂时让SELinux进入Permissive模式这个时候我们尝试访问一下ftp目录,发现能够正常访问。我们查看一下权限:
[root@localhost ~]# getsebool -a | grep ftp
ftpd_anon_write --> off
ftpd_connect_all_unreserved --> off
ftpd_connect_db --> off
ftpd_full_access --> off
ftpd_use_cifs --> off
ftpd_use_fusefs --> off
ftpd_use_nfs --> off
ftpd_use_passive_mode --> off
httpd_can_connect_ftp --> off
httpd_enable_ftp_server --> off
tftp_anon_write --> off
tftp_home_dir --> off
ftp_home_dir和allow_ftpd_full_access必须为on 才能使vsftpd 具有访问ftp根目录,以及文件传输等权限。
setsebool -P tftp_home_dir 1
setsebool -P allow_ftpd_full_access 1
让我们再回到强制模式:
setenforce 1 #进入Enforcing模式如果还是不行的话,可能是我们的目录没有权限:
chmod -R 777 /usr/yong.cao/ftp #ftp的访问路径4.配置vsftpd
用vim /etc/vsftpd/vsftpd.conf打开后修改或者新增:
anonymous_enable=NO    #不允许匿名访问

write_enable=YES    #写权限

local_root=/usr/yong.cao/ftp   #这里是我自定义的ftp目录

chroot_local_user=YES    #这个是限制ftp用户只能在自己目录,如果ftp可以跳到其它任意目录是比较危险的,建议限制

allow_writeable_chroot=YES   #2.3.5之后,如果用户被限定在了其主目录下,则该用户的主目录不能再具有写权限了,需新增此配置
5.激活root用户
处于安全考虑,root用户是不能作为ftp的登录账户的,如果在没有限制访问目录的情况下,root用户可以在ftp里访问任一文件,所以默认是不能登录ftp的。当然,你也可以为新建一些用户,专门作为ftp用户,个人习惯,用虚拟机的时候我一般直接用root用户登录ftp。
我们需要注释或者删除/etc/vsftpd/ftpusers和/etc/vsftpd/user_list中的root:
vi /etc/vsftpd/ftpusers
# Users that are not allowed to login via ftp
#root
bin
daemon
adm
lp
sync
shutdown
halt
mail
news
uucp
operator
games
nobody
--------------------------------------------------------------------
vi /etc/vsftpd/user_list
# vsftpd userlist
# If userlist_deny=NO, only allow users in this file
# If userlist_deny=YES (default), never allow users in this file, and
# do not even prompt for a password.
# Note that the default vsftpd pam config also checks /etc/vsftpd/ftpusers
# for users that are denied.
#root
bin
daemon
adm
lp
sync
shutdown
halt
mail
news
uucp
operator
games
nobody
6.重启服务
CentOS7中是用这个命令:
systemctl restart vsftpd.service如果是其它系统:
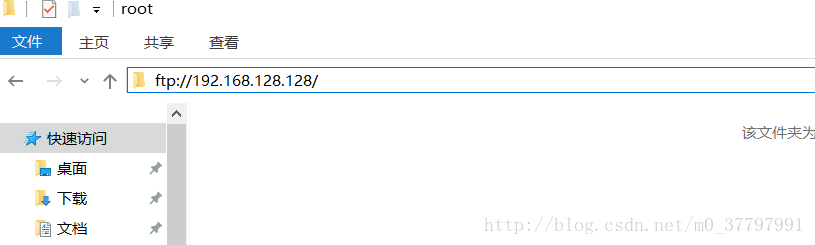
service restart vsftpd在windows上登录: