一、SpringBoot 中Controller的使用
1.1、返回视图
1.1.1 controller代码
import org.springframework.stereotype.Controller;
import org.springframework.web.bind.annotation.RequestMapping;

@Controller
@RequestMapping("test")
public class TestController1 {


    @RequestMapping("test01")
    public String test01(Model model){


        model.addAttribute("msg","Hello World!!!");
        return "index";
    }
}
注意:
-
spring boot 默认支持的是thymeleaf模板引擎,所以我们需要在pom.xml文件中引入以下依赖
  <dependency>
  	<groupId>org.springframework.boot</groupId>
  	<artifactId>spring-boot-starter-thymeleaf</artifactId>
  </dependency>
1.1.2 创建 index.html
我们首先要知道这几个文件目录的作用:
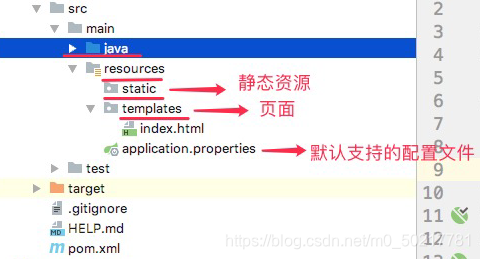
在resources 文件根目录下的 templates 目录中创建index.html页面
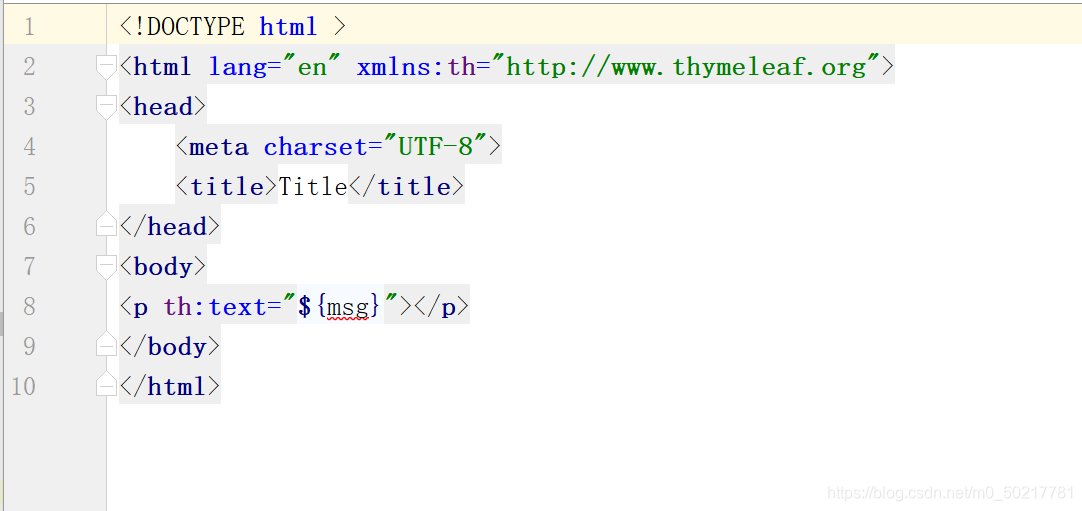
<!DOCTYPE html >
<html lang="en" xmlns:th="http://www.thymeleaf.org">
<head>
    <meta charset="UTF-8">
    <title>Title</title>
</head>
<body>
<p th:text="${msg}"></p>
</body>
</html>
注意:
-
在html页面中不能使用el表达式了,所以在获取model中的对象的时候使用
th:属性="${msg}"
1.1.3 浏览器打开网页
启动 BootStartApplication,在浏览器中输入
http://localhost:8080/test/test01
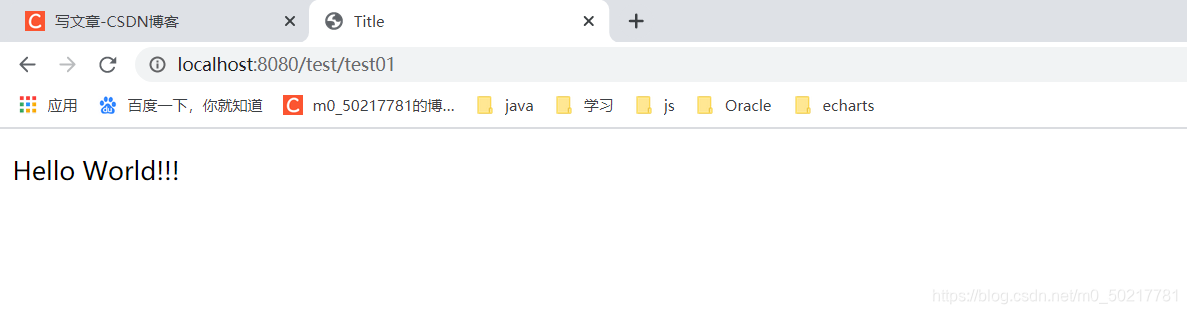
可以看到页面输出了 Hello World!!!
1.2、返回json数据
1.2.1 controller代码
import org.springframework.stereotype.Controller;
import org.springframework.web.bind.annotation.RequestMapping;
import org.springframework.web.bind.annotation.ResponseBody;

@Controller//可以更改为@RestController,此处更改后下面的ResponseBody就不用写了
@RequestMapping("test")
public class TestController1 {


    @ResponseBody//让返回值类型变为json格式
    @RequestMapping("test02")
    public String test02(){


        return "Hello SpringBoot!!!";
    }
}
1.2.2 浏览器打开网页
启动 BootStartApplication,在浏览器中输入
http://localhost:8080/test/test02
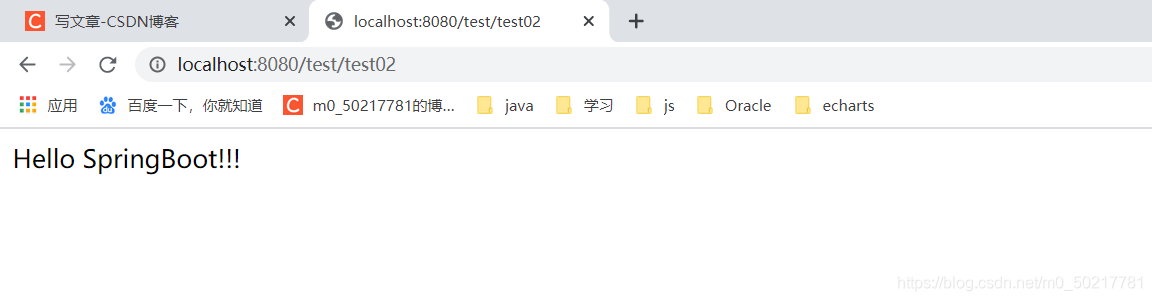
可以看到页面输出了 Hello SpringBoot!!!
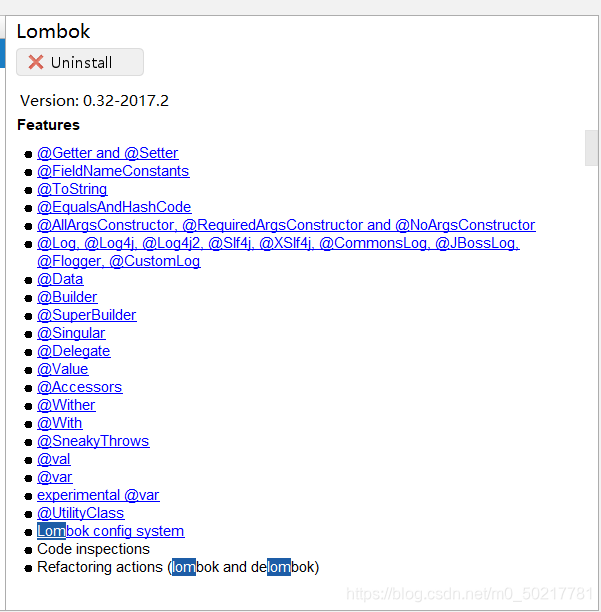
1.3、lombok插件使用(建议掌握)
好东西,学起来!!!!
1.3.1 安装插件:
参考
https://jingyan.baidu.com/article/0a52e3f4e53ca1bf63ed725c.html
1.3.2. 加入lombok依赖
在pom.xml文件中加入lombok依赖
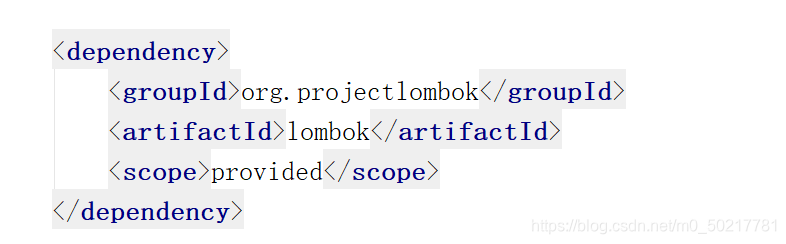
 <dependency>
   <groupId>org.projectlombok</groupId>
   <artifactId>lombok</artifactId>
   <version>1.18.16</version>
 </dependency>
1.3.3. 编写Controller
有的同学就会问了,我们要怎么返回一个实体类到页面上呢,来上代码
import lombok.AllArgsConstructor;
import lombok.Data;
import org.springframework.stereotype.Controller;
import org.springframework.web.bind.annotation.RequestMapping;
import org.springframework.web.bind.annotation.ResponseBody;

@Controller//可以更改为@RestController,此处更改后下面的ResponseBody就不用写了
@RequestMapping("test")
public class TestController1 {


    @Data
    @AllArgsConstructor
    class Person{


        private String name;
        private int age;
    }
    @RequestMapping("test03")
    @ResponseBody//让返回值类型变为json格式
    public Person test03(){


        return new Person("张三",18);
    }
}
这里我们使用了lombok的注解,可以通过加注解的方式让其自动生成get和set方法,还可以生成构造方法,是不是很方便,当然还有很多其他的API可以使用:
感兴趣的同学可以自己去尝试,这里就不做多的阐述了
1.3.4 浏览器打开网页
启动 BootStartApplication,在浏览器中输入
http://localhost:8080/test/test03

页面带着数据出来啦
二、SpringBoot 中Controller的使用
2.1 配置文件读取顺序
- 1)命令行
- 2)java:comp/env 里的 JNDI 属性
- 3)JVM 系统属性
- 4)操作系统环境变量
- 5)RandomValuePropertySource 属性类生成的 random.* 属性
- 6)应用以外的 application.properties(或 yml)文件
- 7)打包在应用内的 application.properties(或 yml)文件
- 8)在应用 @Configuration 配置类中,用 @PropertySource 注解声明的属性文件
- 9)SpringApplication.setDefaultProperties 声明的默认属性
2.1 application.propreties(yml)读取配置
2.1.1 官方的默认配置
https://docs.spring.io/spring-boot/docs/current/reference/html/common-application-properties.html
2.1.2 自定义配置
例如
student.name=zhangsan
student.age=15
student.sex=man
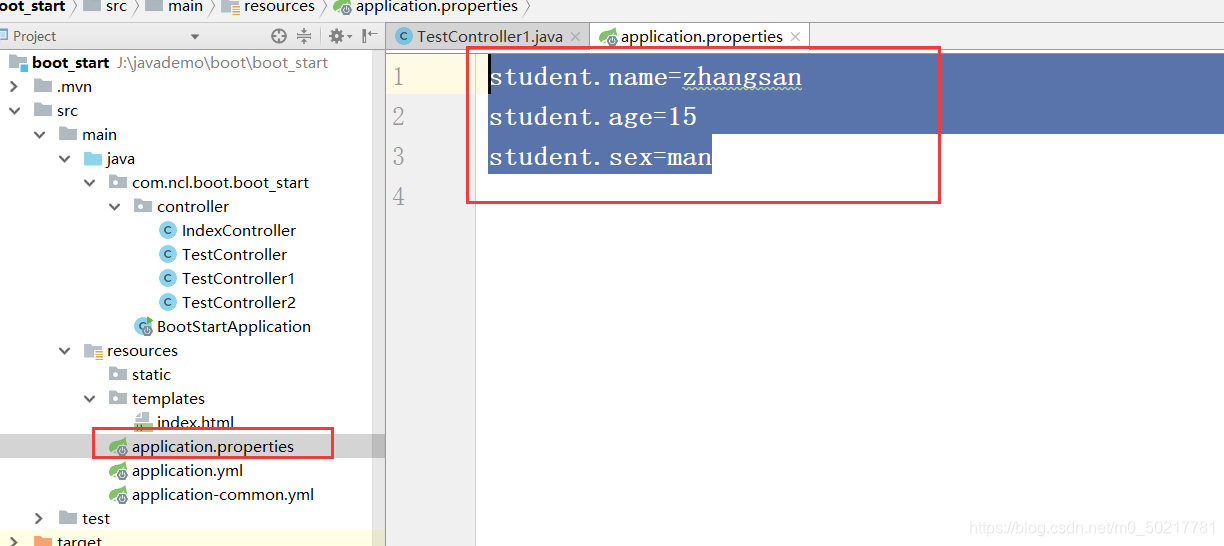
那么,要怎么使用文件里面的参数呢
来,上代码
import lombok.Data;
import org.springframework.boot.context.properties.ConfigurationProperties;
import org.springframework.stereotype.Controller;
import org.springframework.web.bind.annotation.RequestMapping;
import org.springframework.web.bind.annotation.ResponseBody;
@Controller
@RequestMapping("test")
@ConfigurationProperties(prefix = "student")
@Data
public class TestController1 {
private String name;
private int age;
private String sex;
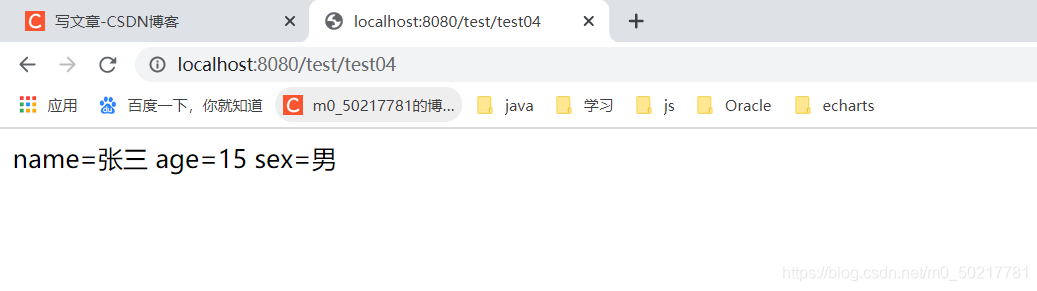
@RequestMapping("test04")
@ResponseBody//让返回值类型变为json格式
public String test04(){
return "name="+name+" age="+age+" sex="+sex;
}
}
除此之外,还需要在启动文件中加入配置文件扫描配置,不然启动无效
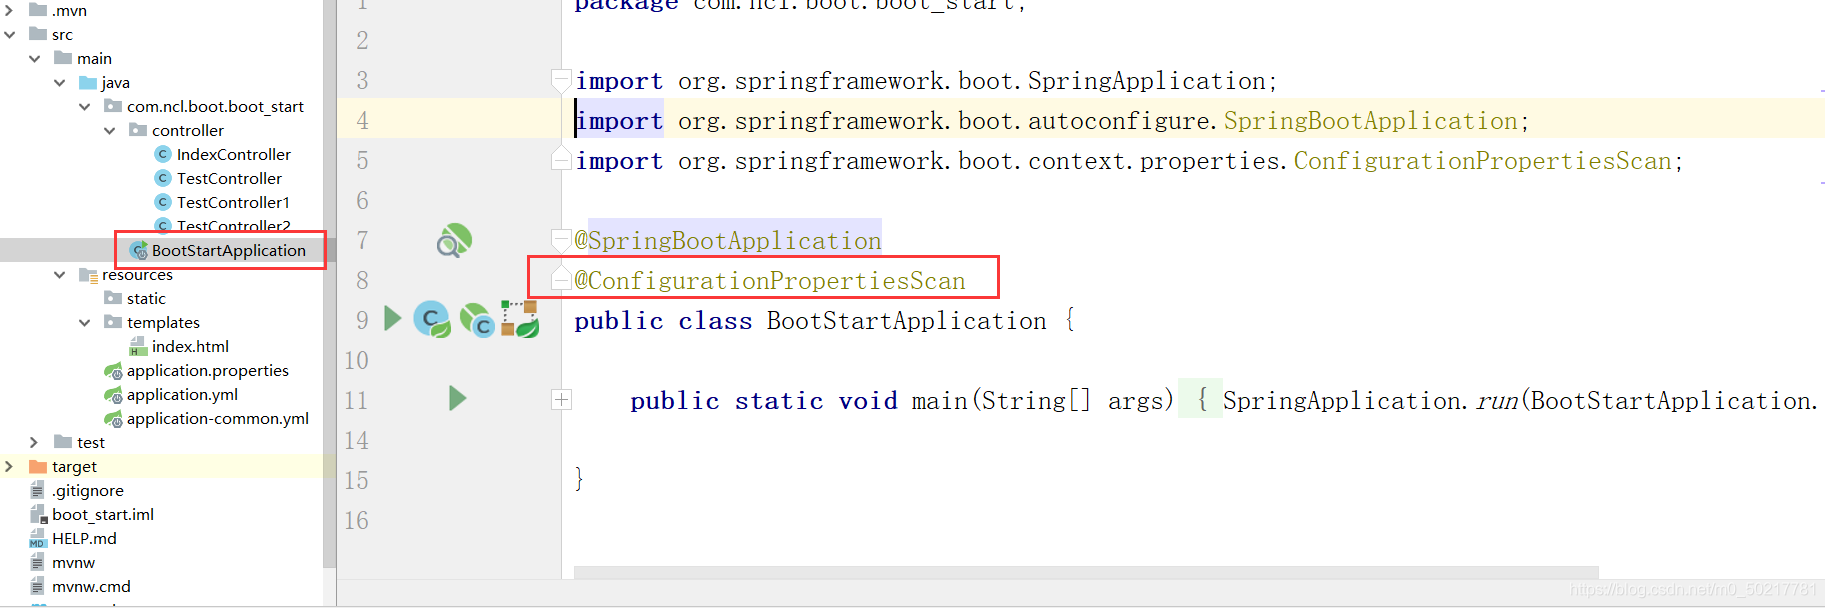
import org.springframework.boot.SpringApplication;
import org.springframework.boot.autoconfigure.SpringBootApplication;
import org.springframework.boot.context.properties.ConfigurationPropertiesScan;

@SpringBootApplication
@ConfigurationPropertiesScan
public class BootStartApplication {


	public static void main(String[] args) {


		SpringApplication.run(BootStartApplication.class, args);
	}
}
然后,我们就可以去浏览器查看啦
2.1.3 yml文件配置
在普通的application.properties 文件中输入中文,数据传输到界面,会出现乱码的情况,但是yml文件就不会产生这样的问题,yml文件的配置方式与properties文件的配置方式有些许的差别,但是使用起来是一样的
2.1.3.1 yml文件配置
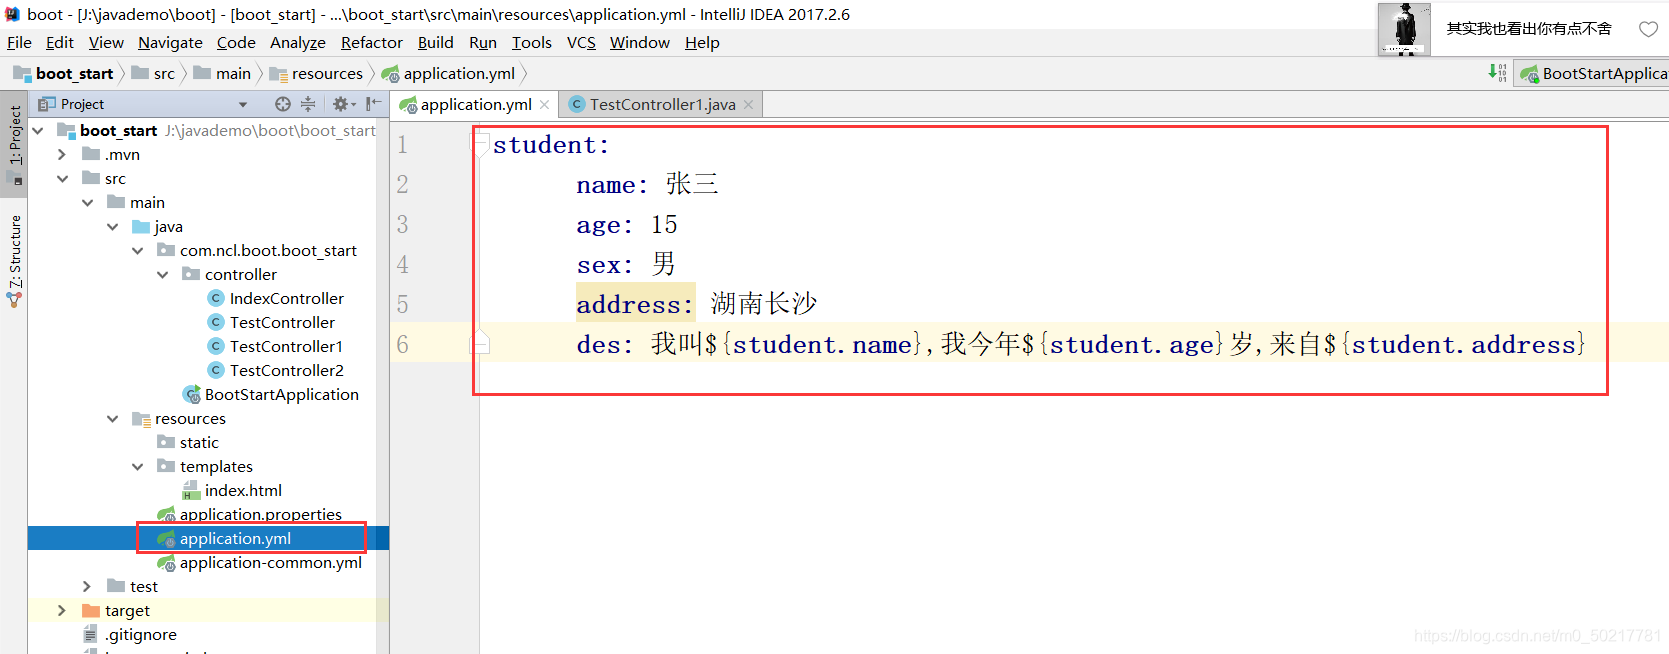
student:
name: 张三
age: 15
sex: 男
address: 湖南长沙
des: 我叫 s t u d e n t . n a m e , 我 今 年 {student.name},我今年 student.name,我今年{student.age}岁,来自${student.address}
java文件配置:
import org.springframework.beans.factory.annotation.Value;
import org.springframework.boot.context.properties.ConfigurationProperties;
import org.springframework.stereotype.Controller;
import org.springframework.web.bind.annotation.RequestMapping;
import org.springframework.web.bind.annotation.ResponseBody;

@Controller
@RequestMapping("test")
@ConfigurationProperties(prefix = "student")
public class TestController1 {


    @Value("${student.des}")
    private String des;

    @RequestMapping("test05")
    @ResponseBody//让返回值类型变为json格式
    public String test05(){


        return des;
    }
}
最后,打开浏览器,输入http://localhost:8080/test/test05
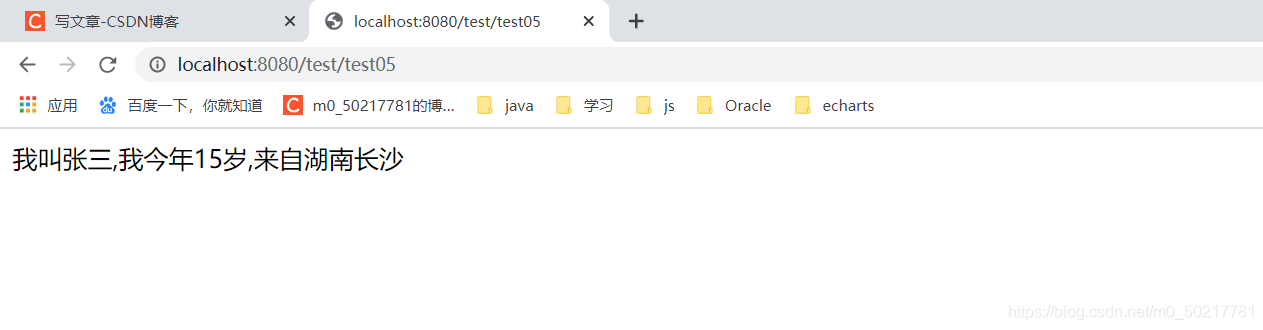
可以看到数据传过来了,而且中文格式的没有出现乱码
那么,又有同学问了,难道我所有的配置全要放在一个yml文件中吗,其实不是的,SpringBoot扫描的是 application.yml或者application.properties文件,但是我们可以自定义一些其他的文件,以application开头,-xxx.yml结尾,例如:
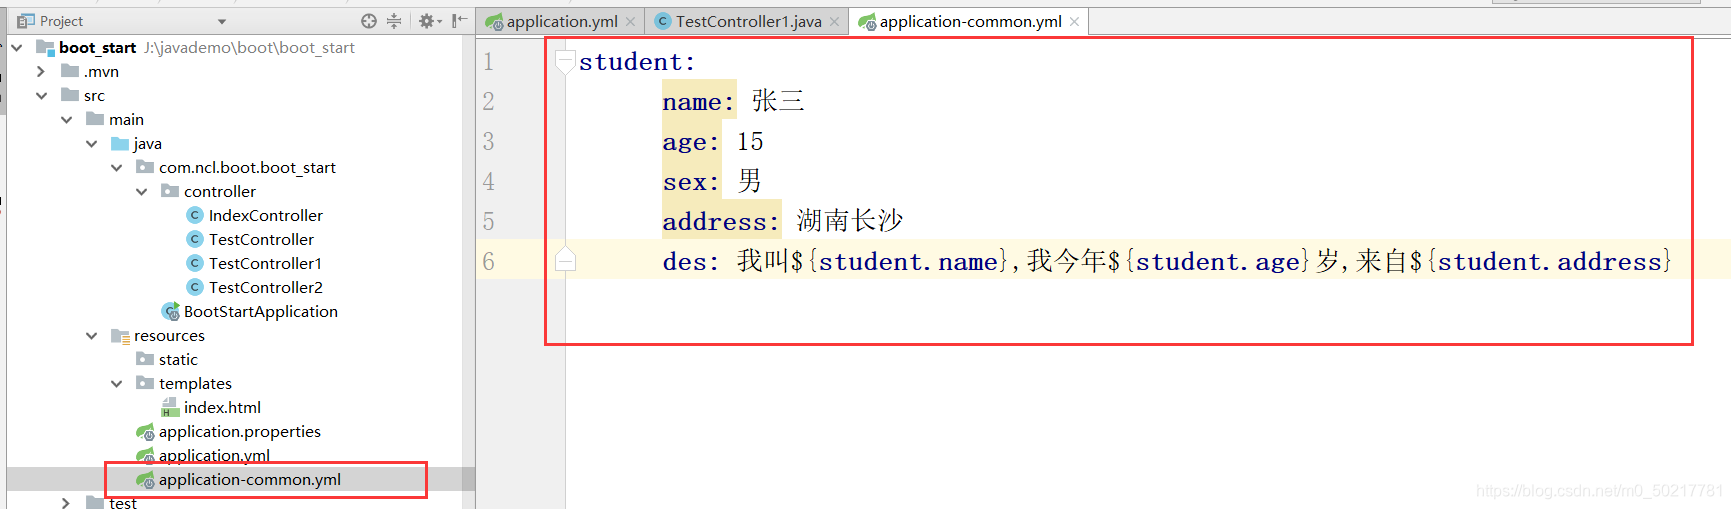
student:
name: 张三
age: 15
sex: 男
address: 湖南长沙
des: 我叫 s t u d e n t . n a m e , 我 今 年 {student.name},我今年 student.name,我今年{student.age}岁,来自${student.address}
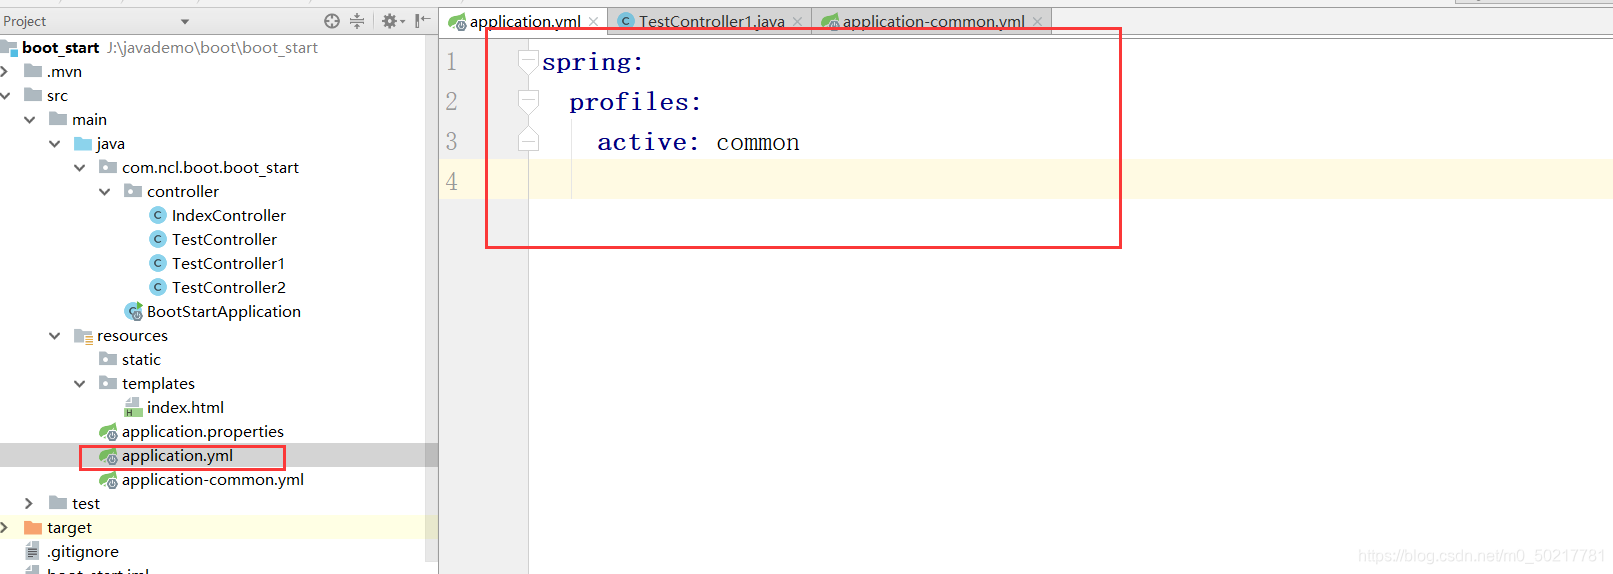
spring:
profiles:
active: common
java代码:
import org.springframework.beans.factory.annotation.Value;
import org.springframework.boot.context.properties.ConfigurationProperties;
import org.springframework.stereotype.Controller;
import org.springframework.web.bind.annotation.RequestMapping;
import org.springframework.web.bind.annotation.ResponseBody;

@Controller
@RequestMapping("test")
@ConfigurationProperties(prefix = "student")
public class TestController1 {


    @Value("${student.des}")
    private String des;

    @RequestMapping("test06")
    @ResponseBody//让返回值类型变为json格式
    public String test06(){


        return des;
    }
}
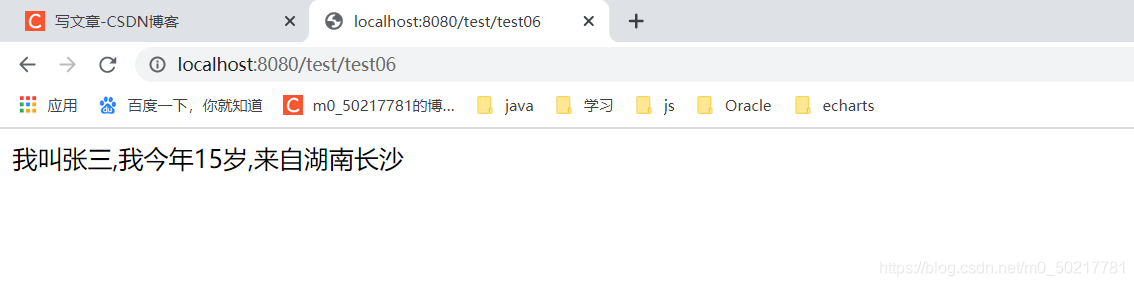
然后浏览器输入http://localhost:8080/test/test06
就可以看到结果啦
到此,SpringBoot 中Controller和配置文件的使用就算介绍完啦
感谢留言评论