水平有限,本文相当基础!!
自己从六月份断断续续的学习了一些android入门的知识。
至于为什么要学android,其实还是为了学习Java,对Java的不熟悉,使得学习了一些java知识之后不知道如何运用,所以选择了android来做一些可以看出效果的一些应用。
写这篇博客的目的,是为了对android知识的进行总结和巩固。一边写一边对原来代码进行优化。
之后会把重心继续放在java上。
这个app界面是本着模仿学校里一个常用软件来做的,因为能力不足,功能有很大不同。
这个app也是从我学android就开始做的,然后在一点点加新学的东西进去。所以有些地方不规范也是这个原因。可以看出很多新手菜鸟的影子。
粗略把结构分成了这样

首先自定义一个MyApplication继承Application,完成一个获取context的方法,方便后面在需要用的地方可以直接使用MyApplication.getContext()方法直接获取context。(虽然我每次都忘了用)
有的地方不建议将Context定义成静态的,具体原因我还没有深入了解,这个方法是真的很方便。
public class MyApplication extends Application {


    private static Context context;
    @Override
    public void onCreate() {


        super.onCreate();
        context = getApplicationContext();
    }
    public  static Context getContext()
    {


        return context;
    }
}
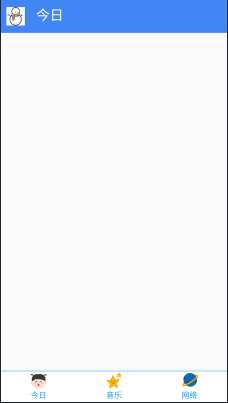
再开始第一个页面时,在配置文件中values中的style里把actionBar改为NoActionBar。设置为隐藏actionbar。
设置在应用开始后先进入一个欢迎页面在进入main页面
public class WelcomeActivity extends AppCompatActivity {


    @Override
    protected void onCreate(Bundle savedInstanceState) {


        super.onCreate(savedInstanceState);
        setContentView(R.layout.activity_weclome);
        Timer timer=new Timer();
        timer.schedule(new TimerTask() {


            @Override
            public void run() {


                toMain();
            }
        },2000);
    }

    private void toMain() {


        startActivity(new Intent(WelcomeActivity.this,MainActivity.class));
        finish();
    }
}
<?xml version="1.0" encoding="utf-8"?>
<FrameLayout xmlns:android="http://schemas.android.com/apk/res/android"
    xmlns:app="http://schemas.android.com/apk/res-auto"
    xmlns:tools="http://schemas.android.com/tools"
    android:layout_width="match_parent"
    android:layout_height="match_parent"
    android:fitsSystemWindows="true">

    <TextView
        android:layout_width="wrap_content"
        android:layout_height="wrap_content"
        android:layout_gravity="center"
        android:drawableTop="@mipmap/iswust"
        android:gravity="center"
        android:text="爱西科生活"
        android:textColor="#000"
        android:textStyle="bold"
        android:textSize="30sp"
        />

</FrameLayout>
这样欢迎页面就算完成。
然后就是开始第一个界面吧,先是登录界面的布局。
activity_main.xml
最开始学的线性布局所以这个界面就是用线性布局写的
<?xml version="1.0" encoding="utf-8"?>
<LinearLayout
    xmlns:android="http://schemas.android.com/apk/res/android"
    android:layout_width="match_parent"
    android:layout_height="match_parent"
    android:fitsSystemWindows="true"
    android:orientation="vertical"
    >
    <ImageView
        android:src="@mipmap/iswust"
        android:layout_gravity="center_horizontal"
        android:layout_width="wrap_content"
        android:layout_height="wrap_content"/>
    <EditText
        android:padding="8dp"
        android:layout_marginTop="30dp"
        android:layout_width="match_parent"
        android:layout_marginLeft="30dp"
        android:layout_marginRight="30dp"
        android:layout_height="wrap_content"
        android:hint="手机号"
        android:drawableLeft="@mipmap/ic_login_account_icon"
        android:layout_gravity="center_horizontal"
        android:background="@drawable/bac_1"/>

    <LinearLayout
        android:layout_width="match_parent"
        android:layout_height="wrap_content"
        android:orientation="horizontal"
        android:layout_marginTop="15dp">
        <EditText
            android:layout_width="0dp"
            android:background="@drawable/bac_1"
            android:padding="8dp"
            android:layout_height="wrap_content"
            android:drawableLeft="@mipmap/ic_login_code_icon"
            android:layout_weight="3"
            android:layout_marginLeft="30dp"
            android:hint="验证码"
            />
        <Button
            android:layout_width="0dp"
            android:layout_weight="1"
            android:layout_height="50dp"
            android:text="获取验证码"
            android:layout_marginRight="30dp"
            android:textColor="@android:color/white"
            android:background="@drawable/bac_2"
            android:layout_marginLeft="15dp"/>
    </LinearLayout>
    <Button
        android:id="@+id/btn_login1"
        android:layout_width="300dp"
        android:layout_height="50dp"
        android:layout_marginTop="20dp"
        android:textSize="20sp"
        android:textColor="@android:color/white"
        android:background="@drawable/bac_2"
        android:layout_gravity="center_horizontal"
        android:text="登录/注册"/>
    <TextView
        android:id="@+id/in"
        android:layout_marginLeft="50dp"
        android:layout_marginTop="10dp"
        android:padding="8dp"
        android:layout_width="wrap_content"
        android:layout_height="wrap_content"
        android:text="使用旧版登录接口"
        android:clickable="true"
        android:textColor="#5382D2"/>

    <TextView
        android:layout_gravity="center_horizontal"
        android:layout_width="wrap_content"
        android:layout_height="wrap_content"
        android:layout_marginTop="80dp"
        android:text="——————第三方登录——————"/>
    <LinearLayout
        android:layout_marginTop="20dp"
        android:layout_width="match_parent"
        android:layout_height="wrap_content"
        android:orientation="horizontal">

        <TextView
            android:layout_width="0dp"
            android:layout_height="wrap_content"
            android:layout_weight="1"
            android:drawableTop="@mipmap/wechat"
            android:gravity="center"
            android:text="微信" />

        <TextView
            android:layout_width="0dp"
            android:layout_weight="1"
            android:layout_height="wrap_content"
            android:drawableTop="@mipmap/qq"
            android:gravity="center"
            android:text="QQ"/>
    </LinearLayout>
    <LinearLayout
        android:layout_marginTop="20dp"
        android:layout_width="match_parent"
        android:layout_height="wrap_content"
        android:orientation="horizontal"
        android:gravity="center"
        >
        <TextView
            android:text="登录即代表同意"
            android:layout_height="wrap_content"
            android:layout_width="wrap_content" />
        <TextView
            android:layout_height="wrap_content"
            android:layout_width="wrap_content"
            android:text="《服务协议》"
            android:textColor="#7D9BD7"/>
    </LinearLayout>

</LinearLayout>
用到的图片也是在网络中获取的,有的是学长发给我的。所以大家可以随意添加。
对按钮的自定义修饰也是因人而异开心就好。
虽然已经有很多人提过,但还是推荐一下这个图标网站 -->点这里https://www.iconfont.cn/
当时为了方便,这里并没有把用到的文本在strings中定义,严格来讲这是不规范的,大家看看就好。
效果如图

出于模仿的目的,很多只实现了界面,像qq,微信这些功还没办法实现,点击按钮会产生一些效果,真正的入口也就在使用旧版登录接口那里。
public class MainActivity extends AppCompatActivity {


    private TextView textView;
    private Button button;
    @Override
    protected void onCreate(Bundle savedInstanceState) {


        super.onCreate(savedInstanceState);
        setContentView(R.layout.activity_main);
        button=findViewById(R.id.btn_login1);
        textView=findViewById(R.id.in);
        textView.setOnClickListener(new View.OnClickListener() {


            @Override
            public void onClick(View v) {


                Intent intent=new Intent(MainActivity.this,LoginActivity.class);
                startActivity(intent);
            }
        });
        button.setOnClickListener(new View.OnClickListener() {


            @Override
            public void onClick(View v) {


                Toast.makeText(MyApplication.getContext(),"请使用旧版登录接口",Toast.LENGTH_SHORT).show();
            }
        });
    }

}
为了简单,可能还是不够规范。
当时为了熟悉布局就写了很多这种页面练手。
接下来就跳转到旧版的登录页面了和上面的界面大同小异。同理如下
activity_login
<?xml version="1.0" encoding="utf-8"?>
<LinearLayout
    xmlns:android="http://schemas.android.com/apk/res/android"
    android:layout_width="match_parent"
    android:layout_height="match_parent"
    android:fitsSystemWindows="true"
    android:background="@drawable/background_1"
    android:orientation="vertical"
    >
    <ImageView
        android:src="@mipmap/iswust"
        android:layout_gravity="center_horizontal"
        android:layout_width="wrap_content"
        android:layout_height="wrap_content"/>
    <TextView
        android:layout_width="wrap_content"
        android:layout_height="wrap_content"
        android:text="爱西科生活"
        android:textSize="35sp"
        android:textStyle="bold"
        android:textColor="#000"
        android:layout_gravity="center"
        />
    <EditText
        android:id="@+id/username"
        android:padding="8dp"
        android:layout_margin="30dp"
        android:layout_width="match_parent"
        android:layout_height="wrap_content"
        android:hint="学号/工号"
        android:drawableLeft="@mipmap/ic_login_account_icon"
        android:background="@drawable/bac_1"/>

    <LinearLayout
        android:layout_width="match_parent"
        android:layout_height="wrap_content"
        android:orientation="horizontal"
>
        <EditText
            android:id="@+id/password"
            android:layout_width="match_parent"
            android:padding="8dp"
            android:background="@drawable/bac_1"
            android:layout_marginLeft="30dp"
            android:layout_marginRight="30dp"
            android:layout_height="wrap_content"
            android:drawableLeft="@mipmap/ic_login_code_icon"
            android:inputType="textPassword"
            android:hint="i西科密码"
            />
    </LinearLayout>
    <Button
        android:id="@+id/btn_login"
        android:layout_width="match_parent"
        android:layout_height="wrap_content"
        android:layout_marginTop="20dp"
        android:layout_marginRight="30dp"
        android:layout_marginLeft="30dp"
        android:textSize="20sp"
        android:textColor="@android:color/white"
        android:background="@drawable/bac_2"
        android:layout_gravity="center_horizontal"
        android:text="登录"/>
    <LinearLayout
        android:layout_width="match_parent"
        android:layout_height="wrap_content"
        android:orientation="horizontal">
        <TextView
            android:id="@+id/tv_register"
            android:layout_marginTop="10dp"
            android:padding="8dp"
            android:layout_width="0dp"
            android:layout_weight="1"
            android:textStyle="bold"
            android:gravity="center"
            android:layout_height="wrap_content"
            android:text="用户注册"
            android:clickable="true"
            android:textColor="#5382D2"/>
        <TextView
            android:layout_marginTop="10dp"
            android:padding="8dp"
            android:layout_width="0dp"
            android:textStyle="bold"
            android:gravity="center"
            android:layout_weight="1"
            android:layout_height="wrap_content"
            android:text="忘记密码"
            android:textColor="#5382D2"/>
    </LinearLayout>
    <TextView
        android:layout_gravity="center_horizontal"
        android:layout_width="wrap_content"
        android:layout_height="wrap_content"
        android:layout_marginTop="80dp"
        android:textStyle="bold"
        android:textColor="#ffff00"
        android:text="——————第三方登录——————"/>

    <LinearLayout
        android:layout_marginTop="20dp"
        android:layout_width="match_parent"
        android:layout_height="wrap_content"
        android:orientation="horizontal">

        <TextView
            android:layout_width="0dp"
            android:layout_height="wrap_content"
            android:layout_weight="1"
            android:textStyle="bold"
            android:drawableTop="@mipmap/wechat"
            android:gravity="center"
            android:text="微信" />

        <TextView
            android:layout_width="0dp"
            android:layout_height="wrap_content"
            android:layout_weight="1"
            android:drawableTop="@mipmap/qq"
            android:gravity="center"
            android:textStyle="bold"
            android:text="QQ"/>
    </LinearLayout>
    <LinearLayout
        android:layout_marginTop="20dp"
        android:layout_width="match_parent"
        android:layout_height="wrap_content"
        android:gravity="center"
        android:orientation="horizontal">

        <TextView
            android:text="登录即代表同意"
            android:textColor="#ffff00"
            android:textStyle="bold"
            android:layout_height="wrap_content"
            android:layout_width="wrap_content" />
        <TextView
            android:layout_height="wrap_content"
            android:layout_width="wrap_content"
            android:textStyle="bold"
            android:text="《服务协议》"
            android:textColor="#ffff00"
            />
    </LinearLayout>

</LinearLayout>
资源文件任意。

public class LoginActivity extends AppCompatActivity {


    private EditText username;
    private EditText password;
    private Button login;
    private TextView register;
    @Override
    protected void onCreate(Bundle savedInstanceState) {


        super.onCreate(savedInstanceState);
        setContentView(R.layout.activity_login);
        findViews();
    }
    private void findViews() {


        username=(EditText) findViewById(R.id.username);
        password=(EditText) findViewById(R.id.password);
        login=(Button) findViewById(R.id.btn_login);
        register=(TextView) findViewById(R.id.tv_register);

        login.setOnClickListener(new View.OnClickListener() {


            @Override
            public void onClick(View v) {


                String name=username.getText().toString();
                System.out.println(name);
                String pass=password.getText().toString();
                System.out.println(pass);
                UserService userService=new UserService(LoginActivity.this);
                boolean flag=userService.login(name, pass);
                if(flag){


                    Toast.makeText(LoginActivity.this, "登录成功", Toast.LENGTH_LONG).show();
                    Intent intent = new Intent(MyApplication.getContext(), MainpageActivity.class);
                    startActivity(intent);
                    finish();
                }else{


                    Toast.makeText(MyApplication.getContext(), "登录失败", Toast.LENGTH_LONG).show();
                }
            }
        });
                register.setOnClickListener(new View.OnClickListener() {


            public void onClick(View v) {


                Intent intent=new Intent(LoginActivity.this,RegisterActivity.class);
                startActivity(intent);
            }
        });
    }
}
为了能够登录进去,就需要实现注册功能,为了实现注册功能,这里我采用sqllite。
先实现注册页面

方法大同小异,不在重复。
接下来就是实现注册功能。
public class User {


    private int id;
    private String username;
    private String password;
    public User() {


        super();
    }
    public User(String username, String password) {


        super();
        this.username = username;
        this.password = password;
    }
    public int getId() {


        return id;
    }
    public void setId(int id) {


        this.id = id;
    }
    public String getUsername() {


        return username;
    }
    public void setUsername(String username) {


        this.username = username;
    }
    public String getPassword() {


        return password;
    }
    public void setPassword(String password) {


        this.password = password;
    }
    @Override
    public String toString() {


        return "User [id=" + id + ", username=" + username + ", password="
                + password + "]";
    }

}
public class DatabaseHelper extends SQLiteOpenHelper {


    static String name="user.db";
    static int dbVersion=1;
    //创建
    public DatabaseHelper(Context context) {


        super(context, name, null, dbVersion);
    }
    public void onCreate(SQLiteDatabase db)  {


        String sql="create table user(id integer primary key autoincrement,username varchar(20),password varchar(20))";
        db.execSQL(sql);
    }
    public void onUpgrade(SQLiteDatabase db, int oldVersion, int newVersion) {


    }

}
public class UserService {


    private DatabaseHelper dbHelper;
    public UserService(Context context){


        dbHelper=new DatabaseHelper(context);
    }
    public boolean login(String username,String password){


        SQLiteDatabase sdb=dbHelper.getReadableDatabase();
        String sql="select * from user where username=? and password=?";
        Cursor cursor=sdb.rawQuery(sql, new String[]{

    username,password});
        if(cursor.moveToFirst()==true){


            cursor.close();
            return true;
        }
        return false;
    }
    //添加
    public boolean register(User user){


        SQLiteDatabase sdb=dbHelper.getReadableDatabase();
        String sql="insert into user(username,password) values(?,?)";
        Object obj[]={

    user.getUsername(),user.getPassword()};
        sdb.execSQL(sql, obj);
        return true;
    }
}
public class RegisterActivity extends AppCompatActivity {


    EditText username;
    EditText password;
    Button register;
    protected void onCreate(Bundle savedInstanceState) {


        super.onCreate(savedInstanceState);
        setContentView(R.layout.activity_register);
        findViews();
        register.setOnClickListener(new View.OnClickListener() {


            public void onClick(View v) {


                String name=username.getText().toString().trim();//去掉两端的空格
                String pass=password.getText().toString().trim();
                UserService userService=new UserService(RegisterActivity.this);
                User user=new User();
                user.setUsername(name);
                user.setPassword(pass);
                userService.register(user);
                Toast.makeText(RegisterActivity.this, "注册成功", Toast.LENGTH_LONG).show();
                Intent intent = new Intent(RegisterActivity.this,LoginActivity.class);
                startActivity(intent);
                finish();
            }
        });
    }
    private void findViews() {


        username=(EditText) findViewById(R.id.usernameRegister);
        password=(EditText) findViewById(R.id.passwordRegister);
        register=(Button) findViewById(R.id.Register);
    }
}
注册功能实现成功之后,就可以点击登录按钮成功进入主界面了。
主界面采用的是Activity+Fragment实现的
创建主界面Activity
public class MainpageActivity extends AppCompatActivity implements RadioGroup.OnCheckedChangeListener,
        ViewPager.OnPageChangeListener {


    private RadioGroup btn_group;
    private RadioButton btn_1;
    private RadioButton btn_2;
    private RadioButton btn_3;
    private ViewPager vpager;

    private MyFragmentPagerAdapter mAdapter;

    public static final int PAGE_ONE = 0;
    public static final int PAGE_TWO = 1;
    public static final int PAGE_THREE = 2;

    @Override
    protected void onCreate(Bundle savedInstanceState) {


        super.onCreate(savedInstanceState);
        setContentView(R.layout.activity_mainpage);
    mAdapter = new MyFragmentPagerAdapter(getSupportFragmentManager());
    bindViews();
    btn_1.setChecked(true);
}
    private void bindViews() {


        btn_group = (RadioGroup) findViewById(R.id.btn_group);
        btn_1 = (RadioButton) findViewById(R.id.btn_1);
        btn_2 = (RadioButton) findViewById(R.id.btn_2);
        btn_3 = (RadioButton) findViewById(R.id.btn_3);
        btn_group.setOnCheckedChangeListener(this);

        vpager = (ViewPager) findViewById(R.id.viewpager);
        vpager.setAdapter(mAdapter);
        vpager.setCurrentItem(0);
        vpager.addOnPageChangeListener(this);
    }
    @Override
    public void onCheckedChanged(RadioGroup group, int checkedId) {


        switch (checkedId) {


            case R.id.btn_1:
                vpager.setCurrentItem(PAGE_ONE);
                break;
            case R.id.btn_2:
                vpager.setCurrentItem(PAGE_TWO);
                break;
            case R.id.btn_3:
                vpager.setCurrentItem(PAGE_THREE);
                break;
        }
    }


    @Override
    public void onPageScrolled(int position, float positionOffset, int positionOffsetPixels) {


    }

    @Override
    public void onPageSelected(int position) {


    }

    @Override
    public void onPageScrollStateChanged(int state) {


        //state的状态有三个,0表示什么都没做,1正在滑动,2滑动完毕
        if (state == 2) {


            switch (vpager.getCurrentItem()) {


                case PAGE_ONE:
                    btn_1.setChecked(true);
                    break;
                case PAGE_TWO:
                    btn_2.setChecked(true);
                    break;
                case PAGE_THREE:
                    btn_3.setChecked(true);
                    break;
            }
        }
    }
}
布局为
<?xml version="1.0" encoding="utf-8"?>
<androidx.drawerlayout.widget.DrawerLayout
    android:layout_height="match_parent"
    android:layout_width="match_parent"
    android:fitsSystemWindows="true"
    xmlns:android="http://schemas.android.com/apk/res/android">
    <RelativeLayout
        xmlns:android="http://schemas.android.com/apk/res/android"
        xmlns:tools="http://schemas.android.com/tools"
        android:layout_width="match_parent"
        android:layout_height="match_parent"
        tools:context=".Activities.MainpageActivity">
        <LinearLayout
            android:id="@+id/re1"
            android:layout_width="match_parent"
            android:layout_height="wrap_content"
            android:background="#4286F5"
            android:fitsSystemWindows="true"
            android:orientation="horizontal">

            <TextView
                android:id="@+id/title"
                android:layout_width="0dp"
                android:layout_height="40dp"
                android:layout_margin="10dp"
                android:layout_weight="6"
                android:drawableLeft="@mipmap/iceman"
                android:drawablePadding="20dp"
                android:text="今日"
                android:textColor="#FFFFFF"
                android:textSize="25sp" />
        </LinearLayout>
        <RadioGroup
            android:id="@+id/btn_group"
            android:layout_width="match_parent"
            android:layout_height="56dp"
            android:layout_alignParentBottom="true"
            android:background="#FFFFFF"
            android:orientation="horizontal">
            <RadioButton
                android:id="@+id/btn_1"
                android:text="今日"
                android:textColor="#0997F7"
                android:drawableTop="@drawable/btn_1"
                android:button="@null"
                android:layout_height="wrap_content"
                android:gravity="center"
                android:layout_weight="1"
                android:layout_width="0dp"
                />

            <RadioButton
                android:id="@+id/btn_2"
                android:layout_width="0dp"
                android:layout_height="wrap_content"
                android:button="@null"
                android:drawableTop="@drawable/btn_2"
                android:gravity="center"
                android:text="音乐"
                android:layout_weight="1"
                android:textColor="#0997F7" />

            <RadioButton
                android:id="@+id/btn_3"
                android:text="网络"
                android:textColor="#0997F7"
                android:drawableTop="@drawable/btn_3"
                android:button="@null"
                android:layout_height="wrap_content"
                android:gravity="center"
                android:layout_width="0dp"
                android:layout_weight="1" />
        </RadioGroup>

        <View
            android:id="@+id/line"
            android:layout_width="match_parent"
            android:layout_height="2px"
            android:layout_above="@id/btn_group"
            android:background="#0997F7" />

        <androidx.viewpager.widget.ViewPager
            android:id="@+id/viewpager"
            android:layout_width="match_parent"
            android:layout_height="match_parent"
            android:layout_above="@id/line"
            android:layout_below="@+id/re1"
            />
    </RelativeLayout>

    <TextView
        android:layout_width="match_parent"
        android:layout_height="match_parent"
        android:background="#fff"
        android:textSize="30sp"
        android:layout_gravity="left"
        android:text="This is Test"
        />
</androidx.drawerlayout.widget.DrawerLayout>
这里采用了viewPager实现三个子页面。
要实现viewPager就需要单独来写一个适配器了。
public class MyFragmentPagerAdapter extends FragmentPagerAdapter {


    private final int PAGER_COUNT = 3;
    private MyFragment1 myFragment1 ;
    private MyFragment2 myFragment2 ;
    private MyFragment3 myFragment3 ;

    public MyFragmentPagerAdapter(FragmentManager fm) {


        super(fm);
        myFragment1 = new MyFragment1();
        myFragment2 = new MyFragment2();
        myFragment3 = new MyFragment3();
    }
    @Override
    public int getCount() {


        return PAGER_COUNT;
    }

    @Override
    public Object instantiateItem(ViewGroup vg, int position) {


        return super.instantiateItem(vg, position);
    }

    @Override
    public void destroyItem(ViewGroup container, int position, Object object) {


        super.destroyItem(container, position, object);
    }

    @Override
    public Fragment getItem(int position) {


        Fragment fragment = null;
        switch (position) {


            case MainpageActivity.PAGE_ONE:
                fragment = myFragment1;
                break;
            case MainpageActivity.PAGE_TWO:
                fragment = myFragment2;
                break;
            case MainpageActivity.PAGE_THREE:
                fragment = myFragment3;
                break;
        }
        return fragment;
    }
}
所用到的几个fragment,可以先简单的加一些内容先确保正确性,等适配器写好之后就可以简单的主界面也就完成了。
另外写viewpager的适配器除了可以继承FragmentPagerAdapter外,还可以继承PagerAdapter重写四个方法也能达到效果也是相当简单。
接下来我们就可以往fragment中添加内容充实一下了。
在第一个碎片中,我在最上方又加了一个viewpager,为了实现一个轮播图类似于广告的效果。然后在下方随意设置几个按钮,在设置按钮时,按理来说运用recycleview或者gridView会更好一些,但当时为了速度,就偷懒直接采用布局排列了。
<?xml version="1.0" encoding="utf-8"?>
<ScrollView
    android:layout_height="match_parent"
    android:layout_width="match_parent"
    xmlns:android="http://schemas.android.com/apk/res/android">
    <LinearLayout
        xmlns:android="http://schemas.android.com/apk/res/android"
        android:layout_width="match_parent"
        android:layout_height="match_parent"
        android:orientation="vertical">
        <androidx.viewpager.widget.ViewPager
            android:id="@+id/advpager"
            android:layout_width="match_parent"
            android:layout_height="300dp"
            />
        <LinearLayout
            android:id="@+id/ll_btn"
            android:layout_width="match_parent"
            android:layout_height="wrap_content"
            android:orientation="horizontal">
            <Button
                android:id="@+id/btn_a"
                android:layout_width="0dp"
                android:layout_weight="1"
                android:layout_height="wrap_content"
                android:drawableTop="@mipmap/dog"
                style="?android:attr/borderlessButtonStyle"
                android:text="按钮a" />

            <Button
                android:id="@+id/btn_b"
                android:layout_width="0dp"
                android:layout_weight="1"
                android:layout_height="wrap_content"
                android:drawableTop="@mipmap/tiger"
                style="?android:attr/borderlessButtonStyle"
                android:text="按钮b" />

            <Button
                android:id="@+id/btn_c"
                android:layout_width="0dp"
                android:layout_weight="1"
                android:layout_height="wrap_content"
                android:drawableTop="@mipmap/changjinglu"

                style="?android:attr/borderlessButtonStyle"
                android:text="按钮c" />

            <Button
                android:id="@+id/btn_d"
                android:layout_width="0dp"
                android:layout_weight="1"
                android:layout_height="wrap_content"
                android:drawableTop="@mipmap/songshu"

                style="?android:attr/borderlessButtonStyle"
                android:text="按钮d" />
        </LinearLayout>
        <LinearLayout
            android:layout_width="match_parent"
            android:layout_height="wrap_content"
            android:orientation="horizontal">
            <Button
                android:id="@+id/btn_e"
                android:layout_width="0dp"
                android:layout_weight="1"
                android:layout_height="wrap_content"
                android:drawableTop="@mipmap/horse"

                style="?android:attr/borderlessButtonStyle"
                android:text="按钮e" />
            <Button
                android:id="@+id/btn_f"
                android:layout_width="0dp"
                android:layout_weight="1"
                android:layout_height="wrap_content"
                android:drawableTop="@mipmap/lion"
                style="?android:attr/borderlessButtonStyle"
                android:text="按钮f" />
            <Button
                android:id="@+id/btn_g"
                android:layout_width="0dp"
                android:layout_weight="1"
                android:layout_height="wrap_content"
                android:drawableTop="@mipmap/panda"
                style="?android:attr/borderlessButtonStyle"
                android:text="按钮g" />

            <CheckBox
                android:id="@+id/btn_h"
                android:layout_width="0dp"
                android:layout_height="wrap_content"
                android:layout_weight="1"
                android:drawableTop="@drawable/more"
                android:button="@null"
                android:gravity="center"
                android:text="更多" />

        </LinearLayout>

        <LinearLayout
            android:layout_width="match_parent"
            android:layout_height="wrap_content"
            >
            <Button
                android:id="@+id/btn_text"
                style="?android:attr/borderlessButtonStyle"
                android:layout_width="0dp"
                android:layout_height="wrap_content"
                android:layout_weight="1"
                android:drawableTop="@mipmap/text"
                android:text="西科小说" />
            <Button
                android:id="@+id/btn_movie"
                android:layout_width="0dp"
                android:layout_weight="1"
                android:layout_height="wrap_content"
                android:drawableTop="@mipmap/movie"
                style="?android:attr/borderlessButtonStyle"
                android:text="西科电影" />
        </LinearLayout>

    </LinearLayout>
</ScrollView>
所用到的图标大家还是随便用自己喜欢的就行。
然后就又是写轮播图的viewpager适配器
public class AdAdapter extends FragmentPagerAdapter {


private AdFragment1 adfragment1;
private AdFragment2 adfragment2;
private AdFragment3 adfragment3;
    public AdAdapter(FragmentManager fm) {


        super(fm);
        adfragment1=new AdFragment1();
        adfragment2=new AdFragment2();
        adfragment3=new AdFragment3();
    }


    @Override
    public Fragment getItem(int position) {


        Fragment fragment = null;
        switch (position) {


            case MainpageActivity.PAGE_ONE:
                fragment = adfragment1;
                break;
            case MainpageActivity.PAGE_TWO:
                fragment = adfragment2;
                break;
            case MainpageActivity.PAGE_THREE:
                fragment = adfragment3;
                break;
        }
        return fragment;
    }

    @Override
    public Object instantiateItem(ViewGroup vg, int position) {


        return super.instantiateItem(vg, position);
    }

    @Override
    public void destroyItem(ViewGroup container, int position, Object object) {


        super.destroyItem(container, position, object);
    }
    @Override
    public int getCount() {


        return 3;
    }

}
与之前的大同小异,其实继承pagerview,传入几个view直接显示会更方便与直观一些,我运用fragment的原因是为了当时不熟悉继承了FragmentAdapter该怎么用,为了加深印象就又使用了一遍。
接着就实现了第一个碎片页面
public class MyFragment1 extends Fragment {


    View view;
    ViewPager advpager = null;
    Button buttona,buttonb,buttonc,buttond,buttone,buttonf,buttong,buttontext,button_movie;
    CheckBox buttonh;
    boolean isVisible =true;
    @Override
    public View onCreateView(final LayoutInflater inflater, ViewGroup container, Bundle savedInstanceState) {


        view = inflater.inflate(R.layout.fg_1, container, false);
        AdAdapter adAdapter = new AdAdapter(getChildFragmentManager());
        advpager = view.findViewById(R.id.advpager);
        advpager.setAdapter(adAdapter);
        buttona=view.findViewById(R.id.btn_a);
        buttonb=view.findViewById(R.id.btn_b);
        buttonc=view.findViewById(R.id.btn_c);
        buttond=view.findViewById(R.id.btn_d);
        buttone=view.findViewById(R.id.btn_e);
        buttonf=view.findViewById(R.id.btn_f);
        buttong=view.findViewById(R.id.btn_g);
        buttonh=view.findViewById(R.id.btn_h);
        buttontext=view.findViewById(R.id.btn_text);
        button_movie=view.findViewById(R.id.btn_movie);
        buttontext.setVisibility(View.INVISIBLE);
        button_movie.setVisibility(View.INVISIBLE);
        buttontext.setOnClickListener(new View.OnClickListener() {


            @Override
            public void onClick(View v) {


                Intent intent =new Intent(getContext(), BookActivity.class);
                startActivity(intent);
                Toast.makeText(getContext(),"请选择章节",Toast.LENGTH_SHORT).show();

            }
        });
        button_movie.setOnClickListener(new View.OnClickListener() {


            @Override
            public void onClick(View v) {


                Intent intent=new Intent(getContext(), MovieActivity.class);
                startActivity(intent);
            }
        });
        buttonh.setOnClickListener(new View.OnClickListener() {


            @Override
            public void onClick(View v) {


                if(isVisible)
                {


                    buttontext.setVisibility(View.VISIBLE);
                    button_movie.setVisibility(View.VISIBLE);
                    isVisible=false;
                }
                else
                {


                    buttontext.setVisibility(View.INVISIBLE);
                    button_movie.setVisibility(View.INVISIBLE);
                    isVisible=true;
                }
            }
        });
        return view;
    }

    @Override
    public void onResume() {


        super.onResume();
        mHandler.sendEmptyMessageDelayed(1,3000);
    }
    @SuppressLint("HandlerLeak")
    private Handler mHandler = new Handler() {


        @Override
        public void handleMessage(Message msg) {


            switch (msg.what) {


                case 1:
                    int count = 3;
                    int currentItem=advpager.getCurrentItem();
                    int now=(currentItem+1)%count;
                    advpager.setCurrentItem(now,true);
                    this.sendEmptyMessageDelayed(1,3000);
            }
        }
    };
}
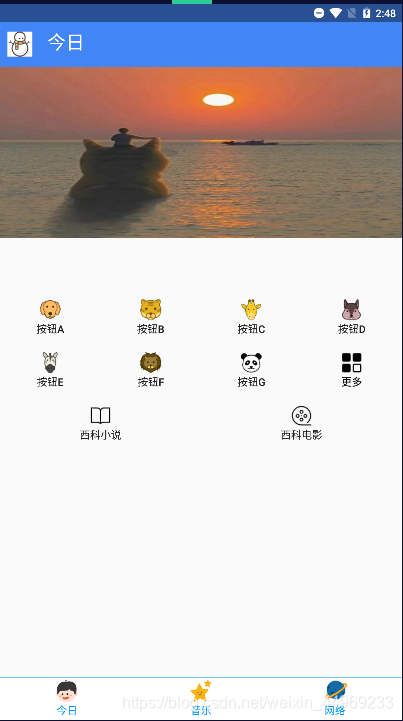
为了实现轮播图的效果,用到Handler来接受从onResume发出的消息更新ui,每三秒更新一次。Onresume()是活动准备好和用户交互的时候调用,只需重写用来发消息即可。
在第一个界面中的更多按钮中,设计了一个小说按钮,点击可以进入小说界面。
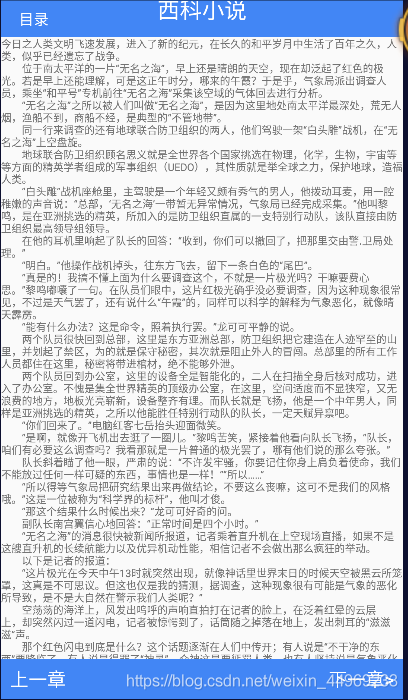
小说界面同样简单,简单设置即可。
<?xml version="1.0" encoding="utf-8"?>

<androidx.constraintlayout.widget.ConstraintLayout xmlns:app="http://schemas.android.com/apk/res-auto"
    xmlns:tools="http://schemas.android.com/tools"
    xmlns:android="http://schemas.android.com/apk/res/android"
    android:layout_width="match_parent"
    android:layout_height="match_parent">
    <RelativeLayout
        android:id="@+id/line_title"
        android:layout_width="match_parent"
        android:layout_height="wrap_content"
        android:background="#4286F5"
        android:fitsSystemWindows="true"
        tools:ignore="MissingConstraints">
        <TextView
            android:id="@+id/title"
            android:layout_width="wrap_content"
            android:layout_height="wrap_content"
            android:layout_gravity="center_horizontal"
            android:text="西科小说"
            android:layout_centerInParent="true"
            android:textColor="#fff"
            android:textSize="30sp"
            tools:ignore="MissingConstraints" />
        <Button
            android:id="@+id/title_btn"
            android:layout_width="wrap_content"
            android:layout_height="wrap_content"
            android:background="#4286F5"
            android:text="目录"
            android:textSize="20sp"
            android:textColor="#fff"
            style="?android:attr/borderlessButtonStyle"
            tools:ignore="MissingConstraints" />
    </RelativeLayout>

    <ScrollView
        android:id="@+id/scr_text"
        app:layout_constraintTop_toBottomOf="@id/line_title"
        app:layout_constraintBottom_toTopOf="@+id/re_1"
        app:layout_constraintLeft_toLeftOf="parent"
        app:layout_constraintRight_toRightOf="parent"
        android:layout_width="0dp"
        android:layout_height="0dp"
        android:fillViewport="true"
        tools:ignore="MissingConstraints" >
        <TextView
            android:id="@+id/text"
            android:layout_width="wrap_content"
            android:layout_height="wrap_content"
            android:scrollbars="vertical"
            android:fadeScrollbars="false"
            tools:ignore="MissingConstraints,NotSibling"
            />
    </ScrollView>

    <RelativeLayout
        android:id="@+id/re_1"
        android:layout_width="match_parent"
        android:layout_height="wrap_content"
        android:background="#4286F5"
        app:layout_constraintBottom_toBottomOf="parent"
        tools:ignore="NotSibling"
        tools:layout_editor_absoluteX="0dp">

        <Button
            android:id="@+id/last_zhang"
            style="?android:attr/borderlessButtonStyle"
            android:layout_width="wrap_content"
            android:layout_height="wrap_content"
            android:clickable="true"

            android:text="上一章"
            android:textColor="#fff"
            android:textSize="25sp" />

        <Button
            android:id="@+id/next_zhang"
            style="?android:attr/borderlessButtonStyle"
            android:layout_width="wrap_content"
            android:layout_height="wrap_content"
            android:layout_alignParentRight="true"
            android:clickable="true"
            android:text="下一章>"
            android:textColor="#fff"
            android:textSize="25sp" />
    </RelativeLayout>
</androidx.constraintlayout.widget.ConstraintLayout>

在bookactivity中采用okhttp来访问网络并采用异步的方式返回结果。在这其中运用Jsoup来爬取小说网站上文本内容(仅学习使用,未用作任何商业用途)最后运用handler来更新ui。
public class BookActivity extends AppCompatActivity {


    TextView mainText;
    Button title_btn;
    Button textView1,textView2;
    int flag;
    ScrollView scrollView;
    Handler handler =new Handler(Looper.getMainLooper())
    {


        @Override
        public void handleMessage(@NonNull Message msg) {


            super.handleMessage(msg);
            switch (msg.what)
            {


                case 1:mainText.setText((String)msg.obj);
                    break;
            }
        }
    };
    @Override
    protected void onCreate(Bundle savedInstanceState) {


        super.onCreate(savedInstanceState);
        setContentView(R.layout.activity_book);
        mainText = findViewById(R.id.text);
        title_btn = findViewById(R.id.title_btn);
        textView1=findViewById(R.id.last_zhang);
        textView2=findViewById(R.id.next_zhang);
        scrollView=findViewById(R.id.scr_text);
        mainText.setMovementMethod(ScrollingMovementMethod.getInstance());

//        sendRequest();
        textView1.setOnClickListener(new View.OnClickListener() {


            @Override
            public void onClick(View v) {


                switch (flag){


                    case 1:Toast.makeText(BookActivity.this,"没有上一章啦!",Toast.LENGTH_SHORT).show();
                    break;
                    case 2:scrollView.smoothScrollTo(0,0);
                        sendRequest("http://book.zongheng.com/chapter/1028707/61764491.html");
                    flag--;
                    break;
                    case 3:scrollView.smoothScrollTo(0,0);
                        sendRequest("http://book.zongheng.com/chapter/1028707/61764498.html");
                    flag--;
                    break;
                }
            }
        });
        textView2.setOnClickListener(new View.OnClickListener() {


            @Override
            public void onClick(View v) {


                switch (flag){


                    case 1:
                        scrollView.smoothScrollTo(0,0);
                        sendRequest("http://book.zongheng.com/chapter/1028707/61764498.html");
                        flag++;
                        break;
                    case 2:
                        scrollView.smoothScrollTo(0,0);
                        sendRequest("http://book.zongheng.com/chapter/1028707/61764524.html");
                    flag++;
                        break;
                    case 3:
                        Toast.makeText(BookActivity.this,"没有下一章啦!",Toast.LENGTH_SHORT).show();
                        break;
                }
            }
        });
        title_btn.setOnClickListener(new View.OnClickListener() {


            @Override
            public void onClick(View v) {


                PopupMenu popupMenu =new PopupMenu(BookActivity.this,title_btn);
                popupMenu.getMenuInflater().inflate(R.menu.title_menu,popupMenu.getMenu());
                popupMenu.show();
                popupMenu.setOnMenuItemClickListener(new PopupMenu.OnMenuItemClickListener() {


                    @Override
                    public boolean onMenuItemClick(MenuItem item) {


                        switch (item.getItemId())
                        {


                            case R.id.text_1:
                                flag=1;
                                scrollView.smoothScrollTo(0,0);
                                sendRequest("http://book.zongheng.com/chapter/1028707/61764491.html");
                                Toast.makeText(BookActivity.this,"第一章",Toast.LENGTH_SHORT).show();
                                break;
                            case R.id.text_2:
                                flag=2;
                                scrollView.smoothScrollTo(0,0);
                                sendRequest("http://book.zongheng.com/chapter/1028707/61764498.html");
                                Toast.makeText(BookActivity.this,"第二章",Toast.LENGTH_SHORT).show();
                                break;
                            case R.id.text_3:
                                flag=3;
                                scrollView.smoothScrollTo(0,0);
                                sendRequest("http://book.zongheng.com/chapter/1028707/61764524.html");
                                Toast.makeText(BookActivity.this,"第三章",Toast.LENGTH_SHORT).show();
                                break;
                        }
                        return true;
                    }
                });
            }
        });
    }


    private void sendRequest(String uurl) {


        OkHttpClient client=new OkHttpClient();
        final Request request=new Request.Builder()
                .url(uurl)
                .build();
        Call call=client.newCall(request);
        call.enqueue(new Callback() {


            @Override
            public void onFailure( Call call,  IOException e) {


                Log.w("fail","fail to ask");
            }

            @Override
            public void onResponse( Call call,  Response response) throws IOException {


                String str=response.body().string();

                Document document= Jsoup.parse(str);
                Element element=document.getElementsByClass("content").first();
                Elements element1 =element.getElementsByTag("p");
                String text="";
                for(int i=0;i<element1.size();i++){


                    text+=element1.get(i).text()+"\n";
                }
//                final String finalText = text;
//                MainActivity.this.runOnUiThread(new Runnable() {


//                    @Override
//                    public void run() {


//                        mainText.setText(finalText);
//                    }
//                });
                Message message =Message.obtain();
                message.what=1;
                message.obj=text;
                text="";
                handler.sendMessage(message);
            }
        });
    }
}
切换章节时需要使用smoothScrollto(0,0)来回到最初否则效果不佳。左上方在按钮上加了一个popupMenu实现一个选择章节的功能。上一章,下一章按钮也是同理。
而在主界面中还有另外一个电影按钮。
只运用了一个listview
<?xml version="1.0" encoding="utf-8"?>
<LinearLayout xmlns:android="http://schemas.android.com/apk/res/android"
    android:layout_width="match_parent"
    android:fitsSystemWindows="true"
    android:layout_height="match_parent"
    android:orientation="vertical">

    <ListView
        android:id="@+id/movie_list"
        android:layout_width="match_parent"
        android:layout_height="match_parent"
        />

</LinearLayout>
建立了一个本地服务器,我这里使用的是apache。
在htdocs目录下,创建json文件。存入一些内容。
比如
[{“name”:“Titanic”,“data”:“1997-12-19”,“director”:“James Cameron”},{“name”:“your name”,“data”:“2016-12-2”,“director”:“Makoto Shinkai”}]
然后在MovieActivity中解析这些数据并把这些数据放在相应的控件上。
电影相关的适配器和布局如下
public class MovieAdapter extends ArrayAdapter<Movie> {


    private int resourceId;

    public MovieAdapter(@NonNull Context context, int resource, @NonNull List<Movie> objects) {


        super(context, resource, objects);
        resourceId=resource;
    }

    @NonNull
    @Override
    public View getView(int position, @Nullable View convertView, @NonNull ViewGroup parent) {


        Movie movie=getItem(position);
        View view= LayoutInflater.from(getContext()).inflate(resourceId,parent,false);
        ImageView img=view.findViewById(R.id.movie_image);
        TextView nameMovie=view.findViewById(R.id.movie_name);
        TextView dataMovie =view.findViewById(R.id.moive_data);
        TextView directorMovie =view.findViewById(R.id.movie_director);
        img.setImageResource(movie.img);
        nameMovie.setText(movie.getName());
        dataMovie.setText(movie.getData());
        directorMovie.setText(movie.getDirector());
        return view;
    }
}
public class Movie {


    public int img;
    String name;
    String data;
    String director;

    public Movie(int img,String name, String data, String director) {


        this.img =img;
        this.name = name;
        this.data = data;
        this.director = director;
    }

    public String getName() {


        return name;
    }

    public void setName(String name) {


        this.name = name;
    }

    public String getData() {


        return data;
    }

    public void setData(String data) {


        this.data = data;
    }

    public String getDirector() {


        return director;
    }

    public void setDirector(String director) {


        this.director = director;
    }
}
movie_item
<?xml version="1.0" encoding="utf-8"?>
<RelativeLayout xmlns:android="http://schemas.android.com/apk/res/android"
    android:layout_width="match_parent"
    android:layout_height="wrap_content">
    <ImageView
        android:id="@+id/movie_image"
        android:layout_width="100dp"
        android:layout_height="100dp"/>
    <TextView
        android:layout_toRightOf="@+id/movie_image"
        android:id="@+id/movie_name"
        android:layout_width="match_parent"
        android:layout_height="wrap_content"
        android:gravity="center"
        android:textSize="28sp"
        android:layout_marginLeft="10dp"
        />
    <TextView
        android:id="@+id/moive_data"
        android:layout_toRightOf="@+id/movie_image"
        android:layout_below="@+id/movie_name"
        android:layout_width="match_parent"
        android:layout_height="wrap_content"
        android:text="上映时间:xxxx-xx-xx"
        android:gravity="center"
        android:textSize="20sp"/>
    <TextView
        android:id="@+id/movie_director"
        android:layout_toRightOf="@+id/movie_image"
        android:layout_below="@+id/moive_data"
        android:layout_width="match_parent"
        android:layout_height="wrap_content"
        android:text="导演:xxx"
        android:gravity="center"
        android:textSize="20sp"/>

</RelativeLayout>
public class MovieActivity extends AppCompatActivity {


 private List<Movie> movieList=new ArrayList<>();
 ImageView imageView;
 ListView listView;
    @Override
    protected void onCreate(Bundle savedInstanceState) {


        super.onCreate(savedInstanceState);
        setContentView(R.layout.activity_movie);
        listView=findViewById(R.id.movie_list);
        MovieAdapter adapter=new MovieAdapter(MovieActivity.this,R.layout.movie_item,movieList);
        sendRequest();
        listView.setAdapter(adapter);
        listView.setOnItemClickListener(new AdapterView.OnItemClickListener() {


            @Override
            public void onItemClick(AdapterView<?> parent, View view, int position, long id) {


                Movie movie=movieList.get(position);
                Intent intent =new Intent(MovieActivity.this,MovieWebActivity.class);
                switch (movie.getName())
                {


                    case "Titanic":intent.putExtra("movie_url","https://baike.baidu.com/item/%E6%B3%B0%E5%9D%A6%E5%B0%BC%E5%85%8B%E5%8F%B7/6162581?fr=aladdin");
                        break;
                    case "your name":intent.putExtra("movie_url","https://baike.baidu.com/item/%E4%BD%A0%E7%9A%84%E5%90%8D%E5%AD%97%E3%80%82/19127928?fromtitle=%E4%BD%A0%E7%9A%84%E5%90%8D%E5%AD%97&fromid=19126915&fr=aladdin");
                        break;
                }
                startActivity(intent);
                /*Intent intent =new Intent(Intent.ACTION_VIEW);
                switch (movie.name)
                {
                    case "Titanic":intent.setData(Uri.parse("https://baike.baidu.com/item/%E6%B3%B0%E5%9D%A6%E5%B0%BC%E5%85%8B%E5%8F%B7/6162581?fr=aladdin"));
                    break;
                }
                 startActivity(intent);*/
            }
        });
    }
    private void sendRequest() {


        OkHttpClient client=new OkHttpClient();
        Request request =new Request.Builder()
                .url("http://192.168.1.107/get_data.json")
                //上面这个ip输入你自己当前的ip
                .build();
        Call call=client.newCall(request);
        call.enqueue(new Callback() {


            @Override
            public void onFailure(Call call, IOException e) {


                Log.w("result","fail to ask");
            }
            @Override
            public void onResponse(Call call, Response response) throws IOException {


                Gson gson =new Gson();
                String str=response.body().string();
                List<Movie> jsonsList=gson.fromJson(str,new TypeToken<List<Movie>>(){

    }.getType());
                for(int i=0;i<5;i++) {


                    Movie movie1 = new Movie(R.mipmap.titanic, jsonsList.get(0).getName(), jsonsList.get(0).getData(), jsonsList.get(0).getDirector());
                    Movie movie2 = new Movie(R.mipmap.yourname, jsonsList.get(1).getName(), jsonsList.get(1).getData(), jsonsList.get(1).getDirector());
                    movieList.add(movie1);
                    movieList.add(movie2);
                }
            }
        });
    }

}
采用okhttp访问网络返回内容,采用GSON解析数据。
效果如图:
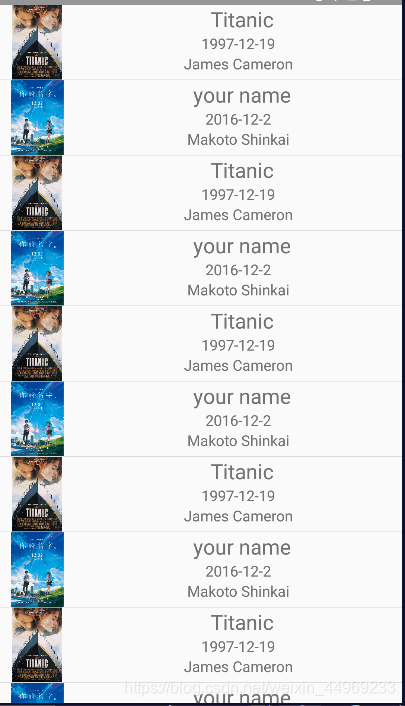
为了丰富一下效果又加了一个点击事件,可以根据列表中的名字跳转到对应的百度百科上面。运用的是webview。webview中需要用到的网址,是加在intent里传递过去的,又在webviewActivity中取出,然后加载,另外还有一种直接打开浏览器加载网址的方法都在上面的代码的注释中。
public class MovieWebActivity extends AppCompatActivity {


WebView webView;
    @Override
    protected void onCreate(Bundle savedInstanceState) {


        super.onCreate(savedInstanceState);
        setContentView(R.layout.activity_movie_web);
        webView=findViewById(R.id.web_view);
        String data=getIntent().getStringExtra("movie_url");
        webView.getSettings().setJavaScriptEnabled(true);
        webView.loadUrl(data);
    }

    @Override
    public boolean onKeyDown(int keyCode, KeyEvent event) {


        if (keyCode==KeyEvent.KEYCODE_BACK&webView.canGoBack()){


            webView.goBack();
            return true;
        }
        return super.onKeyDown(keyCode,event);
    }
}
重写了back键的用法,当能退出时一步一步的退。

至此第一个碎片界面也完成的差不多了。
你可能会发现我在很多布局中都是用android:fitsSystemWindows="true"这句代码,这是为了让标题栏实现半透明效果并不会挡住我们界面内容所必须要加的一句代码。
那么怎么实现标题栏半透明效果呢?
我采用的方法是创建value-19文件添加styles.xml文件在其中加入如下代码
<?xml version="1.0" encoding="utf-8"?>
<resources>

    <style name="AppTheme.Main" parent="AppTheme">
        <item name="android:windowTranslucentStatus">true</item>
    </style>

</resources>
而在原本的value的styles.xml中则加入了这段代码
    <style name="AppTheme.Main" parent="AppTheme">

    </style>
在配置文件将Theme改为AppTheme.Main,在此基础之上就可实现标题栏半透明。
说回android:fitsSystemWindows="true"这句代码,我查阅一些博客,大多数说是要将这段代码加在根布局中但是我试了一下,有些有用,但在一些复杂的布局中却没有用处甚至更改成了默认的灰色,而当我把这句代码加在设置颜色相关的控件中时,就能够成功显示。具体原因也还有深入了解。
最后为各个Activity之间的切换增加几个动画效果,显得更加丝滑一点。
同样在style中加入
<item name="android:windowAnimationStyle">@style/AnimationActivity</item>
然后继续完善在后面加入代码
    <style name="AnimationActivity" parent="@android:style/Animation.Activity">
        <!-- 打开Activity时,新进入的activity执行的动画-->
        <item name="android:activityOpenEnterAnimation">@anim/open_enter</item>
        <!-- 打开Activity时,原activity执行的动画-->
        <item name="android:activityOpenExitAnimation">@anim/open_exit</item>
        <!-- 打开Activity时,退出的activity执行的动画-->
        <item name="android:activityCloseExitAnimation">@anim/close_exit</item>
        <!-- 打开Activity时,重新显示activity执行的动画-->
        <item name="android:activityCloseEnterAnimation">@anim/close_enter</item>

    </style>
紧接着创建anim动画文件
完善这几个动画资源
open_enter
<?xml version="1.0" encoding="utf-8"?>
<set xmlns:android="http://schemas.android.com/apk/res/android">
  <translate
      android:fromXDelta="100%"
      android:toXDelta="0%"
      android:duration="500"
      />
</set>
open_exit
<?xml version="1.0" encoding="utf-8"?>
<set xmlns:android="http://schemas.android.com/apk/res/android">

    <scale android:fromXScale="1.0"
        android:fromYScale="1.0"
        android:toXScale="0.8"
        android:toYScale="0.8"
        android:pivotX="50%"
        android:pivotY="50%"
        android:duration="500"
        />
</set>
close_enter
<?xml version="1.0" encoding="utf-8"?>
<set xmlns:android="http://schemas.android.com/apk/res/android">

    <scale android:fromXScale="0.8"
        android:fromYScale="0.8"
        android:toXScale="1.0"
        android:toYScale="1.0"
        android:pivotX="50%"
        android:pivotY="50%"
        android:duration="500"
        />
</set>
close_exit
<?xml version="1.0" encoding="utf-8"?>
<set xmlns:android="http://schemas.android.com/apk/res/android">
    <translate
        android:fromXDelta="0%"
        android:toXDelta="100%"
        android:duration="500"
        />
</set>
在第二个碎片中,我打算加一个音乐相关的页面。
在第三个碎片中,随便在加一些自己元素在里面就行了。
因为音乐界面运用到的依然是写界面+一些简单逻辑然后在运用一些播放音频的api就行了,自己写的过于简单,后面打算模仿写一个看起来高逼格的音乐app。所以就不在展示相关代码了。

第三个界面还没想好怎么写。
ok,这样简单的项目,轻松完成了。