逆向工程之什么都不教就写APK系列 (ーー゛)
非常感谢网上各位大佬们的教程!!
真的全靠你们!!!!( •̥́ ˍ •̀ू )
这下要好好补课安卓开发啦~
看一下Lab2的考察点(真·全没学过)
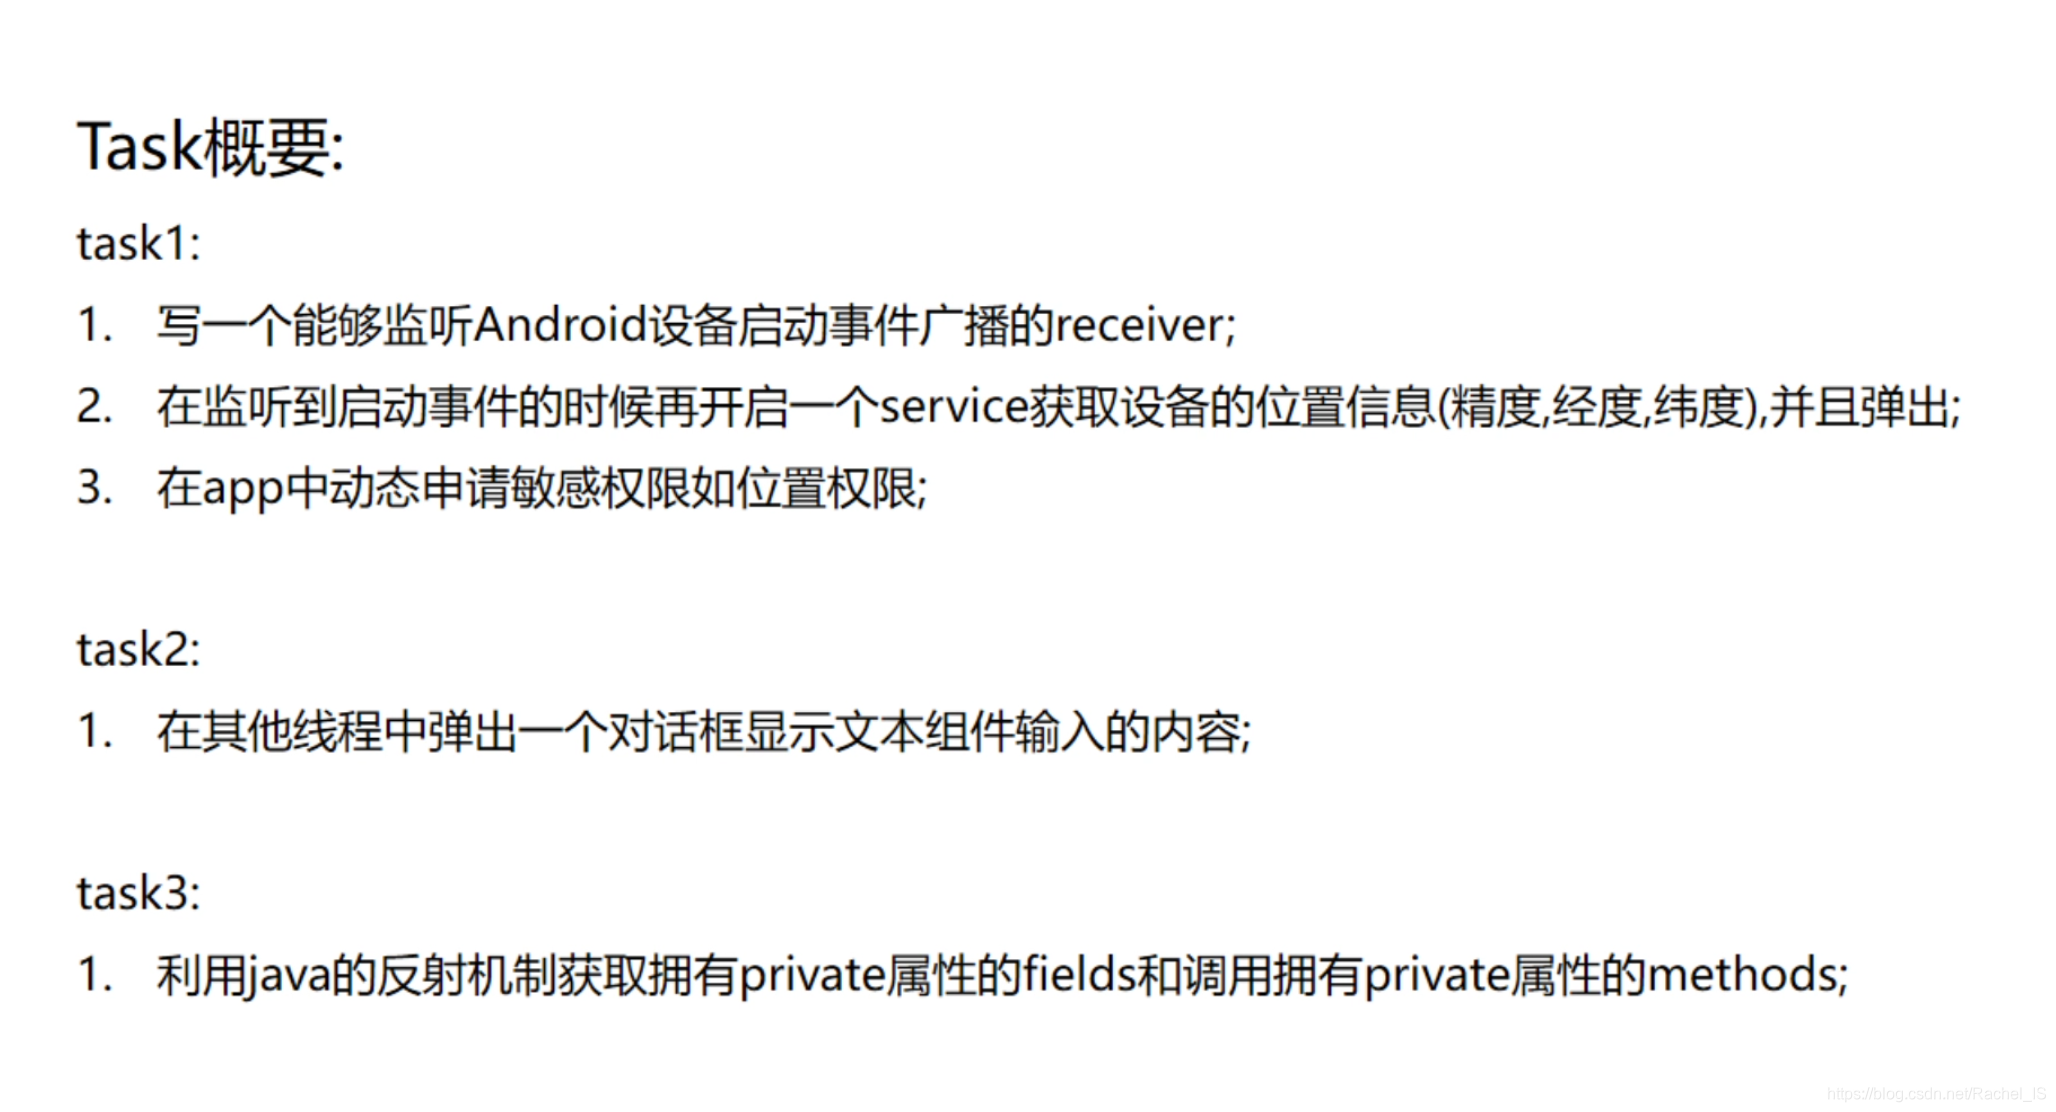
Task1
非常真实的卡在Task1
1.实现receiver,开机自启动并自动调用service
思路:写一个receiver,Manifest里注册接收开机广播
收到广播后,用intent去启动一个service
Manifest:
 <uses-permission android:name="android.permission.RECEIVE_BOOT_COMPLETED"/>
 <receiver android:name=".SecretBootReceiver"
                android:enabled="true"
                android:exported="true">
                <intent-filter android:priority="1000">
                <action android:name="android.intent.action.BOOT_COMPLETED"/>
                <category android:name="android.intent.category.HOME" />
            </intent-filter>
        </receiver>
receiver:
public class SecretBootReceiver extends BroadcastReceiver {


    static final String ACTION = "android.intent.action.BOOT_COMPLETED";
    @Override
    public void onReceive(Context context, Intent intent) {


        if (intent.getAction().equals(ACTION)){


            Intent service= new Intent(context,SecretService.class);
            service.addFlags(Intent.FLAG_ACTIVITY_NEW_TASK);
            Log.e("TAG","receiver");
            context.startService(service);
    }
}}
参考:(是我能找到的对小白最友好的了……)
开机自运行
https://www.cnblogs.com/Chenshuai7/p/5434868.html
启动service
https://www.cnblogs.com/guanxinjing/p/9861476.html
2.service里获取GPS定位,每三秒自动toast
完全盲写的感觉…
思路:在manifest里注册需要的权限,用LocationManager实现定位,用requestLocationUpdates实现每三秒重新获取,用toast输出
Manifest:
    <uses-permission android:name="android.permission.ACCESS_COARSE_LOCATION"/>
    <uses-permission android:name="android.permission.ACCESS_FINE_LOCATION"/>
    <uses-permission android:name="android.permission.INTERNET"/>
public class SecretService extends Service {


    private LocationManager locationManager;

    public void endService()
    {


        if(locationManager != null && locationListener != null)
        {


            locationManager.removeUpdates(locationListener);
        }
    }
    @Override
    public IBinder onBind(Intent intent) {


        return null;
    }


    @SuppressLint("MissingPermission")
    @Override
    public void onCreate() {


        super.onCreate();
        Log.e("TAG", "service");
        final LocationManager locationManager = (LocationManager) getSystemService(Context.LOCATION_SERVICE);
        LocationListener locationListener = new LocationListener() {


            public void onLocationChanged(Location location) {


                if (location != null) {


                    String latitude = Double.toString(location.getLatitude());//经度
                    String longitude = Double.toString(location.getLongitude());//纬度
                    String accuracy = Double.toString(location.getAccuracy());
                    Log.i("log", "Location changed : Lat: " + latitude + " Lng: " + longitude);
                    Toast.makeText(SecretService.this, "getAccuracy:" + accuracy + "\ngetLatitude:" + latitude + "\ngetLongitude:" + longitude, Toast.LENGTH_SHORT).show();
                } else {


                    Log.i("log", "Location changed : Lat: " + "NULL" + " Lng: " + "NULL");
                }

            }

            @Override
            public void onStatusChanged(String provider, int status, Bundle extras) {


            }

            @Override
            public void onProviderEnabled(String provider) {


            }

            @Override
            public void onProviderDisabled(String provider) {


            }
        };

        //实现每三秒重新获取
        locationManager.requestLocationUpdates(LocationManager.GPS_PROVIDER, 3000, 0, locationListener);

    }


    @Override
    public void onDestroy()
    {


        endService();
    }


    private final LocationListener locationListener = new LocationListener() {


        public void onLocationChanged(Location location) {


            if (location != null) {


                String latitude = Double.toString(location.getLatitude());
                String longitude = Double.toString(location.getLongitude());
                }
            }


        @Override
        public void onStatusChanged(String provider, int status, Bundle extras) {


        }

        @Override
        public void onProviderEnabled(String provider) {


        }

        @Override
        public void onProviderDisabled(String provider) {


        }
    };

};
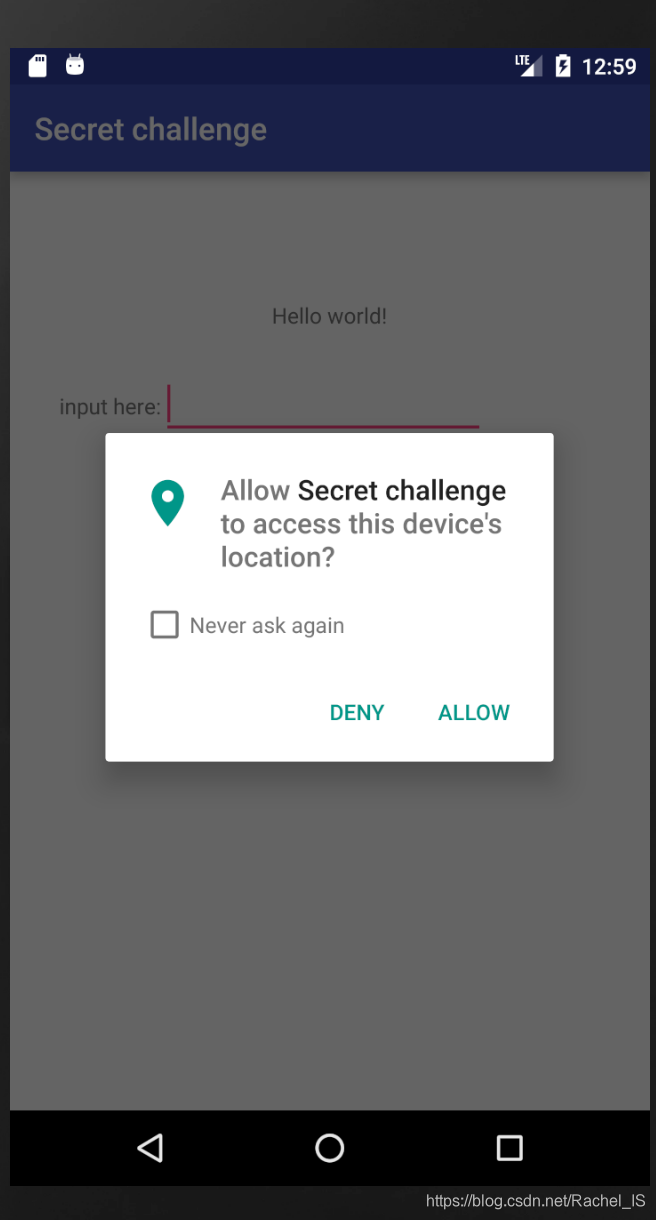
3.实现首次启动APP时动态获取权限
private String[] permissions ={

    Manifest.permission.ACCESS_COARSE_LOCATION,Manifest.permission.ACCESS_FINE_LOCATION,Manifest.permission.INTERNET};
 for (int i = 1; i < permissions.length; i++) {


            if (ContextCompat.checkSelfPermission(this, permissions[i]) != PackageManager.PERMISSION_GRANTED) {


                ActivityCompat.requestPermissions(this, permissions, i);
            } else {


                Intent intent = new Intent(MainActivity.this, MainActivity.class);
                startService(intent);
            }
参考:
https://blog.csdn.net/shen4402/article/details/78311124
获取权限
https://blog.csdn.net/ww897532167/article/details/70162678/
效果:
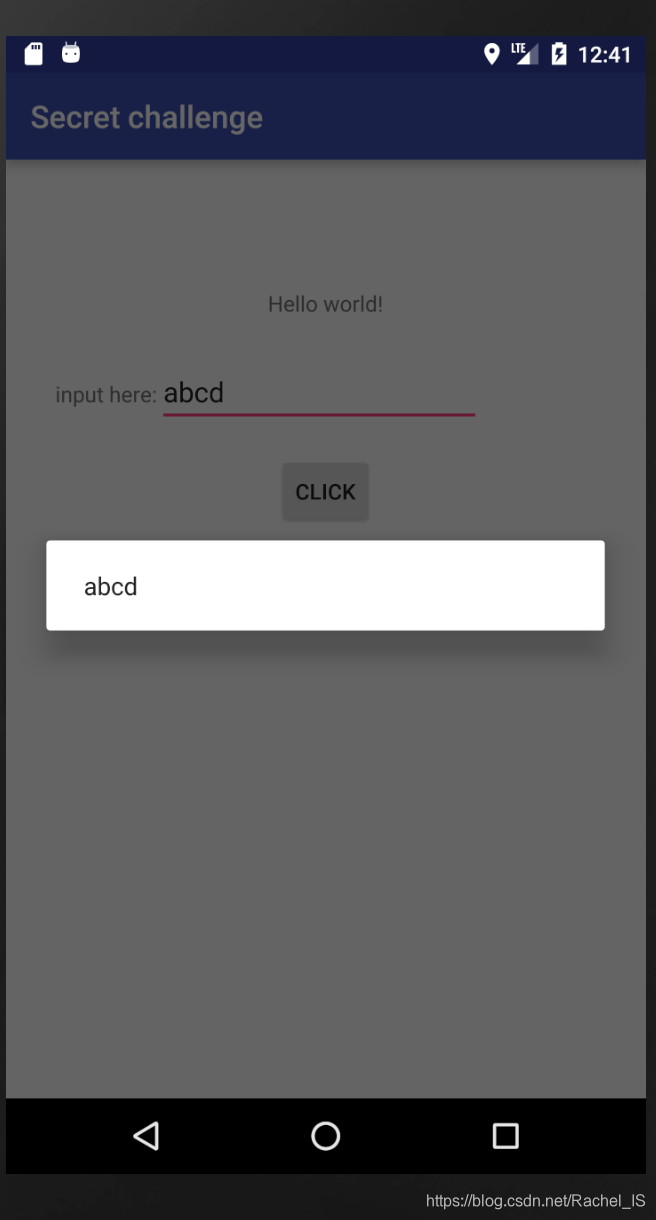
Task2
子线程修改UI的问题
emm一样盲写
new Thread(new Runnable() {


                        @Override
                        public void run() {


                            Looper.prepare();
                            Handler handler = new Handler(Looper.getMainLooper()) {


                                @Override
                                public void handleMessage(Message msg) {


                                    AlertDialog.Builder builder = new AlertDialog.Builder(MainActivity.this);
                                    builder.setMessage(input);
                                    builder.show();
                                }
                            };
                            handler.sendEmptyMessage(1);
                            Looper.loop();
                            tv.setText(input);
                            // Make a dialog rather than edit the text in main UI
                        }

                    }).start();
参考:
弹窗
https://www.cnblogs.com/javadongx/p/android_alert_message.html
子线程更新UI
https://blog.csdn.net/CVSDN/article/details/84879725
效果:
Task3
主要考察Java的反射机制,各位大佬写的教程都很容易懂
PoRELab.publicMethod(input);
                    PoRELab obj1 = new PoRELab();
                    try {


                        Class<?> clazz = obj1.getClass();
                        System.out.println(clazz);
                        PoRELab obj2 = (PoRELab) clazz.newInstance();
                        Field field = clazz.getDeclaredField("curStr");
                        field.setAccessible(true);
                        String got = (String) (field).get(obj2);
                        Method method = clazz.getDeclaredMethod("privateMethod", String.class, String.class);
                        method.setAccessible(true);
                        method.invoke(obj2, "get private method", got);
                    } catch (NoSuchFieldException | IllegalAccessException | NoSuchMethodException | InvocationTargetException | InstantiationException e) {


                        e.printStackTrace();
                    }
效果:

一度认为自己要扑街的Lab2做完了…后面的Lab会是什么样啊( •̥́ ˍ •̀ू )
总之!要好好补课安卓开发了!!!!B站走起!