1、准备工作
(1)安装nvidia驱动:ubuntu16搭建深度学习环境(一)——安装nvidia驱动
(2)安装cuda和cudnn:ubuntu16搭建深度学习环境(二)——安装cuda和cudnn
(3)安装Anaconda:ubuntu16安装Anaconda3
2、创建虚拟环境
首先添加镜像源:
conda config --add channels https://mirrors.tuna.tsinghua.edu.cn/anaconda/pkgs/free/
conda config --set show_channel_urls yes
再创建虚拟环境:
conda create -n pytorchgpu python=3.7  //pytorchgpu是自己设置的环境名字
conda activate pytorchgpu  //激活环境
3、安装pytorch
首先到pytorch官网https://pytorch.org/搜索对应版本,如下图所示。
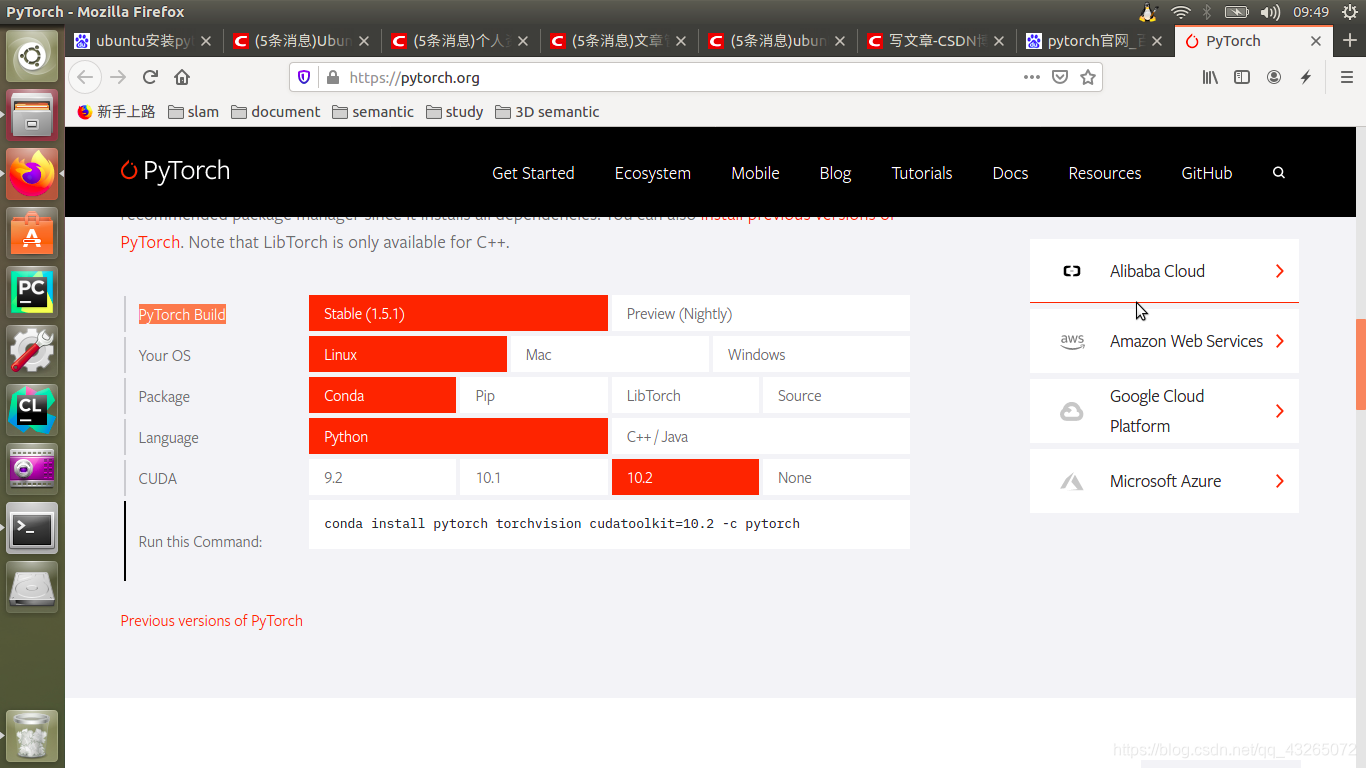 直接粘贴给出的命令即可。
4、验证pytorch下是否可用cuda和cudnn
在终端输入python,然后输入下面代码:
import torch
print(torch.cuda.is_available()) //返回True则已经安装了cuda
from torch.backends import cudnn
print(cudnn.is_available()) //返回True则已经安装了cudnn