文章目录
一、简介
本文是 Spring源码分析:Spring源码分析十一:@Aspect方式的AOP上篇 - @EnableAspectJAutoProxy 的衍生文章。主要是因为本人菜鸡,在分析源码的过程中还有一些其他的内容不理解,故开设衍生篇来完善内容以学习。
全集目录:Spring源码分析:全集整理
1. 简介
Aop 即面向切面编程,而 Aspect 是Aop 思想的一种实现。
并不是所有的AOP框架都相同,它们在连接点模型上可能有强弱之分,有些允许在字段修饰符级别的应用通知,有些只支持方法调用相关的连接点。需要注意的是 Spring 只支持方法级别的连接点。
Spring 提供了4种类型的AOP支持
- 基于代理的经典Spring Aop
- 纯Pojo切面
- @Aspect注解驱动的切面
- 注入式的Aspectj的切面
前三种都是Spring Aop 实现的变体,Spring Aop 构建在动态代理之上,因此Spring 对Aop的支持局限于方法拦截。
本文中会介绍 经典的的Aop使用(ProxyFactoryBean)和 @Aspect注解驱动的切面。
二者的区别个人理解在于:
AspectJ的代理模式:解析@Aspect注解的类,根据方法上的不同注解,来动态封装成Advisor (顾问),里面包含了方法对应的Advice 和指定的切点(这里的切点方法匹配是根据逻辑表达式来,而传统的SpringAop需要自己写判断逻辑,其实也可以写一个逻辑表达式判断,所以这里是一样的,只是实现方式的不同而已)
1. Spring Aop 和 AspectJ 的关系
AspectJ 是一套AOP框架,是对java语言语法和语义的扩展,所以他自己提供了一套关键字,这也就是说,如果在没有安装 AspectJ的情况下,是无法使用 AspectJ 的。这里需要注意的是,在 Spring框架中使用的 @Aspect 注解实现的 Aop 功能并不是上面所说的AspectJ 框架, 在Spring中使用 @Aspect 注解实现的AOP 功能,其底层实现还是 Spring Aop。
二、经典Spring Aop
1. 基本释义
经典的 Spring Aop 中有几个关键类

- Advisor : 顾问,顾问是Spring听提供的另一种切面。可以完成更为复杂的切面织入功能。PointcutAdvisor是顾问的一种,可以指定具体的切入点。顾问将通知进行了包装,会根据不同的通知
类型,在不同的时间点,将切面织入到不同的切入点。通知和顾问都是切面的实现方式增强点, 包含Advice和Pointcut。个人认为是 Spring AOP完成增强动作的最小单元。 - Advice : 通知,通知是Spring提供的一种切面(Aspect)。但是其功能过于简单,只能讲切面织入到目标类的所有目标方法中,无法完成讲切面织入到指定目标方法中。通知实际上使用具体的增强操作,即切面织入之后的实际操作。
- Pointcut :切点信息, 这个主要是用来确定切入点在那,即在那切入。
Advisor两个子接口PointcutAdvisor、IntroductionAdvisor :
IntroductionAdvisor与PointcutAdvisor 最本质上的区别就是,IntroductionAdvisor只能应用于类级别的拦截,只能使用Introduction型的Advice。而不能像PointcutAdvisor那样,可以使用任何类型的Pointcut,以及几乎任何类型的Advice。
PointCutAdvisor接口 比较常用的两个实现类
- 根据切入点(主业务方法)名称织入切面 :
NameMatchMethodPointCutAdvisor - 根据自定义的正则表达式织入切面 :
RegexpMethodPointoutAdvisor
2. 简单Demo
声明两个通知类型 。一个是 MethodBeforeAdvice ,一个是 AfterReturningAdvice、,见名知意,一个在方法执行前调用,一个在方法执行后调用
@Component
public class DemoAfterReturnAdvice implements AfterReturningAdvice {


    @Override
    public void afterReturning(Object returnValue, Method method, Object[] args, Object target) throws Throwable {


        System.out.println("DemoAfterReturnAdvice.afterReturning");
    }
}
@Component
public class DemoBeforeAdvice implements MethodBeforeAdvice {


    @Override
    public void before(Method method, Object[] args, Object target) throws Throwable {


        System.out.println("DemoBeforeAdvice.before");
    }
}
被代理的目标类 DemoController
public class DemoController {


    public void hello(String msg) {


        System.out.println("hello " + msg);
    }
}
配置了中将代理对象注入,这里可以看到注入的是ProxyFactoryBean 。我们知道FactoryBean会将 getObject 方法的返回值作为结果注入到Spring容器中。这里不难猜测,ProxyFactoryBean 的getObject 方法中必定做了代理。(FactoryBean 的内容请参考:Spring 源码分析衍生篇一:FactoryBean介绍)
@Configuration
public class AopConfig {


    @Bean("demoController")
    public ProxyFactoryBean proxyFactoryBean() {


        ProxyFactoryBean proxyFactoryBean = new ProxyFactoryBean();
        // 设置代理的目标类
        proxyFactoryBean.setTarget(new DemoController());
        // 设置通知拦截器
        proxyFactoryBean.setInterceptorNames("demoAfterReturnAdvice", "demoBeforeAdvice");
        return proxyFactoryBean;
    }
}
我们来调用试试
@SpringBootApplication
public class AopDemoApplication {


    public static void main(String[] args) {


        ConfigurableApplicationContext run = SpringApplication.run(AopDemoApplication.class, args);
        DemoController demoController = (DemoController) run.getBean("demoController");
        demoController.hello("123");
    }
}
输出结果如下:
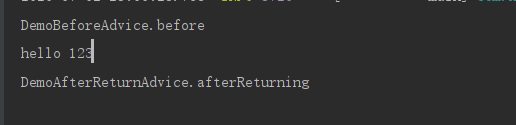
综上:可以看到 经典Spring AOP 起了作用。
核心逻辑就是在 ProxyFactoryBean 中的getObject方法中。
	@Override
	@Nullable
	public Object getObject() throws BeansException {


		// 初始化连接器链路
		initializeAdvisorChain();
		if (isSingleton()) {


			// 获取代理类
			return getSingletonInstance();
		}
		else {


			if (this.targetName == null) {


				logger.info("Using non-singleton proxies with singleton targets is often undesirable. " +
						"Enable prototype proxies by setting the 'targetName' property.");
			}
			return newPrototypeInstance();
		}
	}
1.在getObject时会调用 initializeAdvisorChain() 根据InterceptorNames来初始化拦截器。
2.将拦截器包装成Advisor。(目前看来, Spring AOP一个增强功能最基本的实现单元就是Advisor)
3. 将Advisor保存到this.advisors 集合中
4. newPrototypeInstance();创建代理对象。这里的创建逻辑和@Aspect注解的AOP 实现逻辑基本相同(毕竟@Aspect使用的就是Spring AOP实现的)
5.根据某些条件选择cglib(CglibAopProxy)或者jdk(JdkDynamicAopProxy)代理方式。
关于详细的代码解读,后续会有文章进行解读。
三、@Aspect注解驱动的切面
1. 基本释义
- 切面(Aspect) :官方的抽象定义为“一个关注点的模块化,这个关注点可能会横切多个对象”。
- 连接点(Joinpoint) :程序执行过程中的某一行为。
- 通知(Advice) :“切面”对于某个“连接点”所产生的动作。
- 切入点(Pointcut) :匹配连接点的断言,在AOP中通知和一个切入点表达式关联。
- 目标对象(Target Object) :被一个或者多个切面所通知的对象。
- AOP代理(AOP Proxy) 在Spring AOP中有两种代理方式,JDK动态代理和CGLIB代理。
1.1 定义切点
Spring 借助 AspectJ 的切点表达式语言来定义 Spring 切面
下面是用来定义切点的的描述符
| AspectJ指示器 | 描述 |
|---|---|
| arg() | 限制连接点匹配参数为指定类型的执行方法 |
| @args() | 限制连接点匹配参数由指定注解标注的执行方法 |
| execution() | 用于匹配是连接点的执行方法 |
| this() | 限制连接点匹配 AOP代理的bean引用为指定类型的类 |
| target | 限制连接点匹配的目标对象为指定类型的类 |
| @target() | 限制连接点匹配特定的执行对象,这些对象对应的类要具有指定类型的注解 |
| within() | 限制连接点匹配指定的类型 |
| @within() | 限制连接匹配指定注解所标注的类型(当使用 Spring Aop 时,方法定义在由指定的注解所标注的类里) |
| @annotation | 限定匹配带有指定注解的连接点 |
| bean() | 限定 bean 的id |
上述指示器中,只有 execution() 指示器是实际匹配执行的,其余都是限制匹配的。
execution (* com.kingfish.AopTest.test(..) && within(com.kingfish.AopTest.*))
其中,使用execution () 执行器,选择了 com.kingfish.AopTest.test() 作为切点, * 代表这个方法可以返回任意类型。 .. 代表 这个方法可以使用任意参数。&& 代表与,也可以使用 and(与之类似的还有 || 代表或(or)、!代表非( not )。注意在xml配置中因为 & 具有其他含义,所以可以使用and代替&&) ,within() 代表 连接的一个操作。 within(com.kingfish.AopTest.*) 代表 com.kingfish.AopTest 类 的任意方法被调用。即这个切点的整个意义是, com.kingfish.AopTest.test方法被调用(这个方法可以传递任意参数,也可返回任意类型的返回值) 并且 com.kingfish.AopTest的任意方法被调用。
execution (* com.kingfish.AopTest.test(..) && bean('aop'))
这个切点的整个意义是, com.kingfish.AopTest.test方法被调用(这个方法可以传递任意参数,也可返回任意类型的返回值)但限定bean的Id为 aop。
1.2 定义切面
Spring 使用 AspectJ 注解来声明通知方法
| 注解 | 通知 |
|---|---|
| @After | 通知方法会在目标方法返回或抛出异常后调用 |
| @AfterReturning | 通知方法会在目标方法返回后调用 |
| @AfterThrowing | 通知方法会在目标方法抛出异常后调用 |
| @Around | 通知方法会将目标方法封装起来,环绕通知方式(后续实例中讲解) |
| @Before | 通知方法会在目标方法调用之前执行 |
2. 代码实践
上面说的很混乱,如果没有代码对没有接触的过的人不好理解,这里通过代码来进行进一步的分析.
1. 引入依赖
        <dependency>
            <groupId>org.aspectj</groupId>
            <artifactId>aspectjweaver</artifactId>
            <version>1.8.5</version>
        </dependency>

        <dependency>
            <groupId>org.aspectj</groupId>
            <artifactId>aspectjrt</artifactId>
            <version>1.8.9</version>
        </dependency>
2. 编写切面类并定义切点
@Slf4j
@Component
@Aspect
public class AopDemo {


    @Pointcut("execution(* com.kingfish.aopdemo.controller.AopController.hello(String)) && args(msg)")
    public void pointCut(String msg) {


        System.out.println("AopDemo.pointCut : msg = " + msg);
    }

    @Before("pointCut(msg)")
   // @Before("execution(* com.kingfish.aopdemo.controller.AopController.hello(String)) && args(msg)")  若不使用 @Pointcut 注解,则需要每个方法上都这样写。
    public void before(String msg) {


        System.out.println("before msg = " + msg);
    }

    @AfterReturning("pointCut(msg)")
    public void afterReturning(String msg) {


        System.out.println("afterReturning msg = " + msg);
    }

    @AfterThrowing("pointCut(msg)")
    public void afterThrowing(String msg) {


        System.out.println("afterThrowing msg = " + msg);
    }

    @After("pointCut(msg)")
    public void after(String msg) {


        System.out.println("after msg = " + msg);
    }
}
这个代码有几个注意点如下:
- @Pointcut 注解能够在一个 @Aspect切面内定义一个可重用的注解。他的重要性注释中已经写了。
- pointCut(String msg) 本身的方法内容并不重要,其实他应该是空的,仅仅是提供一个标识,供 @Pointcut 注解依附。
- 其中
execution(* com.kingfish.aopdemo.controller.AopController.hello(String)) && args(msg)的意义是,声明一个切点,在执行 com.kingfish.aopdemo.controller.AopController.hello 方法时,返回值不限,但是参数 msg必须是 String 类型
3. 开启 AspectJ 代理
@SpringBootApplication
@EnableAspectJAutoProxy(proxyTargetClass = true)		// 添加此注解开启自动代理,其实只要引入依赖就会自动添加该注解,这里为了更清晰的看到
public class AopDemoApplication {


    public static void main(String[] args) {


        SpringApplication.run(AopDemoApplication.class, args);
    }
}
- @EnableAspectJAutoProxy(proxyTargetClass = true) 不开启的话是无法使用切面的,注解不会得到解析,也不会将其转化为切面的代理。
4. 编写测试代码
@RestController
@RequestMapping("aop")
public class AopController {


    @RequestMapping("hello")
    public String hello(String msg){


        return "hello ," + msg;
    }
}
5. 运行结果如下

6. 环绕通知的使用
在上面的Demo基础上,我们来看看环绕通知的使用。我们需要继续编写 AopDemo类。仅需在 AopDemo 中添加如下方法
    @Around("pointCut(msg)")
    // msg 不需要可以不接收
    public void around(ProceedingJoinPoint joinPoint, String msg){


        System.out.println("around msg = " + msg);
        try {


            System.out.println("around before");
            joinPoint.proceed();    // 放行切点的方法,不放行则会阻塞调用
            System.out.println("around after");
        } catch (Throwable throwable) {


            throwable.printStackTrace();
            System.out.println("around throwable");
        }
    }
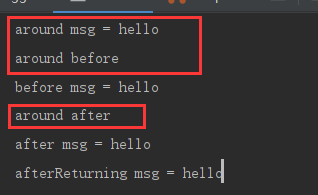
测试结果可以看到如下。
3. 权限拦截Demo
上面的Demo比较简单,这里写一个权限校验的Demo,能更好的体现出 Aop的功能。
1. 自定义校验注解。带有此注解的方法会被拦截。
@Target(ElementType.METHOD)
@Retention(RetentionPolicy.RUNTIME)
@Documented
public @interface AuthAnnotation {


    // 是否需要校验,默认需要
    boolean verify() default true;
}
2. 编写切面切点
这里只是写了一个很简单的校验token是否为空
@Slf4j
@Component
@Aspect
public class AopDemo {


    @Autowired
    private HttpServletRequest httpServletRequest;

	// 指定切点是 AuthAnnotation 注解
    @Pointcut("@annotation(com.kingfish.aopdemo.annotation.AuthAnnotation)")
    public void auth() {


    }

	// 这里写的环绕通知
    @Around("auth()")
    public Object around(ProceedingJoinPoint joinPoint) {


        try {


            MethodSignature signature = (MethodSignature) joinPoint.getSignature(); // 获取切点的署名
            Method method = signature.getMethod();  // 拦截的方法
            AuthAnnotation annotation = method.getAnnotation(AuthAnnotation.class);
            if (annotation != null && annotation.verify()) {


                String token = httpServletRequest.getHeader("token");
                if (StringUtils.isEmpty(token)) {


                    throw new RuntimeException("token 为空");
                }
            }
          return joinPoint.proceed();    // 放行切点的方法,不放行则会阻塞调用
        } catch (Throwable throwable) {


            throwable.printStackTrace();
            throw new RuntimeException(throwable);
        }
    }
}
3. 实际使用就可以直接在需要校验的方法上加上注解即可
    @RequestMapping("verifyHello")
    @AuthAnnotation
    public String verifyHello(String msg){


        return "hello ," + msg;
    }
四、其他
1. MethodInterceptor和HandlerInterceptor区别:
-
HandlerInterceptor:是Springmvc提供的拦截器,这种拦截器的生效时机实在DispatcherServlet分发请求时生效。并非是依赖于SpringAOP功能。正因如此,是只能拦截Controller层的方法请求。使用时需要重写WebMvcConfigurerAdapter addInterceptors方法,来添加指定的拦截器。 -
org.springframework.cglib.proxy.MethodInterceptor:这个是 Cglib 进行代理时所使用的拦截器。 -
org.aopalliance.intercept.MethodInterceptor:就是利用Spring AOP生成的拦截器。所以实际上MethodInterceptor的实现也就是Spring Aop的实现,和之前写的ProxyFactoryBean的用法相同,可以拦截所有层面的方法。其实现也继承了 Advice 接口,结构如下
**以上:内容部分参考
《Spring实战》
《Spring源码深度解析》
https://www.cnblogs.com/cheng21553516/p/12190008.html
https://blog.csdn.net/wyl6019/article/details/80136000
https://blog.csdn.net/f641385712/article/details/89303088
https://blog.csdn.net/qq_31179577/article/details/101054765
https://www.cnblogs.com/lovelands/articles/9890368.html
https://blog.csdn.net/qq.21050291/article/details/72523138
如有侵扰,联系删除。 内容仅用于自我记录学习使用。如有错误,欢迎指正**