文章目录
一、什么是 Sentinel
随着微服务的流行,服务和服务之间的稳定性变得越来越重要。Sentinel 以流量为切入点,从流量控制、熔断降级、系统负载保护等多个维度保护服务的稳定性。
Sentinel 的特征
- 丰富的应用场景: Sentinel 承接了阿里巴巴近 10 年的双十一大促流量的核心场景,例如秒杀(即突发流量控制在系统容量可以承受的范围)、消息削峰填谷(对于突然到来的大量请求,您可以配置流控规则,以稳定的速度逐步处理这些请求,从而避免流量突刺造成系统负载过高)、集群流量控制、实时熔断下游不可用应用等
- 完备的实时监控: Sentinel 同时提供实时的监控功能。您可以在控制台中看到接入应用的单台机器秒级数据,甚至 500 台以下规模的集群的汇总运行情况
- 广泛的开源生态: Sentinel 提供开箱即用的与其它开源框架 / 库的整合模块,例如与 Spring Cloud、Dubbo、gRPC 的整合。您只需要引入相应的依赖并进行简单的配置即可快速地接入 Sentinel
- 完善的 SPI 扩展点: Sentinel 提供简单易用、完善的 SPI 扩展接口。您可以通过实现扩展接口来快速地定制逻辑。例如定制规则管理、适配动态数据源等
Sentinel 的组成
- 核心库(Java 客户端): 不依赖任何框架 / 库,能够运行于所有 Java 运行时环境,同时对 Dubbo / Spring Cloud 等框架也有较好的支持
- 控制台(Dashboard): 基于 Spring Boot 开发,打包后可以直接运行,不需要额外的 Tomcat 等应用容器
二、Sentinel入门
本地应用创建
- 整体流程分析
- 创建
SpringBoot项目- 在
pom.xml中引入sentinel-core依赖- 创建
TestController,定义使用限流规则- 运行测试
-
创建
SpringBoot项目,命名为sentinel-quick-start -
在
pom.xml中引入sentinel-core依赖<dependency> <groupId>com.alibaba.csp</groupId> <artifactId>sentinel-core</artifactId> <version>1.8.0</version> </dependency> -
编写
TestController@RestController public class TestController { @GetMapping("/hello") public String hello(){ try(Entry entry = SphU.entry("Hello")) { return "Hello Sentinel"; } catch (Exception e) { e.printStackTrace(); } return "系统繁忙,请稍后"; } /** 定义限流规则 * @PostConstruct 此注解的含义是:本类构造方法执行结束后执行 */ @PostConstruct public void init(){ //1.创建存放限流规则的集合 List<FlowRule> rules = new ArrayList<>(); //2.创建限流规则 FlowRule rule = new FlowRule(); //定义资源,表示Sentinel会对哪个资源生效 rule.setResource("Hello"); //定义限流的类型(此处使用QPS作为限流类型) rule.setGrade(RuleConstant.FLOW_GRADE_QPS); //定义QPS每秒通过的请求数 rule.setCount(2); //3.将限流规则存放到集合中 rules.add(rule); //4.加载限流规则 FlowRuleManager.loadRules(rules); } } -
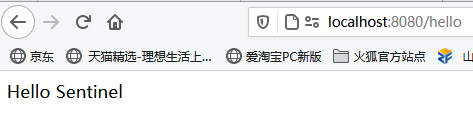
运行测试
正常访问时
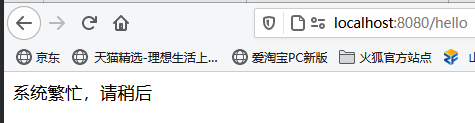
当快速刷新,使
QPS大于2时

搭建Sentinel控制台
-
首先下载Sentinel控制台
https://github.com/alibaba/Sentinel/releases
-
启动Sentinel
注意:启动 Sentinel 控制台需要 JDK 版本为 1.8 及以上版本
# 在与jar包相同的文件夹下新建一个start.bat
java -Dserver.port=8080 -Dcsp.sentinel.dashboard.server=localhost:8718 -Dproject.name=sentinel-dashboard -jar sentinel-dashboard.jar
其中
-Dserver.port=8080用于指定 Sentinel 控制台端口为8718注意: 从 Sentinel 1.6.0 起,Sentinel 控制台引入基本的 登录 功能,默认用户名和密码都是 sentinel
本地应用接入控制台
-
在本地应用的
pom.xml文件中引入依赖<!-- Sentinel本地应用接入控制台 --> <dependency> <groupId>com.alibaba.csp</groupId> <artifactId>sentinel-transport-simple-http</artifactId> <version>1.8.0</version> </dependency> -
在本地应用添加JVM启动参数
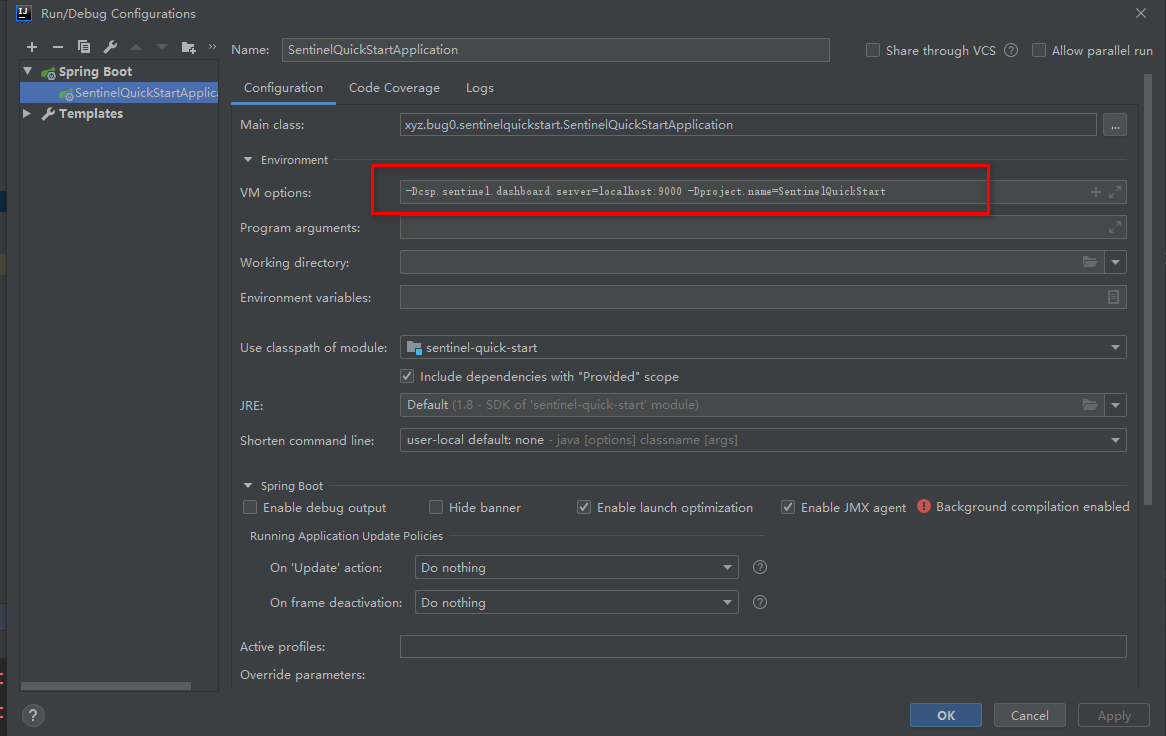
-Dcsp.sentinel.dashboard.server=localhost:9000 Sentinel控制台的地址和端口号 -Dproject.name=SentinelQuickStart 本地应用在控制台中的名称 -
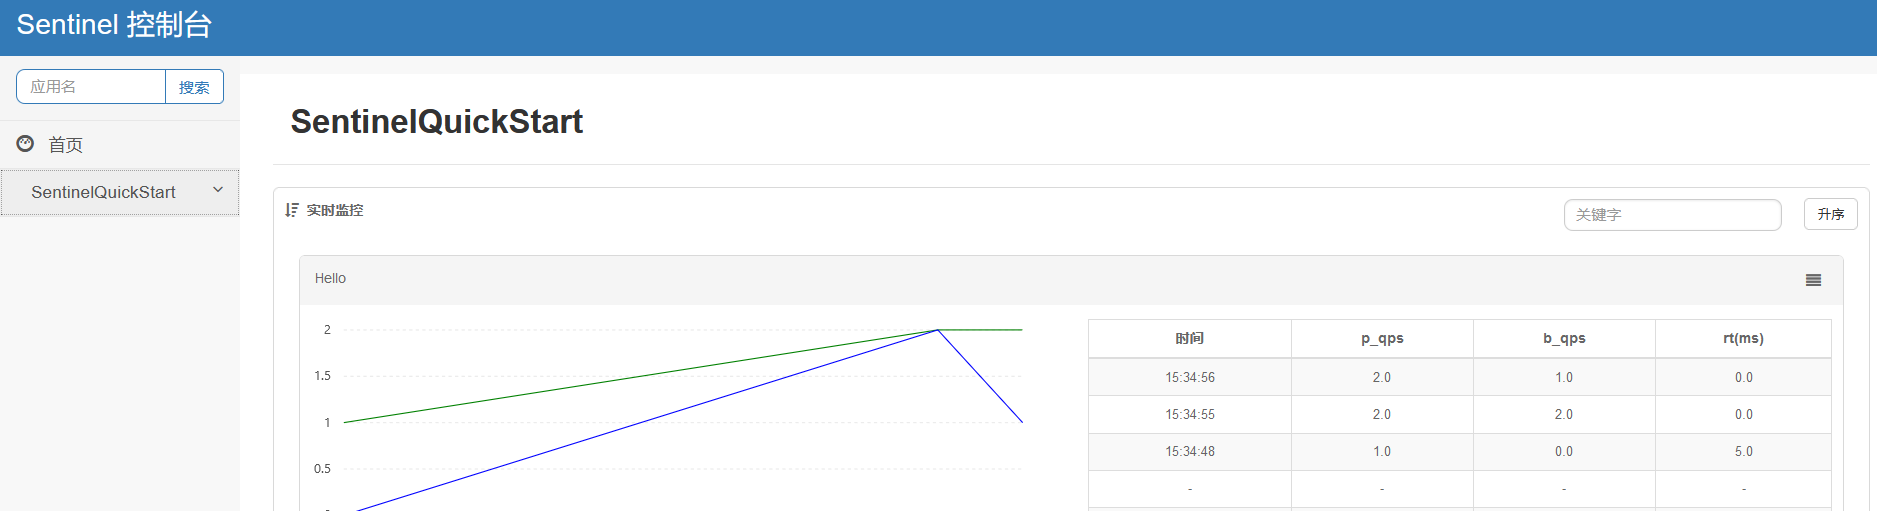
运行测试
第一次查看控制台需要先访问一次被限流控制的接口,否则控制台中没有东西
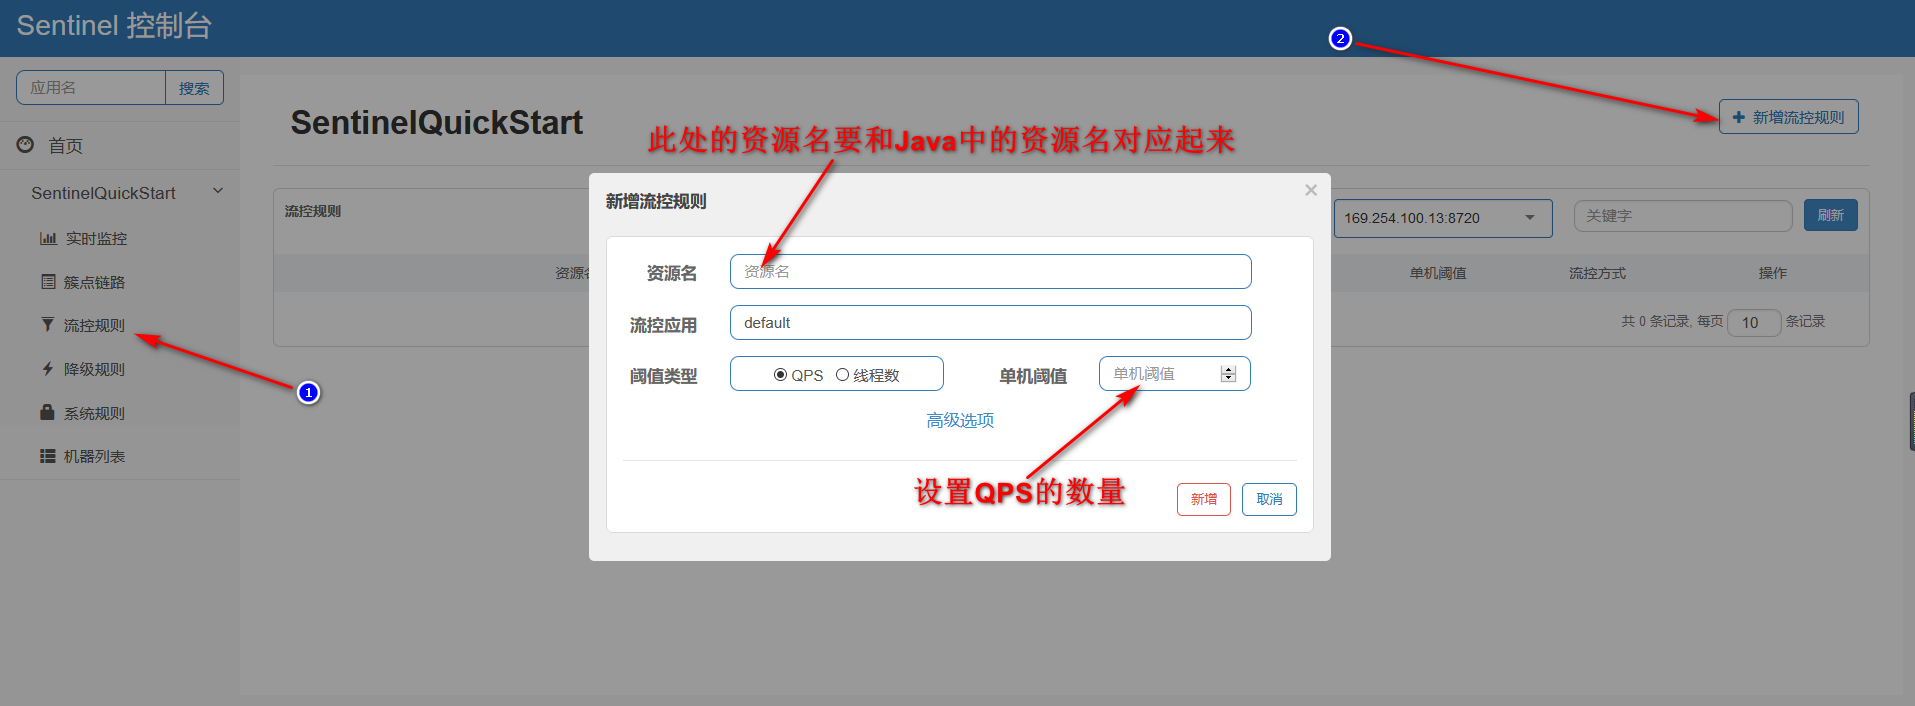
在控制台中设置限流规则
Sentinel提供了两种设置流控规则的方式
在应用中使用代码编写流控规则(不推荐)
在
Sentinel控制台中设置流控规则
Sentinel定义资源的方式
- 抛出异常的方式定义资源
- 返回布尔值的方式定义资源
- 异步调用支持
- 注解方式定义资源
- 主流框架的默认适配
抛出异常的方式定义资源
使用这种方式当资源发生限流后会抛出
BlockException。这个时候可以捕获异常,进行限流之后的逻辑处理,关键代码如下:
        try(Entry entry = SphU.entry("Hello")) {


            return "Hello Sentinel";  //被保护的资源
        } catch (Exception e) {


            e.printStackTrace();
        }
        return "系统繁忙,请稍后";
返回布尔值的方式定义资源
使用的API为
SphO,限流后返回的值为boolean类型注意:
SphO.entry必须和SphO.exit成对出现 否则会报错
   @GetMapping("/boolean")
    public boolean returnBoolean(){


        if (SphO.entry("Sentinel-boolean")){


            try {


                System.out.println("Hello Sentinel");
                return true;
            }finally {


                SphO.exit();//限流的出口
            }
        }else {


            //限流后进行的操作
            System.out.println("系统繁忙,请稍后再试");
            return false;
        }
    }
异步调用的支持
-
在本地引导类中添加
EnableAsync,表示SpringBoot项目开启异步调用支持@SpringBootApplication @EnableAsync public class SentinelQuickStartApplication { public static void main(String[] args) { SpringApplication.run(SentinelQuickStartApplication.class, args); } } -
创建
AsyncService编写异步调用的方法@Service public class AsyncService { //Async表示方法为异步调用 @Async public void hello(){ System.out.println("异步调用开始======"); try { Thread.sleep(5000); } catch (InterruptedException e) { e.printStackTrace(); } System.out.println("异步调用结束====="); } } -
编写
Controller@Autowired private AsyncService asyncService; @GetMapping("/async") public void async(){ //1.进行限流控制 AsyncEntry asyncEntry = null; try { asyncEntry = SphU.asyncEntry("Sentinel_Async"); //限流入口 asyncService.hello(); //异步调用方法 System.out.println("异步测试"); } catch (BlockException e) { e.printStackTrace(); System.out.println("系统繁忙请稍后再试"); } finally { if (asyncEntry != null){ asyncEntry.exit(); //限流出口 } } }
注解方式定义资源
Sentinel支持通过@SentinelResource定义资源并配置blockHandler函数来进行限流之后的处理。
-
在
pom.xml中引入依赖<dependency> <groupId>com.alibaba.csp</groupId> <artifactId>sentinel-annotation-aspectj</artifactId> <version>1.8.0</version> </dependency> -
创建
AspectJ的配置类@Configuration public class SentinelAspectConfiguration { @Bean public SentinelResourceAspect sentinelResourceAspect(){ return new SentinelResourceAspect(); } } -
创建
Controller// value代表资源名称 blockHandler:设置限流或降级处理的类 @SentinelResource(value = "Sentinel_Ann",blockHandler = "exceptionHandler") @GetMapping("/ann") public String ann(){ //使用限流规则 return "Hello Sentinel"; } public String exceptionHandler(BlockException e){ e.printStackTrace(); return "系统繁忙请稍后再试"; }
三、Sentinel高级
Spring Cloud 整合 Sentinel
具体步骤
-
创建
SpringBoot项目,在项目中引入spring-cloud-starter-alibaba-sentinel依赖<dependency> <groupId>com.alibaba.cloud</groupId> <artifactId>spring-cloud-starter-alibaba-sentinel</artifactId> <version>2.2.3.RELEASE</version> </dependency> -
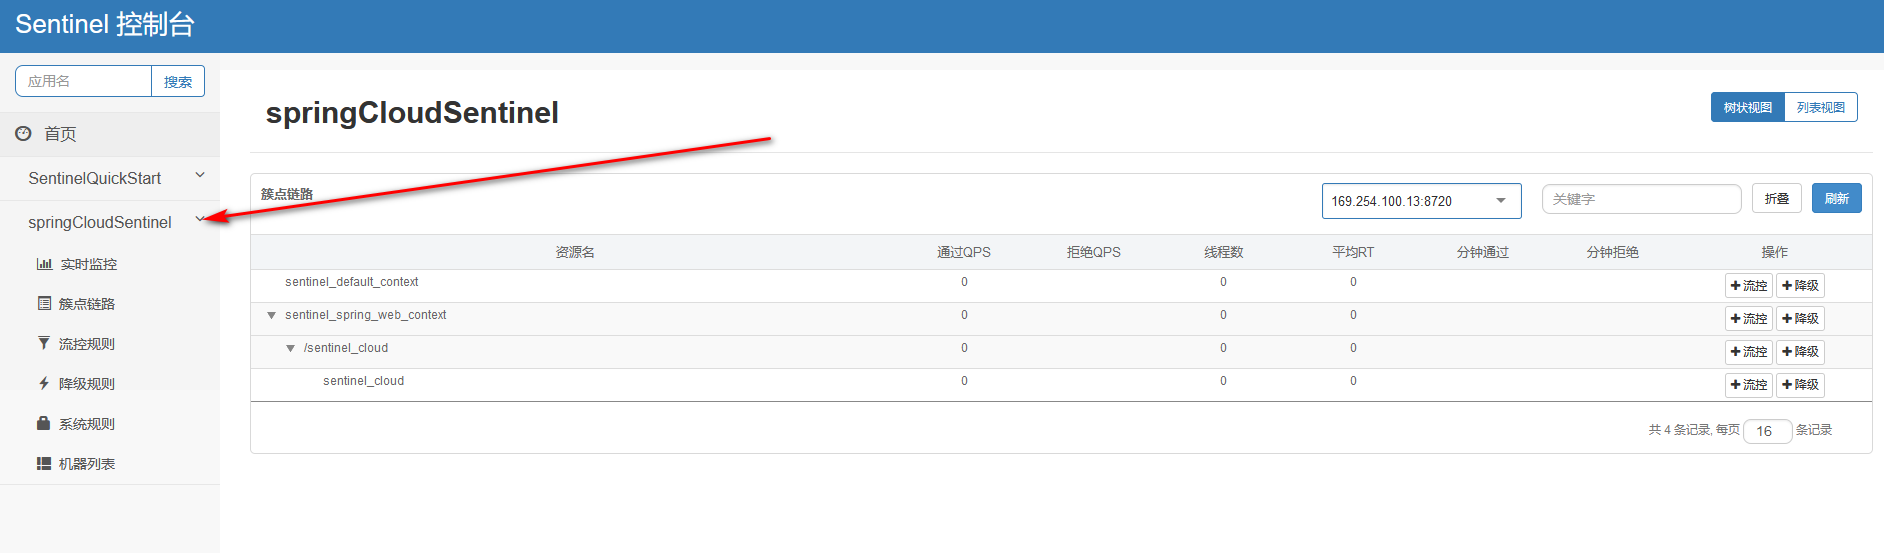
在项目中创建
Test2Controller@RestController public class Test2Controller { @SentinelResource(value = "sentinel_cloud",blockHandler = "exceptionHandler") @GetMapping("/sentinel_cloud") public String ann(){ //使用限流规则 return "Hello Sentinel"; } public String exceptionHandler(BlockException e){ e.printStackTrace(); return "系统繁忙请稍后再试"; } } -
在
application.yaml中加入以下配置# 设置应用的名称 spring: application: name: springCloudSentinel cloud: sentinel: transport: dashboard: localhost:8718 #设置Sentinel控制台的主机地址和端口号 -
测试
Sentinel整合Feign
Sentinel适配了Feign组件。如果想要使用,除了引用spring-cloud-starter-alibaba-sentinel的依赖,还需要两个步骤:
- 配置打开
Sentinel对Feign的支持:feign.sentinel.enable=true - 加入
spring-cloud-starter-openfeign依赖使Sentinel starter自动化配置类生效
这里配置中心使用的为
Nacos,项目结构如下图所示
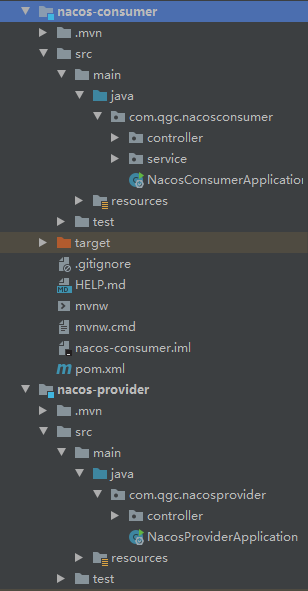
consumer模块中的类:
Controller
@RestController
public class ConsumerController {


    @Resource
    private ConsumerService consumerService;

    @GetMapping("/sayHello")
    public String getHello(){


        return consumerService.getHello();
    }
}
Service
@FeignClient(value = "nacos-provider", fallback = ConsumerServiceImpl.class)
public interface ConsumerService {


    @GetMapping("/sayHello")
    String getHello();
}
@Service
public class ConsumerServiceImpl implements ConsumerService {
@Override
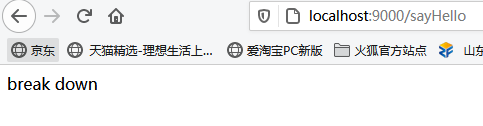
public String getHello() {
return "break down";
}
}
application.yaml
server:
  port: 9000

spring:
  application:
    name: nacos-consumer
  cloud:
    nacos:
      discovery:
        # 服务注册地址
        server-addr: 127.0.0.1:8848
        # 熔断限流
    sentinel:
      transport:
        # 控制台地址
        dashboard: localhost:8718
#开启feign
feign:
  sentinel:
    enabled: true
启动类:
@SpringBootApplication
//使用注册中心
@EnableDiscoveryClient
//获取注册中心的接口
@EnableFeignClients
public class NacosConsumerApplication {


    public static void main(String[] args) {


        SpringApplication.run(NacosConsumerApplication.class, args);
    }

}
provider模块中的类:
@RestController
public class ProviderController {


    @Autowired
    private ConfigurableApplicationContext configurableApplicationContext;

    @GetMapping("/sayHello")
    public String sayHello(){


        return "Hello provider ";
    }

    @GetMapping("/sayHi")
    public String sayHi(){


        String name = configurableApplicationContext.getEnvironment().getProperty("name");
        return "Hi provider " + name;
    }
}
application.yaml
server:
  port: 9002

spring:
  application:
    name: nacos-provider
  cloud:
    nacos:
      discovery:
        # 服务注册地址
        server-addr: 127.0.0.1:8848
      config:
        # 配置中心地址
        server-addr: 127.0.0.1:8848
启动类:
@SpringBootApplication
@EnableDiscoveryClient
public class NacosProviderApplication {


    public static void main(String[] args) {


        SpringApplication.run(NacosProviderApplication.class, args);
    }
}
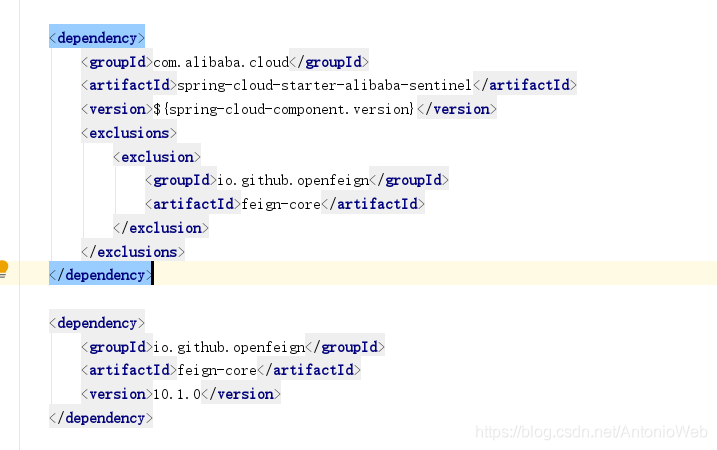
注意:如果发生错误
NoSuchMethodErrorfeign.RequestTemplate.path()Ljava / lang / String;
我遇到的情况是因为版本不匹配造成的
spring-cloud-starter-alibaba-sentinel 2.1.0.RELEASE,但其中的feign-core是9.5.0,这里面的RequestTemplate类却没有path方法,造成异常。
解决办法:
添加流量规则
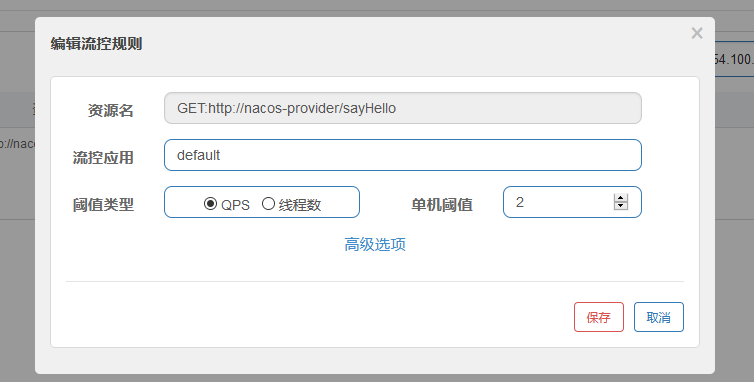
注意此处的资源名格式为:
http请求方式:协议://服务名/请求路径和参数
测试结果
正常情况下:

QPS超过两次
Sentinel整合Spring Cloud gateway
-
在gateway的
pom.xml中引入依赖<dependency> <groupId>com.alibaba.cloud</groupId> <artifactId>spring-cloud-starter-alibaba-sentinel</artifactId> <version>2.2.3.RELEASE</version> </dependency> <dependency> <groupId>com.alibaba.cloud</groupId> <artifactId>spring-cloud-alibaba-sentinel-gateway</artifactId> <version>2.2.3.RELEASE</version> </dependency> -
创建
GatewayConfiguration配置类,配置流控降级回调操作@Component public class GatewayConfiguration { @PostConstruct public void doInit(){ //设置限流或降级的回调函数 GatewayCallbackManager.setBlockHandler(new BlockRequestHandler() { @Override public Mono<ServerResponse> handleRequest(ServerWebExchange serverWebExchange, java.lang.Throwable throwable) { return ServerResponse.status(200).syncBody("系统繁忙请稍后"); } }); } } -
在
application.yaml中配置sentinel控制台访问地址spring: cloud: sentinel: transport: port: 8718 dashboard: 127.0.0.1:8080 -
启动项目,在
Sentinel控制台中添加关于资源的控制规则,sentinel在适配spring cloud gateway时提供了两种配置规则route维度:即在spring配置文件配置的路由条数,资源名为对应的routeId- 自定义API维度:用户可以利用
Sentinel提供的API来自定义一些自定义分组
route维度:
<>/