依赖注入的3种方式
1.set注入:通过setXxx()赋值依赖注入底层是通过反射实现的
<property…>spring使用构造函数注入时必须要有默认构造函数
2.构造器注入:通过构造方法赋值
- < constructor-arg value="" name=""></ constructor>
- < constructor-arg value="" >< /constructor> 按照构造器的顺序来赋值
- < /constructor> 按照index的序号注入
- 按照输入的数据类型注入
3.p命名空间注入
引入p命名空间(如果编译器安装了相应的插件)如下操作
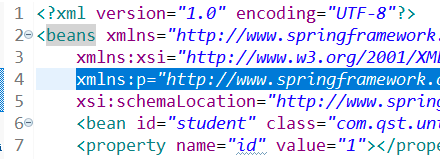

xmlns:p="http://www.springframework.org/schema/p"
注:简单类型:p:属性名=“属性值”
引用类型:p:属性名-ref=“引用的id值”(String类型除外)
多个p赋值的同时要注意空格隔开
- 通过set方式注入
public class Set {


    private int id;

    public int getId() {


        return id;
    }

    public void setId(int id) {


        this.id = id;
    }

    @Override
    public String toString() {


        return "Set{" +
                "id=" + id +
                '}';
    }
}
xml配置
<bean id="MethodByset" class="SetDemo.Set">
        <property name="id">
            <value>111</value>
        </property>
 </bean>
测试
public class DemoTest {


    public static void main(String[] args) {


        ApplicationContext context =  new ClassPathXmlApplicationContext("application.xml");
        Set a =(Set) context.getBean("MethodByset");
        System.out.println(a);

    }

- 通过构造器注入
如果构造器中的数据过多,且与XML赋值的参数顺序不一致,需要通过type指定类型或index、name指定顺序
<constructor-arg value="" index="" name="" type=""></constructor-arg>
public class Construct {


    private int id;

    public Construct(){


    }
    public Construct(int id) {


        this.id = id;
    }
    public int getId() {


        return id;
    }

    public void setId(int id) {


        this.id = id;
    }

    @Override
    public String toString() {


        return "Set{" +
                "id=" + id +
                '}';
    }

}
XML配置
    <bean id="MethodByset" class="SetDemo.Construct">
        <constructor-arg>
            <value>222</value>
        </constructor-arg>

    </bean>
测试
public class DemoTest {


    public static void main(String[] args) {


        ApplicationContext context =  new ClassPathXmlApplicationContext("application.xml");
        Construct a =(Construct) context.getBean("MethodByset");
        System.out.println(a);

    }

- p命名空间注入
public class pSet {


    private int id;

    public int getId() {


        return id;
    }

    public void setId(int id) {


        this.id = id;
    }

    @Override
    public String toString() {


        return "Set{" +
                "id=" + id +
                '}';
    }
}
XML配置
 <bean id="sss" class="SetDemo.SSet" p:id="111111">

    </bean>
测试
 public static void main(String[] args) {


        ApplicationContext context =  new ClassPathXmlApplicationContext("application.xml");
        pSet a =(pSet) context.getBean("sss");
        System.out.println(a);

    }

通过set方式给各种类型的属性赋值
public class Apest {


    private List<String> listElement;
    private Map<String,String> mapElement;
    private ArrayList<String> arrayListElement;
    private Set<String> setElement;
    private Properties[] pro;

    public Properties[] getPro() {


        return pro;
    }

    @Override
    public String toString() {


        return
                "listElement=" + listElement +
                "\n"+"mapElement=" + mapElement +
                "\n"+ "arrayListElement=" + arrayListElement +
                "\n"+ "setElement=" + setElement +
                "\n"+  "pro=" + Arrays.toString(pro)
               ;
    }

    public void setPro(Properties[] pro) {


        this.pro = pro;
    }

    public List<String> getListElement() {


        return listElement;
    }

    public void setListElement(List<String> listElement) {


        this.listElement = listElement;
    }

    public Map<String, String> getMapElement() {


        return mapElement;
    }

    public void setMapElement(Map<String, String> mapElement) {


        this.mapElement = mapElement;
    }

    public ArrayList<String> getArrayListElement() {


        return arrayListElement;
    }

    public void setArrayListElement(ArrayList<String> arrayListElement) {


        this.arrayListElement = arrayListElement;
    }

    public Set<String> getSetElement() {


        return setElement;
    }

    public void setSetElement(Set<String> setElement) {


        this.setElement = setElement;
    }
     public  void show(){


         System.out.println("asd");
     }

}
通过set方式注入(application.xml)
 <bean id="list" class="SetDemo.Apest">
       <property name="listElement" >
           <list>
               <value>list1</value>
               <value>list2</value>
               <value>list3</value>
           </list>
       </property>

        <property name="arrayListElement">
          <array>
              <list>
                  <value>arrayList1</value>
                  <value>arrayList2</value>
                  <value>arrayList3</value>
              </list>
          </array>

        </property>


        <property name="mapElement">
            <map>
                <entry>
                    <key><value>map1</value>
                    </key>
                    <value>1</value>
                </entry>

                <entry>
                    <key><value>map2</value></key>
                    <value>2</value>
                </entry>

                <entry>
                    <key><value>map3</value></key>
                    <value>3</value>
                </entry>


        </map>
        </property>

        <property name="setElement">
            <set>
                <value>set1</value>
                <value>set2</value>
                <value>set3</value>
            </set>
        </property>

        <property name="pro">
           <props>
               <prop key="pro1">1</prop>
               <prop key="pro2">2</prop>
               <prop key="pro3">3</prop>
           </props>
        </property>


    </bean>
测试
import org.springframework.context.ApplicationContext;
import org.springframework.context.support.ClassPathXmlApplicationContext;

public class DemoTest {


    public static void main(String[] args) {


        ApplicationContext context =  new ClassPathXmlApplicationContext("application.xml");
        Apest a =(Apest) context.getBean("list");
        System.out.println(a);
    }}
结果:

注:
- 字面值:可用字符串属性表示的值,可以通过元素签或value属性进行注入
- 基本数据类型及其封装类,String等类型都可以采取字面值注入的方式
- 若字面中包含特殊字符,可以使用<![CDATA[]]>把字面值包裹起来。