一.背景
tomcat7 mysql5 oracle11g
在我的上一篇文章实现了简单的用户无感的热部署集群结构。tomcat集群是通过tomcat广播去实现session同步的。
https://blog.csdn.net/qq_37372909/article/details/80328374
结构图如下:


二.存储tomcat的session到mysql
1.建表
CREATE TABLE `tomcat_sessions` (

	`session_id` varchar(100) NOT NULL,

	`valid_session` char(1) NOT NULL,

	`max_inactive` int(11) NOT NULL,

	`last_access` bigint(20) NOT NULL,

	`app_name` varchar(255) DEFAULT NULL,

	`session_data` mediumblob,

	PRIMARY KEY (`session_id`),

	KEY `kapp_name` (`app_name`)

)
ENGINE=MyISAM DEFAULT CHARSET=utf8;
2.复制驱动包到tomcat
复制mysql-connector-java-5.1.47.jar到tomcat/lib。
3.配置tomcat
在tomcat/conf/context.xml文件中</Context>之前添加下面的配置,配置一目了然就不详细解释了。
<Manager className="org.apache.catalina.session.PersistentManager"
maxIdleBackup="1"
minIdleSwap="0"
maxIdleSwap="0"
processExpiresFrequency="1"
saveOnRestart='true'>
<Store className="org.apache.catalina.session.JDBCStore"
connectionURL="jdbc:mysql://localhost:3306/sessions?user=root&password=root"
driverName="com.mysql.jdbc.Driver"
sessionAppCol="app_name"
sessionDataCol="session_data"
sessionIdCol="session_id"
sessionLastAccessedCol="last_access"
sessionMaxInactiveCol="max_inactive"
sessionTable="tomcat_sessions"
sessionValidCol="valid_session" />
</Manager>4.验证
1)nginx修改配置指向两个tomcat,nginx/conf/nginx.conf文件内容如下:
worker_processes  4;

events {
    worker_connections  10240;
}

http {
    include       mime.types;
    default_type  application/octet-stream;

    sendfile        on;

    keepalive_timeout  120;
	keepalive_requests 200;

	upstream services {
	    server 127.0.0.1:8080;
	    server 127.0.0.1:8180;
	}

    server {
        listen       8082;
        server_name  localhost;
		client_body_buffer_size  128k;
        client_max_body_size   16m;

		proxy_connect_timeout 5;#10
		proxy_send_timeout 60;#600
		proxy_read_timeout 60;#600
		proxy_buffer_size 4k;
		proxy_buffers 32 4k;
		proxy_busy_buffers_size 64k;

		port_in_redirect on;

        proxy_set_header X-Forwarded-For $remote_addr;
        proxy_set_header X-Forwarded-For $proxy_add_x_forwarded_for;
		proxy_set_header  Host $host:$proxy_port;
		location / {
            proxy_pass  http://services;
        }

        error_page   500 502 503 504  /50x.html;
        location = /50x.html {
            root   html;
        }

    }
}
2)准备两个tomcat
tomcat1和tomcat2端口分别设置为8080和8082.tomcat1/webapps/ROOT/index.jsp修改为:
<%@page contentType="text/html;charset=GB2312" %>
<html>
    <head>
           <title>ckl JSP~</title>
    </head>
    <body>
           <%
                  out.println("<h2><font color='red'>this page on 8080 !</font></h2>");
           %>
          <br/>
          <% session.setAttribute("ckl.com","ckl.com"); %>
          <% out.println("<font size='4'>sessionid is<font>"); %>
          <%=session.getId() %><br/>
          <% out.println("sessiontime is"); %>
          <%=session.getCreationTime() %>
    </body>
</html>
tomcat2/webapps/ROOT/index.jsp修改为:
<%@page contentType="text/html;charset=GB2312" %>
<html>
<head>
<title>ckl JSP~</title>
</head>
<body>
<%
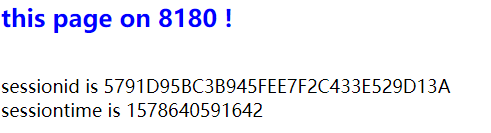
out.println("<h2><font color='blue'>this page on 8180 !</font></h2>");
%>
<br/>
<% session.setAttribute("ckl.com","ckl.com"); %>
<% out.println("<font size='4'>sessionid is<font>"); %>
<%=session.getId() %><br/>
<% out.println("sessiontime is"); %>
<%=session.getCreationTime() %>
</body>
</html>3)修改2个tomcat的tomcat/conf/context.xml文件
<?xml version='1.0' encoding='utf-8'?>
<Context>
<WatchedResource>WEB-INF/web.xml</WatchedResource>
<Manager className="org.apache.catalina.session.PersistentManager"
maxIdleBackup="1"
minIdleSwap="0"
maxIdleSwap="0"
processExpiresFrequency="1"
saveOnRestart='true'>
<Store className="org.apache.catalina.session.JDBCStore"
connectionURL="jdbc:mysql://localhost:3306/sessions?user=root&password=root"
driverName="com.mysql.jdbc.Driver"
sessionAppCol="app_name"
sessionDataCol="session_data"
sessionIdCol="session_id"
sessionLastAccessedCol="last_access"
sessionMaxInactiveCol="max_inactive"
sessionTable="tomcat_sessions"
sessionValidCol="valid_session" />
</Manager>
</Context>修改内容都是一样的。
4)运行结果
第一次
刷新后

数据库中已经看到存储了session

三.存储tomcat的session到oracle
1.建表
CREATE TABLE tomcat_sessions (

	session_id varchar2(100) NOT NULL primary key,

	valid_session varchar2(1) NOT NULL,

	max_inactive int  NOT NULL,

	last_access long  NOT NULL,

	app_name varchar2(255) DEFAULT NULL,

	session_data blob
)  ;
create index kapp_name on tomcat_sessions(app_name);
2.复制驱动包到tomcat
复制ojdbc14-10.2.0.3.0.jar到tomcat/lib。
3.配置tomcat
在tomcat/conf/context.xml文件中</Context>之前添加下面的配置,配置一目了然就不详细解释了。
<Manager className="org.apache.catalina.session.PersistentManager"
        maxIdleBackup="1"
        minIdleSwap="0"
        maxIdleSwap="0"
        processExpiresFrequency="1"
        saveOnRestart='true'>

        <Store className="org.apache.catalina.session.JDBCStore"
                connectionURL="jdbc:oracle:thin:@10.xx.0.20:1521:jwellabc"
				connectionName="jwwaasl"
				connectionPassword="jwsdwl"
                driverName="oracle.jdbc.driver.OracleDriver"
                sessionAppCol="app_name"
                sessionDataCol="session_data"
                sessionIdCol="session_id"
                sessionLastAccessedCol="last_access"
                sessionMaxInactiveCol="max_inactive"
                sessionTable="tomcat_sessions"
                sessionValidCol="valid_session" />
</Manager>
4.验证
方法同存储到mysql的方式,就不重复写了。
四.参考资料
https://blog.csdn.net/iteye_16572/article/details/82641993