1.需求
生成海需要画出一个中空带边框的的tag,如下图。众所周知,微信小程序里的canvas画图都是需要自己一点点画出来,不想html有htmlToCanvas,直接写HTML就可以转成canvas.

2.实现
首先要实现圆角边框,再把字体填充进去,我在网上找到一个方法,直接拿过来改了一下,代码如下:
//画圆角边框
  roundRect(ctx, x, y, w, h, r, fillColor, strokeColor) {
    // 画圆角 ctx、x起点、y起点、w宽度、y高度、r圆角半径、fillColor填充颜色、strokeColor边框颜色
    // 开始绘制
    ctx.beginPath()

    // 绘制左上角圆弧 Math.PI = 180度
    // 圆心x起点、圆心y起点、半径、以3点钟方向顺时针旋转后确认的起始弧度、以3点钟方向顺时针旋转后确认的终止弧度
    ctx.arc(x + r, y + r, r, Math.PI, Math.PI * 1.5)

    // 绘制border-top
    // 移动起点位置 x终点、y终点
    ctx.moveTo(x + r, y)
    // 画一条线 x终点、y终点
    ctx.lineTo(x + w - r, y)
    // ctx.lineTo(x + w, y + r)

    // 绘制右上角圆弧
    ctx.arc(x + w - r, y + r, r, Math.PI * 1.5, Math.PI * 2)

    // 绘制border-right
    ctx.lineTo(x + w, y + h - r)
    // ctx.lineTo(x + w - r, y + h)

    // 绘制右下角圆弧
    ctx.arc(x + w - r, y + h - r, r, 0, Math.PI * 0.5)

    // 绘制border-bottom
    ctx.lineTo(x + r, y + h)
    // ctx.lineTo(x, y + h - r)

    // 绘制左下角圆弧
    ctx.arc(x + r, y + h - r, r, Math.PI * 0.5, Math.PI)

    // 绘制border-left
    ctx.lineTo(x, y + r)
    // ctx.lineTo(x + r, y)

    if (fillColor) {
      // 因为边缘描边存在锯齿,最好指定使用 transparent 填充
      ctx.setFillStyle(fillColor)
      // 对绘画区域填充
      ctx.fill()
    }

    if (strokeColor) {
      // 因为边缘描边存在锯齿,最好指定使用 transparent 填充
      ctx.setStrokeStyle(strokeColor)
      // 画出当前路径的边框
      ctx.stroke()
    }
    // 关闭一个路径
    // ctx.closePath()

    // 剪切,剪切之后的绘画绘制剪切区域内进行,需要save与restore
    ctx.clip()
  },
调用方法,我是通过计算你要填充的文字的宽度加上你想要的padding得到容器的宽度,高度的话我是写一个固定的,不考虑文字长到换行的情况。。。
ctx.measureText(discountText).width 这个方法可以计算出文字的占用宽度。
//画圆角边框
    ctx.setFontSize(20);
    ctx.setFillStyle('#ffffff');
    ctx.setTextAlign('left');
    var discountText = '没啥好说的1111111111111111'
    var bdColor = '#ededed';
    var bdBackground = 'transparent';
    var bdRadius = 20;
    var textPadding = 15;
    var boxHeight = 40;
    var boxWidth = ctx.measureText(discountText).width + textPadding * 2;
    ctx.fillText(discountText, 65, 78);
    console.log(ctx.measureText(discountText).width)

    that.roundRect(ctx, 50, 50, boxWidth, boxHeight, bdRadius, bdBackground, bdColor)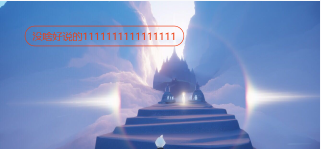
最终效果如图,颜色我稍微改了一下,文字填充的位置需要微调,X轴的位置要加上padding的和,Y轴就自己微调。