目录
4.2 存储操作(以MongoDB为存储数据库)-pipelines.py
4.7 分布式操作的实现-add_category_to_redis.py
一、基础知识及相关安装包
下面是一些博客链接
HTTP基础知识理解:Python网络爬虫-原理及基础知识
Charles抓包:Windows环境下配合Charles进行抓包
JS渲染:如何结合Splash对JS进行渲染
代理池的构建:多线程结合Flask构建免费高匿代理池
MongoDB基础教程:MongoDB基础教程
Redis基础教程:Redis基础教程
scrapy基础项目开发:暂无,后续会做一个小节介绍
二、开发环境及项目结构
软件环境:Pycharm2019 + MongoDB + Redis3.20 + MongoDB+ WIndows10
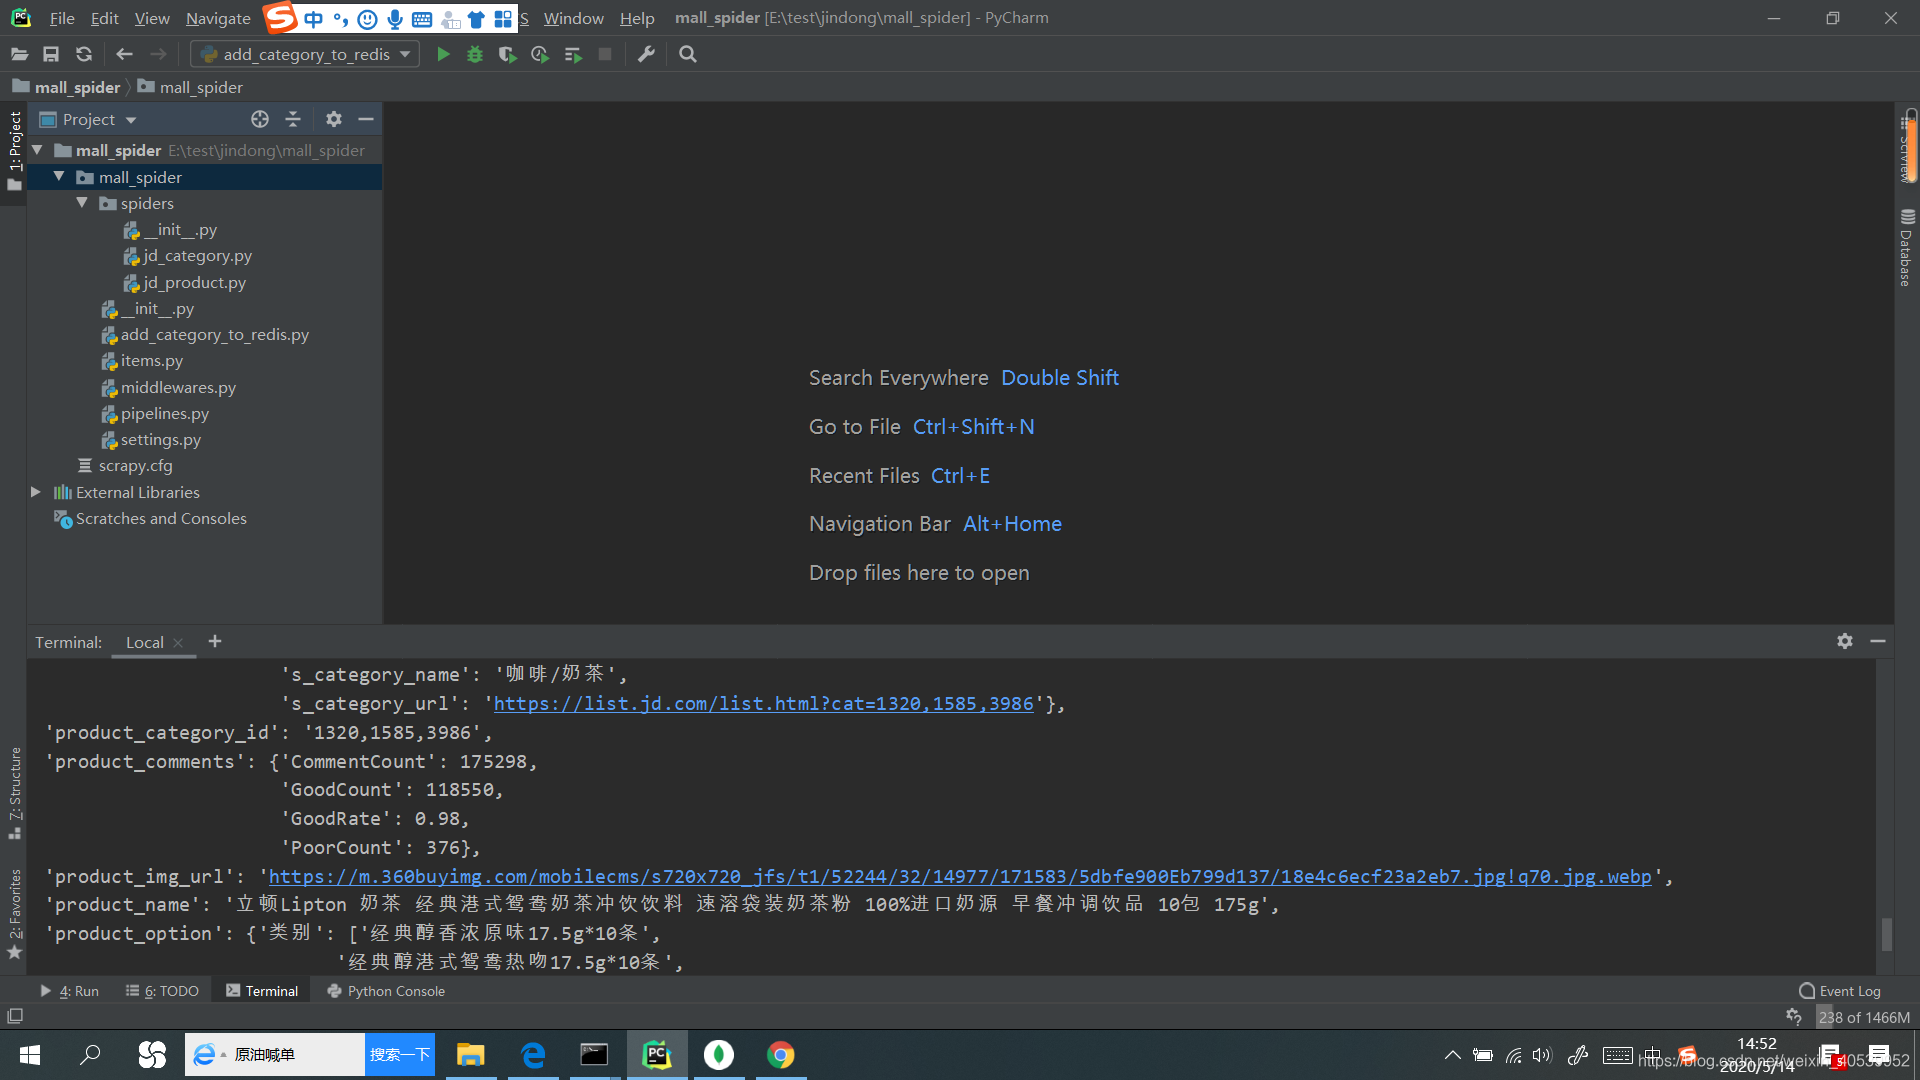

三、结果展示


四、实战源码
4.1 数据模型-items.py
# -*- coding: utf-8 -*-

# Define here the models for your scraped items
#
# See documentation in:
# https://doc.scrapy.org/en/latest/topics/items.html

import scrapy


class MallSpiderItem(scrapy.Item):
    # define the fields for your item here like:
    # name = scrapy.Field()
    pass

class Category(scrapy.Item):
    '''
    定义类型数据模型,明确抓取的字段
    '''
    # 大、中、小商品对应的名称及url
    b_category_name = scrapy.Field()
    b_category_url = scrapy.Field()
    m_category_name = scrapy.Field()
    m_category_url = scrapy.Field()
    s_category_name = scrapy.Field()
    s_category_url = scrapy.Field()

class Product(scrapy.Item):
    '''
    商品信息数据模型
    '''
    product_category = scrapy.Field() # 商品类别
    product_category_id = scrapy.Field() # 类别ID
    product_sku_id = scrapy.Field() # 商品ID
    product_name = scrapy.Field() # 商品名称
    product_img_url = scrapy.Field() # 商品图片URL
    product_book_info = scrapy.Field() # 图书信息,作者,出版社
    product_option = scrapy.Field() # 商品选项
    product_shop = scrapy.Field() # 商品店铺
    product_comments = scrapy.Field() # 商品评论数量
    product_ad = scrapy.Field() # 商品促销
    product_price = scrapy.Field() # 商品价格
4.2 存储操作(以MongoDB为存储数据库)-pipelines.py
# -*- coding: utf-8 -*-

# Define your item pipelines here
#
# Don't forget to add your pipeline to the ITEM_PIPELINES setting
# See: https://doc.scrapy.org/en/latest/topics/item-pipeline.html
from mall_spider.spiders.jd_category import JdCategorySpider
from pymongo import MongoClient
from mall_spider.settings import MONGODB_URL
from mall_spider.spiders.jd_product import JdProductSpider


class CategoryPipeline(object):
    '''存储操作'''
    def open_spider(self,spider):
        # 当爬虫启动时执行,执行一次
        if isinstance(spider,JdCategorySpider):
            # 连接MongoDB数据库,获取要操作的集合
            self.client = MongoClient(MONGODB_URL)
            self.collection = self.client['jd']['category']


    def process_item(self, item, spider):
        if isinstance(spider,JdCategorySpider):
            # 插入数据,转换成字典
            self.collection.insert_one(dict(item))
        return item


    def close_spider(self,spider):
        # 关闭连接
        if isinstance(spider, JdCategorySpider):
            self.client.close()


class ProductPipeline(object):
    '''存储操作'''
    def open_spider(self, spider):
        # 当爬虫启动时执行,执行一次
        if isinstance(spider, JdProductSpider):
            # 连接MongoDB数据库,获取要操作的集合
            self.client = MongoClient(MONGODB_URL)
            self.collection = self.client['jd']['product']

    def process_item(self, item, spider):
        if isinstance(spider, JdProductSpider):
            # 插入数据,转换成字典
            self.collection.insert_one(dict(item))
        return item

    def close_spider(self, spider):
        # 关闭连接
        if isinstance(spider, JdProductSpider):
            self.client.close()
4.3 项目配置-settings.py
# -*- coding: utf-8 -*-

# Scrapy settings for mall_spider project
#
# For simplicity, this file contains only settings considered important or
# commonly used. You can find more settings consulting the documentation:
#
#     https://doc.scrapy.org/en/latest/topics/settings.html
#     https://doc.scrapy.org/en/latest/topics/downloader-middleware.html
#     https://doc.scrapy.org/en/latest/topics/spider-middleware.html

BOT_NAME = 'mall_spider'

SPIDER_MODULES = ['mall_spider.spiders']
NEWSPIDER_MODULE = 'mall_spider.spiders'


# Crawl responsibly by identifying yourself (and your website) on the user-agent
#USER_AGENT = 'mall_spider (+http://www.yourdomain.com)'

# Obey robots.txt rules
ROBOTSTXT_OBEY = True

# Configure maximum concurrent requests performed by Scrapy (default: 16)
#CONCURRENT_REQUESTS = 32

# Configure a delay for requests for the same website (default: 0)
# See https://doc.scrapy.org/en/latest/topics/settings.html#download-delay
# See also autothrottle settings and docs
#DOWNLOAD_DELAY = 3
# The download delay setting will honor only one of:
#CONCURRENT_REQUESTS_PER_DOMAIN = 16
#CONCURRENT_REQUESTS_PER_IP = 16

# Disable cookies (enabled by default)
#COOKIES_ENABLED = False

# Disable Telnet Console (enabled by default)
#TELNETCONSOLE_ENABLED = False

# Override the default request headers:
#DEFAULT_REQUEST_HEADERS = {
#   'Accept': 'text/html,application/xhtml+xml,application/xml;q=0.9,*/*;q=0.8',
#   'Accept-Language': 'en',
#}

# Enable or disable spider middlewares
# See https://doc.scrapy.org/en/latest/topics/spider-middleware.html
#SPIDER_MIDDLEWARES = {
#    'mall_spider.middlewares.MallSpiderSpiderMiddleware': 543,
#}

# Enable or disable downloader middlewares
# See https://doc.scrapy.org/en/latest/topics/downloader-middleware.html
# 下载中间件进行反爬,随机头和随机IP,最好使用付费的
# DOWNLOADER_MIDDLEWARES = {
#    'mall_spider.middlewares.MallSpiderDownloaderMiddleware': 543,
#    'mall_spider.middlewares.RandomUserAgent':301,
# }

# Enable or disable extensions
# See https://doc.scrapy.org/en/latest/topics/extensions.html
#EXTENSIONS = {
#    'scrapy.extensions.telnet.TelnetConsole': None,
#}

# Configure item pipelines
# See https://doc.scrapy.org/en/latest/topics/item-pipeline.html
ITEM_PIPELINES = {
	# 数字越小越先执行
   'mall_spider.pipelines.CategoryPipeline': 300,
   'mall_spider.pipelines.ProductPipeline':301,
}

# Enable and configure the AutoThrottle extension (disabled by default)
# See https://doc.scrapy.org/en/latest/topics/autothrottle.html
#AUTOTHROTTLE_ENABLED = True
# The initial download delay
#AUTOTHROTTLE_START_DELAY = 5
# The maximum download delay to be set in case of high latencies
#AUTOTHROTTLE_MAX_DELAY = 60
# The average number of requests Scrapy should be sending in parallel to
# each remote server
#AUTOTHROTTLE_TARGET_CONCURRENCY = 1.0
# Enable showing throttling stats for every response received:
#AUTOTHROTTLE_DEBUG = False

# Enable and configure HTTP caching (disabled by default)
# See https://doc.scrapy.org/en/latest/topics/downloader-middleware.html#httpcache-middleware-settings
#HTTPCACHE_ENABLED = True
#HTTPCACHE_EXPIRATION_SECS = 0
#HTTPCACHE_DIR = 'httpcache'
#HTTPCACHE_IGNORE_HTTP_CODES = []
#HTTPCACHE_STORAGE = 'scrapy.extensions.httpcache.FilesystemCacheStorage'

# 配置MongoDB的URL
MONGODB_URL = 'mongodb://127.0.0.1:27017'

# 在settings文件中配置scrapy_redis
# REDIS数据链接
REDIS_URL = 'redis://127.0.0.1:6379/0'

# 去重容器类: 用于把已爬指纹存储到基于Redis的set集合中
DUPEFILTER_CLASS = "scrapy_redis.dupefilter.RFPDupeFilter"
# 调度器: 用于把待爬请求存储到基于Redis的队列
SCHEDULER = "scrapy_redis.scheduler.Scheduler"
# 是不进行调度持久化:
# 如果是True, 当程序结束的时候, 会保留Redis中已爬指纹和待爬的请求
# 如果是False, 当程序结束的时候, 会清空Redis中已爬指纹和待爬的请求
SCHEDULER_PERSIST = True
4.4 中间件配置-middlewares.py
注释:这里以随机请求头和代理IP池返回的随机IP构成请求,但是由于京东对免费的IP池进行了反爬,所以我在settings中并没有开启middlewares的配置,仅作参考,若需要抓取万级量度的数据,可以选购付费IP池
# -*- coding: utf-8 -*-

# Define here the models for your spider middleware
#
# See documentation in:
# https://doc.scrapy.org/en/latest/topics/spider-middleware.html
import random
import requests
import re
from scrapy.downloadermiddlewares.retry import RetryMiddleware
from twisted.internet import defer
from twisted.internet.error import TimeoutError, DNSLookupError, \
        ConnectionRefusedError, ConnectionDone, ConnectError, \
        ConnectionLost, TCPTimedOutError
from twisted.web.client import ResponseFailed
from scrapy.core.downloader.handlers.http11 import TunnelError

# 实现代理IP中间件
class MallSpiderDownloaderMiddleware(object):
    EXCEPTIONS_TO_RETRY = (defer.TimeoutError, TimeoutError, DNSLookupError,
                           ConnectionRefusedError, ConnectionDone, ConnectError,
                           ConnectionLost, TCPTimedOutError, ResponseFailed,
                           IOError, TunnelError)
    def process_request(self, request, spider):
        # 从代理池随机获取一个代理IP,协议和域名
        response = requests.get('http://localhost:6888/random?protocal=https&domain=jd.com')
        request.meta['proxy'] = response.content.decode()

    def process_exception(self, request, exception, spider):
        if isinstance(exception, self.EXCEPTIONS_TO_RETRY):
            # 当请求出现异常的时候, 代理池哪些代理IP在本域名下是不可以用的
            url = 'http://localhost:6868/disable_domain'
            proxy = request.meta['proxy']
            ip = re.findall('https?://(.+?):\d+', proxy)[0]
            params = {
                'ip': ip,
                'domain': 'jd.com'
            }
            # 发送请求,  告诉代理池这个代理IP在本域名下是不可以用的
            requests.get(url, params=params)


#1. 准备User-Agent列表
# 准备请求头
USER_AGENTS = [
    "Mozilla/4.0 (compatible; MSIE 6.0; Windows NT 5.1; SV1; AcooBrowser; .NET CLR 1.1.4322; .NET CLR 2.0.50727)",
    "Mozilla/4.0 (compatible; MSIE 7.0; Windows NT 6.0; Acoo Browser; SLCC1; .NET CLR 2.0.50727; Media Center PC 5.0; .NET CLR 3.0.04506)",
    "Mozilla/4.0 (compatible; MSIE 7.0; AOL 9.5; AOLBuild 4337.35; Windows NT 5.1; .NET CLR 1.1.4322; .NET CLR 2.0.50727)",
    "Mozilla/5.0 (Windows; U; MSIE 9.0; Windows NT 9.0; en-US)",
    "Mozilla/5.0 (compatible; MSIE 9.0; Windows NT 6.1; Win64; x64; Trident/5.0; .NET CLR 3.5.30729; .NET CLR 3.0.30729; .NET CLR 2.0.50727; Media Center PC 6.0)",
    "Mozilla/5.0 (compatible; MSIE 8.0; Windows NT 6.0; Trident/4.0; WOW64; Trident/4.0; SLCC2; .NET CLR 2.0.50727; .NET CLR 3.5.30729; .NET CLR 3.0.30729; .NET CLR 1.0.3705; .NET CLR 1.1.4322)",
    "Mozilla/4.0 (compatible; MSIE 7.0b; Windows NT 5.2; .NET CLR 1.1.4322; .NET CLR 2.0.50727; InfoPath.2; .NET CLR 3.0.04506.30)",
    "Mozilla/5.0 (Windows; U; Windows NT 5.1; zh-CN) AppleWebKit/523.15 (KHTML, like Gecko, Safari/419.3) Arora/0.3 (Change: 287 c9dfb30)",
    "Mozilla/5.0 (X11; U; Linux; en-US) AppleWebKit/527+ (KHTML, like Gecko, Safari/419.3) Arora/0.6",
    "Mozilla/5.0 (Windows; U; Windows NT 5.1; en-US; rv:1.8.1.2pre) Gecko/20070215 K-Ninja/2.1.1",
    "Mozilla/5.0 (Windows; U; Windows NT 5.1; zh-CN; rv:1.9) Gecko/20080705 Firefox/3.0 Kapiko/3.0",
    "Mozilla/5.0 (X11; Linux i686; U;) Gecko/20070322 Kazehakase/0.4.5",
    "Mozilla/5.0 (X11; U; Linux i686; en-US; rv:1.9.0.8) Gecko Fedora/1.9.0.8-1.fc10 Kazehakase/0.5.6",
    "Mozilla/5.0 (Windows NT 6.1; WOW64) AppleWebKit/535.11 (KHTML, like Gecko) Chrome/17.0.963.56 Safari/535.11",
    "Mozilla/5.0 (Macintosh; Intel Mac OS X 10_7_3) AppleWebKit/535.20 (KHTML, like Gecko) Chrome/19.0.1036.7 Safari/535.20",
    "Opera/9.80 (Macintosh; Intel Mac OS X 10.6.8; U; fr) Presto/2.9.168 Version/11.52",
    "Mozilla/5.0 (Windows NT 6.1; WOW64) AppleWebKit/536.11 (KHTML, like Gecko) Chrome/20.0.1132.11 TaoBrowser/2.0 Safari/536.11",
    "Mozilla/5.0 (Windows NT 6.1; WOW64) AppleWebKit/537.1 (KHTML, like Gecko) Chrome/21.0.1180.71 Safari/537.1 LBBROWSER",
    "Mozilla/5.0 (compatible; MSIE 9.0; Windows NT 6.1; WOW64; Trident/5.0; SLCC2; .NET CLR 2.0.50727; .NET CLR 3.5.30729; .NET CLR 3.0.30729; Media Center PC 6.0; .NET4.0C; .NET4.0E; LBBROWSER)",
    "Mozilla/4.0 (compatible; MSIE 6.0; Windows NT 5.1; SV1; QQDownload 732; .NET4.0C; .NET4.0E; LBBROWSER)",
    "Mozilla/5.0 (Windows NT 6.1; WOW64) AppleWebKit/535.11 (KHTML, like Gecko) Chrome/17.0.963.84 Safari/535.11 LBBROWSER",
    "Mozilla/4.0 (compatible; MSIE 7.0; Windows NT 6.1; WOW64; Trident/5.0; SLCC2; .NET CLR 2.0.50727; .NET CLR 3.5.30729; .NET CLR 3.0.30729; Media Center PC 6.0; .NET4.0C; .NET4.0E)",
    "Mozilla/5.0 (compatible; MSIE 9.0; Windows NT 6.1; WOW64; Trident/5.0; SLCC2; .NET CLR 2.0.50727; .NET CLR 3.5.30729; .NET CLR 3.0.30729; Media Center PC 6.0; .NET4.0C; .NET4.0E; QQBrowser/7.0.3698.400)",
    "Mozilla/4.0 (compatible; MSIE 6.0; Windows NT 5.1; SV1; QQDownload 732; .NET4.0C; .NET4.0E)",
    "Mozilla/4.0 (compatible; MSIE 7.0; Windows NT 5.1; Trident/4.0; SV1; QQDownload 732; .NET4.0C; .NET4.0E; 360SE)",
    "Mozilla/4.0 (compatible; MSIE 6.0; Windows NT 5.1; SV1; QQDownload 732; .NET4.0C; .NET4.0E)",
    "Mozilla/4.0 (compatible; MSIE 7.0; Windows NT 6.1; WOW64; Trident/5.0; SLCC2; .NET CLR 2.0.50727; .NET CLR 3.5.30729; .NET CLR 3.0.30729; Media Center PC 6.0; .NET4.0C; .NET4.0E)",
    "Mozilla/5.0 (Windows NT 5.1) AppleWebKit/537.1 (KHTML, like Gecko) Chrome/21.0.1180.89 Safari/537.1",
    "Mozilla/5.0 (Windows NT 6.1; WOW64) AppleWebKit/537.1 (KHTML, like Gecko) Chrome/21.0.1180.89 Safari/537.1",
    "Mozilla/5.0 (iPad; U; CPU OS 4_2_1 like Mac OS X; zh-cn) AppleWebKit/533.17.9 (KHTML, like Gecko) Version/5.0.2 Mobile/8C148 Safari/6533.18.5",
    "Mozilla/5.0 (Windows NT 6.1; Win64; x64; rv:2.0b13pre) Gecko/20110307 Firefox/4.0b13pre",
    "Mozilla/5.0 (X11; Ubuntu; Linux x86_64; rv:16.0) Gecko/20100101 Firefox/16.0",
    "Mozilla/5.0 (Windows NT 6.1; WOW64) AppleWebKit/537.11 (KHTML, like Gecko) Chrome/23.0.1271.64 Safari/537.11",
    "Mozilla/5.0 (X11; U; Linux x86_64; zh-CN; rv:1.9.2.10) Gecko/20100922 Ubuntu/10.10 (maverick) Firefox/3.6.10"
]

# 实现RandomUSerAgent类,UserAgent的中间件
class RandomUserAgent(object):
    def process_request(self, request, spider):
        # 如果请求是https://cdnware.m.jd.com开头,就是iPhone的user-agent
        if request.url.startswith('https://cdnware.m.jd.com'):
            request.headers['user-agent'] = 'JD4iPhone/164880 (iPhone; iOS 12.1.2; Scale/2.00)'
        else:
            request.headers['user-agent'] =random.choice(USER_AGENTS)
4.5 分类信息抓取-jd_category.py
注:抓取主页面的所有分类信息
# -*- coding: utf-8 -*-
import scrapy
import json
from mall_spider.items import Category

class JdCategorySpider(scrapy.Spider):
    name = 'jd_category'
    allowed_domains = ['3.cn']
    start_urls = ['https://dc.3.cn/category/get'] # 修改起始url

    def parse(self, response):
        # print(response.body.decode('GBK')) # 指定编码方式,防止乱码
        result = json.loads(response.body.decode('GBK'))
        datas = result['data']
        # 遍历数据列表
        for data in datas:
            # 利用数据模型进行存储
            item = Category()
            b_category = data['s'][0]
            # 大分类信息
            b_category_info = b_category['n']
            # print("大分类:{}".format(b_category_info))
            item['b_category_name'], item['b_category_url'] = self.get_actegory_name_url(b_category_info)
            # 中分类信息列表
            m_category_s = b_category['s']
            # 遍历中分类信息列表
            for m_category in m_category_s:
                # 中分类信息
                m_category_info = m_category['n']
                item['m_category_name'], item['m_category_url'] = self.get_actegory_name_url(m_category_info)
                # print("中分类:{}".format(m_category_info))
                # 获取小分类数据列表
                s_category_s = m_category['s']
                for s_category in s_category_s:
                    s_category_info = s_category['n']
                    # print("小分类:{}".format(s_category_info))
                    item['s_category_name'], item['s_category_url'] = self.get_actegory_name_url(s_category_info)
                    # print(item)
                    # 把数据交给引擎
                    yield item


    def get_actegory_name_url(self,category_info):
        '''
        根据分类的信息,提取名称和url
        :param category_info: 分类信息
        :return: 分类名称和url
        '''
        # 商品分类有三种数据格式,部分url需要进行拼接
        # mice.jd.com;1713-9278;4938-12420-12423
        category = category_info.split('|')
        category_url = category[0] # 分类URL
        category_name = category[1] # 分类名称
        # 处理第一类url
        if category_url.count('jd.com') == 1:
            # url进行补全即可
            category_url = 'https://'+category_url
        elif category_url.count('-')==1:
            # 处理第二类url
            category_url = 'https://channel.jd.com/{}.html'.format(category_url)
        else:
            # 处理第三类,把url中-替换为,
            category_url = category_url.replace('-',',')
            category_url = 'https://list.jd.com/list.html?cat={}'.format(category_url)
        return category_name, category_url
4.6 抓取商品详细信息-jd_product.py
注:这里主要是借用Networks面板进行分析,对网络中出现的json数据接口进行分析得出的,并没有使用selenium对页面进行操作
# -*- coding: utf-8 -*-
import time

import scrapy
import json
import pickle
from mall_spider.items import Product
from jsonpath import jsonpath
from scrapy_redis.spiders import RedisSpider
'''
分布式爬虫
1.修改爬虫类,继承RedisSpider

'''
class JdProductSpider(RedisSpider):
    name = 'jd_product'
    allowed_domains = ['jd.com','3.cn']
    # start_urls = ['http://jd.com/']

    # 2. 用于指定起始url列表,在redis数据库中的key
    redis_key = 'jd_product:category'

    # def start_requests(self):
    #     '''重写start_requests方法,根据分类信息构建列表页的请求'''
    #     category = {
    #         "b_category_name":"家用电器",
    #         "b_category_url":"https://jiadian.jd.com",
    #         "m_category_name": "电视",
    #         "m_category_url": "https://list.jd.com/list.html?cat=737,794,798",
    #         "s_category_name": "超薄电视",
    #         "s_category_url": "https://list.jd.com/list.html?cat=737,794,798&ev=4155_76344&sort=sort_rank_asc&trans=1&JL=2_1_0#J_crumbsBar"
    #     }
    #     # 根据小分类的url构建列表页面请求
    #     yield scrapy.Request(category['s_category_url'],callback=self.parse,meta={'category':category})

    # 3. 重写make_request_from_data
    def make_request_from_data(self, data):
        '''
        根据redis读取的分类信息的二进制数据,构建请求
        :param data: 分类信息的二进制数据
        :return: 根据小分类URl构建的请求对象
        '''
        # 把分类的二进制数据转换为字典
        category = pickle.loads(data)
        # 根据小分类的url构建列表页面请求
        # 注意这里必须使用return返回请求,yield会变成生成器
        return scrapy.Request(category['s_category_url'],callback=self.parse,meta={'category':category})


    def parse(self, response):
        category = response.meta['category']
        # print(category)
        # 解析列表页,提取商品的skuid
        sku_ids = response.xpath('//div[contains(@class,"gl-i-wrap")]//@data-sku').extract()
        for sku_id in sku_ids:
            # 创建一个Product,用于保存商品数据
            item = Product()
            # product_category = scrapy.Field()  # 商品类别
            # product_sku_id = scrapy.Field()  # 商品ID
            # 设置商品类型
            item['product_category'] = category
            item['product_sku_id'] =sku_id
            # 构建商品基本信息请求,通过Charles进行识别获得
            # item传入无需深拷贝
            product_base_url = 'https://cdnware.m.jd.com/c1/skuDetail/apple/7.3.0/{}.json'.format(sku_id) # 但是只能看前三十个
            yield scrapy.Request(product_base_url,callback=self.parse_product_base,meta={'item':item})
        # 获取下一页的url,这里源代码不能使用了,已经进行修改
        # 最大页面数,下面未提取出来,所以换在上面提取,这里不知道为什么失效了,所以只抓取每个分类的前20页,也就是i为40
        max_len = int(response.xpath('//*[@id="J_topPage"]/span/i/text()').extract_first())
        # print("hhhhhhhhhhhhhhhhhhhhhhhhhhhhhhhhhhh",max_len)
        i = 1
        s = 0
        # for i in range(1,max_len+1):
        if i < 20:
            # 进行url拼接,这里的url只为偶数,但发现为偶数时候,不显示后面30个商品,这里是用&s参数来区分的,s每次加60(s代表页指标不动) p代表上页下页
            # 如果i为偶数,则代表不换页,s不变
            if i %2 !=0:
                s += 30
            next_url = category['s_category_url'].split('#')[0]+ "&page={}&s={}".format(i,s)
            # print(next_url)
            yield scrapy.Request(next_url,callback=self.parse,meta={'category':category})
            i += 1


    def parse_product_base(self,response):
        # 取出传递来的数据
        item = response.meta['item']
        # print(item)
        # print(response.text)
        # 把json字符串转化为字典
        result = json.loads(response.text)
        # 提取数据
        # product_name = scrapy.Field()  # 商品名称
        # product_img_url = scrapy.Field()  # 商品图片URL
        # product_book_info = scrapy.Field()  # 图书信息,作者,出版社
        # product_option = scrapy.Field()  # 商品选项
        # product_shop = scrapy.Field()  # 商品店铺
        # product_comments = scrapy.Field()  # 商品评论数量
        # product_ad = scrapy.Field()  # 商品促销
        # product_price = scrapy.Field()  # 商品价格
        item['product_name'] = result['wareInfo']['basicInfo']['name']
        item['product_img_url'] = result['wareInfo']['basicInfo']['wareImage'][0]['small']
        item['product_book_info'] = result['wareInfo']['basicInfo']['bookInfo']
        color_size = jsonpath(result,'$..colorSize')
        if color_size:
            # 注意colorsize值是个列表,jsonpath返回列表
            color_size = color_size[0]
            product_option = {}
            for option in color_size:
                title = option['title']
                value = jsonpath(option,'$..text') # 这是一个路径表达式
                product_option[title] = value
            item['product_option'] = product_option
        shop = jsonpath(result,'$..shop')
        if shop:
            shop = shop[0]
            if shop:
                # 无id则为京东自营
                item['product_shop'] = {
                    'shop_id':shop['shopId'],
                    'shop_name': shop['name'],
                    'shop_score': shop['score']
                }
            else:
                item['product_shop'] = {
                    'shop_name': '京东自营'
                }

        item['product_category_id'] = result['wareInfo']['basicInfo']['category'].replace(';',',')
        # 准备促销信息的URL,搜索promotion可以获得相关api,5051427
        ad_url = 'https://cd.jd.com/promotion/v2?skuId={}&area=12_919_922_0&cat={}'.format(item['product_sku_id'],item['product_category_id'])
        # print(item)
        # 构建促销请求
        yield scrapy.Request(ad_url,callback=self.parse_product_ad,meta={'item':item})


    def parse_product_ad(self,response):
        item = response.meta['item']
        print(item)
        # print(response.body.decode['GBK'])
        # 转化为字典
        result = json.loads(response.body)
        item['product_ad'] = jsonpath(result,'$..ad')[0] if jsonpath(result,'$..ad') else ''
        # 构建评价信息请求,comments刷新页面可见
        comments_url = 'https://club.jd.com/comment/productCommentSummaries.action?referenceIds={}'.format(item['product_sku_id'])
        yield scrapy.Request(comments_url,callback=self.parse_product_comments,meta={'item':item})
        print(item)

    def parse_product_comments(self,response):
        item = response.meta['item']
        # print(item)
        # print(response.text)
        result = json.loads(response.text)
        item['product_comments'] = {
            'CommentCount': jsonpath(result,'$..CommentCount')[0],
            'GoodCount': jsonpath(result,'$..GoodCount')[0],
            'PoorCount': jsonpath(result,'$..PoorCount')[0],
            'GoodRate': jsonpath(result,'$..GoodRate')[0]
        }
        # print(item)
        # 构造价格请求,但这里scrapy会过滤非jd.com的域名,所以前面需要加上
        price_url = 'https://p.3.cn/prices/mgets?skuIds=J_{}'.format(item['product_sku_id'])
        yield scrapy.Request(price_url,callback=self.parse_product_price,meta={'item':item})


    def parse_product_price(self,response):
        item = response.meta['item']
        # print(response.text)
        item['product_price'] = json.loads(response.text)[0]['p']
        # print(item)

        # 把商品数据交给引擎
        yield item
4.7 分布式操作的实现-add_category_to_redis.py
#!/usr/bin/env python

# -*- encoding: utf-8 -*-

'''
@Author  :   {Jack Zhao}

@Time    :   2020/5/14 12:26

@Contact :   {[email protected]}

@Desc    :  链接mongodb,链接redis,将mongodb中数据添加到redis_key,关闭mongodb
'''

from pymongo import MongoClient
from redis import StrictRedis
from mall_spider.settings import MONGODB_URL,REDIS_URL
from mall_spider.spiders.jd_product import JdProductSpider
import pickle

def add_category_to_redis():
	mongo =MongoClient(MONGODB_URL)
	redis =StrictRedis.from_url(REDIS_URL)
	# 获取信息
	collection = mongo['jd']['category']
	cursor = collection.find()
	for category in cursor:
		# 序列化字典数据
		data = pickle.dumps(category)
		# 添加到redis
		redis.lpush(JdProductSpider.redis_key,data)

	mongo.close()

if __name__ == '__main__':
	# 调用方法测试
	add_category_to_redis()
五、项目使用方法
# WIn+R 输入services.msc
# 先保证已经开启MongoDB,Redis
cd ../mall_spider
scrapy crawl jd_category # 先抓目录,再进行下面的操作
scrapy crawl jd_product # 这里暂时是使用本机的IP进行爬取,不要过分爬取,防止京东封你家IP