本文是在三台已经部署了PostgreSQL的集群上部署pgpool,请看另一篇文章
PostgreSQL(一)PostgreSQL一主二从集群部署
对于三台机器的介绍,如下表所示
| 虚拟机名 |
IP |
hostname |
主从划分 |
| pgpool0 |
192.168.149.236 |
node236 |
主节点 |
| pgpool1 |
192.168.149.237 |
node237 |
从节点1 |
| pgpool2 |
192.168.149.238 |
node238 |
从节点2 |
整体部署结构

本文整体部署架构如图所示。最底层是三个PostgreSQL Server,分别部署在三台机器上,采用“一主二从”的部署方法,即一台主节点、两台从节点。最上层是应用程序服务器,应用程序服务器对于PostgreSQL Server来说就是一个PostgreSQL 数据库客户端,应用程序服务器向PostgreSQL Server发送请求。在只有三台PostgreSQL Server的情况下,是可以满足数据库访问求的,但是在负载均衡方面,故障发生时,主从切换等方面,无法满足需求。
而pgpool-II Server是一个中间件。它向应用程序提供一个固定的虚拟IP地址,应用程序无需关心PostgreSQL Server后台。pgpool-II Server部署在其中两台机机器当中,pgpool-II Server之间通过“看门狗”服务保持信息互通,同时避免pgpool单点故障。
1.节点间postgres用户免密登录
1.1关闭防火墙和SELinux
|
|
手工修改/etc/selinux/config SELINUX=disabled,或使用下面命令:
| sed -i '/^SELINUX=.*/ s//SELINUX=disabled/' /etc/selinux/config setenforce 0 |
reboot重启,使配置生效
1.2给postgres用户更改密码

1.3生成并同步密钥
以node236为例,想要免密登录另外两台机器。
ssh-keygen时一路回车往下,ssh-copy-id时需要输入密码。
| # su postgres $ ssh-keygen $ ssh-copy-id 192.168.149.237 $ ssh-copy-id 192.168.149.238 |
可以尝试一下,如下图所示,若是成功免密登录,登录过去,查看ip来确认。

同理,在node237和node238上执行相同的操作。
3.2安装pgpool
尽量选择yum安装默认版本的软件,以便后期维护。执行安装命令
| yum install -y postgresql-pgpool-II |
但是有时默认安装没办法完成,如下图所示。如果公司源没有,则需要到公网下载。需要机器具有访问互联网的能力。

执行命令。
| yum install -y https://www.pgpool.net/yum/rpms/3.4/redhat/rhel-7-x86_64/pgpool-II-pg92-3.4.6-1pgdg.rhel7.x86_64.rpm |
3.3修改认证相关配置
(1)pool_hba.conf和之前配置的PostgreSQL中的配置时一样的,
| vi /etc/pgpool-II/pool_hba.conf host replication repl 192.168.149.236/32 trust host replication repl 192.168.149.237/32 trust host replication repl 192.168.149.238/32 trust host all all 192.168.149.0/24 md5 |
![]() 密码
密码
(2)对postgres的密码进行加密。本文将postgres的密码设置为和用户名相同,将加密结果复制,并粘贴到pcp.conf中相应的位置,取消掉该行的注释。
| # vi /etc/pgpool-II/pcp.conf postgres:81dc9bdb52d04dc20036dbd8313ed055 |
如图所示。

(3)执行命令
| pg_md5 -m -p -u postgres pool_passwd |
然后输入密码,如图所示。

3.4修改集群配置
| vi /etc/pgpool-II/pgpool.conf |
文件内容太长,为不影响阅读,放在文末。这里显示相比于默认文件修改之处。
左边为原文件,右边为修改后的文件。
(1)修改监听地址,将localhost改为*,即监听所有地址发来的请求。
![]()
(2)修改backend相关参数,对应的是PostgreSQL三个节点的相关信息。

(3)pg_hba.conf生效
![]()
(4)使负载均衡生效
![]()
(5)主从流复制生效,并配置用于检查的用户,这个用户会在下文进行创建。

(6)健康检查相关配置,并配置用于检查的用户,这个用户会在下文进行创建。

(7)配置主机故障触发执行的脚本。

![]()

(9)开启虚拟IP,并修改网卡信息。

(10)心跳检查的配置与看门狗配置。


以上,是主节点的配置。对于从节点,和主节点的配置有三处不同。
第一处是wd_hostname需要配置为当前节点的IP

第二处和第三处这里需要配置为另外的看门狗

3.5编写故障切换脚本
该脚本的核心思想,是当主机宕机时选举从机作为主机。有两种方式可选,一种是通过文件触发,一种是通过命令触发。
# Failover command for streaming replication.
# This script assumes that DB node 0 is primary, and 1 is standby.
#
# If standby goes down, do nothing. If primary goes down, create a
# trigger file so that standby takes over primary node.
#
# Arguments: $1: failed node id. $2: new master hostname. $3: path to
# trigger file.
failed_node=$1
new_master=$2
trigger_file=$3
# Do nothing if standby goes down.
if [ $failed_node = 1 ]; then
exit 0;
fi
# Create the trigger file.
# use commond
/usr/bin/ssh -T $new_master $PGHOME/bin/pg_ctl promote -D $PGDATA
# use file
# /usr/bin/ssh -T $new_master  /bin/touch /tmp/trigger_file0
exit 0;
$PGDATA是postgresql的数据目录 /var/lib/pgsql/data/
$PGHOME是postgresql的根目录
3.6权限更改与开放端口
| chmod u+s /sbin/ifconfig &&chmod u+s /usr/sbin chown postgres:postgres failover_stream.sh &&chmod 777 failover_stream.sh chown -R postgres.postgres /etc/pgpool-II mkdir /var/log/pgpool chown -R postgres.postgres /var/log/pgpool mkdir /var/run/pgpool chown -R postgres.postgres /var/run/pgpool
# 如果防火墙已经关闭,可以不用修改防火墙和iptables iptables -I INPUT -p tcp --dport 9999 -j ACCEPT iptables -I INPUT -p tcp --dport 5432 -j ACCEPT iptables -I INPUT -p tcp --dport 9000 -j ACCEPT iptables -I INPUT -p tcp --dport 9898 -j ACCEPT iptables -I INPUT -p tcp --dport 9694 -j ACCEPT
|
3.7创建与修改用户
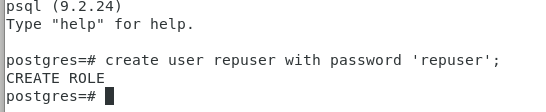
(1)创建一个用于pgpool检查的用户。
| su postgres psql create user repuser with password 'repuser'; |
如图所示
(2)修改postgres用户的密码,用于远程登录。
| postgres=# alter role postgres with password 'postgres'; |
3.8运行pgpool
| pgpool -n -d -D |
-n 为必要参数
-d 为打印更多日志
-D 是清除上次的状态。
通过VIP登录
或者 -C 清除缓存
| pgpool -n -d -D -C |

查看节点信息

当主节点服务断掉,发现主节点自动切换。

最后贴上我的主节点配置文件全部内容,从节点的内容参照上文,稍作修改。
listen_addresses = '*'
port = 9999
socket_dir = '/tmp'
listen_backlog_multiplier = 2
pcp_listen_addresses = '*'
pcp_port = 9898
pcp_socket_dir = '/tmp'
backend_hostname0 = '192.168.149.236'
backend_port0 = 5432
backend_weight0 = 1
backend_data_directory0 = '/var/lib/pgsql/data'
backend_flag0 = 'ALLOW_TO_FAILOVER'
backend_hostname1 = '192.168.149.237'
backend_port1 = 5432
backend_weight1 = 1
backend_data_directory1 = '/var/lib/pgsql/data'
backend_flag1 = 'ALLOW_TO_FAILOVER'
backend_hostname2 = '192.168.149.238'
backend_port2 = 5432
backend_weight2 = 1
backend_data_directory2 = '/var/lib/pgsql/data'
backend_flag2 = 'ALLOW_TO_FAILOVER'
enable_pool_hba = on
pool_passwd = 'pool_passwd'
authentication_timeout = 60
ssl = off
num_init_children = 32
max_pool = 4
child_life_time = 300
child_max_connections = 0
connection_life_time = 0
client_idle_limit = 0
log_destination = 'stderr'
log_line_prefix = '%t: pid %p: '
log_connections = off
log_hostname = off
log_statement = off
log_per_node_statement = off
log_standby_delay = 'none'
syslog_facility = 'LOCAL0'
syslog_ident = 'pgpool'
debug_level = 0
pid_file_name = '/var/run/pgpool/pgpool.pid'
logdir = '/var/log/pgpool'
connection_cache = on
reset_query_list = 'ABORT; DISCARD ALL'
replication_mode = off
replicate_select = off
insert_lock = on
lobj_lock_table = ''
replication_stop_on_mismatch = off
failover_if_affected_tuples_mismatch = off
load_balance_mode = on
ignore_leading_white_space = on
white_function_list = ''
black_function_list = 'nextval,setval,nextval,setval'
database_redirect_preference_list = ''
app_name_redirect_preference_list = ''
allow_sql_comments = off
master_slave_mode = on
master_slave_sub_mode = 'stream'
sr_check_period = 5
sr_check_user = 'repuser'
sr_check_password = 'repuser'
sr_check_database = 'postgres'
delay_threshold = 10000000
follow_master_command = ''
health_check_period = 10
health_check_database = 'postgres'
health_check_timeout = 20
health_check_user = 'repuser'
health_check_password = 'repuser'
health_check_max_retries = 0
health_check_retry_delay = 1
connect_timeout = 10000
failover_command = '/var/lib/pgsql/failover_stream.sh %d %H'
failback_command = ''
fail_over_on_backend_error = on
search_primary_node_timeout = 10
recovery_user = 'nobody'
recovery_password = ''
recovery_1st_stage_command = ''
recovery_2nd_stage_command = ''
recovery_timeout = 90
client_idle_limit_in_recovery = 0
use_watchdog = on
trusted_servers = ''
ping_path = '/bin'
wd_hostname = '192.168.149.236'
wd_port = 9000
wd_authkey = ''
delegate_IP = '192.168.149.239'
ifconfig_path = '/sbin'
if_up_cmd = 'ifconfig ens33:0 inet $_IP_$ netmask 255.255.255.0'
if_down_cmd = 'ifconfig ens33:0 down'
arping_path = '/usr/sbin'
arping_cmd = 'arping -U $_IP_$ -w 1'
clear_memqcache_on_escalation = on
wd_escalation_command = ''
wd_lifecheck_method = 'heartbeat'
wd_interval = 10
wd_heartbeat_port = 9694
wd_heartbeat_keepalive = 2
wd_heartbeat_deadtime = 30
heartbeat_destination0 = '192.168.149.237'
heartbeat_destination_port0 = 9694
heartbeat_device0 = 'ens33'
wd_life_point = 3
wd_lifecheck_query = 'SELECT 1'
wd_lifecheck_dbname = 'template1'
wd_lifecheck_user = 'nobody'
wd_lifecheck_password = ''
other_pgpool_hostname0 = '192.168.149.237'
other_pgpool_port0 = 9999
other_wd_port0 = 9000
relcache_expire = 0
relcache_size = 256
check_temp_table = on
check_unlogged_table = on
memory_cache_enabled = off
memqcache_method = 'shmem'
memqcache_memcached_host = 'localhost'
memqcache_memcached_port = 11211
memqcache_total_size = 67108864
memqcache_max_num_cache = 1000000
memqcache_expire = 0
memqcache_auto_cache_invalidation = on
memqcache_maxcache = 409600
memqcache_cache_block_size = 1048576
memqcache_oiddir = '/var/log/pgpool/oiddir'
white_memqcache_table_list = ''
black_memqcache_table_list = ''