基本思想:
方案一:首先搭建一个Android的最基本工程,完成Android 调用c++ 的代码;
方案二:然后本地写一个c++的子模块,使用配置好的(arm-linux-androideabi-gcc/g++)进行编译得到.a 最后将本地编译的.a文件移植到Android工程上,完成Android-->c++ 工程---->(pc端交叉编译的.a) 完成调用;
方案三:直接在c++中引交叉编译的so文件使用
-------------------------------------------------------------------------------------------------------------------------------------------------------------------------------------
方案一:
第一步、首先建立一个基本的Android 工程,然后写入Android调用c++ 的函数模块;

MainActivity 修改了默认的设置
package com.example.myapplication;

import androidx.appcompat.app.AppCompatActivity;

import android.os.Bundle;
import android.widget.TextView;
import android.widget.Toast;
public class MainActivity extends AppCompatActivity {

    // Used to load the 'native-lib' library on application startup.
    static {
        System.loadLibrary("native-lib");
    }

    @Override
    protected void onCreate(Bundle savedInstanceState) {
        super.onCreate(savedInstanceState);

        setContentView(R.layout.activity_main);
        // Example of a call to a native method
        //TextView tv = findViewById(R.id.sample_text);
        TextView tv = new TextView(this);
        testA aaa=new testA();
        String text=aaa.way();
        tv.setText(text);
        setContentView(tv);
    }

    /**
     * A native method that is implemented by the 'native-lib' native library,
     * which is packaged with this application.
     */

    public native int add(int a,int b,int []c);
}
testA文件内容
package com.example.myapplication;

public class testA {

    public String  way(){

        //tv.setText(stringFromJNI());
        int c[] ={1,2,3,4,5,6,7,8,8,9,9,1};
        int sum = add(2, 3,c);
        return "2 + 3 = " + Integer.toString(sum);
    }

    public native int add(int a,int b,int []c);
}
native-lib.cpp文件
#include <jni.h>
#include <string>
#include<iostream>

#include "info.h"
//#include <Eigen/Dense>
using namespace std;
extern "C" {


int total(int t,int g) {
    return t*g;
}


JNIEXPORT jint JNICALL
Java_com_example_myapplication_testA_add( JNIEnv*  env,
                                                  jobject  ,
                                                  jint a,
                                                  jint b,
                                                  jintArray arr)
{
    jint *carr;
    carr = env->GetIntArrayElements(arr, JNI_FALSE);

    if(carr == NULL) {
        return 0;
    }

    jint sum = 0;
    for(int i=0; i<10; i++) {
        sum += carr[i];
    }
    INFO *info= new INFO();
    int c=info->compute(a,b);
    delete info;
    int z=total(c,c);
    return (z+sum);
}

}
info.h头文件
#ifndef MY_APPLICATION_INFO_H
#define MY_APPLICATION_INFO_H

class INFO
{

public:
    int compute(int a,int b);

};
#endif //MY_APPLICATION_INFO_H
info.cpp文件
//
#include "info.h"

int INFO::compute(int a,int b)
{

    return a+b;
}
CmakeLists.txt文件
# For more information about using CMake with Android Studio, read the
# documentation: https://d.android.com/studio/projects/add-native-code.html

# Sets the minimum version of CMake required to build the native library.

cmake_minimum_required(VERSION 3.4.1)

# Creates and names a library, sets it as either STATIC
# or SHARED, and provides the relative paths to its source code.
# You can define multiple libraries, and CMake builds them for you.
# Gradle automatically packages shared libraries with your APK.
add_library( # Sets the name of the library.
        native-lib

        # Sets the library as a shared library.
        SHARED

        # Provides a relative path to your source file(s).
        native-lib.cpp
        info.cpp
        )

# Searches for a specified prebuilt library and stores the path as a
# variable. Because CMake includes system libraries in the search path by
# default, you only need to specify the name of the public NDK library
# you want to add. CMake verifies that the library exists before
# completing its build.

find_library( # Sets the name of the path variable.
        log-lib

        # Specifies the name of the NDK library that
        # you want CMake to locate.
        log)

# Specifies libraries CMake should link to your target library. You
# can link multiple libraries, such as libraries you define in this
# build script, prebuilt third-party libraries, or system libraries.

target_link_libraries( # Specifies the target library.
        native-lib

        # Links the target library to the log library
        # included in the NDK.
        ${log-lib}
        )
然后点击允执行效果如下(使用sevensquare 连接手机,点击Android stdio 运行,Android Stdio 环境配置自己解决)

启用Android stdio的默认工程讲述
方案二:
然后在本第编译XXX.a文件;首先在ubuntu 16.04 下载https://dl.google.com/android/repository/android-ndk-r21d-linux-x86_64.zip建立交叉编译器,
ubutnu@ubuntu:axel -n 100 https://dl.google.com/android/repository/android-ndk-r21d-linux-x86_64.zip

ubuntu@ubutnu:~$ unzip android-ndk-r21d-linux-x86_64.zip

ubuntu@ubutnu:~$ sudo cp -r android-ndk-r21d /usr/local/


ubuntu@ubutnu:/usr/local/android-ndk-r21d$ sudo ./build/tools/make-standalone-toolchain.sh --package-dir=/usr/local --toolchain=arm-linux-androideabi-4.9
HOST_OS=linux
HOST_EXE=
HOST_ARCH=x86_64
HOST_TAG=linux-x86_64
HOST_NUM_CPUS=12
BUILD_NUM_CPUS=24
Auto-config: --arch=arm
Package installed to /usr/local.

ubuntu@ubutnu:/usr/local$ sudo tar -jxvf arm-linux-androideabi.tar.bz2

ubuntu@ubutnu:/usr/local/arm-linux-androideabi/bin$ pwd
/usr/local/arm-linux-androideabi/bin

ubuntu@ubutnu:/usr/local/android-ndk-r21d$ pwd
/usr/local/android-ndk-r21d


填入环境变量
ubuntu@ubutnu:/usr/local$ sudo vim ~/.bashrc
ubuntu@ubutnu:/usr/local$ source ~/.bashrc

export ANDROID_NDK=/usr/local/android-ndk-r21d
export ARM_TOOL=/usr/local/arm-linux-androideabi/bin
export PATH=$ANDROID_NDK:$ARM_TOOL:$PATH
查看编译是否成功
ubuntu@ubutnu:/usr/local$ arm + TAB 键
ubuntu@ubutnu:/usr/local$ arm
arm                                 arm-none-linux-gnueabi-addr2line
arm2hpdl                            arm-none-linux-gnueabi-ar
arm-linux-addr2line                 arm-none-linux-gnueabi-as
arm-linux-androideabi-addr2line     arm-none-linux-gnueabi-c++
arm-linux-androideabi-ar            arm-none-linux-gnueabi-c++filt
arm-linux-androideabi-as            arm-none-linux-gnueabi-cpp
arm-linux-androideabi-c++filt       arm-none-linux-gnueabi-g++
arm-linux-androideabi-clang         arm-none-linux-gnueabi-gcc
arm-linux-androideab
....
先插入一个例子测试一下交叉编译器是否可用
ubuntu@ubuntu:~$ cat c.c
#include<stdio.h>
int main()
{
	printf("%s","hello world\n");
	return 0;
}
ubuntu@ubuntu:~$ arm-linux-androideabi-gcc -static c.c -o helloword
ubuntu@ubuntu:~$  adb push helloword /data/
5340 KB/s (3445564 bytes in 0.630s)
ubuntu@ubuntu:~$ adb shell
root@phone:/ #  cd /data/
root@phone:/data #  ./helloword
hello world
root@phone:/data #
Android设备测试通过;
在本地写一个function.cpp文件
#include<stdio.h>

int fun(int a,int b)
{
return a+b;
}
ubutnu@ubuntu: arm-linux-androideabi-g++ -shared -fPIC function.cpp -o libfunction.so
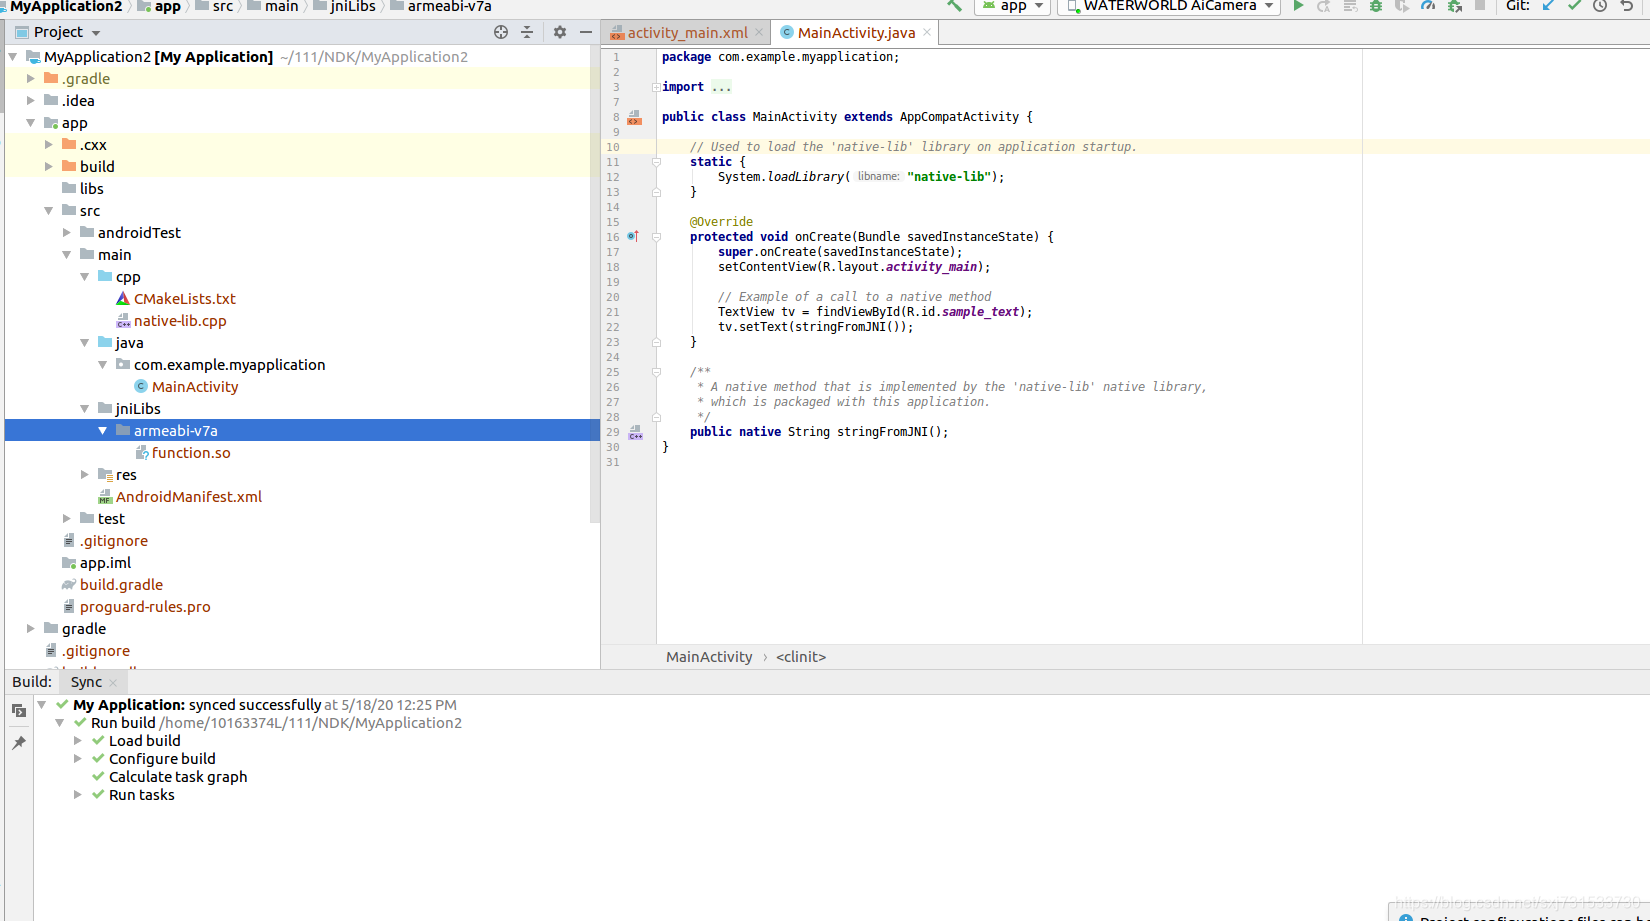
上述要注意,一定要生成libxxx.so 否则找不到这个动态库文件,然后 新建一个Android 的工程
ubuntu@ubuntu:MyApplication2$ tree -l
.
├── app
│   ├── app.iml
│   ├── build
│   │   ├── generated
│   │   │   └── source
│   │   │       └── buildConfig
│   │   │           ├── androidTest
│   │   │           │   └── debug
│   │   │           │       └── com
│   │   │           │           └── example
│   │   │           │               └── myapplication
│   │   │           │                   └── test
│   │   │           │                       └── BuildConfig.java
│   │   │           └── debug
│   │   │               └── com
│   │   │                   └── example
│   │   │                       └── myapplication
│   │   │                           └── BuildConfig.java
│   │   ├── intermediates
│   │   │   ├── apk_list
│   │   │   │   └── debug
│   │   │   │       └── mainApkListPersistenceDebug
│   │   │   │           └── apk-list.gson
│   │   │   ├── bundle_manifest
│   │   │   │   └── debug
│   │   │   │       └── processDebugManifest
│   │   │   │           └── bundle-manifest
│   │   │   │               ├── AndroidManifest.xml
│   │   │   │               └── output.json
│   │   │   ├── check_manifest_result
│   │   │   │   └── debug
│   │   │   │       └── checkDebugManifest
│   │   │   │           └── out
│   │   │   ├── cmake
│   │   │   │   └── debug
│   │   │   │       └── obj
│   │   │   │           └── x86
│   │   │   ├── compatible_screen_manifest
│   │   │   │   └── debug
│   │   │   │       └── createDebugCompatibleScreenManifests
│   │   │   │           └── out
│   │   │   │               └── output.json
│   │   │   ├── instant_app_manifest
│   │   │   │   └── debug
│   │   │   │       ├── AndroidManifest.xml
│   │   │   │       └── output.json
│   │   │   ├── lint_jar
│   │   │   │   └── global
│   │   │   │       └── prepareLintJar
│   │   │   ├── lint_publish_jar
│   │   │   │   └── global
│   │   │   │       └── prepareLintJarForPublish
│   │   │   ├── manifest_merge_blame_file
│   │   │   │   ├── debug
│   │   │   │   │   └── manifest-merger-blame-debug-report.txt
│   │   │   │   └── debugAndroidTest
│   │   │   │       └── manifest-merger-blame-debug-androidTest-report.txt
│   │   │   ├── merged_manifests
│   │   │   │   ├── debug
│   │   │   │   │   ├── AndroidManifest.xml
│   │   │   │   │   └── output.json
│   │   │   │   └── debugAndroidTest
│   │   │   │       ├── AndroidManifest.xml
│   │   │   │       └── output.json
│   │   │   ├── metadata_feature_manifest
│   │   │   │   └── debug
│   │   │   │       └── processDebugManifest
│   │   │   │           └── metadata-feature
│   │   │   │               └── output.json
│   │   │   └── tmp
│   │   │       └── manifest
│   │   │           └── androidTest
│   │   │               └── debug
│   │   └── outputs
│   │       └── logs
│   │           └── manifest-merger-debug-report.txt
│   ├── build.gradle
│   ├── libs
│   ├── proguard-rules.pro
│   └── src
│       ├── androidTest
│       │   └── java
│       │       └── com
│       │           └── example
│       │               └── myapplication
│       │                   └── ExampleInstrumentedTest.java
│       ├── main
│       │   ├── AndroidManifest.xml
│       │   ├── cpp
│       │   │   ├── CMakeLists.txt
│       │   │   └── native-lib.cpp
│       │   ├── java
│       │   │   └── com
│       │   │       └── example
│       │   │           └── myapplication
│       │   │               └── MainActivity.java
│       │   └── res
│       │       ├── drawable
│       │       │   └── ic_launcher_background.xml
│       │       ├── drawable-v24
│       │       │   └── ic_launcher_foreground.xml
│       │       ├── layout
│       │       │   └── activity_main.xml
│       │       ├── mipmap-anydpi-v26
│       │       │   ├── ic_launcher_round.xml
│       │       │   └── ic_launcher.xml
│       │       ├── mipmap-hdpi
│       │       │   ├── ic_launcher.png
│       │       │   └── ic_launcher_round.png
│       │       ├── mipmap-mdpi
│       │       │   ├── ic_launcher.png
│       │       │   └── ic_launcher_round.png
│       │       ├── mipmap-xhdpi
│       │       │   ├── ic_launcher.png
│       │       │   └── ic_launcher_round.png
│       │       ├── mipmap-xxhdpi
│       │       │   ├── ic_launcher.png
│       │       │   └── ic_launcher_round.png
│       │       ├── mipmap-xxxhdpi
│       │       │   ├── ic_launcher.png
│       │       │   └── ic_launcher_round.png
│       │       └── values
│       │           ├── colors.xml
│       │           ├── strings.xml
│       │           └── styles.xml
│       └── test
│           └── java
│               └── com
│                   └── example
│                       └── myapplication
│                           └── ExampleUnitTest.java
├── build.gradle
├── gradle
│   └── wrapper
│       ├── gradle-wrapper.jar
│       └── gradle-wrapper.properties
├── gradle.properties
├── gradlew
├── gradlew.bat
├── local.properties
├── My Application.iml
└── settings.gradle

90 directories, 52 files
工程界面
在这个目录下建立一个文件夹,将so文件拖入进去,参考(https://www.cnblogs.com/leipDao/p/10685302.html) 动态库只能建立在该文件夹下 jniLibs,静态库无所谓~~
然后将CMakeLists.txt 拖到这里,填入相应的内容:

# For more information about using CMake with Android Studio, read the
# documentation: https://d.android.com/studio/projects/add-native-code.html

# Sets the minimum version of CMake required to build the native library.

cmake_minimum_required(VERSION 3.4.1)

# Creates and names a library, sets it as either STATIC
# or SHARED, and provides the relative paths to its source code.
# You can define multiple libraries, and CMake builds them for you.
# Gradle automatically packages shared libraries with your APK.

add_library( # Sets the name of the library.
        native-lib

        # Sets the library as a shared library.
        SHARED

        # Provides a relative path to your source file(s).
        src/main/cpp/native-lib.cpp)

# Searches for a specified prebuilt library and stores the path as a
# variable. Because CMake includes system libraries in the search path by
# default, you only need to specify the name of the public NDK library
# you want to add. CMake verifies that the library exists before
# completing its build.

find_library( # Sets the name of the path variable.
        log-lib

        # Specifies the name of the NDK library that
        # you want CMake to locate.
        log)

# Specifies libraries CMake should link to your target library. You
# can link multiple libraries, such as libraries you define in this
# build script, prebuilt third-party libraries, or system libraries.
set(CMAKE_CXX_FLAGS "${CMAKE_CXX_FLAGS} -L${CMAKE_SOURCE_DIR}/src/main/jniLibs/armeabi-v7a")

target_link_libraries( # Specifies the target library.
        native-lib
        function

        # Links the target library to the log library
        # included in the NDK.
        ${log-lib})
因为移动了CMakeLIsts.txt的位置,需要修改一下这个文件build.gradle

然后在代码中写入调用的函数即可

native-lib.cpp 文件 (这里需要自己写明函数声明,实际大型工程中,是调用include文件夹的头文件的,具体可以参考后续方案三)

然后点击运行就可以调用了,这里没有打印显示

静态库的编译
ubuntu@ubuntu:~/project/src$ arm-linux-androideabi-g++ -shared -fPIC function.cpp -o libfunction.so
ubuntu@ubuntu:~/project/src$ ls
function.cpp  libfunction.so  Untitled Document
ubuntu@ubuntu:~/project/src$ arm-linux-androideabi-ar r staticfunction.a libfunction.so
arm-linux-androideabi-ar: creating staticfunction.a
填入工程目录

然后修改对应的文件CMakelists.txt
# For more information about using CMake with Android Studio, read the
# documentation: https://d.android.com/studio/projects/add-native-code.html

# Sets the minimum version of CMake required to build the native library.

cmake_minimum_required(VERSION 3.4.1)

# Creates and names a library, sets it as either STATIC
# or SHARED, and provides the relative paths to its source code.
# You can define multiple libraries, and CMake builds them for you.
# Gradle automatically packages shared libraries with your APK.

add_library( # Sets the name of the library.
        native-lib

        # Sets the library as a shared library.
        SHARED

        # Provides a relative path to your source file(s).
        src/main/cpp/native-lib.cpp)

# Searches for a specified prebuilt library and stores the path as a
# variable. Because CMake includes system libraries in the search path by
# default, you only need to specify the name of the public NDK library
# you want to add. CMake verifies that the library exists before
# completing its build.

find_library( # Sets the name of the path variable.
        log-lib

        # Specifies the name of the NDK library that
        # you want CMake to locate.
        log)
add_library(function STATIC IMPORTED)

set_target_properties(function PROPERTIES IMPORTED_LOCATION ${CMAKE_SOURCE_DIR}/src/main/staticlibs/staticfunction.a)

# Specifies libraries CMake should link to your target library. You
# can link multiple libraries, such as libraries you define in this
# build script, prebuilt third-party libraries, or system libraries.

target_link_libraries( # Specifies the target library.
        native-lib
        function
        # Links the target library to the log library
        # included in the NDK.
        ${log-lib})
可以运行了,结果正常~~

方案三:
创建Android的c++ 工程,调用动态库交叉编译器生成的so文件,使用独立的头文件和独立的so文件,这种方式常见于官方提供的源代码和大型工程中(需要使用构建的交叉编译器NDK编译文件):
ubuntu@ubuntu:~$ cat function.cpp
#include<iostream>
#include "function.h"
int fun(int a,int b)
{
return a+b;
}
ubuntu@ubuntu:~$ cat function.h
#include<iostream>
int fun(int a,int b);
ubuntu@ubuntu:~$ arm-linux-androideabi-g++ -c function.cpp -o function.so
ubuntu@ubuntu:~$ ls
function.cpp  function.h  function.so
然后修改build.gradle文件

 externalNativeBuild {
            cmake {
                cppFlags "-std=c++11"
            }
            ndk{
                abiFilters 'armeabi-v7a'  // x86 armeabi arm64-v8a x86_64
            }
        }
    }

    sourceSets{
        main{
            jniLibs.srcDirs=["src/main/jniLibs/libs"]
        }
    }
修改CmakeLists.txt 文件内容为:
# For more information about using CMake with Android Studio, read the
# documentation: https://d.android.com/studio/projects/add-native-code.html

# Sets the minimum version of CMake required to build the native library.

cmake_minimum_required(VERSION 3.4.1)

# Creates and names a library, sets it as either STATIC
# or SHARED, and provides the relative paths to its source code.
# You can define multiple libraries, and CMake builds them for you.
# Gradle automatically packages shared libraries with your APK.

include_directories(${CMAKE_SOURCE_DIR}/include)

# 导入opencv的so
add_library(function SHARED IMPORTED)
set_target_properties(function PROPERTIES IMPORTED_LOCATION
        ${CMAKE_SOURCE_DIR}/../jniLibs/libs/${ANDROID_ABI}/function.so)


add_library( # Sets the name of the library.
             native-lib

             # Sets the library as a shared library.
             SHARED

             # Provides a relative path to your source file(s).
             native-lib.cpp )

# Searches for a specified prebuilt library and stores the path as a
# variable. Because CMake includes system libraries in the search path by
# default, you only need to specify the name of the public NDK library
# you want to add. CMake verifies that the library exists before
# completing its build.

find_library( # Sets the name of the path variable.
              log-lib

              # Specifies the name of the NDK library that
              # you want CMake to locate.
              log )

# Specifies libraries CMake should link to your target library. You
# can link multiple libraries, such as libraries you define in this
# build script, prebuilt third-party libraries, or system libraries.

target_link_libraries( # Specifies the target library.
                       native-lib
                       function
                       # Links the target library to the log library
                       # included in the NDK.
                       ${log-lib} )
建议存放的头文件和so文件目录不要修改;
对应的native-lib.cpp文件内容为
#include <jni.h>
#include <string>
#include <iostream>
#include "include/function.h"


using namespace std;
extern "C" JNIEXPORT jstring JNICALL
Java_com_example_boost_MainActivity_stringFromJNI(
        JNIEnv* env,
        jobject /* this */) {
    std::string hello = "Hello from C++";

    cout<<fun(2,3)<<endl;
    return env->NewStringUTF(hello.c_str());
}
ok 打通了Android 独立使用c++代码;Android 的c++模块调用.a文件;Android 的c++模块调用.so文件;
感谢博客及其对应的博主~~ 致谢
https://www.jianshu.com/p/b842e2a6414a
https://www.cnblogs.com/leipDao/p/10685302.html