Qt开启多线程,主要用到类QThread。有两种方法,第一种用一个类继承QThread,然后重新改写虚函数run()。当要开启新线程时,只需要实例该类,然后调用函数start(),就可以开启一条多线程。第二种方法是继承一个QObject类,然后利用moveToThread()函数开启一个线程槽函数,将要花费大量时间计算的代码放入该线程槽函数中。第二种方法可以参考写的另一篇博客https://blog.csdn.net/naibozhuan3744/article/details/81201502
下面我总结的主要是第一种方法。(注意:只有在run()函数里面才是新的线程,所有复杂逻辑都应该在run()函数里面做。当run()函数运行完毕后,该线程生命周期结束。)
创建多线程步骤如下:
a1新建一个类MyThread,基类为QThread。
a2重写类MyThread的虚函数void run();,即新建一个函数protected void run(),然后对其进行定义。
a3在需要用到多线程的地方,实例MyThread,然后调用函数MyThread::start()后,则开启一条线程,自动运行函数run()。
a4当停止线程时,调用MyThread::wait()函数,等待线程结束,并且回收线程资源。
1.1新建一个widget工程,不要勾选ui界面。然后分别在mythread.h,mythread.cpp,widget.h,widget.cpp,main.cpp分别添加如下代码。
mythread.h
-
#ifndef MYTHREAD_H
-
#define MYTHREAD_H
-
-
#include <QThread>
-
-
class MyThread :
public QThread
-
{
-
public:
-
MyThread();
-
void closeThread();
-
-
protected:
-
virtual void run();
-
-
private:
-
volatile
bool isStop;
//isStop是易失性变量,需要用volatile进行申明
-
};
-
-
#endif // MYTHREAD_H
mythread.cpp
-
#include "mythread.h"
-
#include <QDebug>
-
#include <QMutex>
-
-
MyThread::MyThread()
-
{
-
isStop =
false;
-
}
-
-
void MyThread::closeThread()
-
{
-
isStop =
true;
-
}
-
-
void MyThread::run()
-
{
-
while (
1)
-
{
-
if(isStop)
-
return;
-
qDebug()<<tr(
"mythread QThread::currentThreadId()==")<<QThread::currentThreadId();
-
sleep(
1);
-
}
-
}
widget.h
-
#ifndef WIDGET_H
-
#define WIDGET_H
-
-
#include <QWidget>
-
#include <mythread.h>
-
#include <QPushButton>
-
#include <QVBoxLayout>
-
#include <QMutex>
-
-
class Widget :
public QWidget
-
{
-
Q_OBJECT
-
-
public:
-
Widget(QWidget *parent =
0);
-
~Widget();
-
void createView();
-
-
private slots:
-
void openThreadBtnSlot();
-
void closeThreadBtnSlot();
-
void finishedThreadBtnSlot();
-
// void testBtnSlot();
-
-
private:
-
QVBoxLayout *mainLayout;
-
MyThread *thread1;
-
};
-
-
#endif // WIDGET_H
widget.cpp
-
#include "widget.h"
-
#include <QDebug>
-
#include <windows.h>
-
-
Widget::Widget(QWidget *parent)
-
: QWidget(parent)
-
{
-
createView();
-
}
-
-
void Widget::createView()
-
{
-
/*添加界面*/
-
QPushButton *openThreadBtn =
new QPushButton(tr(
"打开线程"));
-
QPushButton *closeThreadBtn =
new QPushButton(tr(
"关闭线程"));
-
mainLayout =
new QVBoxLayout(
this);
-
mainLayout->addWidget(openThreadBtn);
-
mainLayout->addWidget(closeThreadBtn);
-
mainLayout->addStretch();
-
connect(openThreadBtn,SIGNAL(clicked(
bool)),
this,SLOT(openThreadBtnSlot()));
-
connect(closeThreadBtn,SIGNAL(clicked(
bool)),
this,SLOT(closeThreadBtnSlot()));
-
-
/*线程初始化*/
-
thread1 =
new MyThread;
-
connect(thread1,SIGNAL(finished()),
this,SLOT(finishedThreadBtnSlot()));
-
}
-
-
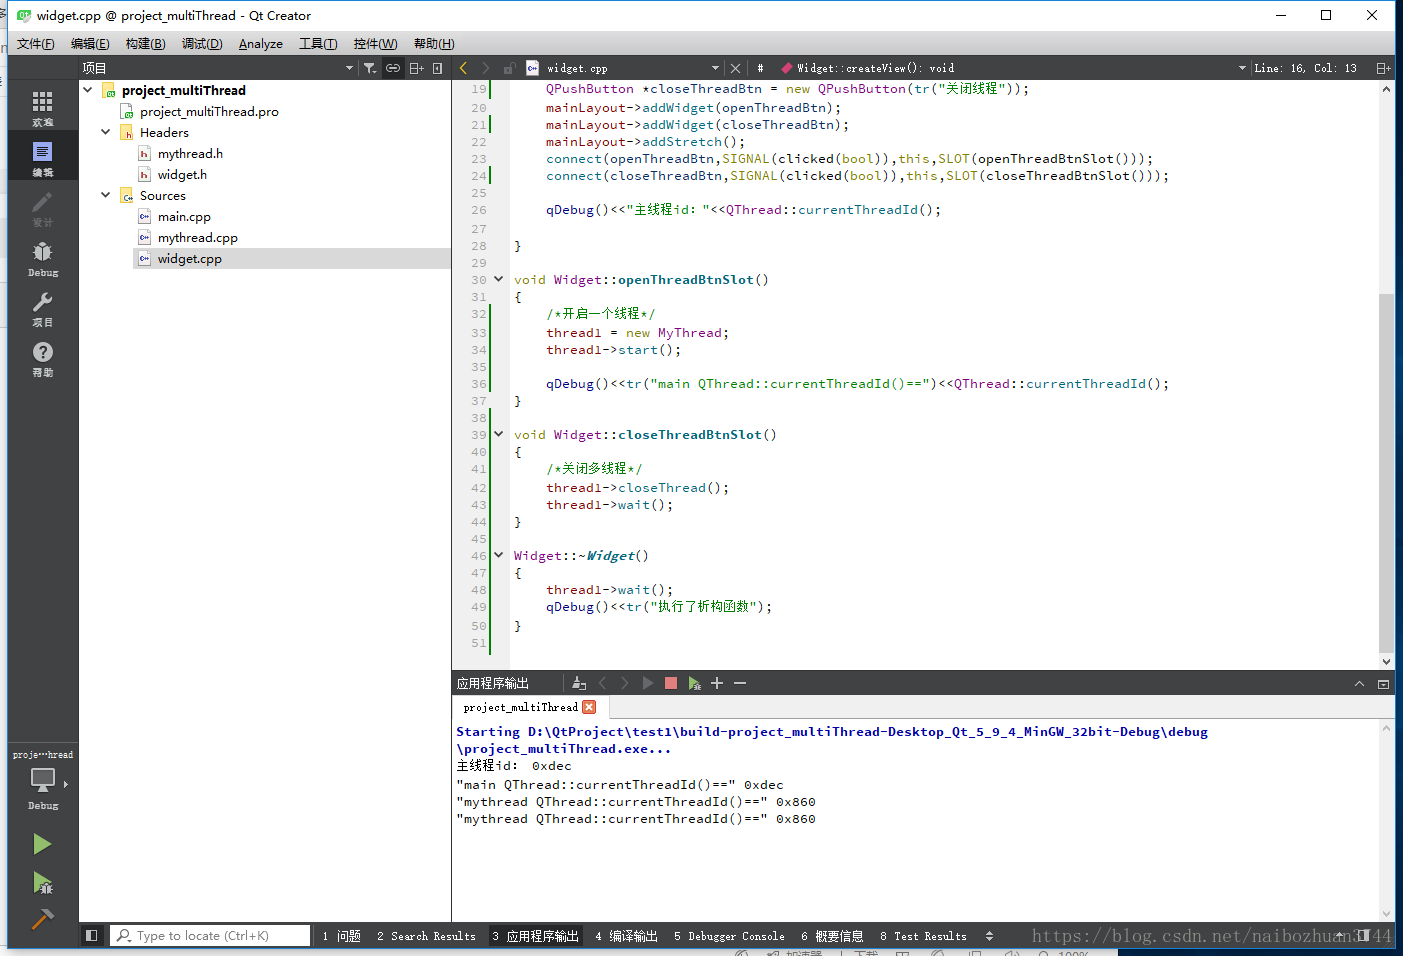
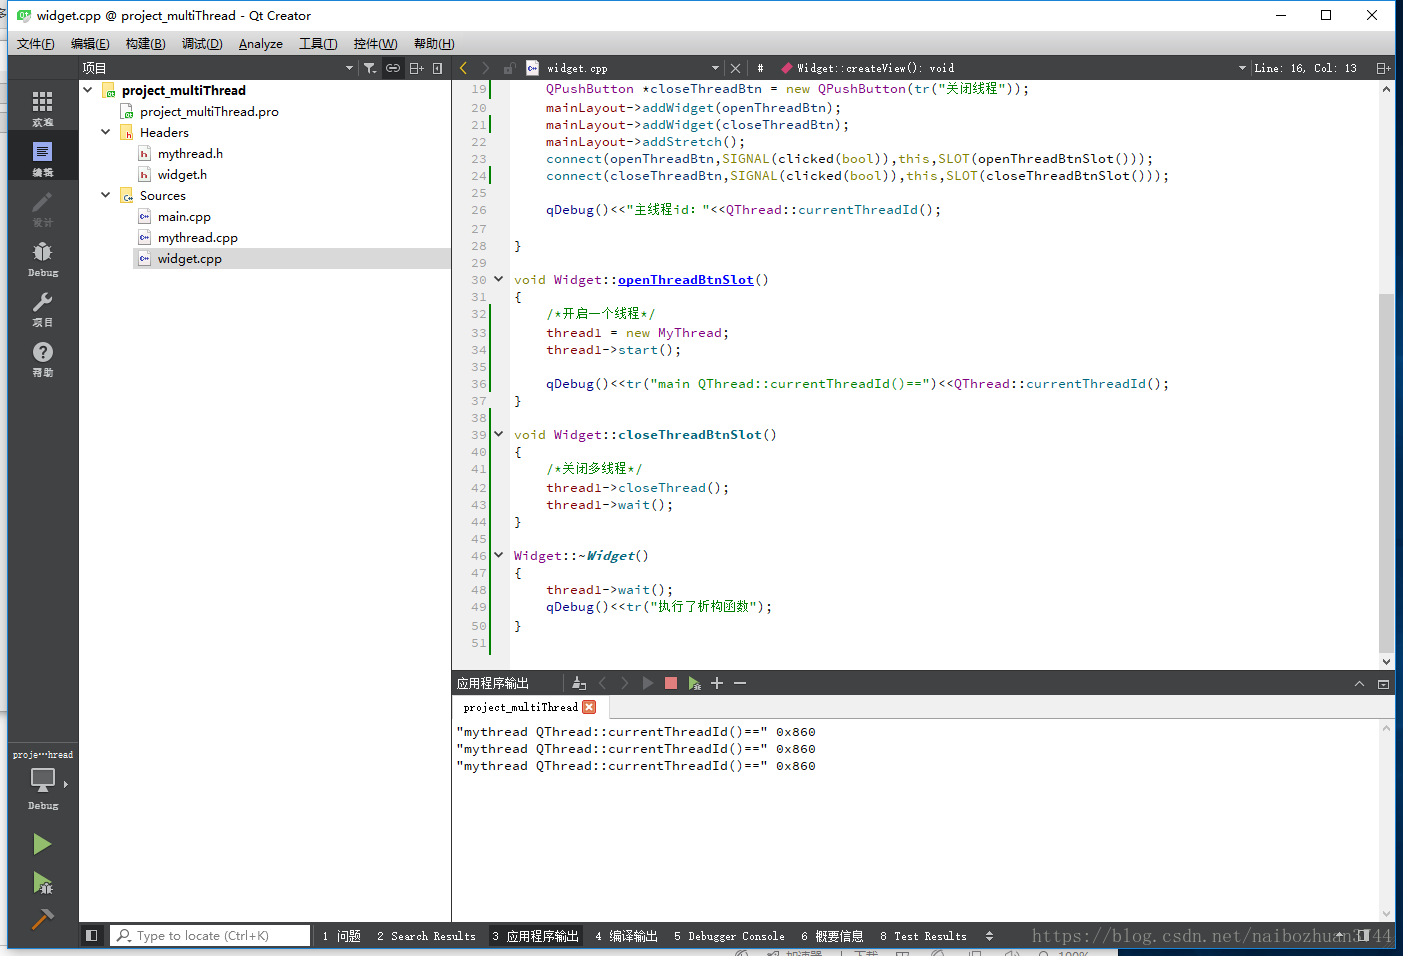
void Widget::openThreadBtnSlot()
-
{
-
/*开启一个线程*/
-
thread1->start();
-
qDebug()<<
"主线程id:"<<QThread::currentThreadId();
-
}
-
-
void Widget::closeThreadBtnSlot()
-
{
-
/*关闭多线程*/
-
thread1->closeThread();
-
thread1->wait();
-
}
-
-
void Widget::finishedThreadBtnSlot()
-
{
-
qDebug()<<tr(
"完成信号finished触发");
-
}
-
-
Widget::~Widget()
-
{
-
}
main.cpp
-
#include "widget.h"
-
#include <QApplication>
-
-
int main(int argc, char *argv[])
-
{
-
QApplication a(argc, argv);
-
Widget w;
-
w.resize(
960,
640);
-
w.show();
-
-
return a.exec();
-
}
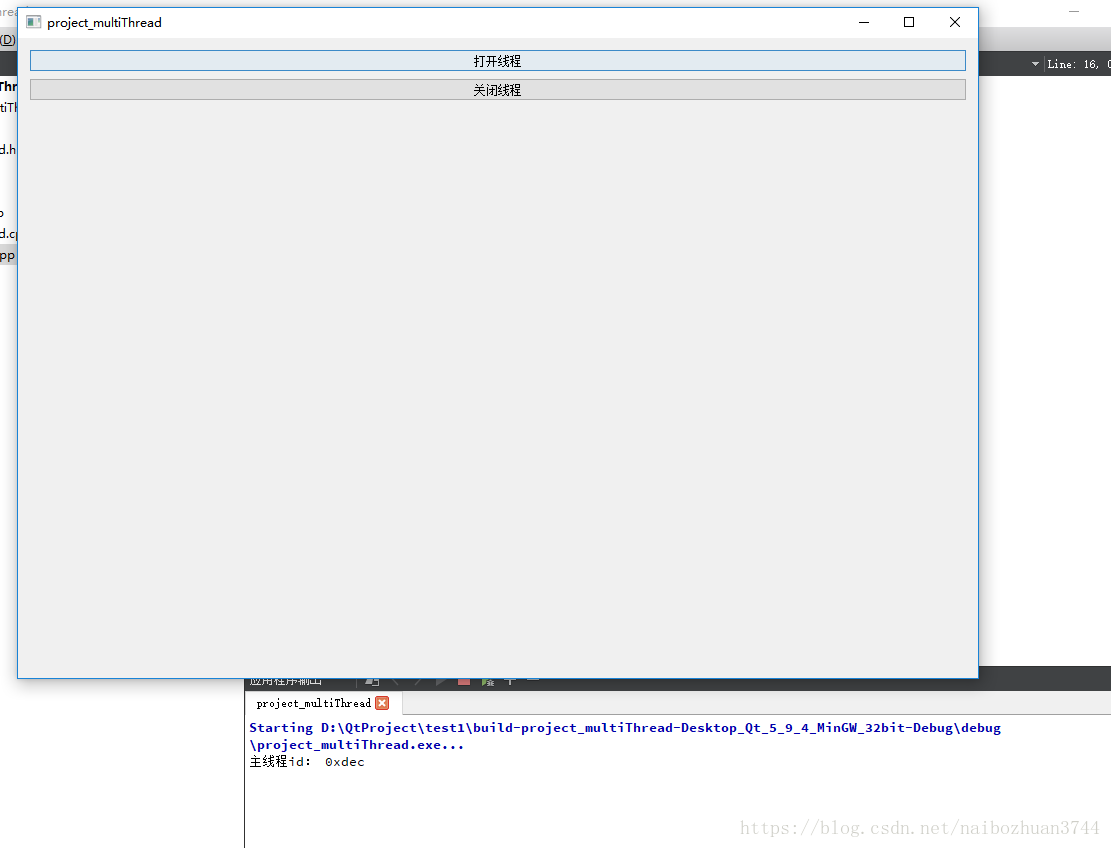
1.2程序构建和运行后,结果如下图所示:
参考内容:
https://blog.csdn.net/czyt1988/article/details/64441443(正确终止线程经典教程)
https://blog.csdn.net/MyCodingLine/article/details/48597935
https://blog.csdn.net/xipiaoyouzi/article/details/8450704
https://blog.csdn.net/qq769651718/article/details/79357933(两种创建多线程方式)