STM32使用cJSON
STM32移植cJSON库创建和解析json字符,原本想使用Keil官方的那个解析json的库Jansson但是自己测试了一下,感觉使用起来并不是太好,所以选择了cJSON这个库,但是Jansson库占用的内存相对小。
我自己使用Jansson库的博客链接:https://blog.csdn.net/weixin_45488643/article/details/107132066
1、cJSON库的下载与移植
1.1、下载地址
我是直接下载的github上的cJSON库,下载链接:https://github.com/DaveGamble/cJSON有些小伙伴可能下载不了,我会在最后附上网盘下载地址和我使用的工程文件,我使用的是正点原子的工程文件。
官方下载链接:https://sourceforge.net/projects/cjson/
中文说明:http://www.json.org/json-zh.html
1.2、STM32移植
解压后的库文件如下所示:
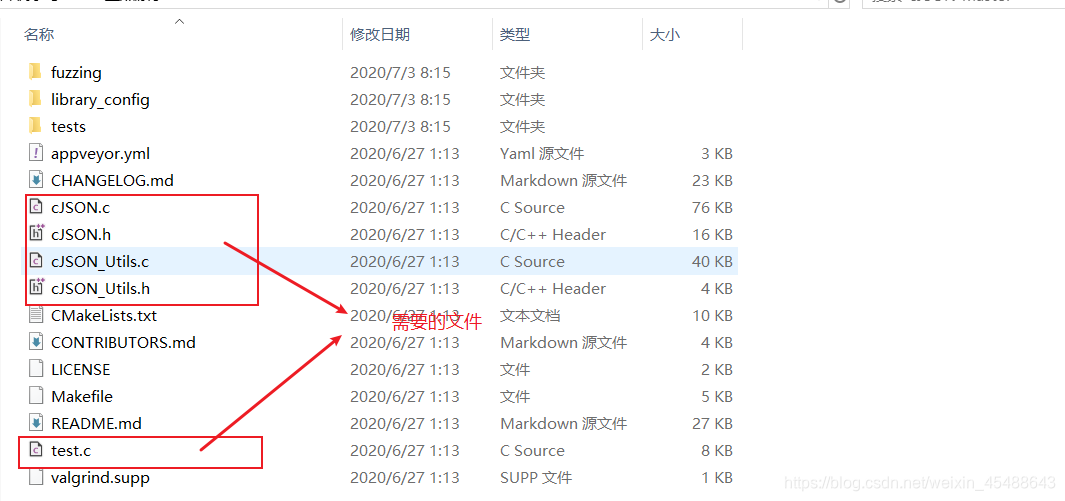
在工程文件根目录下面创建一个文件夹用于存放我们需要的文件。
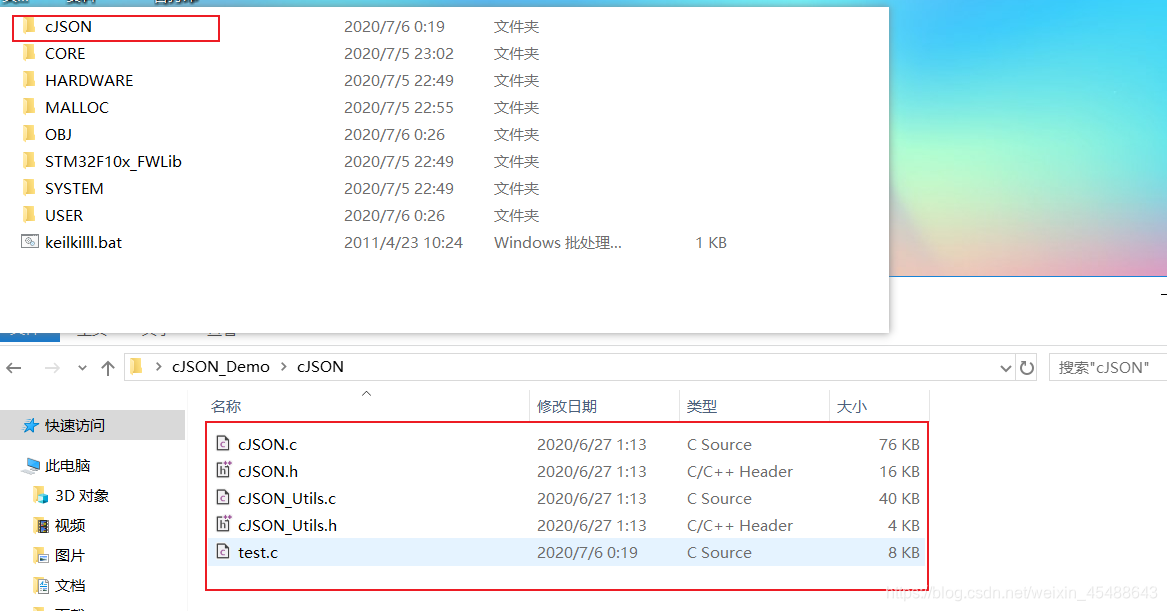
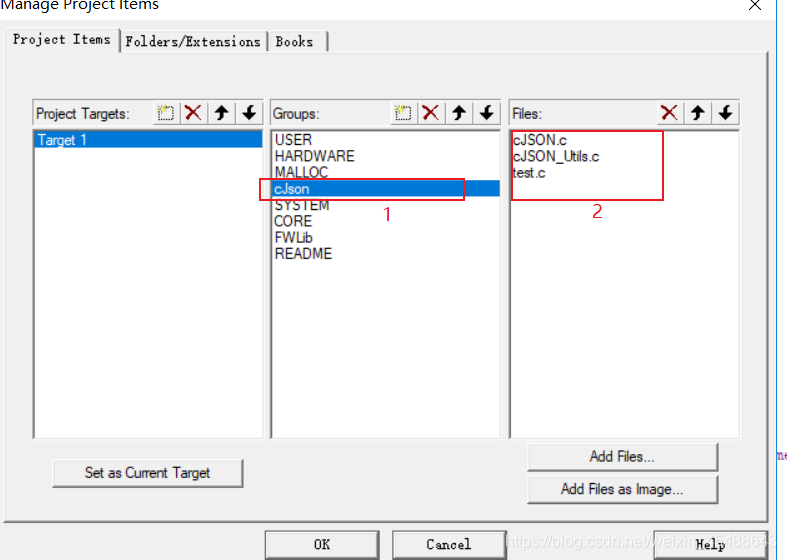
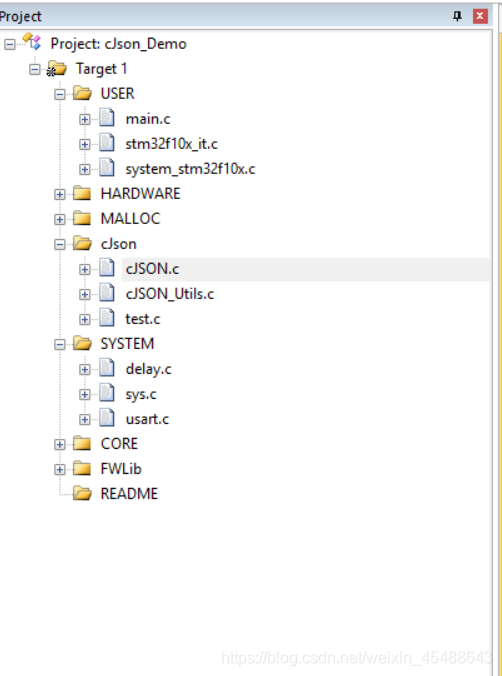
打开工程文件创建一个cJSON文件夹,添加cJSON.c、cJSON_Utils.c、test.c 3个文件,主要使用自带的test.c里面的文件经行创建json格式字符的测试。
1.3、修改堆栈大小
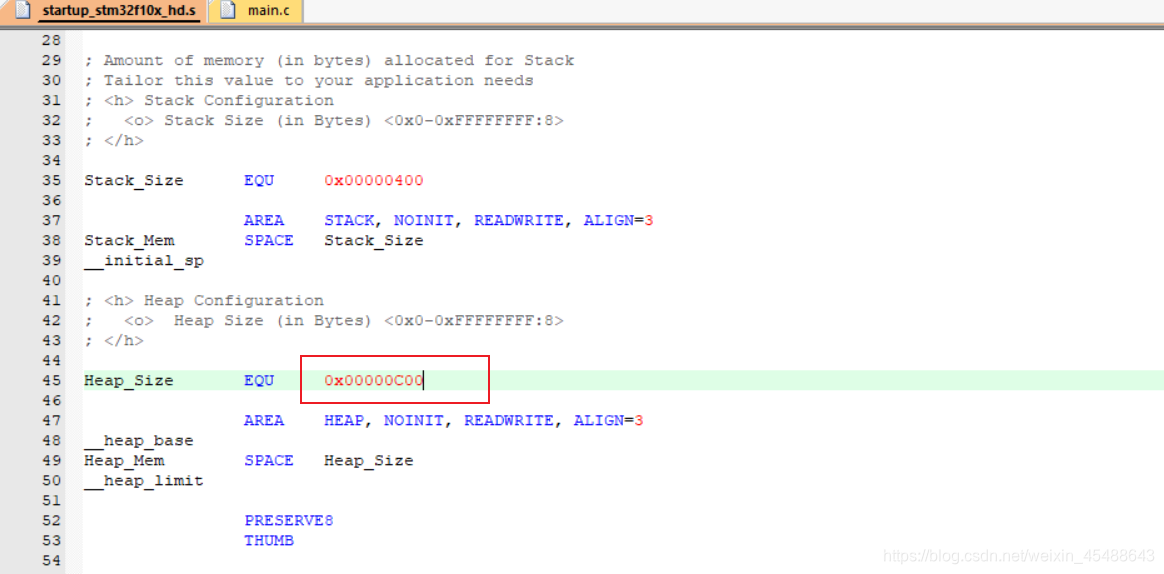
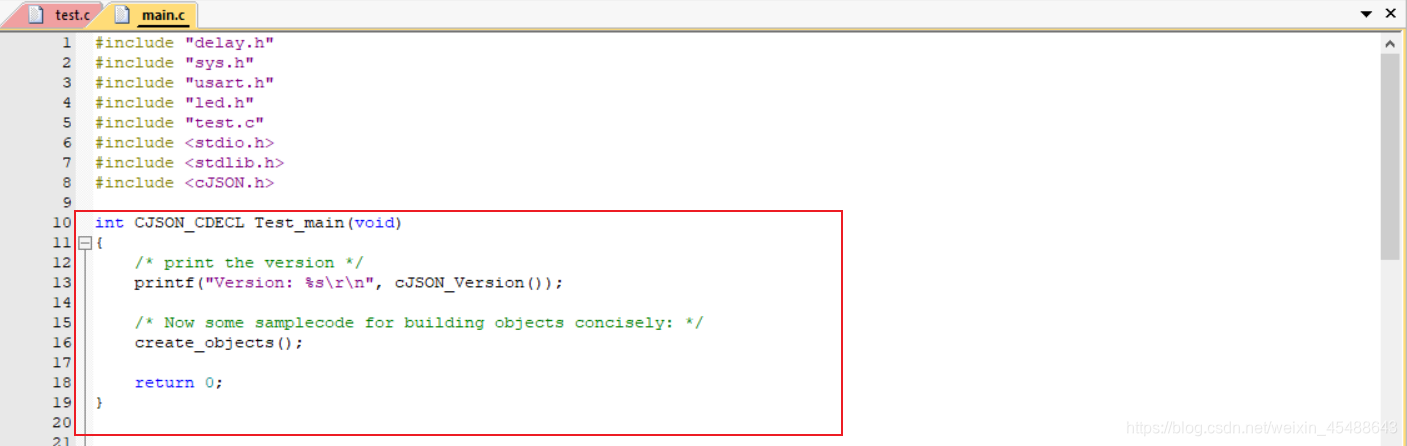
把test.c中的main函数删除,不然程序会报错。删除test.c中的main函数之后在添加一个Test_main()函数,在自己的main函数中。
一定要及时使用**cJSON_Delete()**函数清除空间,防止单片机死机。
主函数:
#include "delay.h"
#include "sys.h"
#include "usart.h"
#include "led.h"
#include "test.c"
#include <stdio.h>
#include <stdlib.h>
#include <cJSON.h>

int CJSON_CDECL Test_main(void)
{


    /* print the version */
    printf("Version: %s\r\n", cJSON_Version());

    /* Now some samplecode for building objects concisely: */
    create_objects();

    return 0;
}


int cJSON_Test() {


	const char *line = "{\"state\": {\"desired\": {\"hz\": 5,\"temp_comp\":   -0.1}}, \
    \"metadata\": {\"reported\": {\"hz\": {\"timestamp\": 1559720433}, \
    \"temp_comp\": {\"timestamp\": 1559720433}}, \
    \"desired\": {\"hz\": {\"timestamp\": 1559720433},\"temp_comp\": {\"timestamp\": 1559720433}}}, \
  	\"timestamp\": 1559720433, \
  	\"version\": 3}";

    cJSON *json;
    //char *out;

    json = cJSON_Parse( line );			//

    if(json == NULL)
    	printf("json fmt error:%s\r\n.", cJSON_GetErrorPtr());
    else{


    	cJSON *object = cJSON_GetObjectItem(json, "state");
    	cJSON *object1 = cJSON_GetObjectItem(object, "desired");

    	cJSON *item = cJSON_GetObjectItem(object1, "hz");
    	printf("desired->hz: %d\r\n", item->valueint);

    	item = cJSON_GetObjectItem(object1, "temp_comp");
    	printf("desired->temp_comp: %f\r\n", item->valuedouble);

    	cJSON_Delete(json);
	}

	return 0;
}


 int main(void)
 {


		uart_init(9600);
		delay_init();	     //延时初始化
		NVIC_PriorityGroupConfig(NVIC_PriorityGroup_2);// 设置中断优先级分组2
		LED_Init();		  	//初始化与LED连接的硬件接口
    Test_main();
		printf("\r\n");
	  cJSON_Test();

   while(1)
   {


  		GPIO_ResetBits(GPIOA,GPIO_Pin_8);			   //给PA8置0
			delay_ms(800);
			GPIO_SetBits(GPIOA,GPIO_Pin_8);			   //给PA8置1
			delay_ms(800);

   }
}
1.4、报错解决
显示了如下错误。

解决方法,在usart.c函数里面添加定义代码,问题就可以解决。
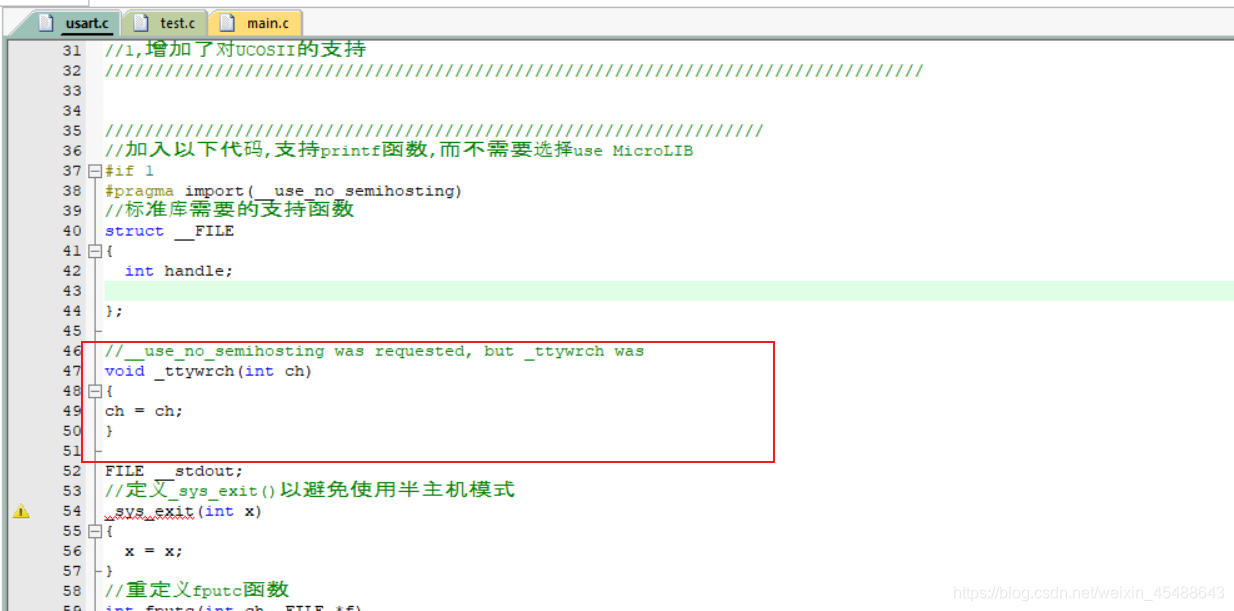
//__use_no_semihosting was requested, but _ttywrch was
void _ttywrch(int ch)
{


ch = ch;
}
2、测试展示
2.1、整体串口输出
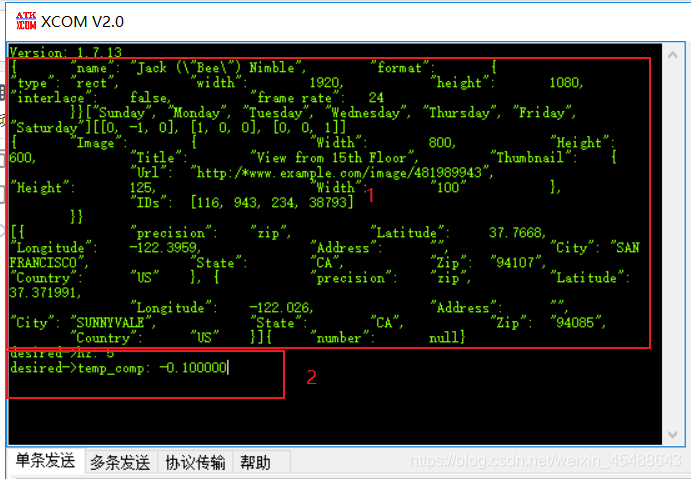
2.2、编码json格式验证
复制红色1标记的字符进行验证,使用在线json解析网站https://www.bejson.com/
验证结果:
{


	"name":	"Jack (\"Bee\") Nimble",
	"format":	{


		"type":	"rect",
		"width":	1920,
		"height":	1080,
		"interlace":	false,
		"frame rate":	24
	}
}
["Sunday", "Monday", "Tuesday", "Wednesday", "Thursday", "Friday", "Saturday"]
[[0, -1, 0], [1, 0, 0], [0, 0, 1]]
{


	"Image":	{


		"Width":	800,
		"Height":	600,
		"Title":	"View from 15th Floor",
		"Thumbnail":	{


			"Url":	"http:/*www.example.com/image/481989943",
			"Height":	125,
			"Width":	"100"
		},
		"IDs":	[116, 943, 234, 38793]
	}
}
[{


		"precision":	"zip",
		"Latitude":	37.7668,
		"Longitude":	-122.3959,
		"Address":	"",
		"City":	"SAN FRANCISCO",
		"State":	"CA",
		"Zip":	"94107",
		"Country":	"US"
	}, {


		"precision":	"zip",
		"Latitude":	37.371991,
		"Longitude":	-122.026,
		"Address":	"",
		"City":	"SUNNYVALE",
		"State":	"CA",
		"Zip":	"94085",
		"Country":	"US"
	}]
{


	"number":	null
}
2.3、解析json
进行json数据格式的解析。

串口输出结果:

至此移植工程和测试就结束了,更多的详细使用请到官方文档查看。
最后附上工程文件和cJSON库,下载链接:https://wwa.lanzous.com/b00nq1k1c
密码:as2d,希望能给个赞呗。