前言:
vue调用本地摄像头实现拍照功能,由于调用摄像头有使用权限,只能在本地运行,线上需用https域名才可以使用。
实现效果:
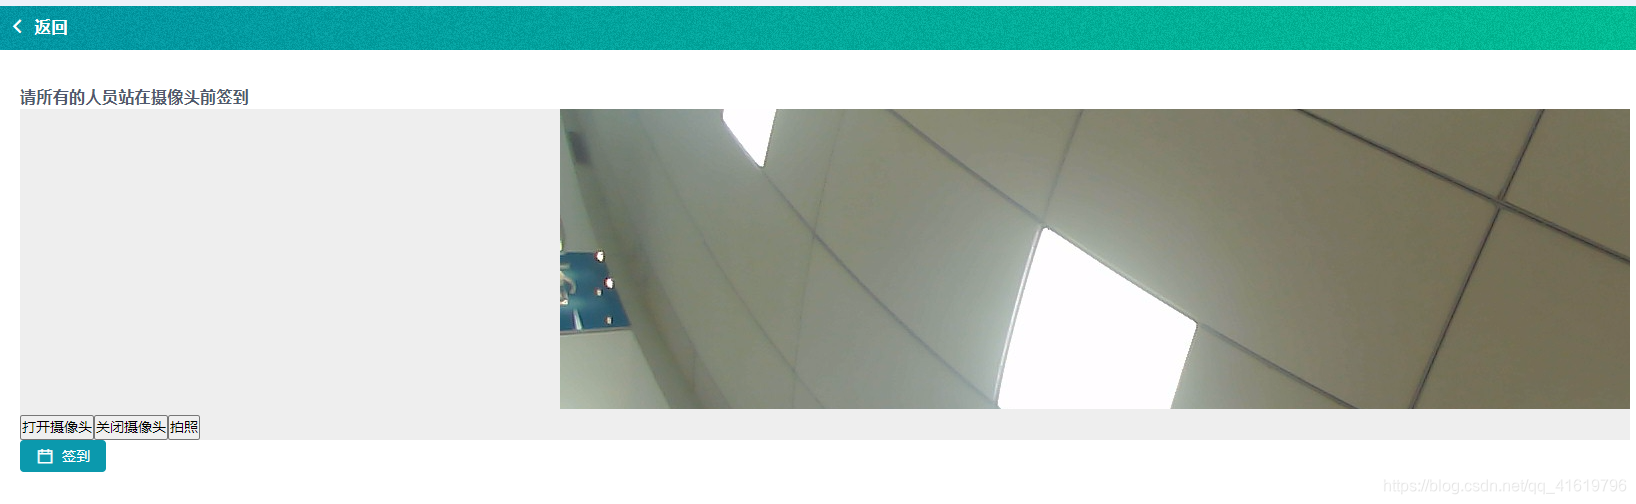
1、摄像头效果:
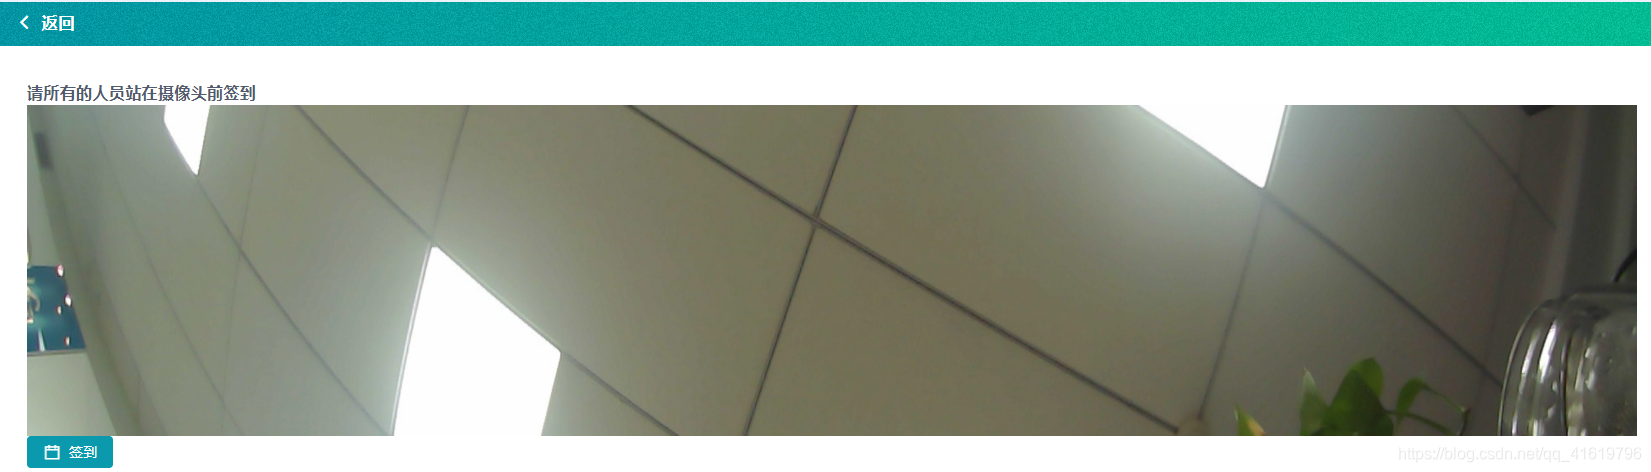
2、拍照效果:
实现代码:
<template>
    <div class="camera_outer">
      <video id="videoCamera" :width="videoWidth" :height="videoHeight" autoplay></video>
      <canvas style="display:none;" id="canvasCamera" :width="videoWidth" :height="videoHeight" ></canvas>

      <div v-if="imgSrc" class="img_bg_camera">
        <img :src="imgSrc" alt="" class="tx_img">
      </div>
      <button @click="getCompetence()">打开摄像头</button>
      <button @click="stopNavigator()">关闭摄像头</button>
     <button @click="setImage()">拍照</button>


    </div>
  </template>
  <script>
  export default {
    data () {
      return {
        videoWidth: 3000,
        videoHeight: 300,
        imgSrc: '',
        thisCancas: null,
        thisContext: null,
        thisVideo: null,
      }
    },
    methods: {
// 调用权限(打开摄像头功能)
      getCompetence () {
        var _this = this
        this.thisCancas = document.getElementById('canvasCamera')
        this.thisContext = this.thisCancas.getContext('2d')
        this.thisVideo = document.getElementById('videoCamera')
        // 旧版本浏览器可能根本不支持mediaDevices,我们首先设置一个空对象
        if (navigator.mediaDevices === undefined) {
          navigator.mediaDevices = {}
        }
        // 一些浏览器实现了部分mediaDevices,我们不能只分配一个对象
        // 使用getUserMedia,因为它会覆盖现有的属性。
        // 这里,如果缺少getUserMedia属性,就添加它。
        if (navigator.mediaDevices.getUserMedia === undefined) {
          navigator.mediaDevices.getUserMedia = function (constraints) {
            // 首先获取现存的getUserMedia(如果存在)
            var getUserMedia = navigator.webkitGetUserMedia || navigator.mozGetUserMedia || navigator.getUserMedia
            // 有些浏览器不支持,会返回错误信息
            // 保持接口一致
            if (!getUserMedia) {
              return Promise.reject(new Error('getUserMedia is not implemented in this browser'))
            }
            // 否则,使用Promise将调用包装到旧的navigator.getUserMedia
            return new Promise(function (resolve, reject) {
              getUserMedia.call(navigator, constraints, resolve, reject)
            })
          }
        }
        var constraints = { audio: false, video: { width: this.videoWidth, height: this.videoHeight, transform: 'scaleX(-1)' } }
        navigator.mediaDevices.getUserMedia(constraints).then(function (stream) {
          // 旧的浏览器可能没有srcObject
          if ('srcObject' in _this.thisVideo) {
            _this.thisVideo.srcObject = stream
          } else {
            // 避免在新的浏览器中使用它,因为它正在被弃用。
            _this.thisVideo.src = window.URL.createObjectURL(stream)
          }
          _this.thisVideo.onloadedmetadata = function (e) {
            _this.thisVideo.play()
          }
        }).catch(err => {
          console.log(err)
        })
      },
//  绘制图片(拍照功能)

      setImage () {
        var _this = this
        // 点击,canvas画图
        _this.thisContext.drawImage(_this.thisVideo, 0, 0, _this.videoWidth, _this.videoHeight)
        // 获取图片base64链接
        var image = this.thisCancas.toDataURL('image/png')
        _this.imgSrc = image
        this.$emit('refreshDataList', this.imgSrc)
      },
// base64转文件

      dataURLtoFile (dataurl, filename) {
        var arr = dataurl.split(',')
        var mime = arr[0].match(/:(.*?);/)[1]
        var bstr = atob(arr[1])
        var n = bstr.length
        var u8arr = new Uint8Array(n)
        while (n--) {
          u8arr[n] = bstr.charCodeAt(n)
        }
        return new File([u8arr], filename, { type: mime })
      },
// 关闭摄像头

      stopNavigator () {
        this.thisVideo.srcObject.getTracks()[0].stop()
      }
    },

  }

  </script>
  <style lang="less" scoped>
  .camera_outer{
    position: relative;
    overflow: hidden;
    background: url("../../assets/img/user_0608_04.png") no-repeat center;
    background-size: 100%;
    video,canvas,.tx_img{
      -moz-transform:scaleX(-1);
      -webkit-transform:scaleX(-1);
      -o-transform:scaleX(-1);
      transform:scaleX(-1);
    }
    .btn_camera{
      position: absolute;
      bottom: 4px;
      left: 0;
      right: 0;
      height: 50px;
      background-color: rgba(0,0,0,0.3);
      line-height: 50px;
      text-align: center;
      color: #ffffff;
    }
    .bg_r_img{
      position: absolute;
      bottom: 0;
      left: 0;
      right: 0;
      top: 0;
    }
    .img_bg_camera{
      position: absolute;
      bottom: 0;
      left: 0;
      right: 0;
      top: 0;
      img{
        width: 100%;
        height: 100%;
      }
      .img_btn_camera{
        position: absolute;
        bottom: 0;
        left: 0;
        right: 0;
        height: 50px;
        line-height: 50px;
        text-align: center;
        background-color: rgba(0,0,0,0.3);
        color: #ffffff;
        .loding_img{
          width: 50px;
          height: 50px;
        }
      }
    }
  }
  </style>
更多资料