参考:https://blog.csdn.net/fesdgasdgasdg/article/details/78527048
https://blog.csdn.net/u010071211/article/details/79877303
今天web那边说给某某用户svn账号,一脸懵逼,不懂
不过也不难,找了篇文章先把任务完成了。
下面开始自己实战:
一、安装SVN
[root@client ~]# yum install -y subversion
查看安装了哪些文件
[root@client ~]# rpm -ql subversion
/etc/subversion
/etc/sysconfig/svnserve
/run/svnserve
/usr/bin/svn
/usr/bin/svnadmin
/usr/bin/svndumpfilter
/usr/bin/svnlook
/usr/bin/svnrdump
/usr/bin/svnserve
/usr/bin/svnsync
/usr/bin/svnversion
/usr/lib/systemd/system/svnserve.service
二、建立版本库
subversion默认以/var/svn作为数据根目录,可以通过/etc/sysconfig/svnserve修改这个默认位置。
vim /etc/sysconfig/svnserve
文件内容
OPTIONS="-r /var/svn"
修改默认位置然后初始化后就可以使用systemctl命令启动关闭svn服务了,不然得手动启动svn服务
修改默认位置如下:
OPTIONS="-r /data/svn"
然后使用svnadmin建立版本库
[root@client ~]# mkdir -p /data/svn
[root@client ~]# svnadmin create /data/svn
[root@client ~]# ll /data/svn -d
drwxr-xr-x 6 root root 86 2月  12 16:59 /data/svn
[root@client ~]# ll /data/svn
总用量 8
drwxr-xr-x 2 root root  54 2月  12 16:59 conf
drwxr-sr-x 6 root root 233 2月  12 16:59 db
-r--r--r-- 1 root root   2 2月  12 16:59 format
drwxr-xr-x 2 root root 231 2月  12 16:59 hooks
drwxr-xr-x 2 root root  41 2月  12 16:59 locks
-rw-r--r-- 1 root root 229 2月  12 16:59 README.txt
三、配置
3.1编辑passwd,添加两个用户:lu,guest
[root@client svn]# cd conf
[root@client conf]# vim passwd
[users]
lu = 123456
guest = 123456
3.2 编辑权限文件authz,设置lu可读可写权限,guets可读
[root@client conf]# vim authz
[/]
lu = rw
guest = r
3.3编辑svnserver.conf
[root@client conf]# vim svnserve.conf
[general]
anon-access = none	#匿名用户禁止读写
auth-access = write		#认证用户允许读写
password-db = passwd	#密码文件为当前目录的passwd
password-db = passwd	#权限文件为当前目录的authz
四、启动svn服务,加入开机启动项
[root@client conf]# systemctl start svnserve
[root@client svn]# systemctl enable svnserve.service
Created symlink from /etc/systemd/system/multi-user.target.wants/svnserve.service to /usr/lib/systemd/system/svnserve.service.
可以使用systemctl status svnserve查看svn的状态
ss -ltunp | grep svn
监听了3690端口
[root@client conf]# ss -ltunp | grep svn
tcp    LISTEN     0      7         *:3690                  *:*                   users:(("svnserve",pid=54321,fd=3))
ps aux | grep svn
可以看到其实就是这一条命令启动的,完全可以手动启动
[root@client conf]# ps aux | grep svn
root      54321  0.0  0.1 180732  1048 ?        Ss   17:21   0:00 /usr/bin/svnserve --daemon --pid-file=/run/svnserve/svnserve.pid -r /data/svn
root      54336  0.0  0.0 112724   988 pts/7    S+   17:24   0:00 grep --color=auto svn
五、用windows的小乌龟去连
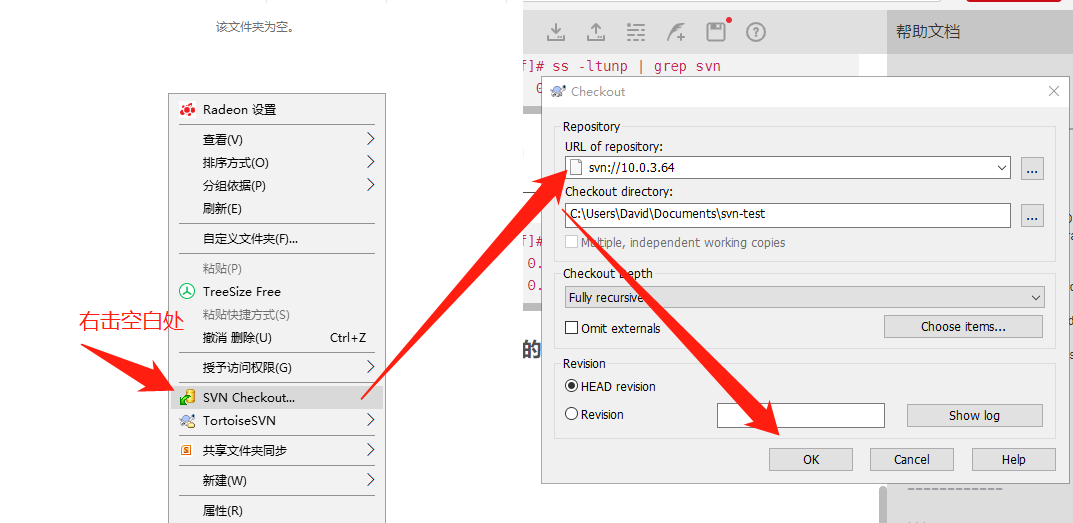
输入用户名和密码
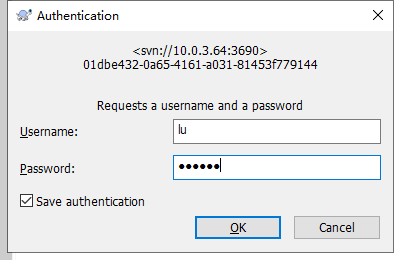
然后就连进去了:
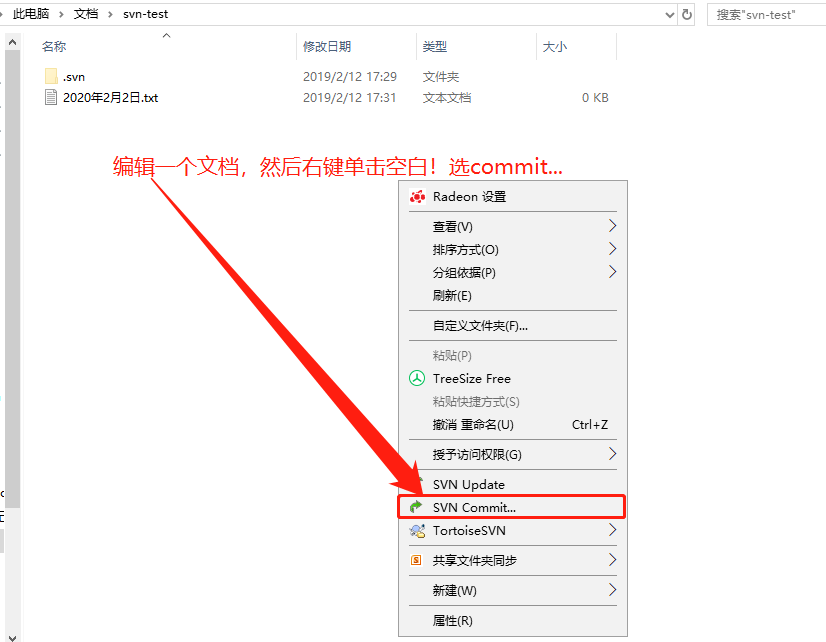
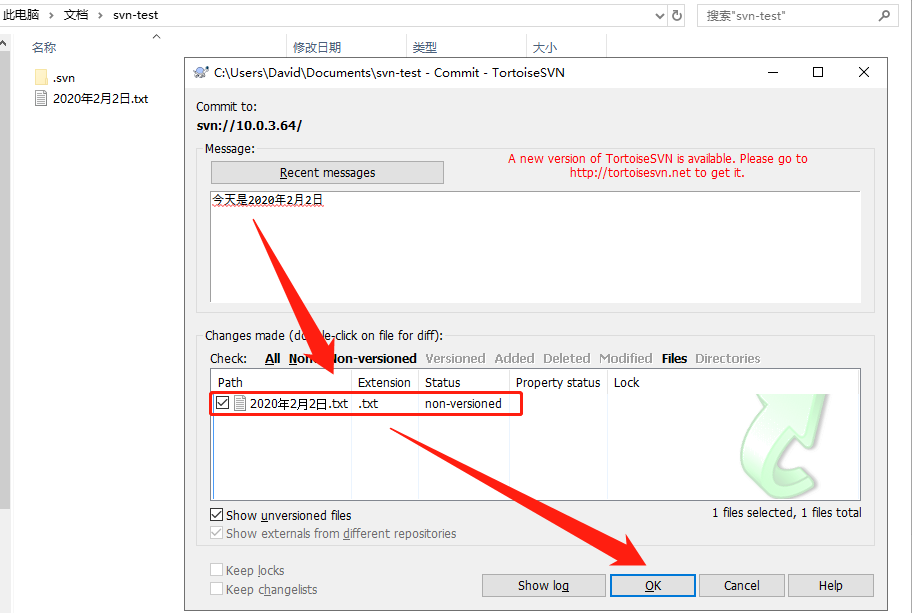
新建一个文档,右键单击空白处,点击commit
扫描二维码关注公众号,回复:
11608527 查看本文章

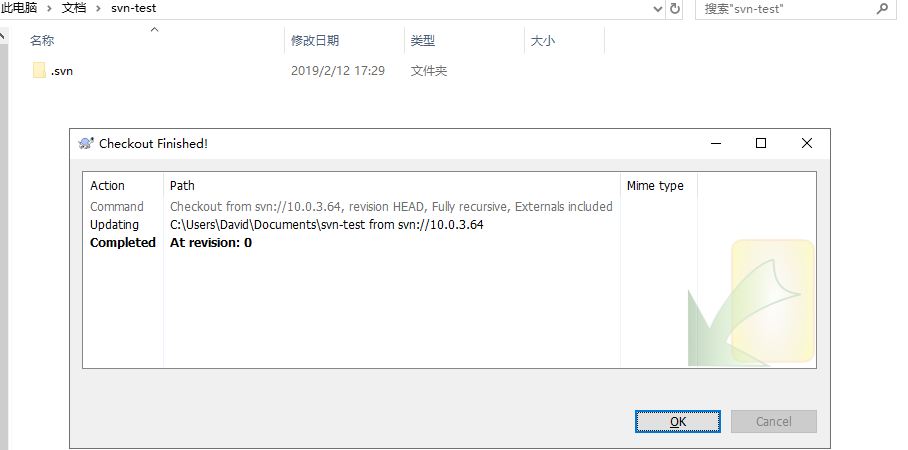
点击提交:
显示执行完成
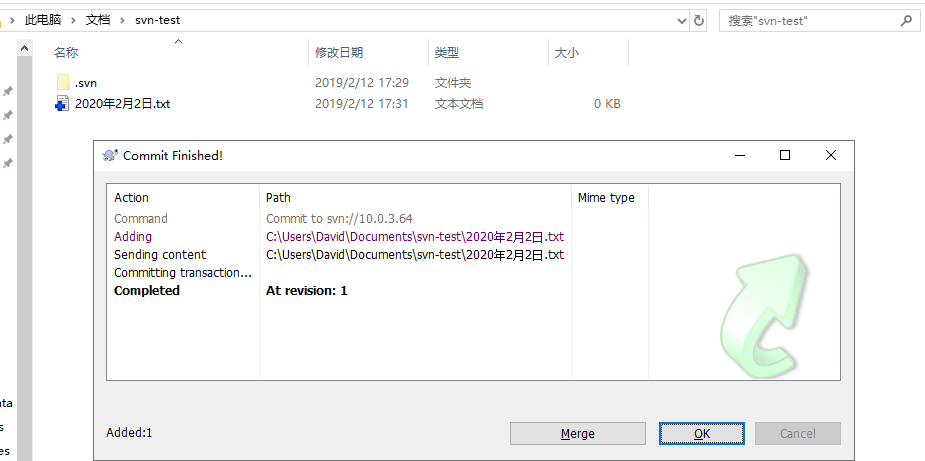
然后可以再新建一个目录,再进行初始化,这个文件就会同步过去了
也可以不使用systemctl进行启动,如下面所示:
[root@client ~]# mkdir /data/svn2
[root@client ~]# svnadmin create /data/svn2
[root@client ~]# cd /data/svn2
[root@client svn2]# ls
conf  db  format  hooks  locks  README.txt
[root@client svn2]# cp ../svn/conf/authzpasswd
authz
[root@client svn2]# cp ../svn/conf/{authz,passwd} conf/
cp:是否覆盖"conf/authz"? y
cp:是否覆盖"conf/passwd"? y
[root@client svn2]# svnserve -d -r /data/svn2
svnserve: E000098: 不能绑定服务器套接字: 地址已在使用
[root@client svn2]# ps aux | grep svn
root      54321  0.0  0.1 180732  1188 ?        Ss   17:21   0:00 /usr/bin/svnserve --daemon --pid-file=/run/svnserve/svnserve.pid -r /data/svn
root      54842  0.0  0.0 112724   988 pts/7    S+   17:56   0:00 grep --color=auto svn
[root@client svn2]# kill -9 54321
[root@client svn2]# svnserve -d -r /data/svn2
[root@client svn2]# ps aux | grep svn
root      54858  0.0  0.0 180732   812 ?        Ss   17:56   0:00 svnserve -d -r /data/svn2
root      54862  0.0  0.0 112724   988 pts/7    R+   17:56   0:00 grep --color=auto svn