docker run 的参数详情
$ sudo docker run
Usage: docker run [OPTIONS] IMAGE [COMMAND] [ARG…]
Run a command in a new container
一、参数
-a, --attach=[] Attach to stdin, stdout or stderr.
-c, --cpu-shares=0 CPU shares (relative weight) ---------------------# 设置cpu使用权重
–cidfile="" Write the container ID to the file ------------------------ # 把容器id写入到指定文件
–cpuset="" CPUs in which to allow execution (0-3, 0,1) ----------------- # cpu绑定
-d, --detach=false Detached mode: Run container in the background, print new container id -----# 后台运行容器
–dns=[] Set custom dns servers ---------------- # 设置dns
–dns-search=[] Set custom dns search domains -------------- # 设置dns域搜索
-e, --env=[] Set environment variables ---------------- # 定义环境变量
–entrypoint="" Overwrite the default entrypoint of the image
–env-file=[] Read in a line delimited file of ENV variables ----- # 从指定文件读取变量值
–expose=[] Expose a port from the container without publishing it to your host -------- # 指定对外提供服务端口
-h, --hostname="" Container host name ---------- # 设置容器主机名
-i, --interactive=false Keep stdin open even if not attached ------------------ # 保持标准输出开启即使没有attached
–link=[] Add link to another container (name:alias) ----------- # 添加链接到另外一个容器
–lxc-conf=[] (lxc exec-driver only) Add custom lxc options --lxc-conf=“lxc.cgroup.cpuset.cpus = 0,1”
-m, --memory="" Memory limit (format: , where unit = b, k, m or g) # ------------内存限制
–name="" Assign a name to the container ----------------------- # 设置容器名
–net=“bridge” Set the Network mode for the container ---------------- # 设置容器网络模式
***** ‘bridge’: creates a new network stack for the container on the docker bridge
***** ‘none’: no networking for this container
***** ‘container:<name|id>’: reuses another container network stack
***** ‘host’: use the host network stack inside the container.
***** Note: the host mode gives the container full access to local system services such as D-bus and is therefore considered insecure.
-P, --publish-all=false Publish all exposed ports to the host interfaces -------- # 自动映射容器对外提供服务的端口
-p, --publish=[] Publish a container’s port to the host ------------ # 指定端口映射
***** format: ip:hostPort:containerPort | ip::containerPort | hostPort:containerPort
***** (use ‘docker port’ to see the actual mapping)
–privileged=false Give extended privileges to this container ------------ # 提供更多的权限给容器
–rm=false Automatically remove the container when it exits (incompatible with -d) ---------------------------------------- # 如果容器退出自动移除和-d选项冲突
–sig-proxy=true Proxify received signals to the process (even in non-tty mode). SIGCHLD is not proxied. # ?
-t, --tty=false Allocate a pseudo-tty ---------- – # 分配伪终端
-u, --user="" Username or UID ---------------- # 指定运行容器的用户uid或者用户名
-v, --volume=[] Bind mount a volume (e.g., from the host: -v /host:/container, from docker: -v /container)
------------ # 挂载卷
–volumes-from=[] Mount volumes from the specified container(s) ------------ # 从指定容器挂载卷-
-w, --workdir="" Working directory inside the container -------------- # 指定容器工作目录
二、示例
$ sudo docker images ubuntu

$ sudo docker run -t -i -c 100 -m 512MB -h test1 -d --name=“docker_test1” ubuntu /bin/bash

$ sudo docker ps

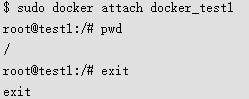
$ sudo docker attach docker_test1