源码github地址:https://github.com/hxinZhang/hxin.git(common-utils项目)
本文用mybatis为持久化层,使用freemarker模板引擎来生成entity、xml、mapper、dao等,接下来就让我们来看看如何使用。
第一步、配置JDBC
打开spring-db.xml,配置数据库的地址以及用户名、密码等。
<?xml version="1.0" encoding="UTF-8"?>
<beans xmlns="http://www.springframework.org/schema/beans"
	   xmlns:xsi="http://www.w3.org/2001/XMLSchema-instance"
	   xmlns:tx="http://www.springframework.org/schema/tx"
	   xmlns:aop="http://www.springframework.org/schema/aop"
	   xmlns:context="http://www.springframework.org/schema/context"
	   xsi:schemaLocation="
        http://www.springframework.org/schema/beans
        http://www.springframework.org/schema/beans/spring-beans-4.0.xsd
        http://www.springframework.org/schema/tx
        http://www.springframework.org/schema/tx/spring-tx-4.0.xsd
        http://www.springframework.org/schema/aop
        http://www.springframework.org/schema/aop/spring-aop-4.0.xsd
        http://www.springframework.org/schema/context
        http://www.springframework.org/schema/context/spring-context.xsd">

	<!-- 配置数据源 使用的是Druid数据源 -->
	<bean name="dataSource" class="com.alibaba.druid.pool.DruidDataSource"
		  init-method="init" destroy-method="close">
		<property name="url" value="jdbc:mysql://127.0.0.1:3306/steps_interest?useUnicode=true" />
		<property name="username" value="root" />
		<property name="password" value="123456" />

		<!-- 初始化连接大小 -->
		<property name="initialSize" value="5" />
		<!-- 连接池最大使用连接数量 -->
		<property name="maxActive" value="500" />

		<!-- 连接池最小空闲 -->
		<property name="minIdle" value="5" />
		<!-- 获取连接最大等待时间 -->
		<property name="maxWait" value="60000" />
		<property name="poolPreparedStatements" value="true" />
		<property name="maxPoolPreparedStatementPerConnectionSize"
				  value="33" />
		<!-- 用来检测有效sql -->
		<property name="validationQuery" value="SELECT 1" />
		<property name="testOnBorrow" value="false" />
		<property name="testOnReturn" value="false" />
		<property name="testWhileIdle" value="true" />
		<!-- 配置间隔多久才进行一次检测,检测需要关闭的空闲连接,单位是毫秒 -->
		<property name="timeBetweenEvictionRunsMillis" value="60000" />
		<!-- 配置一个连接在池中最小生存的时间,单位是毫秒 -->
		<property name="minEvictableIdleTimeMillis" value="25200000" />
		<!-- 打开removeAbandoned功能 -->
		<property name="removeAbandoned" value="true" />
		<!-- 1800秒,也就是30分钟 -->
		<property name="removeAbandonedTimeout" value="1800" />
		<!-- 关闭abanded连接时输出错误日志 -->
		<property name="logAbandoned" value="true" />
		<!-- 监控数据库 -->
		<property name="filters" value="mergeStat" />
	</bean>


	</beans>
第二步、配置Go类,从上到下依次有库名、表名、存放的路径(windows的路径)、entity包路径、dao包路径、mapper包路径。
package com.hxin.common.utils.main;

import com.hxin.common.utils.freemark.CreateFileUtils;

/**
 * 生成工具
 * @author hxin
 */
public class Go {
    //库名
    private static final String DATABASENAME = "steps_interest";
    //表名
    private static final String TABLENAME = "admin_role_rel";
    //生成文件存放路径
    private static final String PATH = "E:\\template\\";
    //entity 路径
    private static final String ENTITYPATH = "com.steps.interest.background.entity.admin";
    //dao 路径
    private static final String DAOPATH = "com.steps.interest.background.dao.admin";
    //mapper 路径
    private static final String MAPPERPATH = "com.steps.interest.background.mapper.admin";

    public static void main(String[] args) {
        CreateFileUtils.run(PATH, ENTITYPATH, MAPPERPATH, TABLENAME, DATABASENAME, DAOPATH);
    }
}
第三步、右键运行则能看到生成的结果如下
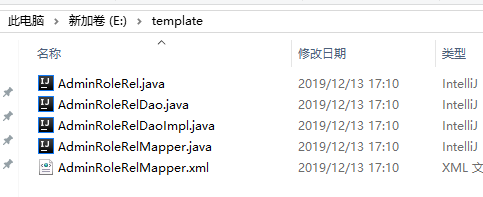
是不是很简单~
接下来我们来看下怎么实现的
首先看下项目的目录

打开CreateFileUtils.java的setColumnInf()方法,可以看到是通过jdbc的原生查询来实现的。
    /**
     * 获取列信息
     * @return
     */
    private static void setColumnInfo() {
        Connection connection = null;
        PreparedStatement ps1 = null;
        ResultSet rs1 = null;
        String sql1 = null;
        PreparedStatement ps2 = null;
        ResultSet rs2 = null;
        String sql2 = null;
        try {
            //实体类  属性信息    key 属性名称   value  属性类型
            Map<String, String> fieldMap = new HashMap<String, String>();
            //属性与字段名 映射关系   key 属性名称   value 字段名称
            Map<String, String> filedColumnMap = new HashMap<String, String>();
            //注释与字段名 映射关系   key 注释   value 字段名称
            Map<String, String> remarkColumnMap = new HashMap<String, String>();
            //过滤map
            Map<String, String> tempColumnMap = new HashMap<String, String>();
            DruidDataSource druidDataSource = (DruidDataSource) context.getBean("dataSource");
            connection = druidDataSource.getConnection();

            sql1 = "select * from :tableName limit 1".replace(":tableName", model.getTableName());
            ps1 = connection.prepareStatement(sql1);
            rs1 = ps1.executeQuery();

            ResultSetMetaData rsmd = rs1.getMetaData();
            for (int i = 1; i <= rsmd.getColumnCount(); i++) {
                String columnName = rsmd.getColumnName(i);
                filedColumnMap.put(hump(columnName), columnName);
                tempColumnMap.put(columnName, hump(columnName));
                int columnType = rsmd.getColumnType(i);
                //整数
                if (columnType == Types.NUMERIC || columnType == Types.INTEGER) {
                    fieldMap.put(hump(columnName), "Integer");
                } else if (columnType == Types.BIGINT) {
                    fieldMap.put(hump(columnName), "Long");
                } else if (columnType == Types.DECIMAL) {
                    fieldMap.put(hump(columnName), "BigDecimal");
                } else if (columnType == Types.VARCHAR ||
                        columnType == Types.CHAR) {//字符串
                    fieldMap.put(hump(columnName), "String");
                } else if (columnType == Types.DATE ||//日期
                        columnType == Types.TIME) {
                    fieldMap.put(hump(columnName), "Date");
                } else if (columnType == Types.TIMESTAMP) {
                    fieldMap.put(hump(columnName), "Date");
                } else if (columnType == Types.DOUBLE) {
                    fieldMap.put(hump(columnName), "Double");
                } else {//其它
                    fieldMap.put(hump(columnName), "String");
                }
            }
            model.setFieldMap(fieldMap);
            model.setFiledColumnMap(filedColumnMap);

            //用于查询注释
            sql2 = "select `COLUMN_NAME`,`column_comment`,`column_type`,`column_key` from information_schema.columns where table_schema = ':databaseName' and table_name = ':tableName'".
                    replace(":databaseName", model.getDatabaseName()).replace(":tableName", model.getTableName());
            ps2 = connection.prepareStatement(sql2);
            rs2 = ps2.executeQuery();
            while(rs2.next()){
                String columnName = rs2.getString("COLUMN_NAME");
                String columnComment = rs2.getString("column_comment");
                remarkColumnMap.put(tempColumnMap.get(columnName), columnComment);
            }
            model.setRemarkColumnMap(remarkColumnMap);
        } catch (SQLException e) {
            e.printStackTrace();
        } finally {
            try {
                rs1.close();
                ps1.close();
                connection.close();
            } catch (SQLException e) {
                e.printStackTrace();
            }
        }

    }
接着使用freemarker解析器,把数据写入到模板,下面是entity的freemarker模板
package ${modelPath};

import lombok.Data;
import lombok.ToString;

import java.io.Serializable;
import java.util.Date;

/**
 * ${modelName}
 * @author
 */
@Data
@ToString
public class ${modelName} extends BaseEntity<${modelName}> implements Serializable{

<#if fieldMap??>
    <#list fieldMap?keys as key>
     //${remarkColumnMap[key]}
     private ${fieldMap[key]} ${key};
    </#list>
</#if>

}
下面是freemarker解析器
package com.hxin.common.utils.freemark;

import freemarker.template.Template;
import org.springframework.beans.factory.annotation.Autowired;
import org.springframework.stereotype.Component;
import org.springframework.ui.freemarker.FreeMarkerTemplateUtils;
import org.springframework.web.servlet.view.freemarker.FreeMarkerConfigurer;

/**
 * freemarker 解析器
 * @author hxin
 */
@Component
public class ParseFreemarker {

    @Autowired
    private FreeMarkerConfigurer freeMarkerConfigurer;

    public String parseFtlFile(String path, Object data) {
        String htmlText = null;
        try {
            Template tpl = freeMarkerConfigurer.getConfiguration().getTemplate(path);
            htmlText = FreeMarkerTemplateUtils.processTemplateIntoString(tpl, data);
        } catch (Exception e) {
            e.printStackTrace();
        }
        return htmlText;
    }
}
最后是使用io流写到文件里
    //===================================创建字符流   ====================================
    //获取IO流
    private static PrintWriter getWriter(String fileName) {
        OutputStream out = null;
        BufferedOutputStream bos = null;
        OutputStreamWriter w = null;
        PrintWriter pw = null;
        try {
            File file = new File(model.getPath() + File.separator + fileName);
            if (file.exists()) {
                file.delete();
            }
            out = new FileOutputStream(file, true);
            bos = new BufferedOutputStream(out);
            w = new OutputStreamWriter(bos, "UTF-8");
            pw = new PrintWriter(w);
            return pw;
        } catch (FileNotFoundException e) {
            e.printStackTrace();
            return null;
        } catch (Exception e) {
            e.printStackTrace();
            return null;
        }
    }
欢迎补充~
【原创】未经许可,禁止转载
详细请看文章开头的github地址