以前使用springmvc项目时,整合quartz框架多用配置文件的形式,使用springboot后,可以完全用注解来整合quartz。
首先创建一个简单的maven项目,然后修改pom配置文件,引入需要用到的依赖
<parent>
	<groupId>org.springframework.boot</groupId>
	<artifactId>spring-boot-starter-parent</artifactId>
	<version>2.1.3.RELEASE</version>
	<relativePath /> <!-- lookup parent from repository -->
</parent>

<dependencies>
	<dependency>
		<groupId>org.springframework.boot</groupId>
		<artifactId>spring-boot-starter-test</artifactId>
		<scope>test</scope>
	</dependency>
	<!-- quartz -->
	<dependency>
		<groupId>org.springframework.boot</groupId>
		<artifactId>spring-boot-starter-quartz</artifactId>
	</dependency>
</dependencies>
然后我们创建QuartzApplication类,这个类是 springboot 程序的启动类
import org.springframework.boot.SpringApplication;
import org.springframework.boot.autoconfigure.SpringBootApplication;

@SpringBootApplication
public class QuartzApplication {
	public static void main(String[] args) {
		SpringApplication.run(QuartzApplication.class, args);
	}
}
接着创建application.yml,该文件为spring的配置文件,文件非常简单,只定义了一个 quartz cron 表达式
quartz:
  #秒,分钟,时,日,月,周,年
  expression:
    print: 0/5 * * * * ? *
这个表达式表示job将会每隔5秒执行一次,我们在程序启动后将表达式的值映射到 QuartzCronKey 中 , 这样方便我们在各个类中使用表达式的值。
import org.springframework.boot.context.properties.ConfigurationProperties;
import org.springframework.stereotype.Component;

/**
 * @title quartz cron 表达式配置bean
 * @author gavin
 * @date 2019年5月10日
 */
@Component
@ConfigurationProperties(prefix="quartz.expression")
public class QuartzCronKey {

	private String print;

	public String getPrint() {
		return print;
	}

	public void setPrint(String print) {
		this.print = print;
	}
}
接下来我们创建PrintJob类,定义定时任务的业务逻辑,execute方法会每隔5秒打印一次系统当前时间
import java.text.DateFormat;
import java.text.SimpleDateFormat;
import java.util.Date;

import org.quartz.DisallowConcurrentExecution;
import org.quartz.Job;
import org.quartz.JobExecutionContext;
import org.quartz.JobExecutionException;

@DisallowConcurrentExecution // 防止当任务执行时间(假如5秒)长于任务设定的间隔时间(假如3秒),本次任务还未执行完毕又开始下一次任务调度。
public class PrintJob implements Job{

	@Override
	public void execute(JobExecutionContext context) throws JobExecutionException {
		Date currentTime = new Date();
		DateFormat format = new SimpleDateFormat("yyyy-MM-dd HH:mm:ss");
		System.out.println("打印当前时间:" + format.format(currentTime));
	}

}
其中 @DisallowConcurrentExecution 注解的作用是,防止当任务执行时间(例如5秒)长于任务设定的间隔时间(例如3秒),本次任务还未执行完毕又开始下一次任务调度。
然后我们创建 PrintTask 类,我们可以在这里配置 JobDetailFactoryBean 和 CronTriggerFactoryBean
import org.springframework.beans.factory.annotation.Autowired;
import org.springframework.context.annotation.Bean;
import org.springframework.context.annotation.Configuration;
import org.springframework.scheduling.quartz.CronTriggerFactoryBean;
import org.springframework.scheduling.quartz.JobDetailFactoryBean;

import com.gavin.quartz.QuartzCronKey;
import com.gavin.quartz.job.PrintJob;

@Configuration
public class PrintTask {

	@Autowired
	private QuartzCronKey quartzCronKey;


	@Bean(name="printFactory")
	public JobDetailFactoryBean jobDetailFactoryBean() {
		// 生成jobDetail
		JobDetailFactoryBean factory = new JobDetailFactoryBean();
		// 设置对应的Job类型
		factory.setJobClass(PrintJob.class);
		return factory;
	}


	@Bean("printTrigger")
	public CronTriggerFactoryBean cronTriggerFactoryBean(){
		CronTriggerFactoryBean factory = new CronTriggerFactoryBean();
		// 设置jobDetail
		factory.setJobDetail(jobDetailFactoryBean().getObject());
		factory.setStartDelay(1000);
		// 定时任务cron表达式配置
		factory.setCronExpression(quartzCronKey.getPrint());
		return factory;
	}
}
除了以上几个类之外,我们还需要定义一个 AutowiringSpringBeanJobFactory 类,这个类用来将Quartz中的job自动注入spring容器中,这样我们的定时任务才能被 spring 容器加载。
import org.quartz.spi.TriggerFiredBundle;
import org.springframework.beans.factory.config.AutowireCapableBeanFactory;
import org.springframework.context.ApplicationContext;
import org.springframework.context.ApplicationContextAware;
import org.springframework.scheduling.quartz.SpringBeanJobFactory;

/**
 * @title AutowiringSpringBeanJobFactory类,这个类用来Quartz中的job自动注入spring容器托管的对象
 * @author gavin
 * @date 2019年5月10日
 */
public final class AutowiringSpringBeanJobFactory
	extends SpringBeanJobFactory
	implements ApplicationContextAware{

	private transient AutowireCapableBeanFactory beanFactory;

	@Override
	public void setApplicationContext(final ApplicationContext context) {
		beanFactory = context.getAutowireCapableBeanFactory();
	}

	@Override
	protected Object createJobInstance(final TriggerFiredBundle bundle) throws Exception {
		final Object job = super.createJobInstance(bundle);
		beanFactory.autowireBean(job);
		return job;
	}

}
最后我们通过定义 QuartzConfig 类来配置所有的 trigger 触发器
import org.springframework.beans.factory.annotation.Autowired;
import org.springframework.beans.factory.annotation.Qualifier;
import org.springframework.context.annotation.Bean;
import org.springframework.context.annotation.Configuration;
import org.springframework.scheduling.quartz.CronTriggerFactoryBean;
import org.springframework.scheduling.quartz.SchedulerFactoryBean;

@Configuration
public class QuartzConfig {

	@Autowired
	@Qualifier("printTrigger")
	private CronTriggerFactoryBean printTrigger;

	/**
	 * @title Quartz中的job自动注入spring容器托管的对象
	 * @author gavin
	 * @date 2019年5月10日
	 * @return
	 */
	@Bean
	public AutowiringSpringBeanJobFactory autoWiringSpringBeanJobFactory() {
		return new AutowiringSpringBeanJobFactory();
	}


	@Bean
	public SchedulerFactoryBean schedulerFactoryBean() throws Exception{
		SchedulerFactoryBean scheduler  = new SchedulerFactoryBean();
		// 配置Spring注入的Job类
		scheduler.setJobFactory(autoWiringSpringBeanJobFactory());
		// 配置定时器,参数接收Trigger数组,可接收多个trigger
		scheduler.setTriggers(
			printTrigger.getObject()
		);
		scheduler.setAutoStartup(true);
		return scheduler;
	}

}
其中 scheduler.setJobFactory(trigger…)方法接收的是一个数组,也意味着如果我们想配置多个触发器,只要在该方法中添加即可。
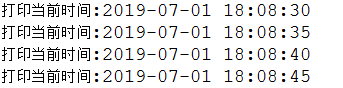
所有配置完毕,我们运行 QuartzApplication 中的main方法,可以看到每隔5秒控制台会打印当前时间信息,说明 quartz 整合成功 !
如需查看完整代码,请访问github获取: https://github.com/liaozq0426/-spring-quartz.git