1.项目的要求:基于psutil模块监控服务器的磁盘信息,监控详情如下表

2.项目的基本简介
# Sysinfo
## 简介
sysinfo 使用 Python Django 框架和 psutil 开发的一个中文版 Linux 服务器信息查看应用,
可查看的信息包括系统、CPU、内存、硬盘、进程、网络、登录用户等,
同时可查看并导出部分数据的图表(正在更新完成中)。

## 需要安装的 Python 包
- Django==3.x
- psutil
```bash
# 安装项目需要的第三方python软件包
pip install -r requirements.txt
```

### 运行
```bash
python manage.py runserver
```
### 参考资料:
Github参考网址: https://github.com/hypersport/sysinfo
3.项目流程
(1)在pycharm中创建Django项目 项目命名为sysinfo
(2)在项目中创建子应用 命名为host
python3 manage.py startapp host
(2)编写第一个主路由函数 在sysinfo中指定如下
from django.contrib import admin
from django.urls import path,include

urlpatterns = [
    path('admin/', admin.site.urls),
    path('',include('host.urls'))        #当客户端发出请求时 此时主路由函数要求去访问host子应用
                                          中的路由函数
]
(3)编写视图函数 views.py
在该函数中指定所有的需求
from django.shortcuts import render
from django.http import HttpResponse
import os
import platform
from datetime import datetime
import time
import psutil
import difflib
from host.tools import get_md5
# Create your views here.
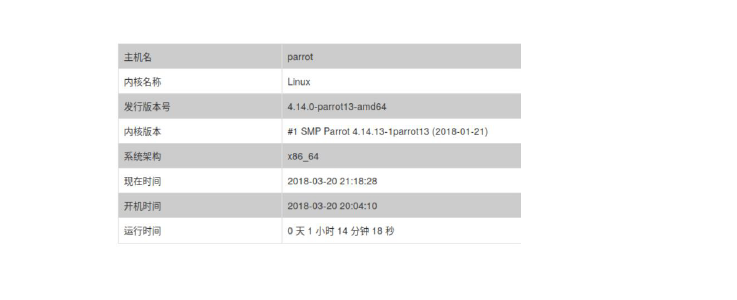
# 需求1: 用户访问http://127.0.0.1:8000,返回主机的详情信息
def index(request):
try:
# 如果是Linux系统,执行下面内容
# os.uname在windows系统中不能执行
system_info = os.uname()
node = system_info.nodename
system = system_info.sysname
except Exception as e:
# 如果是Windows系统,执行下面内容
system_info = platform.uname()
node = system_info.node
system = system_info.system
boot_time = psutil.boot_time()
boot_time = datetime.fromtimestamp(boot_time)
now_time = datetime.fromtimestamp(time.time())
info = {
'node': node,
'system': system,
"kernel_name": system,
'release': system_info.release,
'version': system_info.version,
'machine': system_info.machine,
'now_time': now_time,
'boot_time': boot_time,
'boot_delta': now_time - boot_time
}
# 默认情况下返回的是普通字符串,不美观, 需要模板
return render(request, 'host/index.html', {'info': info}) 此处返回的HTML文件
# Create your views here.
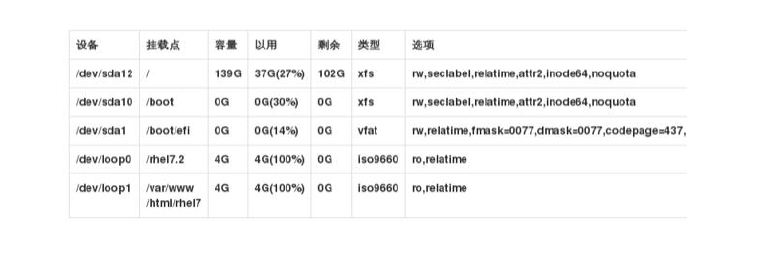
# 需求2:用户访问http://ip/disk/,返回磁盘分区的详细信息
def disk(request):
# 获取系统所有的磁盘分区
parts = psutil.disk_partitions()
disks = []
# 依次遍历获取每个分区的详细信息
for part in parts:
usage = psutil.disk_usage(part.device)
disk = {
'device': part.device,
'mountpoint': part.mountpoint,
'fstype': part.fstype,
'opts': part.opts,
'total': usage.total,
'percent': usage.percent
}
disks.append(disk)
# 返回html页面信息
return render(request, 'host/disk.html', {'disks': disks})
# 用户访问http://ip/users/,返回当前登录用户的详细信息
def users(requests):
all_users = []
# [suser(name='Fan', terminal=None, host=None, started=1595661568.4721968, pid=None)]
users = psutil.users()
for user in users:
one_user = {
'name': user.name,
'host': user.host,
'started': datetime.fromtimestamp(user.started)
}
all_users.append(one_user)
return render(requests, 'host/users.html', {'users': all_users})
# 需求4:用户访问http://ip/, diff/,返回html页面,可以让用户上传文件
def diff(request):
print("客户端请求的方法: ", request.method)
if request.method == 'POST':
files = request.FILES
content1 = files.get('filename1').read()
content2 = files.get('filename2').read()
if get_md5(content1) == get_md5(content2):
return HttpResponse("文件内容一致")
else:
hdiff = difflib.HtmlDiff()
content1 = content1.decode('utf-8').splitlines()
content2 = content2.decode('utf-8').splitlines()
result = hdiff.make_file(content1, content2) # 会生成一个html字符串
return HttpResponse(result)
return render(request, 'host/diff.html')(4)做好需求后需要在网页前端编写HTML文件 根据需求 编写HTML文件 django中编写HTML一般是在templates目录下 我们在该目录下建立host目录 在该目录下编写 index.html disk.html users.html diff.html 文件
index.html
<!DOCTYPE html>
<html lang="en">
<head>
    <meta charset="UTF-8">
    <title>首页: 服务器信息查看应用</title>
    {#  导入Bootstrap帮我们设置好的CSS样式和JS的动效   #}
    <link rel="stylesheet" href="https://cdn.staticfile.org/twitter-bootstrap/3.3.7/css/bootstrap.min.css">
    <script src="https://cdn.staticfile.org/jquery/2.1.1/jquery.min.js"></script>
    <script src="https://cdn.staticfile.org/twitter-bootstrap/3.3.7/js/bootstrap.min.js"></script>
</head>
<body>


{% include 'host/nav.html' %}

<h1>系统信息监控</h1>
{#设置table标签的类名称为table和table-striped,其实就是使用Bootstrap帮我们写好的CSS样式设置表格样式#}
<table class="table table-striped table-hover">
    <tr>
        <td>主机名</td>
        {#    前端模板, 变量的使用{{ 变量名 }}  获取字典里面的key对应的value值: {{ info.keyname }}    #}
        <td>{{ info.node }}</td>
    </tr>
    <tr>
        <td>操作系统</td>
        <td>{{ info.system }}</td>
    </tr>
    <tr>
        <td>内核名称</td>
        <td>{{ info.kernel_name }}</td>
    </tr>
    <tr>
        <td>发行版本号</td>
        <td>{{ info.release }}</td>
    </tr>
    <tr>
        <td>内核版本</td>
        <td>{{ info.version }}</td>
    </tr>
    <tr>
        <td>系统架构</td>
        <td>{{ info.machine }}</td>
    </tr>
    <tr>
        <td>当前时间</td>
        <td>{{ info.now_time }}</td>
    </tr>
    <tr>
        <td>开机时间</td>
        <td>{{ info.boot_time }}</td>
    </tr>
    <tr>
        <td>开机时长</td>
        <td>{{ info.boot_delta }}</td>
    </tr>
</table>

</body>
</html>
disk.html
!DOCTYPE html>
<html lang="en">
<head>
    <meta charset="UTF-8">
    <title>磁盘监控信息</title>
    {#  导入Bootstrap帮我们设置好的CSS样式和JS的动效   #}
    <link rel="stylesheet" href="https://cdn.staticfile.org/twitter-bootstrap/3.3.7/css/bootstrap.min.css">
    <script src="https://cdn.staticfile.org/jquery/2.1.1/jquery.min.js"></script>
    <script src="https://cdn.staticfile.org/twitter-bootstrap/3.3.7/js/bootstrap.min.js"></script>
</head>
<body>
{% include 'host/nav.html' %}
<h1>磁盘信息监控</h1>
{#设置table标签的类名称为table和table-striped,其实就是使用Bootstrap帮我们写好的CSS样式设置表格样式#}
<table class="table table-striped table-hover">
    <tr>
        <td>分区名称</td>
        <td>挂载点</td>
        <td>文件系统类型</td>
        <td>挂载属性</td>
        <td>磁盘总容量</td>
        <td>磁盘使用百分比(单位:%)</td>
    </tr>

    {% for disk in disks %}
        <tr>
            <td>{{ disk.device }}</td>
            <td>{{ disk.mountpoint }}</td>
            <td>{{ disk.fstype }}</td>
            <td>{{ disk.opts }}</td>
            <td>{{ disk.total }}</td>
            <td>{{ disk.percent }}</td>
        </tr>
    {% endfor %}


</table>

</body>
</html>
users.html
<!DOCTYPE html>
<html lang="en">
<head>
    <meta charset="UTF-8">
    <title>登录用户监控信息</title>
    {#  导入Bootstrap帮我们设置好的CSS样式和JS的动效   #}
    <link rel="stylesheet" href="https://cdn.staticfile.org/twitter-bootstrap/3.3.7/css/bootstrap.min.css">
    <script src="https://cdn.staticfile.org/jquery/2.1.1/jquery.min.js"></script>
    <script src="https://cdn.staticfile.org/twitter-bootstrap/3.3.7/js/bootstrap.min.js"></script>
</head>
<body>
{% include 'host/nav.html' %}
{# Django模板中好用的功能: 过滤器  users|length 获取该列表的长度#}
<h1>登录用户信息监控-登录的用户数量: {{ users | length }}</h1>
{#设置table标签的类名称为table和table-striped,其实就是使用Bootstrap帮我们写好的CSS样式设置表格样式#}
<table class="table table-striped table-hover">
    <tr>
        <td>登录的用户名</td>
        <td>登录的主机</td>
        <td>登录的时间</td>
    </tr>

    {% for user in users %}
        <tr>
            <td>{{ user.name }}</td>
            <td>{{ user.host }}</td>
            <td>{{ user.started  | date}}</td>
        </tr>
    {% endfor %}


</table>
</body>
</html>
diff.html
在编写文件差异性的函数时 需要在host目录下编写一个tools.py 指定加密文件
import hashlib
def get_md5(content):
    """对于字符串进行md5加密"""
    md1 = hashlib.md5(content)
    return md1.hexdigest()
<!DOCTYPE html>
<html lang="en">
<head>
<meta charset="UTF-8">
<title>配置文件差异性对比</title>
{# 导入Bootstrap帮我们设置好的CSS样式和JS的动效 #}
<link rel="stylesheet" href="https://cdn.staticfile.org/twitter-bootstrap/3.3.7/css/bootstrap.min.css">
<script src="https://cdn.staticfile.org/jquery/2.1.1/jquery.min.js"></script>
<script src="https://cdn.staticfile.org/twitter-bootstrap/3.3.7/js/bootstrap.min.js"></script>
</head>
<body>
{% include 'host/nav.html' %}
{#设置table标签的类名称为table和table-striped,其实就是使用Bootstrap帮我们写好的CSS样式设置表格样式#}
<div class="container">
<div class="row">
<div class="col-sm-6 col-sm-offset-3">
<h1>配置文件差异性对比</h1>
{#form表单需要指定的信息: 1). 提交的方式method=post 2). 提交给哪一个路由处理? /diff/对应的视图函数是diff函数#}
{# form表单上传文件时,一定要设置 enctype="multipart/form-data" #}
<form role="form" action="/diff/" method="post" enctype="multipart/form-data">
{% csrf_token %}
<div class="form-group">
<label for="inputfile">第一个配置文件:</label>
<input type="file" id="inputfile" name="filename1">
</div>
<div class="form-group">
<label for="inputfile">第二个配置文件:</label>
<input type="file" id="inputfile" name="filename2">
</div>
<button type="submit" class="btn btn-success">上传文件</button>
</form>
{#<form action="#">#}
{# 第一个配置文件: <input type="file" name="filename1"><br/>#}
{# 第二个配置文件: <input type="file" name="filename2"><br/>#}
{# <input type="submit" value="上传">#}
{#</form>#}
</div>
</div>
</div>
</body>
</html>nav.html 该文件是为不重复编写代码 显示导航栏
{#编写代码发现html代码重复较多,就可以抽象出来, 存储到一个文件中#}
{#其他文件希望使用, {% include 'host/nav.html' %} 导入即可 #}
<nav class="navbar navbar-inverse" role="navigation">
    <div class="container-fluid">
        <div class="navbar-header">
            {#     超链接       #}
            <a class="navbar-brand" href="/">Sysinfo</a>
        </div>
        <div>
            <ul class="nav navbar-nav">
                <li><a href="/">主机信息监控</a></li>
                <li><a href="/disk/">磁盘分区监控</a></li>
                <li><a href="/users/">登录用户监控</a></li>
            </ul>
        </div>
    </div>
</nav>
(5)指定子路由 在host子应用中添加新建urls.py
from django.contrib import admin
from django.urls import path,include
from . import views

urlpatterns = [
    path('',views.index, name='index'),
    path('disk/',views.disk, name='disk'),
    path('users/',views.users, name='users'),
    path('diff/', views.diff, name='diff'),
]
(6)由于该项目没有涉及数据库 我们只需要在settings.py 文件中加入子应用host 然后注释数据库的指定 同时该项目也不涉及admin的后台管理 故不需要指定module.py 文件
(7) 测试 效果
python3 manage.py runserver 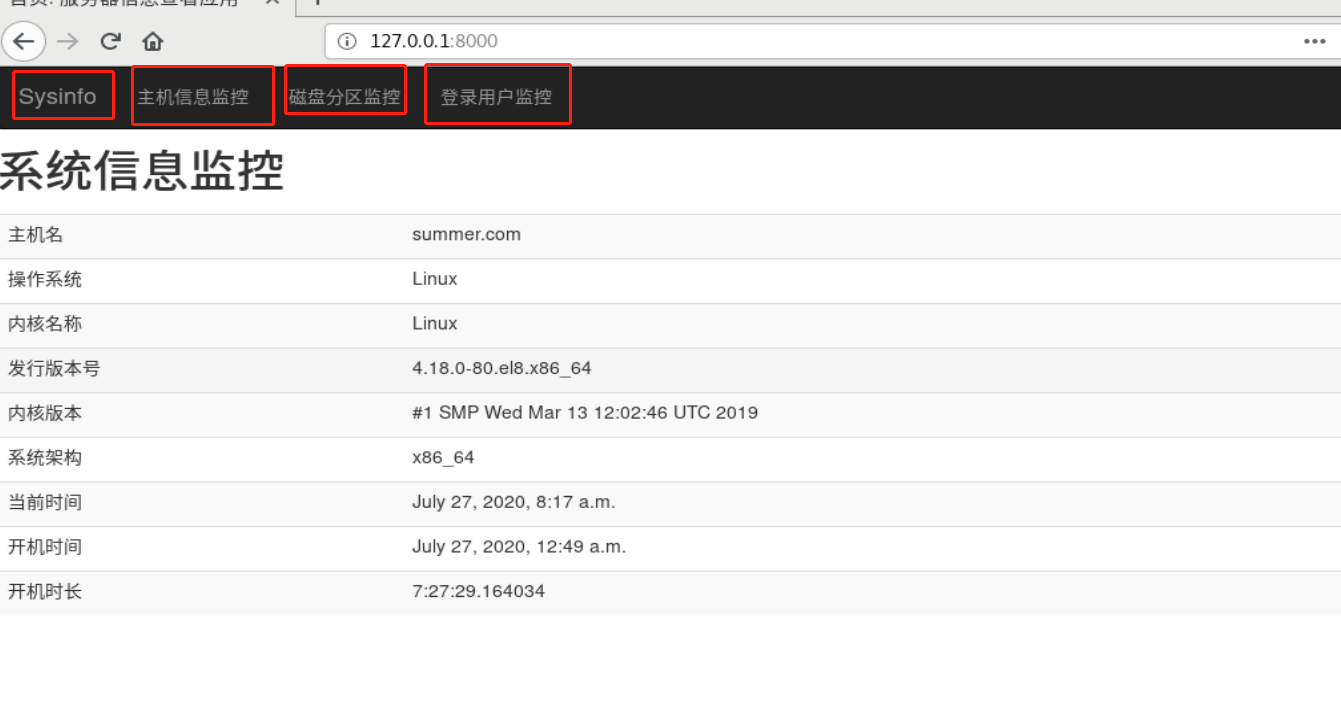
输入 http://127.0.0.1:8000/diff
