文章目录
这次我们来学习创建3架飞机,通过面对对象的思想,逐层抽象。
资源管理
首先,我们把我们用到的资源下载下来。(右击保存)


然后放到Final文件夹下,为了便于管理,我们在Final文件夹中创建一个名为plane的文件夹,然后再把图片资源放进去。并且重命名,可以自己随便起名字,我的名字是为了好记忆,根据名字就知道是哪款战机。

类结构
在写代码之前,我们分析如下:

我们层层抽象,我们的三个飞机对应最下面的三个类,这里不是对象。
加载图片
然后我们开始写代码:
首先,在template.h文件的app类外(或者你可以写在 #define COMPANY_NAME “My Company” 的下方)声明我们三个图片的编号。
(由于其他地方会用到,所以声明为全局变量)
extern int IMG_f11;
extern int IMG_tm;
extern int IMG_redStar;
既然是全局变量,我们必须在template.cpp中再次说明一下(可以不赋初值)。
int IMG_f11;
int IMG_tm;
int IMG_redStar;
然后,我们加载图像资源。(由于我们放到了plane文件夹,所以这里路径与之前背景图略有不同。同样放在Begin函数中。)
	IMG_f11 = agk::LoadImage("plane/F-11.png");
	IMG_redStar = agk::LoadImage("plane/redStar.png");
	IMG_tm = agk::LoadImage("plane/TM.png");
我们根据我们上面的分析,依次添加类。
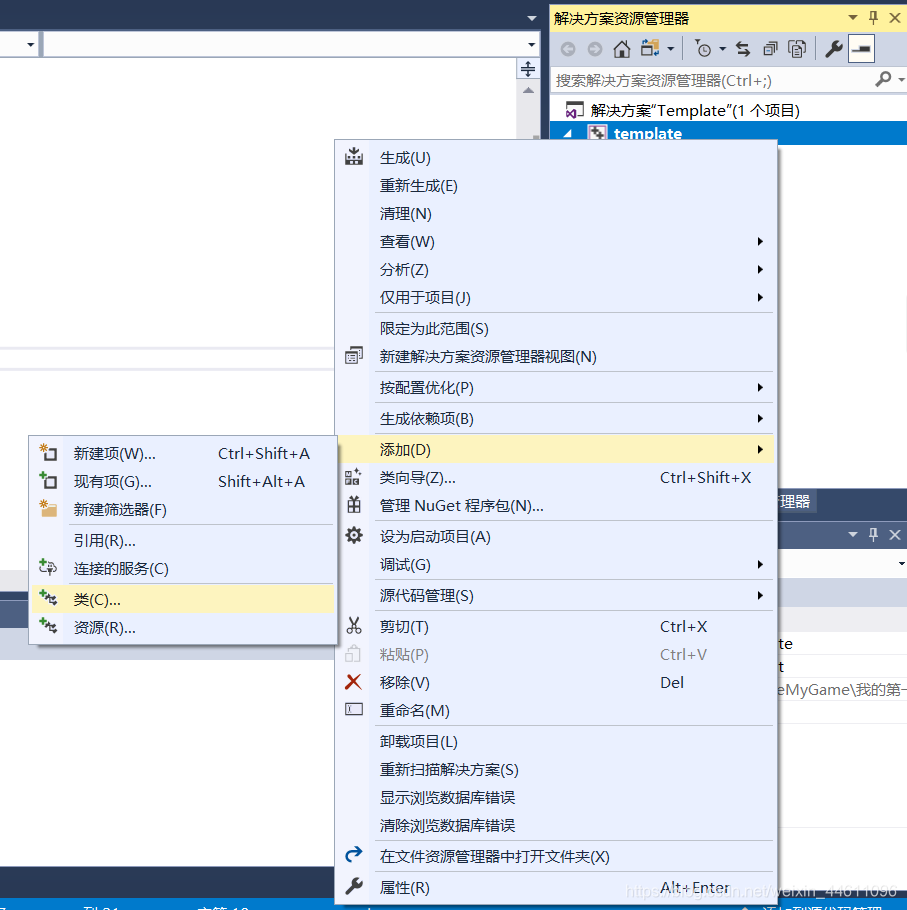
右击项目,添加,类
物体类
在弹出框中,输入类名为Object,然后勾选虚拟析构函数,这是为了我们之后多态使用

Object.h
物体的图像用图像编号即可存储,所以有_imageID。(我的个人习惯,以下划线开头代表是变量,大写字母开头代表是函数)
物体还有一个唯一编号_spriteID,这个可以正好用上精灵的编号(创建精灵时的返回值)。
物体的函数有功能,这个功能是为多态准备的,而且我们不可能直接创建一个物体类,所以是一个纯虚函数。
对于构造函数,传个参数用于保存图像编号。
class Object
{
public:
	Object(int _imageID);
	virtual ~Object();
	virtual void Func()=0;
protected:
	int _imageID;
	int _spriteID;
};
Object.cpp
构造函数用来创建一个精灵,使用我们的图像编号,并保存精灵的编号。
析构函数用来删除这个精灵。
#include "Object.h"
#include"template.h"


Object::Object(int _imageID)
{
	this->_imageID = _imageID;
	_spriteID=agk::CreateSprite(_imageID);
}


Object::~Object()
{
	agk::DeleteSprite(_spriteID);
}
角色类
创建方法同上,类名是Actor,基类是Object,任然是虚拟析构函数

Actor.h
根据角色类的信息,我们加入了以下变量。
为什么血量和速度不使用int型呢?
这是为了避免做乘法时,乘小数得到的结果不准确。
构造函数用于初始化全部变量。
根据函数移动,增加了Move函数,同样也是纯虚的。
#include "Object.h"
class Actor :
	public Object
{
public:
	Actor(int team,float _hp,float _speed,float _x,float _y,int _imageID);
	virtual ~Actor();
	virtual void Move() = 0;
protected:
	int team;
	float _hp;
	float _speed;
	float _x;
	float _y;
};
Actor.cpp
构造函数给自己的变量赋值,并且给其父类Object赋_imageID的值,最后设置精灵的位置。
析构函数使用Object的析构函数。
#include "Actor.h"
#include"template.h"


Actor::Actor(int team, float _hp, float _speed, float _x, float _y,int _imageID):Object(_imageID)
{
	this->team = team;
	this->_hp = _hp;
	this->_speed = _speed;
	this->_x = _x;
	this->_y = _y;
	agk::SetSpritePosition(_spriteID, _x, _y);
}


Actor::~Actor()
{
	Object::~Object();
}
飞机类
类名是Plane,基类是Actor。这次不用虚拟析构了,原因我们之后说。

Plane.h
可以看到构造函数的参数越来越多了,不过没关系,之后就省事了。
由于我们这篇文章只讲飞机,没有子弹,所以子弹类型就先省略,相应的攻击方法也不能使用(但可以先声明一个空方法Attack)。
我们将Move函数重写,这样就可以移动我们的飞机。
由于此类已不是虚基类,所以必须实现Func方法。
攻击速度我要说明一下,代表每秒钟发射的子弹数。
既然是子弹数,那为什么不是整数呢?
那是因为如果2秒发一颗子弹,整数能表示1.5吗?
#include "Actor.h"
class Plane :
	public Actor
{
public:
	Plane(float _fireSpeed,int team, float _hp, float _speed, float _x, float _y, int _imageID);
	~Plane();
	void Attack();
	void Move();
	void Func();
protected:
	float _fireSpeed;
	//子弹类型
};
Plane.cpp
构造方法依然只是赋值,无其他功能。
Attack函数我们之后有了子弹类再实现。
Move函数用来移动飞机,GetDirectionX在电脑上用来获取X方向的值,按下键盘右键时返回1,键盘左键返回-1,左右都不按返回0。
GetDirectionY在电脑上用来获取Y方向的值,按下键盘上键时返回-1,键盘下键返回1,上下都不按返回0。
在Func函数中调用Move方法。
#include "Plane.h"
#include"template.h"


Plane::Plane(float _fireSpeed, int team, float _hp, float _speed, float _x, float _y, int _imageID):Actor(team,_hp,_speed,_x,_y,_imageID)
{
	this->_fireSpeed = _fireSpeed;
}


Plane::~Plane()
{
	Actor::~Actor();
}

void Plane::Attack()
{
	//根据射速发射子弹
}

void Plane::Move()
{
	_x = agk::GetSpriteX(_spriteID) + agk::GetDirectionX()*_speed;
	_y = agk::GetSpriteY(_spriteID) + agk::GetDirectionY()*_speed;
	agk::SetSpritePosition(_spriteID, _x, _y);
}

void Plane::Func()
{
	Move();
}
TM类
后面这三个类大同小异,我就不一一截图了。

构造函数的参数只有此飞机的出生坐标。
TM.h
#include "Plane.h"
class TM :
	public Plane
{
public:
	TM(float _x,float _y);
	~TM();
};
TM.cpp
构造函数给子类赋具体的值,不再是变量。SetSpriteSize用于设置精灵大小,由于我的图片资源像素较大,所以使用这个函数调整大小,宽为60像素,高度自适应(-1时等比例缩放)。
#include "TM.h"
#include"template.h"


TM::TM(float _x, float _y):Plane(1,1,10,2,_x,_y,IMG_tm)
{
	agk::SetSpriteSize(_spriteID, 60, -1);
}


TM::~TM()
{
}
F-11类
F11.h
#include "Plane.h"
class F11 :
	public Plane
{
public:
	F11(float _x, float _y);
	~F11();
};
F11.cpp
#include "F11.h"
#include"template.h"


F11::F11(float _x, float _y) :Plane(2, 1, 10, 2, _x, _y, IMG_f11)
{
	agk::SetSpriteSize(_spriteID, 60, -1);
}


F11::~F11()
{
}
redStar类
RedStar.h
#include "Plane.h"
class RedStar :
	public Plane
{
public:
	RedStar(float _x, float _y);
	~RedStar();
};
RedStar.cpp
#include "RedStar.h"
#include"template.h"


RedStar::RedStar(float _x, float _y) :Plane(1, 1, 10, 2, _x, _y, IMG_redStar)
{
	agk::SetSpriteSize(_spriteID, 60, -1);
}


RedStar::~RedStar()
{
}
所有的类都写好了,我们开始使用它们。
首先必须包含三种飞机的头文件。
在Begin函数之前声明三个指针。
在Begin函数中,必须在加载图像之后,创建三个对象并给指针赋值。
在Loop函数中,调用它们的Func函数。(之后我会教大家使用多态,更方便)
在End函数中,删除指针(必须)。
template.cpp
// Includes
#include "template.h"
#include"TM.h"
#include"F11.h"
#include"RedStar.h"
// Namespace
using namespace AGK;

app App;
int IMG_f11;
int IMG_tm;
int IMG_redStar;

TM *tm;
F11 *f11;
RedStar *rs;

void app::Begin(void)
{
	agk::SetVirtualResolution(DEVICE_WIDTH, DEVICE_HEIGHT);
	agk::SetClearColor(255, 0, 255); // light blue
	agk::SetSyncRate(30, 0);
	agk::SetScissor(0, 0, 0, 0);

	agk::SetWindowTitle("Space");
	agk::UseNewDefaultFonts(1);

	IMG_bg1=agk::LoadImage("bg1.jpg");
	IMG_f11 = agk::LoadImage("plane/F-11.png");
	IMG_redStar = agk::LoadImage("plane/redStar.png");
	IMG_tm = agk::LoadImage("plane/TM.png");

	SPR_bg1=agk::CreateSprite(IMG_bg1);
	agk::SetSpriteColor(SPR_bg1,252, 157, 154, 255);
	tm = new TM(100, 300);
	f11 = new F11(250, 300);
	rs = new RedStar(400, 300);
}

int app::Loop(void)
{
	tm->Func();
	f11->Func();
	rs->Func();
	agk::Print(agk::ScreenFPS());
	agk::Print("Thank you for reading!");
	agk::Sync();

	return 0; // return 1 to close app
}


void app::End(void)
{
	delete tm;
	delete f11;
	delete rs;
	agk::Message("感谢使用");
}
由于担心有些朋友不清楚template.h的内容,我写在下面。
template.h
#ifndef _H_AGK_TEMPLATE_
#define _H_AGK_TEMPLATE_

// Link to GDK libraries
#include "AGK.h"


#define DEVICE_WIDTH 640
#define DEVICE_HEIGHT 480
#define DEVICE_POS_X 32
#define DEVICE_POS_Y 32
#define FULLSCREEN false

// used to make a more unique folder for the write path
#define COMPANY_NAME "My Company"

extern int IMG_f11;
extern int IMG_tm;
extern int IMG_redStar;

class app
{
public:

	// constructor
	app() { memset(this, 0, sizeof(app)); }

	// main app functions - mike to experiment with a derived class for this..
	void Begin(void);
	int Loop(void);
	void End(void);
private:
	int IMG_bg1;
	int SPR_bg1;
};

extern app App;

#endif
// Allow us to use the LoadImage function name
#ifdef LoadImage
#undef LoadImage
#endif
运行效果

可以使用键盘上下左右一起移动。
下次再见,拜拜!