大数据系列之elasticsearch、elasticsearch-head、kibana安装
elasticsearch下载地址
https://www.elastic.co/cn/downloads/past-releases/elasticsearch-6-3-0
解压文件
tar -xvf elasticsearch-6.3.0.tar.gz -C /opt/apache
创建用户es 注意elasticsearch不能用root启动
groupadd es
useradd es -g es -p 123456
chown -R es:es /opt/apache/elasticsearch-6.3.0/
修改配置文件elasticsearch.yml
cluster.name: elasticsearch
node.name: node-1
path.data: /opt/apache/elasticsearch-6.3.0/data
path.logs: /opt/apache/elasticsearch-6.3.0/logs
network.host: 192.168.12.130
http.port: 9200
# tcp端口
transport.tcp.port: 9300
transport.tcp.compress: true
# 集群信息
discovery.zen.ping.unicast.hosts: ["192.168.12.130", "192.168.12.131","192.168.12.132"]
gateway.recover_after_nodes: 2
http.cors.enabled: true
http.cors.allow-origin: "*"
启动elasticsearch
su es
nohup /opt/apache/elasticsearch-6.3.0/bin/elasticsearch &
查看是否启动成功
# 查看进程
ps -ef | grep elastic
# 查看http端口信息,出现下面信息代表安装成功。
curl -i "http://192.168.12.130:9200"
HTTP/1.1 200 OK
content-type: application/json; charset=UTF-8
content-length: 492
{
"name" : "node-1",
"cluster_name" : "elasticsearch",
"cluster_uuid" : "45tGjkXmRDeq9_k47oqdBA",
"version" : {
"number" : "6.3.0",
"build_flavor" : "default",
"build_type" : "tar",
"build_hash" : "424e937",
"build_date" : "2018-06-11T23:38:03.357887Z",
"build_snapshot" : false,
"lucene_version" : "7.3.1",
"minimum_wire_compatibility_version" : "5.6.0",
"minimum_index_compatibility_version" : "5.0.0"
},
"tagline" : "You Know, for Search"
}
elasticsearch-head下载地址
git clone git://github.com/mobz/elasticsearch-head.git
需要node依赖下载地址
https://nodejs.org/dist/v12.18.3/node-v12.18.3-linux-x64.tar.xz
解压安装node
cd /usr/local
yum install -y xz
xz -d node-v8.11.1-linux-x64.tar.xz
tar -xf node-v8.11.1-linux-x64.tar
# 想要全局使用npm 和 node,就需要做相关软链,如下:
cd /usr/local/bin
ln -s /usr/local/src/node-v8.10.0-linux-x64/bin/npm
ln -s /usr/local/src/node-v8.10.0-linux-x64/bin/node
# 查看node和npm版本
node -v
npm -v
修改配置文件之Gruntfile.js
server: {
options: {
port: 9100,
base: ‘.’,
keepalive: true,
hostname: '*'
}
}
修改_site文件夹下的app.js,将localhost:9200改成 “你的ip:9200”
this.base_uri = this.config.base_uri || this.prefs.get("app-base_uri") || "http://192.168.12.130:9200";
启动elasticsearch-head
cd /opt/apache/elasticsearch-head
# 若想在后台运行,结尾追加“&”
nohup grunt server &
# 也可以使用
nohup npm run start &
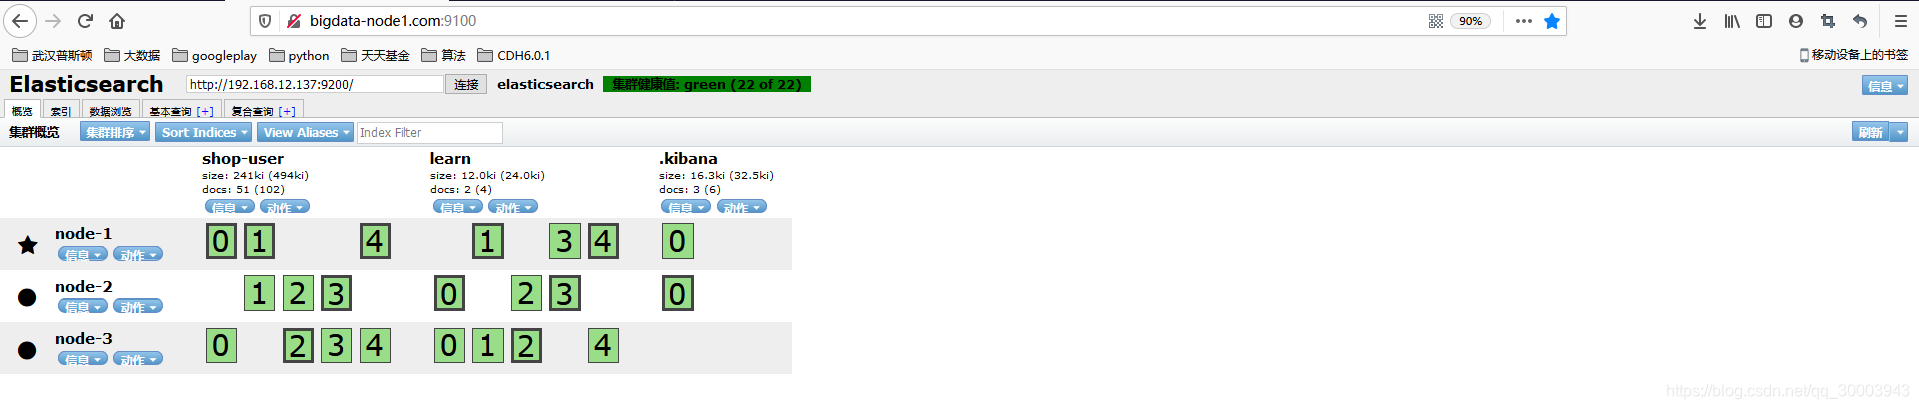
访问地址
http://192.168.12.130:9100
Kibana国内镜像下载地址
https://www.newbe.pro/Mirrors/Mirrors-Kibana/
解压文件并修改名称
tar -xvf kibana-6.3.0-linux-x86_64.tar.gz
mv kibana-6.3.0-linux-x86_64/ kibana-6.3.0
修改配置文件kibana.yml
vim  kibana.yml
server.port: 5601
server.host: "0.0.0.0"
elasticsearch.url: "http://192.168.12.130:9200"    //修改成自己集群的端口号
kibana.index: ".kibana"
启动Kibana
nohup /opt/apache/kibana-6.3.0/bin/kibana &
访问Http的WEBUI
http://192.168.12.130:5601
