配置dns正向解析应用服务
一、DNS系统原理


named.rfc1912.zones //区域配置文件


cd /var/named
vi /var/named.ca //查看全球13个根域名服务器地址


实验一:配置dns正向解析应用服务
1. 实验描述
- 部署一个dns服务器(1)centos 7.6,主配置文件允许所以域名访问。服务器NAT模式,静态ip地址192.168.75.137
- 自定义一个区域域名,www.ttyy.com,IP地址 192.168.75.188
- 部署一个Apache服务器,作为www.ttyy.com域名的http服务器。nat模式,ip地址 192.168.75.188
- 开启一个win10作为客户机,验证成功访问dns解析和www.ttyy.com服务。
实验逻辑图
(1)步骤一
1. 首先安装bind
yum -y install bind                      //yum 安装bind
[root@localhost /]# rpm -qc  bind             //查看bind 配置文件路径
/etc/logrotate.d/named
/etc/named.conf
/etc/named.iscdlv.key
/etc/named.rfc1912.zones              //区域配置文件
/etc/named.root.key
/etc/rndc.conf
/etc/rndc.key
/etc/sysconfig/named
/var/named/named.ca
/var/named/named.empty
/var/named/named.localhost               //区域数据配置文件
/var/named/named.loopback

root@localhost /]# vi /etc/named.conf      //设置主配置文件

[root@localhost ttyy]# vim /etc/named.rfc1912.zones //在区域配置文件中设置自定义的域名

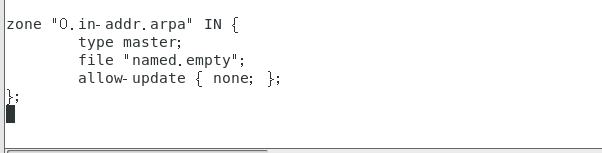
主配置文件中的 唯一根区域数据
[root@localhost named]#  cp -p named.localhost ttyy.com.zone    //带有属性复制区域数据配置文件并且ttyy.com.zone
[root@localhost named]# vim ttyy.com.zone     //编辑区域数据配置文件

[root@localhost named]# systemctl restart named //重启named服务
(2)步骤二
- 开启另一台centos 服务部署Apache ,/var/www/html中自定义index网页内容
- 注意:服务器使用nat模式,并且IP地址与DNS服务器(centos 1)同一网段。
- Apache服务器的网卡地址就是自定义域名www.ttyy.com 的ip地址 192.168.75.188
[root@localhost ttyy]# yum -y install httpd

root@localhost ttyy]# cd /var/www
[root@localhost www]# ll
总用量 0
drwxr-xr-x. 2 root root 6 4月   2 21:14 cgi-bin
drwxr-xr-x. 2 root root 6 4月   2 21:14 html

[root@localhost www]# vi index.html
[root@localhost www]# cd html/
[root@localhost html]# ll
总用量 0
[root@localhost html]# cd ..
[root@localhost www]# ll
总用量 4
drwxr-xr-x. 2 root root  6 4月   2 21:14 cgi-bin
drwxr-xr-x. 2 root root  6 7月   7 09:16 html
-rw-r--r--. 1 root root 41 7月   7 09:17 index.html
[root@localhost www]# mv index.html html/
[root@localhost www]# ll
总用量 0
drwxr-xr-x. 2 root root  6 4月   2 21:14 cgi-bin
drwxr-xr-x. 2 root root 24 7月   7 09:18 html
(3)步骤三
-
开启一台win10 ,网络适配nat模式,VMnet8 ,虚拟机验证dns服务器。
-
设置win10的dns服务器地址为192.168.75.137也就是dns服务器的ip地址。


