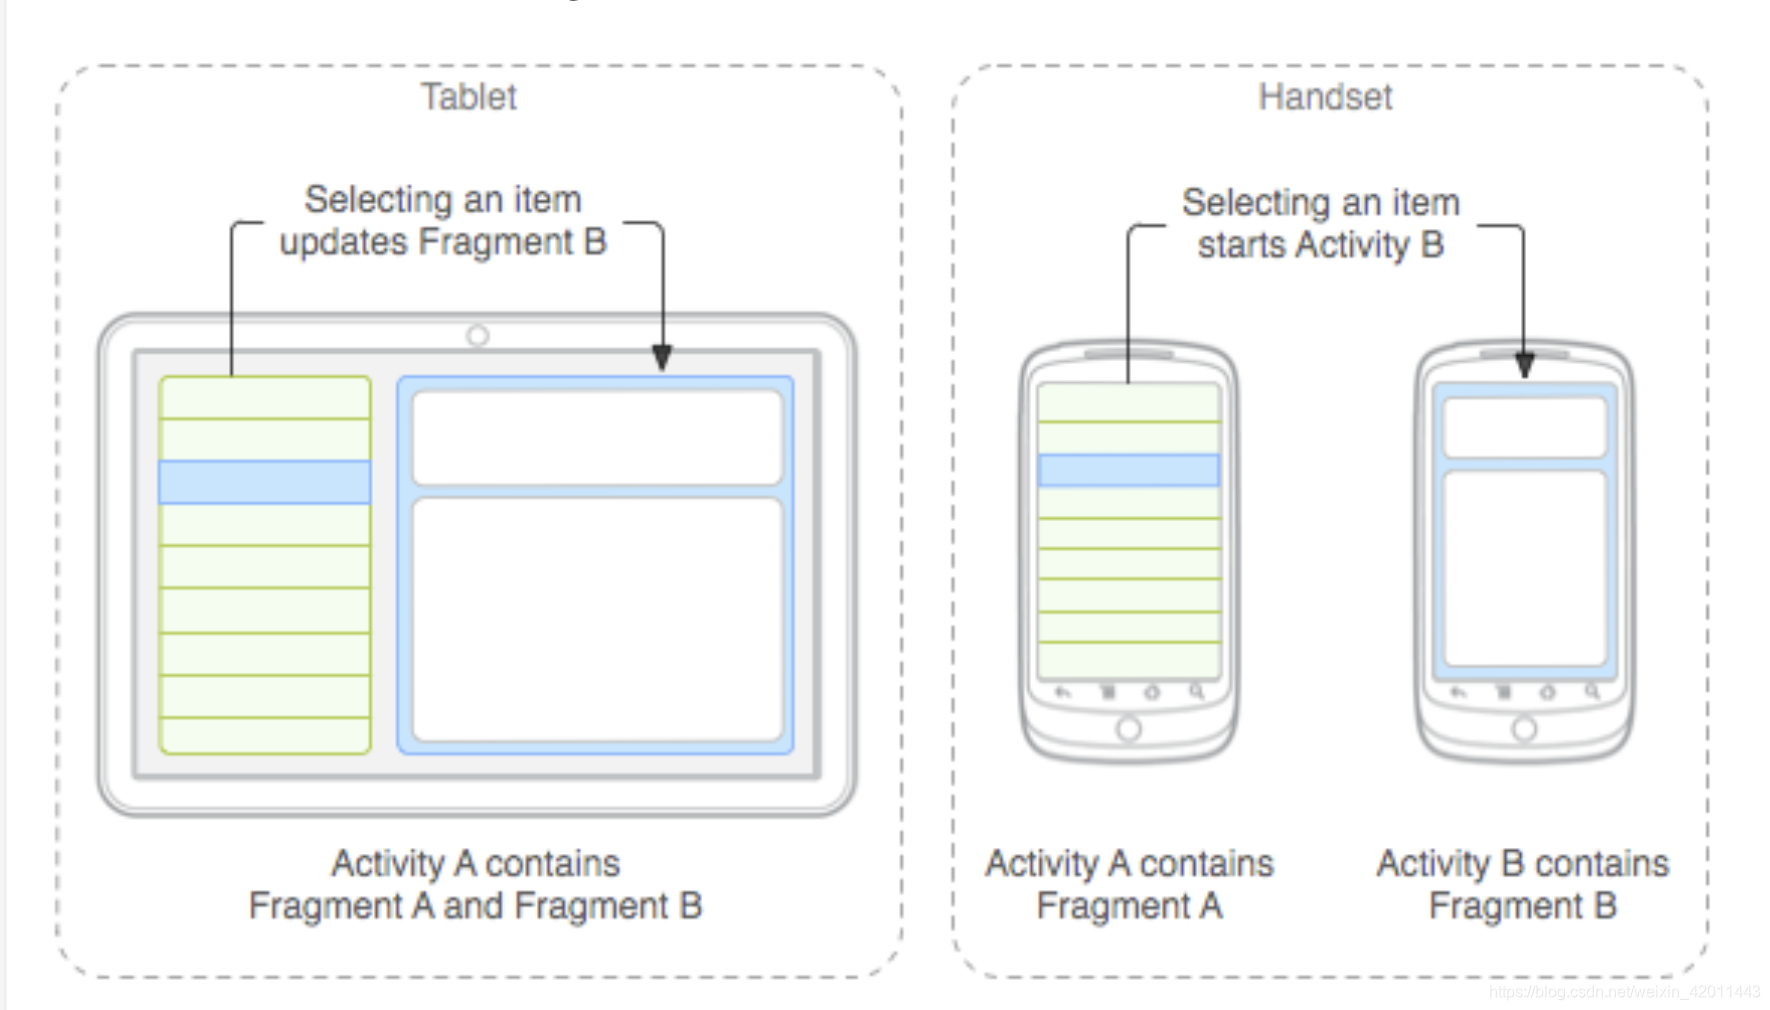
Fragment可以看成是一个小型的Activity,设置的初衷是为了适应类似于平板电脑的大屏幕设备。Fragment 不能单独使用,必须嵌套在Activity 中,且Fragment的生命周期会受到宿主Activity的影响。
下图是非常经典一个Fragment分别对应手机与平板间不同情况的处理图:
1.Fragment生命周期
参考链接(https://www.runoob.com/w3cnote/android-tutorial-fragment-base.html)
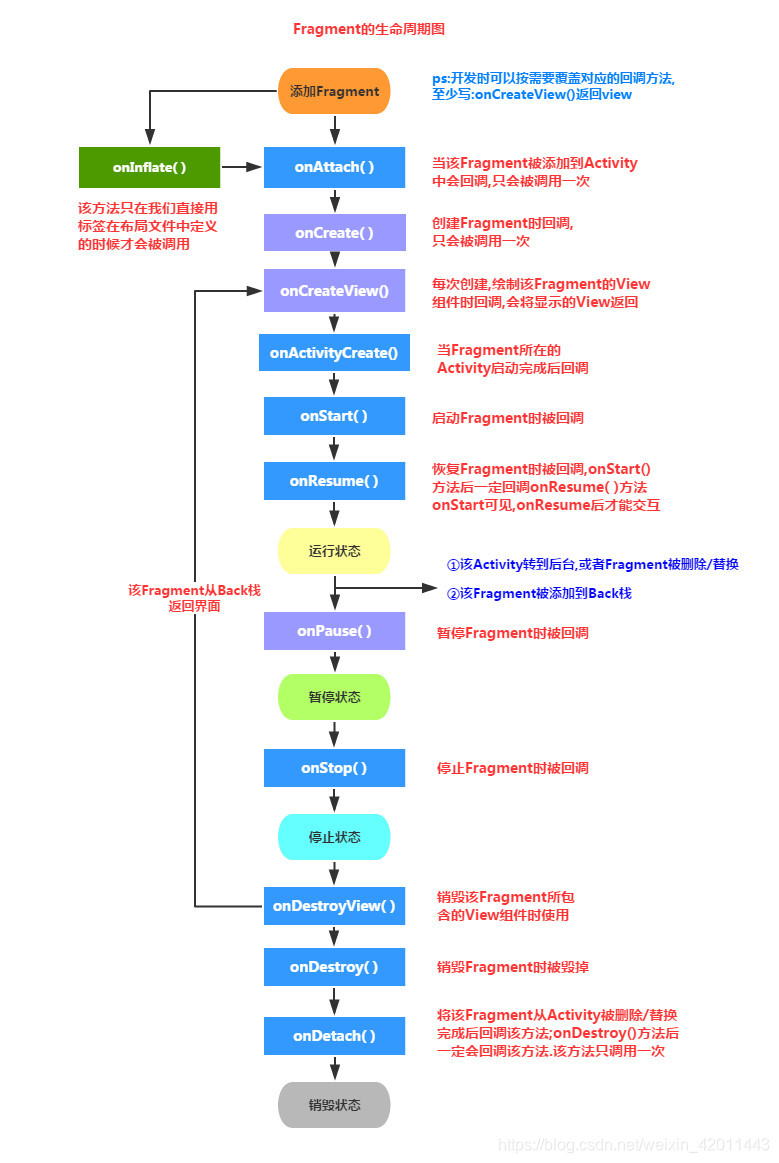
碎片的生命周期包括 onAttach->onCreat->onCreatView->onActivityCreated->onStart->onResume->onPuse->onStop->onDestoryView->onDestory->onDetach。有些方法与Activity的相同,不同的有以下几个:
onAttach:当碎片和活动建立关联时调用
onCreateView:为碎片加载布局的时候调用
onActivityCreated:与碎片相关联的活动一定onCreate之后也就是创建完毕的时候调用
onDestoryView:与碎片相关联的视图被移除时使用
onDetach:当碎片与活动解除关联的时候被调用
将Fragment生命周期与其宿主Activity联合起来考虑的话:
运行程序/打开界面:Activity.onCreate->Fragment.onAttach->Fragment.onCreate->Fragment.onCreateView
->Fragment.onActivityCreated->Activity.onStart->Fragment.onStart->Activity.onResume->Fragment.onResume
按下主屏键/切换到其他应用:Fragment.onPause->Activity.onPause->Fragment.onStop->Activity.onStop
切回本应用/重新打开界面:Activity.onRestart->Activity.onStart->Fragment.onStart->Activity.onResume->Fragment.onResume
退出应用/回退键:Fragment.onPause->Activity.onPause->Fragment.onStop->Activity.onStop->Fragment.onDestoryView->Fragment.onDestory->Fragment.onDetach->Activity.onDestory
2.Fragment与Activity的关系
由Fragment的生命周期可看到Fragment与Activity的异同:
Activity和Fragment的相似点在于,它们都可加载布局、都有自己的生命周期,Fragment可看似迷你Activity。
不同点在于Fragment不能单独存在必须依附于Acticity,因为依附的关系所以也多了些与宿主Activity相关的生命周期方法。例外可以看到,Activity的生命周期方法都是protect属性,而Fragment生命周期方法都是public的,这说明Fragment的生命周期方法是由Activity调用的而非操作系统,Activity调用Fragment的生命周期方法并管理它。
3.Fragment的两种加载方式
一种是静态加载方式:
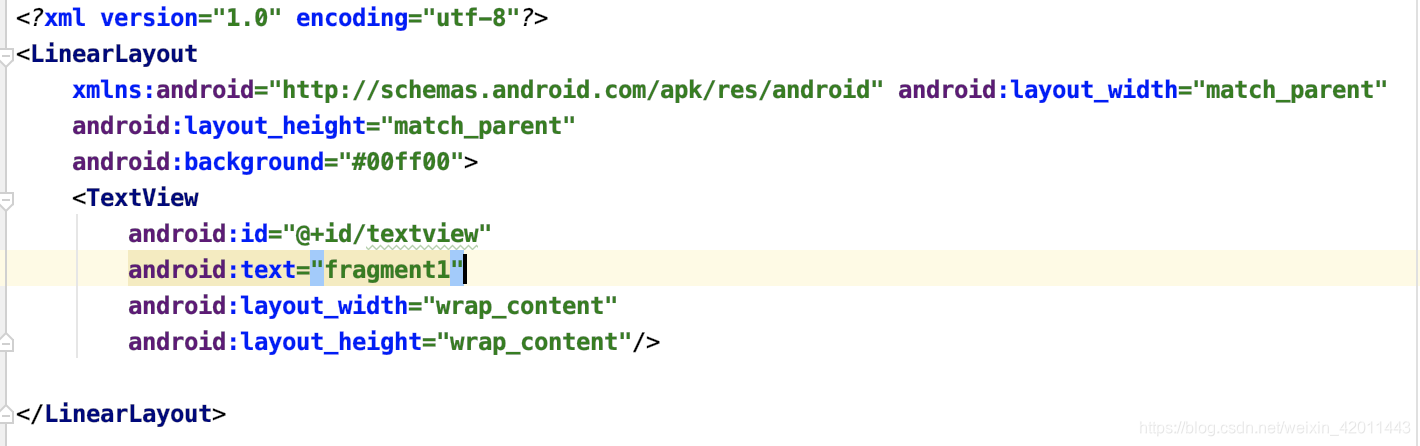
1.首先定义Fragment的布局, left_fragment.xml:
right_fragment.xml:
2.自定义一个Fragment类,需要继承Fragment或者他的子类,重写onCreateView()方法 在该方法中调用:inflater.inflate()方法加载Fragment的布局文件,接着返回加载的view对象


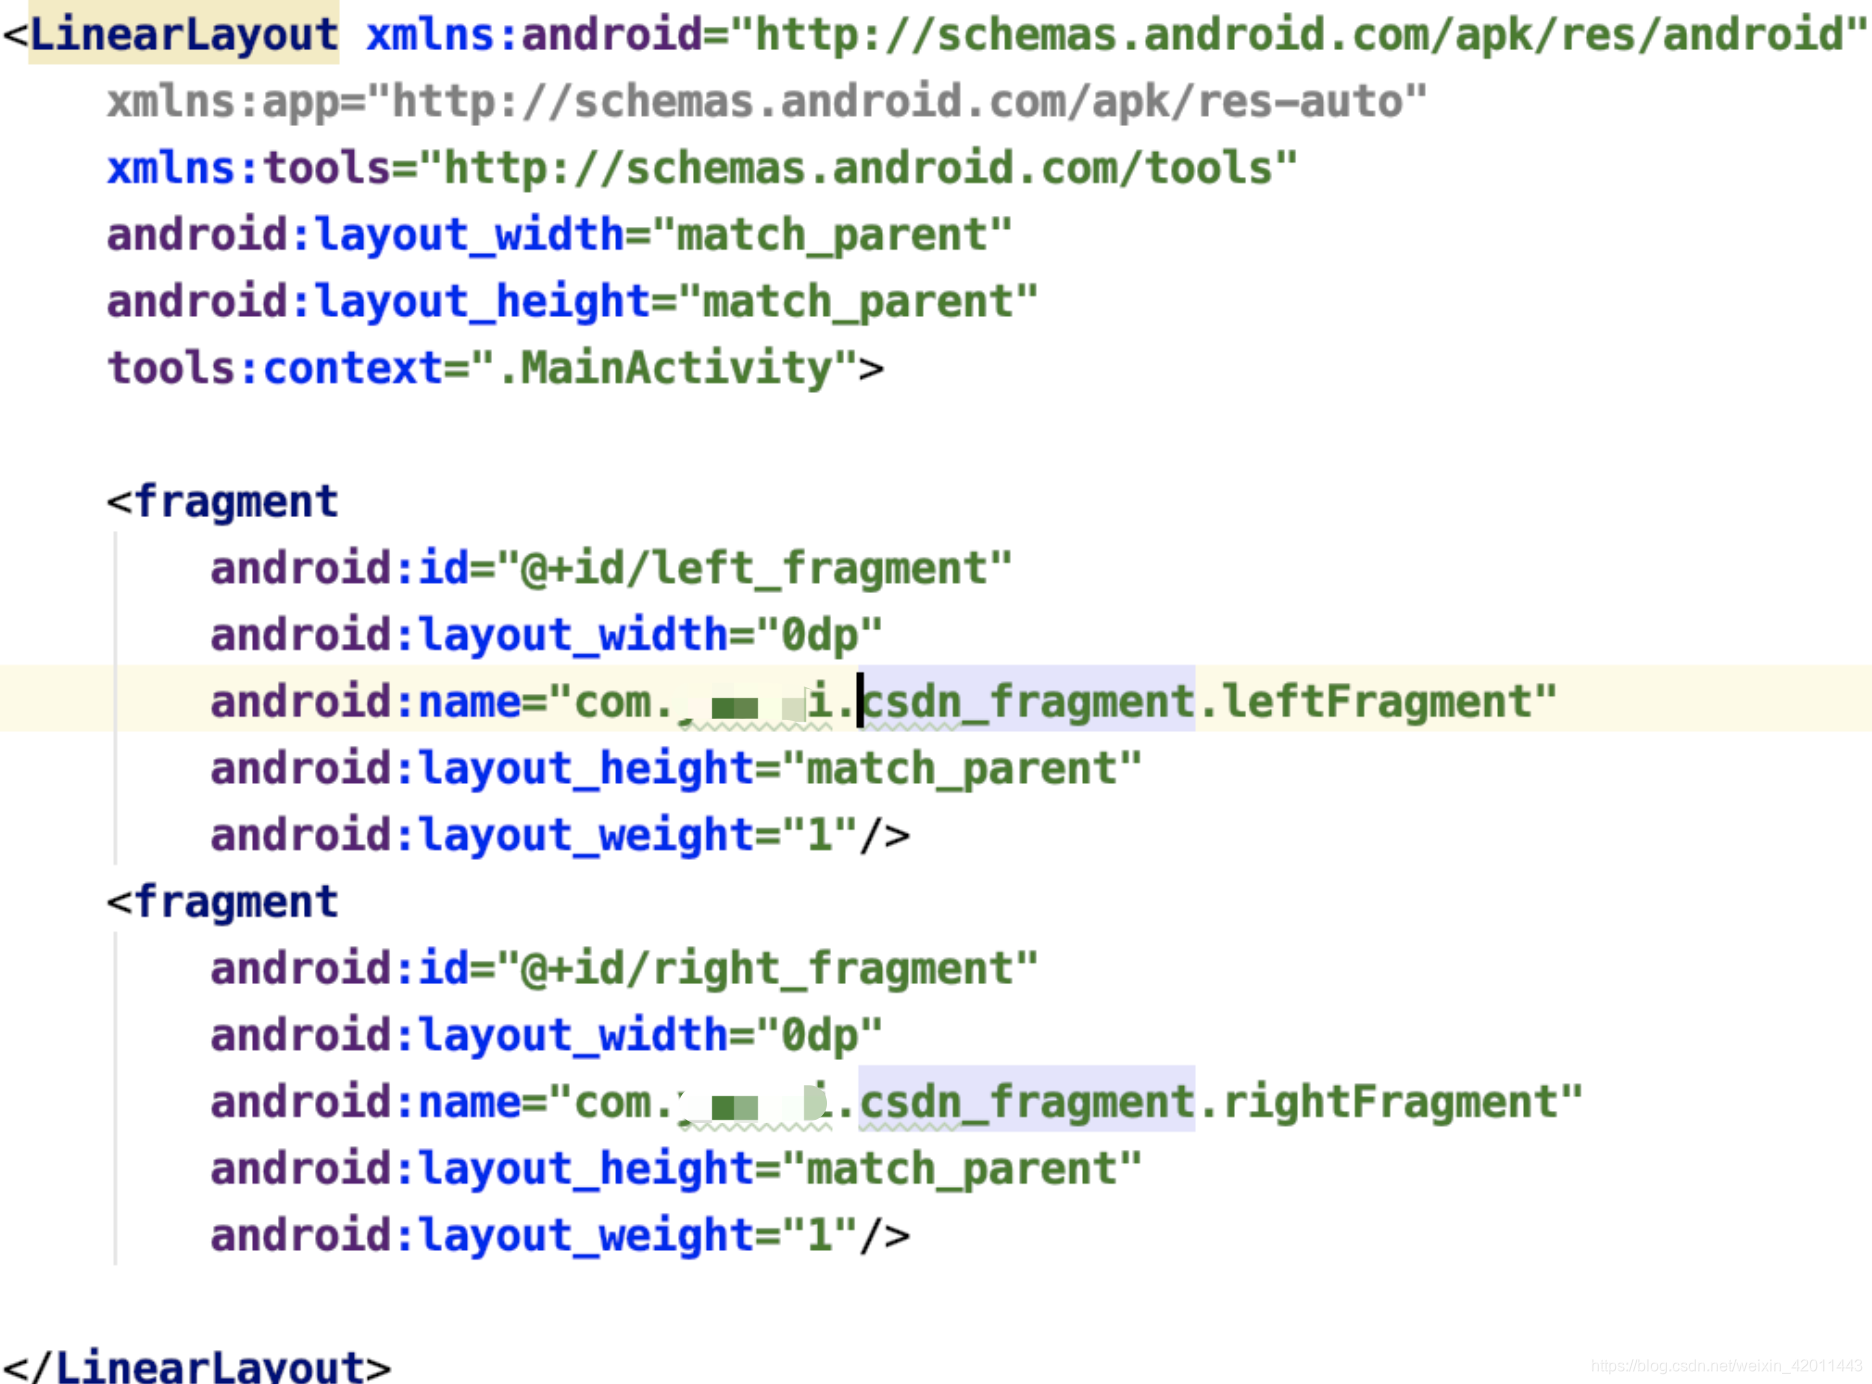
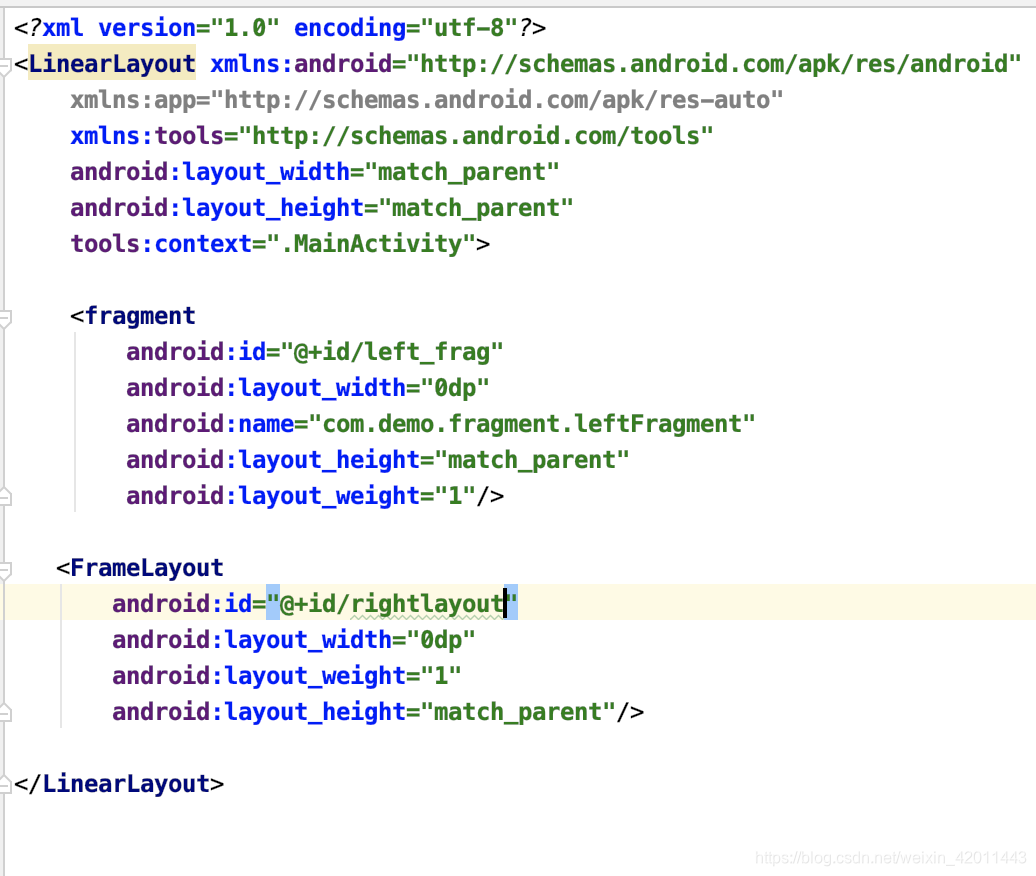
3.在需要加载Fragment的Activity对应的布局文件中添加fragment的标签,注意静态方式要添加android:name属性
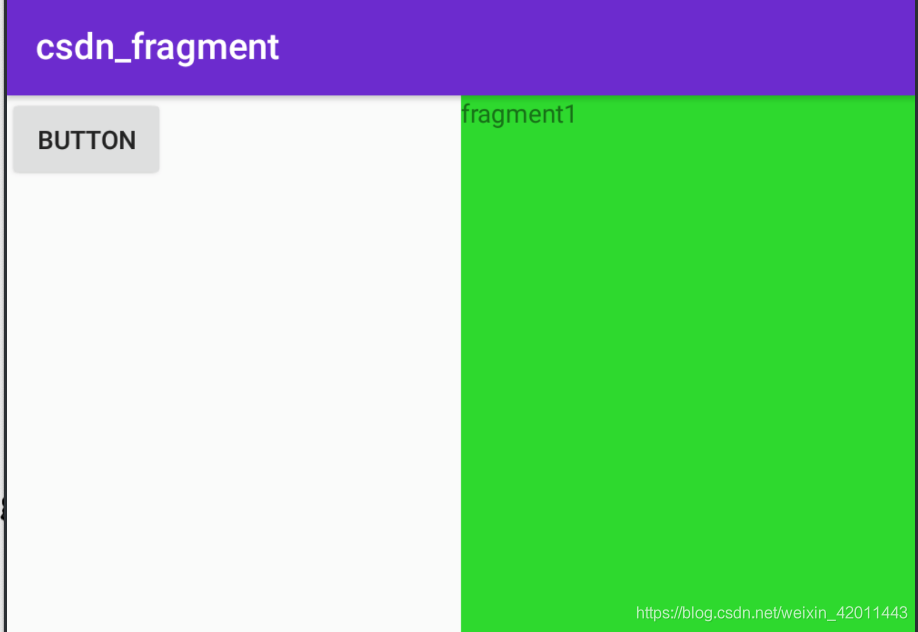
效果如下:
Kotlin 布局文件相同,leftFragment碎片如下,rightFragment相同:
   class leftFragment : Fragment() {
    override fun onCreateView(
        inflater: LayoutInflater,
        container: ViewGroup?,
        savedInstanceState: Bundle?
    ): View? {
        return inflater.inflate(R.layout.left_fragment,container,false);
    }
}
另一种是动态加载方式:
新建另一个碎片:布局如下
与another_rightfragment.xml在backgroud上颜色不同
修改activity_main.xml布局文件,将右侧Fragment替换成一个FrameLayout:
动态的含义就是动态的往FrameLayout里面添加Fragment,核心代码就是:
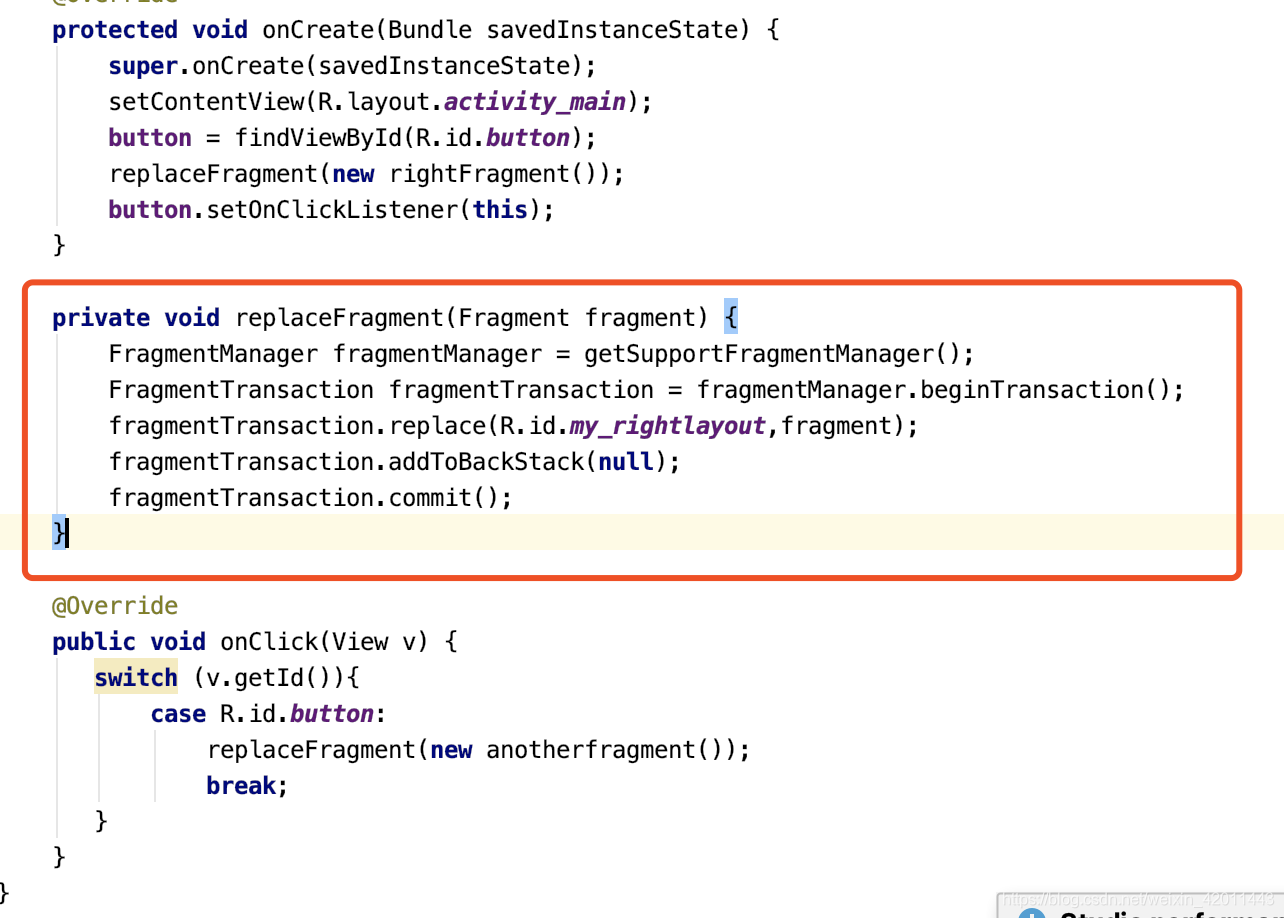
通过getSupportFragmentManager()获得Fragment管理对象,通过管理对象的beginTransaction()方法获得管理事务对象,利用这个事务对象完成增删替换,通过addToBackStack()方法将事务添加到返回栈中,通过commit()方法提交事务。
Kotlin: 和Java逻辑相同
class MainActivity : AppCompatActivity() {
    override fun onCreate(savedInstanceState: Bundle?) {
        super.onCreate(savedInstanceState)
        setContentView(R.layout.activity_main)
        replaceFragment(rightFragment())
        button.setOnClickListener {
            replaceFragment(anotherrightFragment())
        }
    }
    fun replaceFragment(fragment:Fragment){
        val fragmentManager = supportFragmentManager
        val fragmentTransition = fragmentManager.beginTransaction()
        fragmentTransition.apply {
              replace(R.id.rightlayout,fragment)
              addToBackStack(null)
              commit()
        }
    }

}
4.碎片与活动、活动与碎片、碎片与碎片通信
这里提到的通信主要是指组件获取,当然还有数据通信,这个以后用到再学习。
   活动中调用碎片里的方法:活动中通过getFragmentManager的findFragmentById获取碎片实例,这样就能调用碎片中方法。
   碎片中调用活动里的方法:碎片中通过(MainActivity)getActivity()获取活动实例,自然也可以调用活动里方法。
   碎片与碎片通信:在碎片中获得与之相关联的活动实例,通过活动实例又获取另一个碎片的实例,就可以实现碎片之间的通信。
5.Demo
这里采用ListView和Fragment来实现一个简易的新闻应用,实现方式和文章刚开始时的第二张图相同。
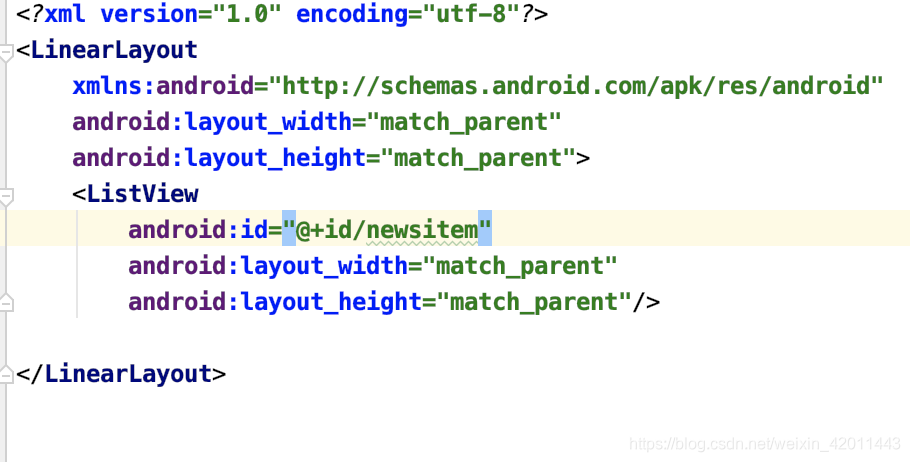
新闻列表使用ListView实现,首先先分别定义新闻列表页面的布局和新闻内容页的布局,新闻列表页面newsitem_fragment.xml:
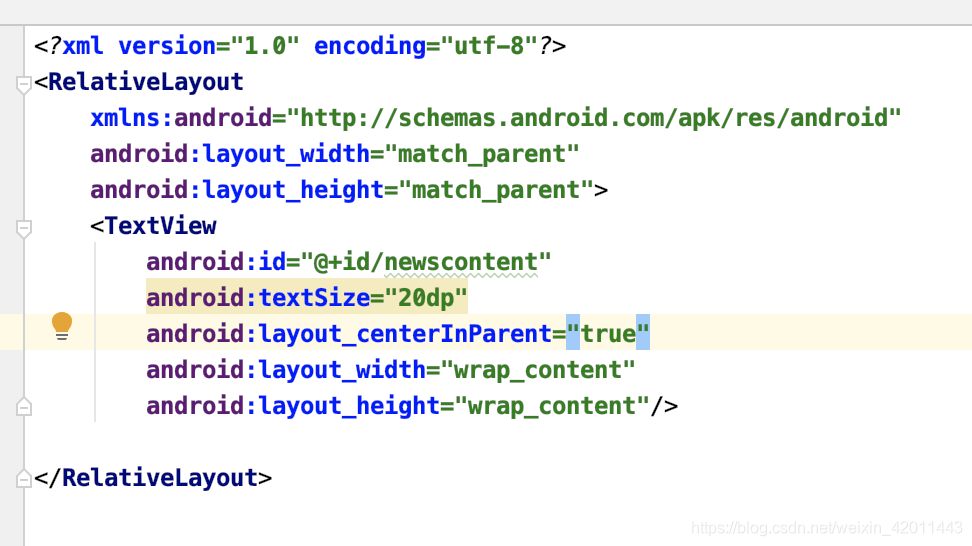
新闻内容页布局newscontent_fragment.xml:
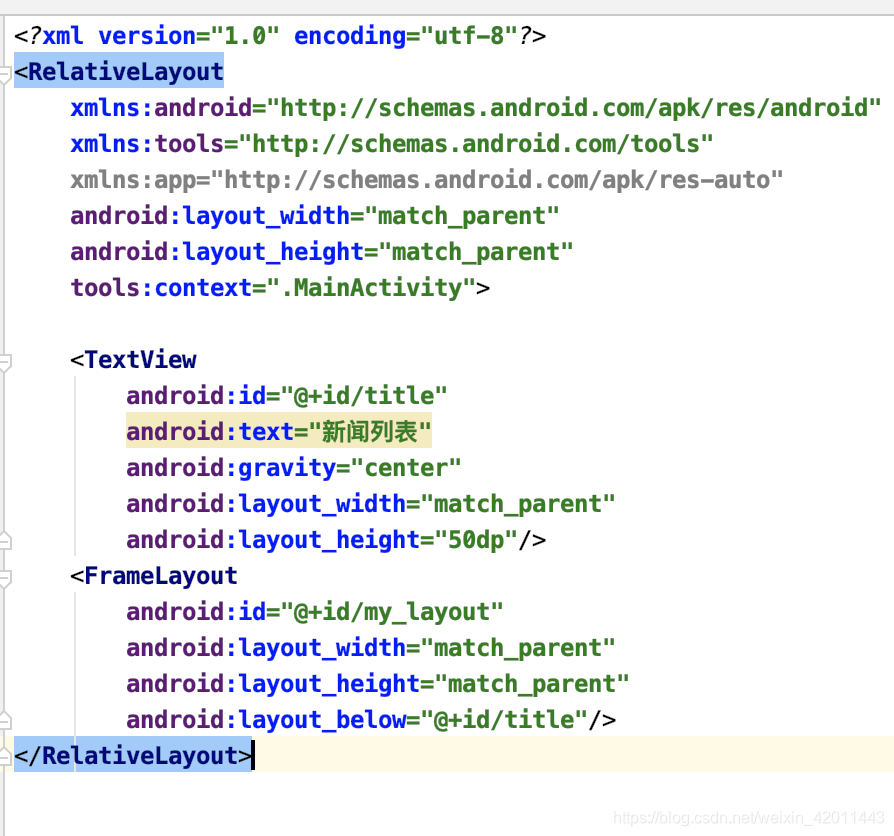
activity_main布局:
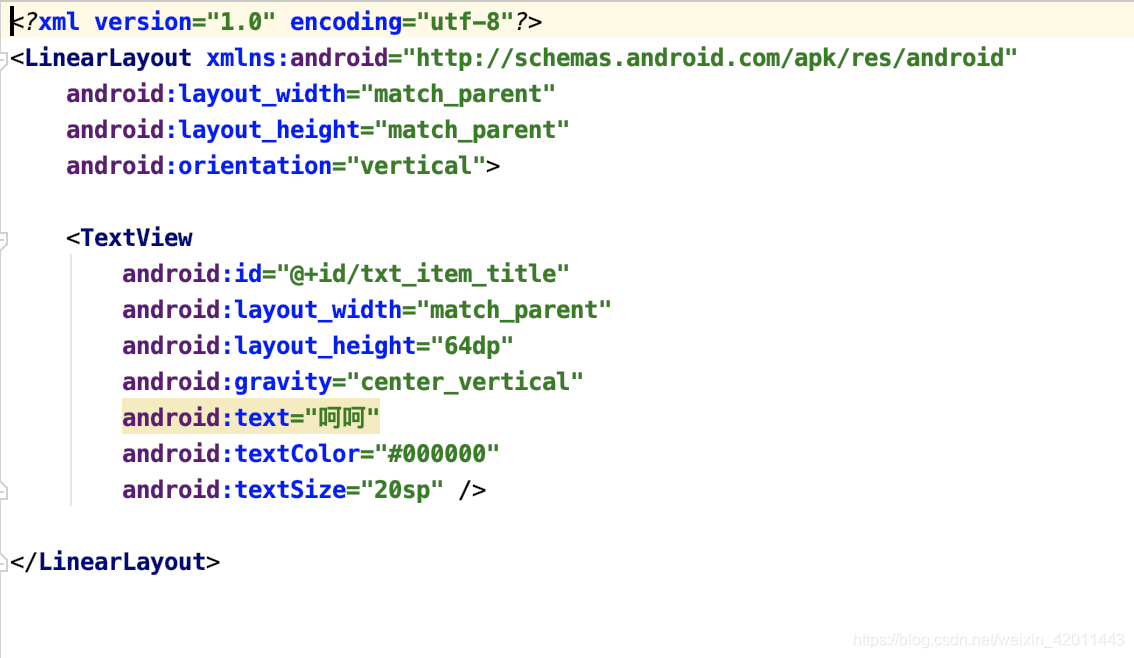
然后list_item.xml:ListView子项布局
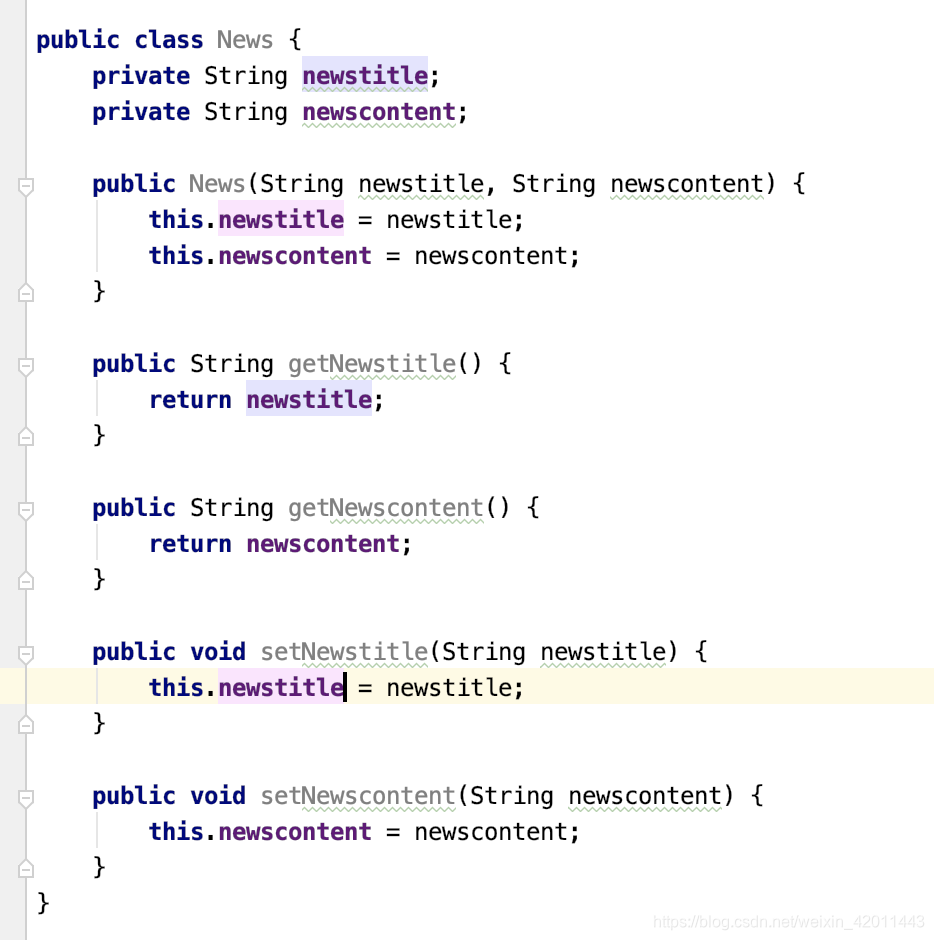
接着定义News类:
定义ListView的适配器MyAdppter:
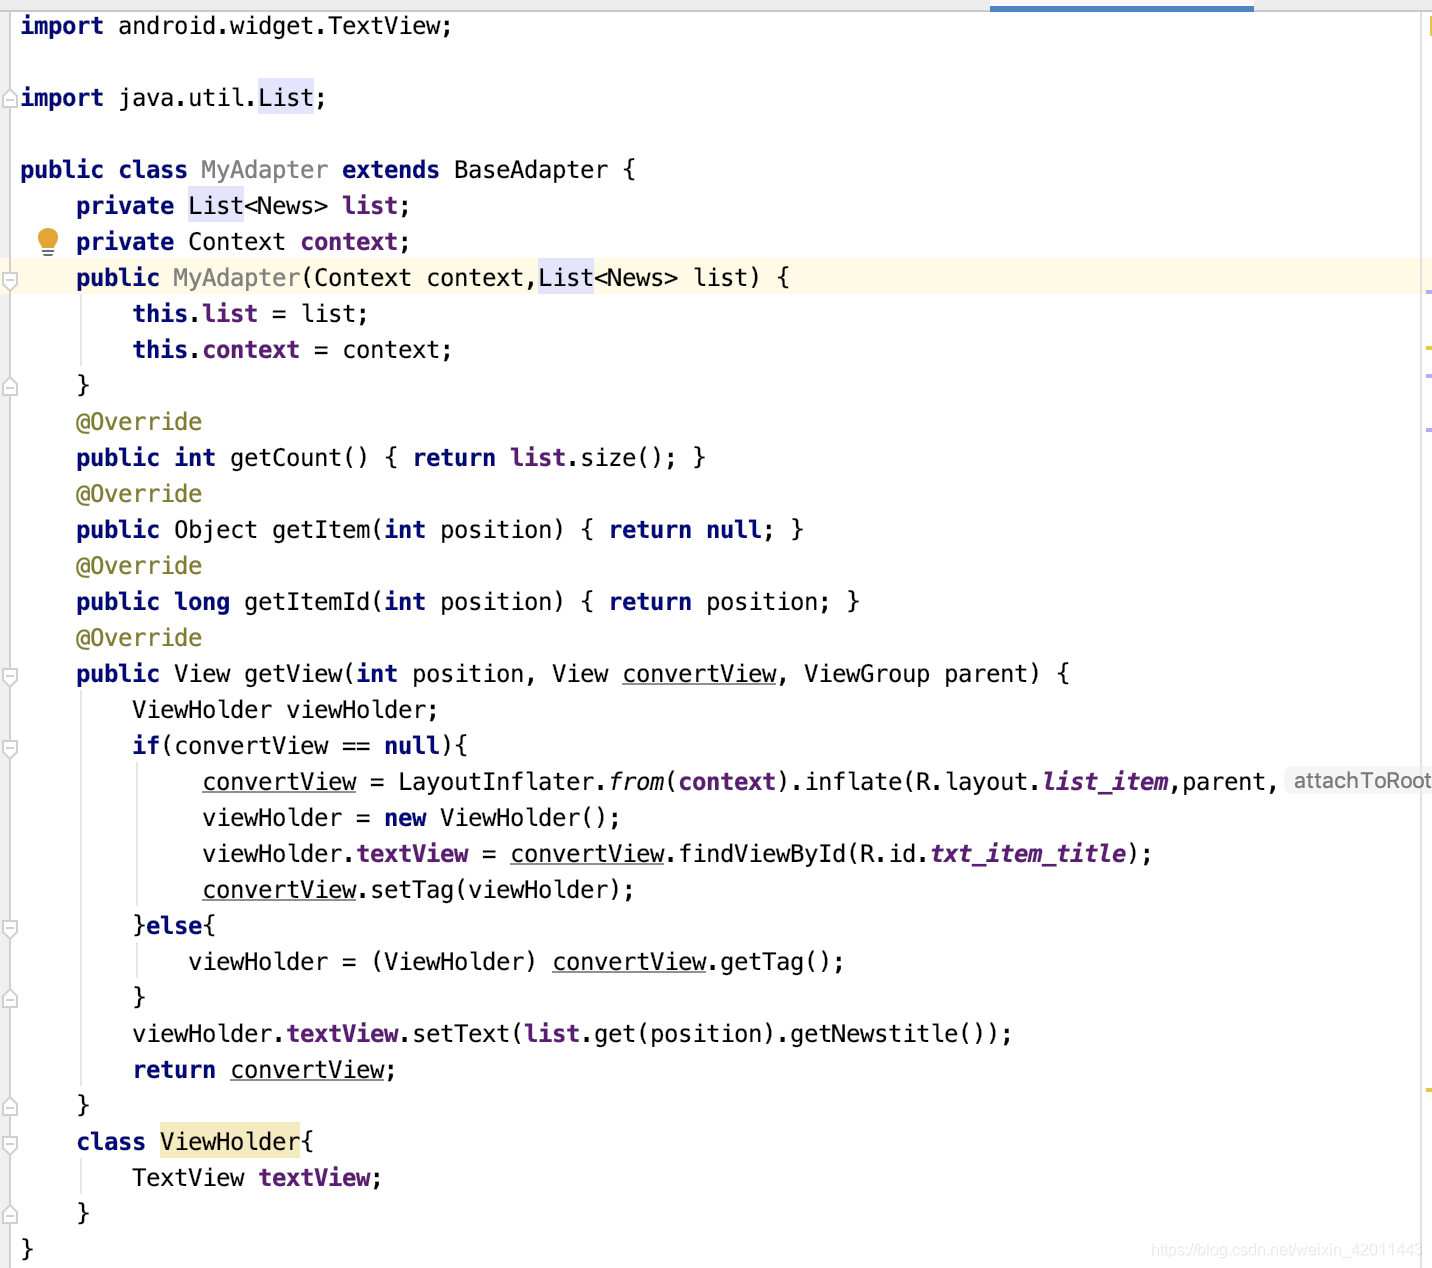
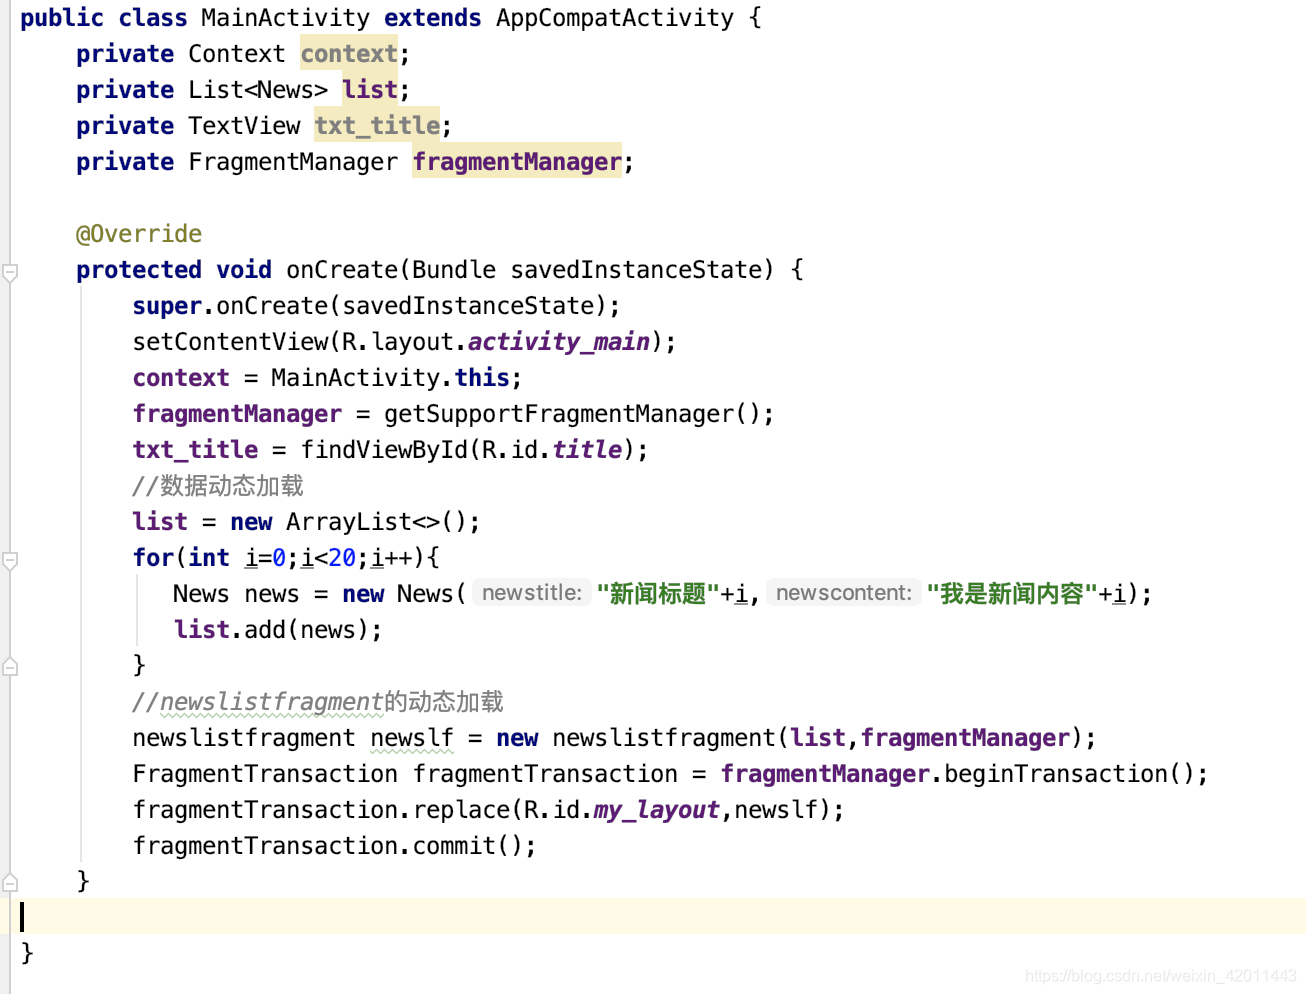
因为ListView是在Fragment中嵌入的,前面说过Fragment相当于迷你Activity,那么ListView的数据绑定工作就在这个Fragment中完成,并且ListView的点击事件也在这个迷你Activity里完成,点击事件为点击新闻列表后切换新闻内容,MainActivity中主要完成的是数据的动态加载以及这个newslist_fragment碎片的动态加载。基于这种设置思想,首先新建两个碎片的类:
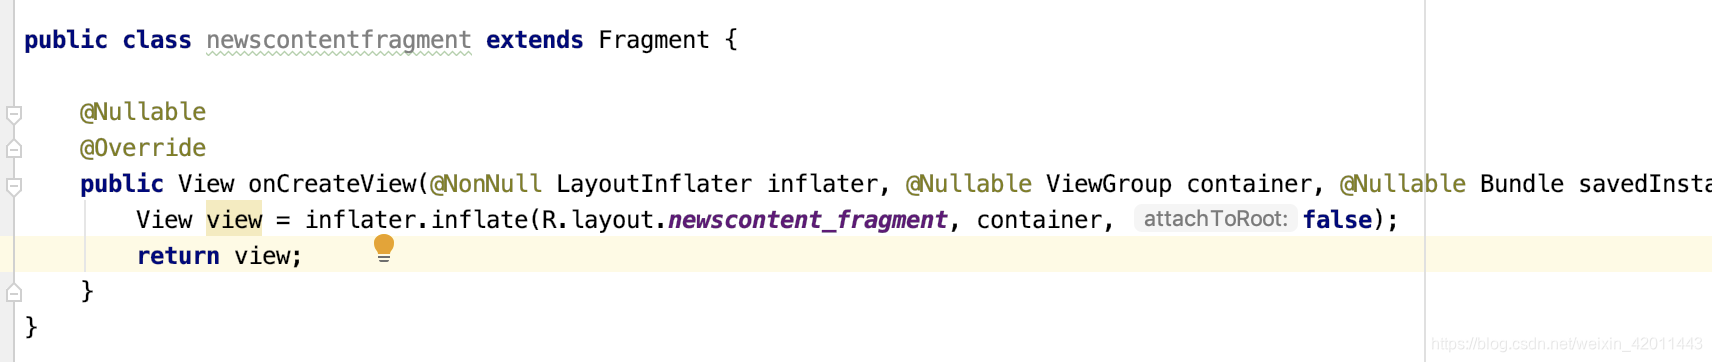
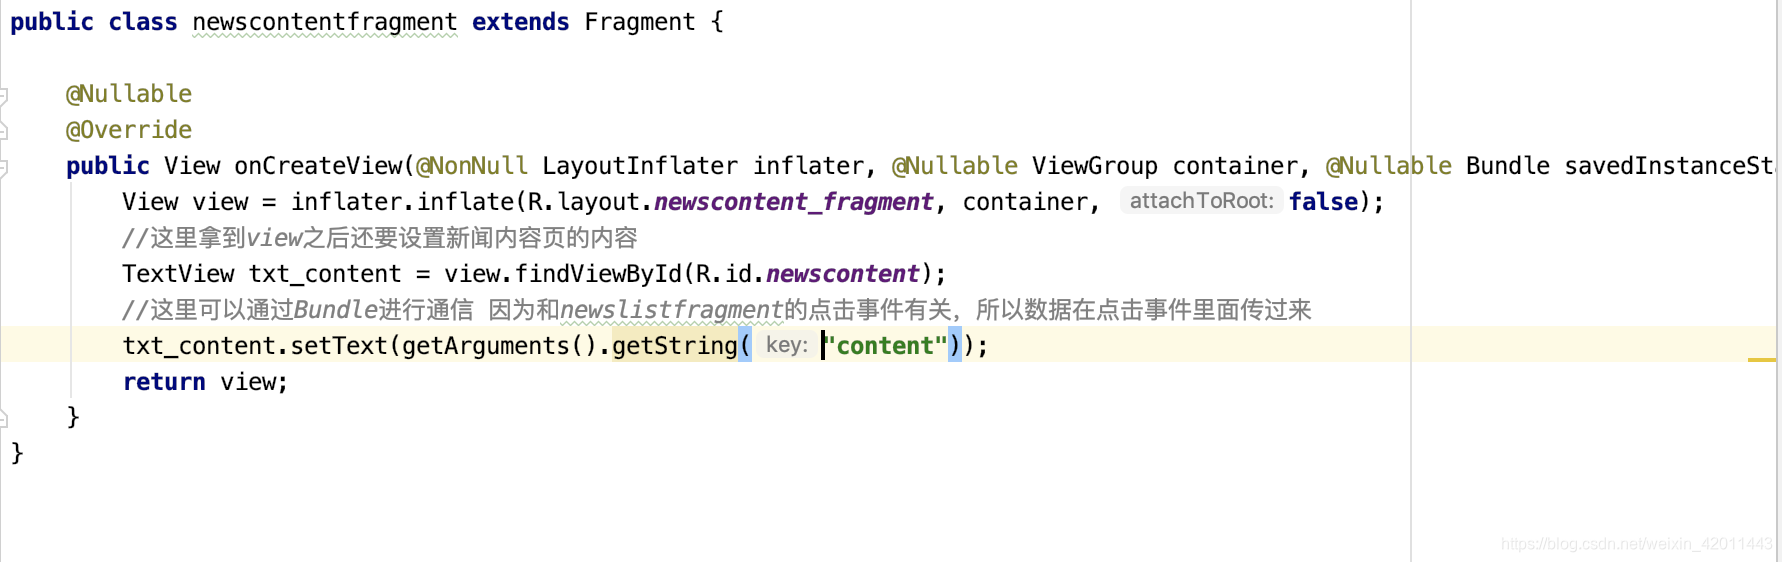
newscontentfragment类,重写onCreateView方法:这里先不考虑数据的传递,等大致框架写好之后再进行数据的接收与发送:
newslistfragment类,同样要重写onCreateView方法并且完成数据绑定以及点击事件动态加载的工作,之前也提到了是通过FragmentManager来完成的:
avF 修改newscontentfragment类以取到Bundle数据:
MainActivity中完成数据动态加载以及列表碎片的动态加载:
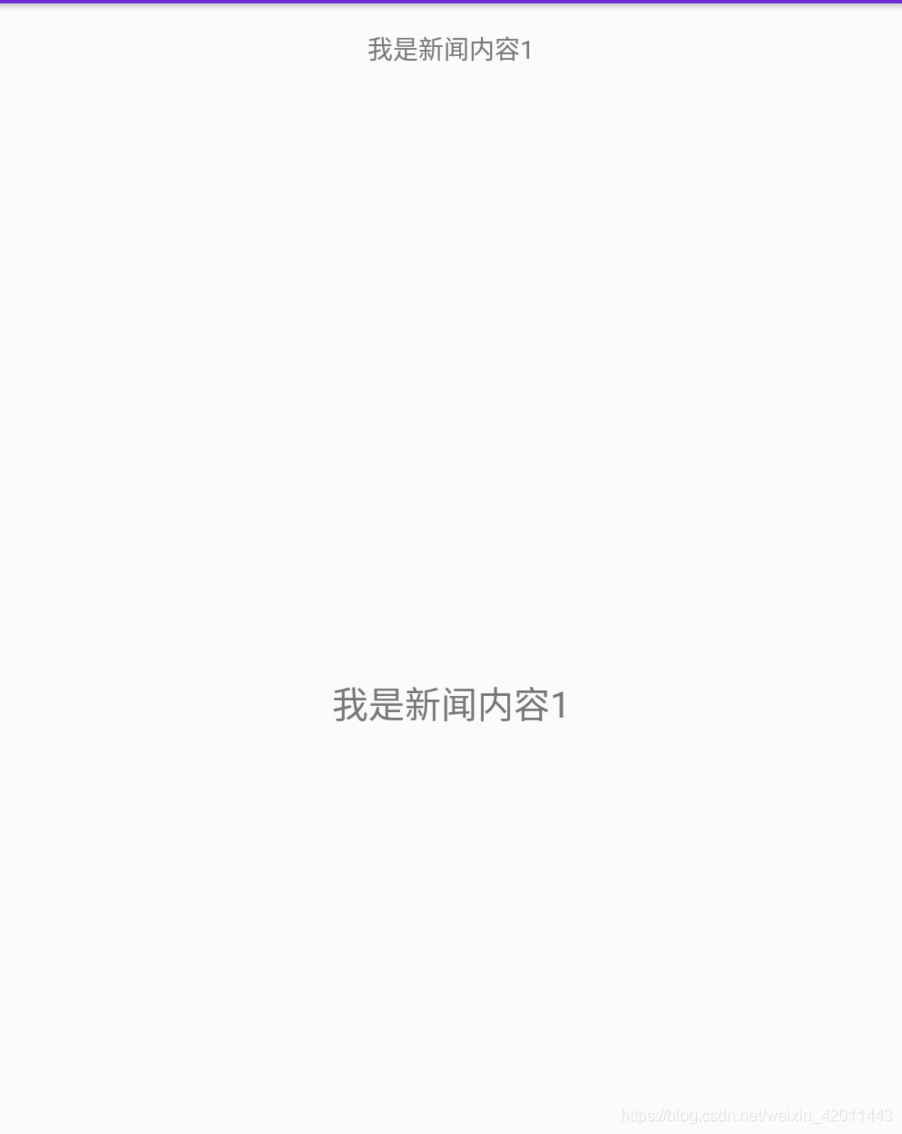
 这里之后就大致完成了这个小Demo,但是在测试的时候发现点击某新闻列表回退后出现了这种情况:
修改newslistfragment类中的onCreatView方法,前面我们知道onCreatView方法是为碎片加载布局的时候调用,因此在加载布局初始化时设置新闻title:

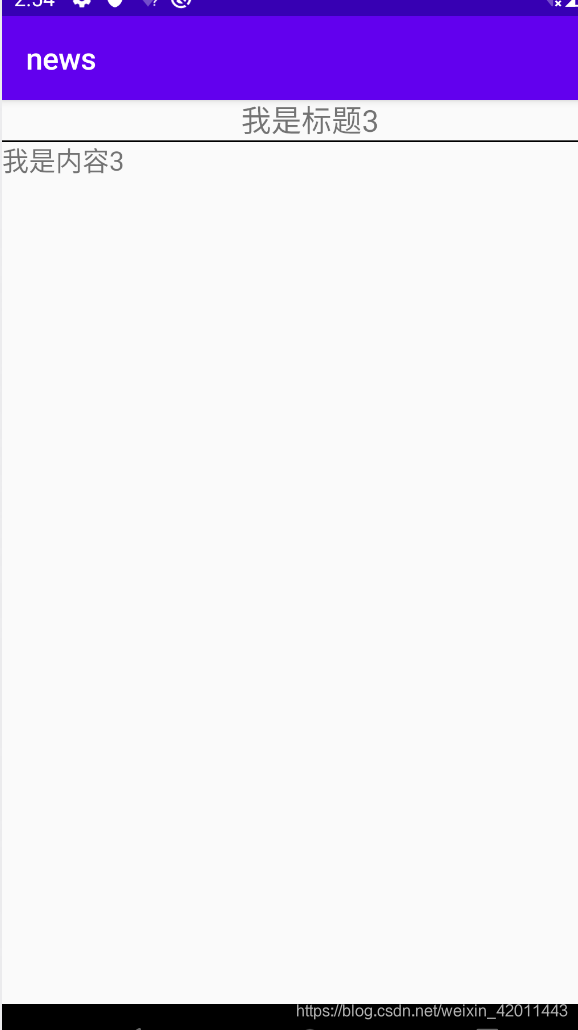
现在点击进去再回退,发现变为了新闻列表:

新闻内容页:
Kotlin和Java版本的有一些不同,首先listview改用recyclerview,并且这里标题与内容两个碎片分别放在了不同的Activity中,不像Java版本那样通过动态加载的方式,而是通过启动活动的方式完成加载,这样也更简洁。
首先看内容碎片的布局文件:
<?xml version="1.0" encoding="utf-8"?>
<RelativeLayout
    xmlns:android="http://schemas.android.com/apk/res/android"
    android:layout_width="match_parent"
    android:layout_height="match_parent">
    <LinearLayout
        android:id="@+id/newcontentlayout"
        android:layout_width="match_parent"
        android:layout_height="match_parent"
        android:orientation="vertical">
        <TextView
            android:id="@+id/newscontenttitle"
            android:layout_width="match_parent"
            android:layout_height="wrap_content"
            android:gravity="center"
            android:textSize="20sp"/>
        <View
            android:layout_width="match_parent"
            android:layout_height="1dp"
            android:background="#000"/>

        <TextView
            android:id="@+id/newscontent"
            android:layout_width="match_parent"
            android:layout_height="0dp"
            android:layout_weight="1"
            android:textSize="18sp"/>

    </LinearLayout>

</RelativeLayout>
然后和静态加载的方式一样,创建NewsContentFragment继承Fragment重写onCreateView方法为碎片加载布局文件,并且增加refresh方法对布局文件中的控件内容进行刷新:
class NewsContentFragment:Fragment() {
    override fun onCreateView(
        inflater: LayoutInflater,
        container: ViewGroup?,
        savedInstanceState: Bundle?
    ): View? {
        return inflater.inflate(R.layout.news_content_frag,container,false)
    }

    fun refresh(title:String,content:String){
        newscontenttitle.text = title
        newscontent.text = content
    }

}
既然内容碎片是在单独的Activity中,因此也要创建这个Activity的布局文件activity_news_content.xml,只有一个fragment控件并通过name属性显示绑定碎片类:
<?xml version="1.0" encoding="utf-8"?>
<LinearLayout
    xmlns:android="http://schemas.android.com/apk/res/android"
    android:orientation="vertical"
    android:layout_width="match_parent"
    android:layout_height="match_parent">

    <fragment
        android:id="@+id/newscontentFrag"
        android:layout_width="match_parent"
        android:layout_height="match_parent"
        android:name="com.demo.news.NewsContentFragment"/>

</LinearLayout>
接着创建内容碎片所在的的Activity NewsContentActivity,在这个NewsContentActivity中加载activity_news_content.xml布局并得到点击标题页面所传进来的新闻标题与内容,再调用NewsContentFragment的refresh方法刷新,调用的过程相当于就是活动与碎片通信,Kotlin提供了简单的通过碎片id就能得到碎片实例的方式,如下面代码中的var fragment = newscontentFrag as NewsContentFragment,得到碎片实例就能调用碎片中的方法了:
class NewsContentActivity:AppCompatActivity() {
     companion object{
         fun actionStart(context:Context,title:String,content:String){
             val intent = Intent(context,NewsContentActivity::class.java)
             intent.apply {
                 putExtra("title",title)
                 putExtra("content",content)
             }
             context.startActivity(intent)
         }

     }

    override fun onCreate(savedInstanceState: Bundle?) {
        super.onCreate(savedInstanceState)
        setContentView(R.layout.activity_news_content)
        val title = intent.getStringExtra("title")
        val content = intent.getStringExtra("content")
        if(title!=null&&content!=null){
            var fragment = newscontentFrag as NewsContentFragment//活动与碎片通信
            fragment.refresh(title,content)
        }
    }

}
内容页面看完之后,就开始标题页面,和内容碎片一样也是通过静态加载碎片的方式:
首先新建标题碎片的布局方式new_title_frag.xml,如下所示,碎片的布局里面是通过RecyclerView显示标题的:
<?xml version="1.0" encoding="utf-8"?>
<LinearLayout
    xmlns:android="http://schemas.android.com/apk/res/android"
    android:layout_width="match_parent"
    android:orientation="vertical"
    android:layout_height="match_parent">

    <androidx.recyclerview.widget.RecyclerView
        android:id="@+id/recyclerview"
        android:layout_width="match_parent"
        android:layout_height="match_parent"/>

</LinearLayout>
因为是Recyclerview的缘故,我们还得创建子项布局,由TextView和间隔线组成:
<?xml version="1.0" encoding="utf-8"?>
<LinearLayout
    xmlns:android="http://schemas.android.com/apk/res/android"
    android:layout_width="match_parent"
    android:layout_height="wrap_content"
    android:orientation="vertical">

    <TextView
        android:id="@+id/news_title"
        android:layout_width="match_parent"
        android:layout_height="wrap_content"
        android:layout_gravity="center_vertical"
        android:maxLines="1"
        android:textSize="20sp"
        android:ellipsize="end"
        android:padding="10dp"
        android:textColor="#000000"/>
    <View
        android:layout_width="match_parent"
        android:layout_height="1dp"
        android:alpha="0.1"
        android:background="#000"/>

</LinearLayout>
然后和静态加载的方式一样,新建碎片NewsTitleFragment继承Fragment重写onCreateView方法为碎片加载布局文件,并重写onActivityCreated方法为recyclerview添加适配器,如果直接在onCreateView中添加适配器会报错:recyclerview must not be null,原因参考:这个时候recyclerview可能并没有返回。
class NewsTitleFragment:Fragment() {
    override fun onActivityCreated(savedInstanceState: Bundle?) {
        super.onActivityCreated(savedInstanceState)
        val layoutManager = LinearLayoutManager(activity)
        recyclerview.layoutManager = layoutManager
        val adapter = NewsAdapter(getNews())
        recyclerview.adapter = adapter
    }

    override fun onCreateView(
        inflater: LayoutInflater,
        container: ViewGroup?,
        savedInstanceState: Bundle?
    ): View? {
        return inflater.inflate(R.layout.new_title_frag,container,false)
    }

    fun getNews():List<News>{
        val news = ArrayList<News>()
        for(i in 1..15){
            news.add(News("我是标题$i","我是内容$i"))
        }
        return news
    }

}
在activity_main.xml中,显示生命添加的碎片:
<?xml version="1.0" encoding="utf-8"?>
<RelativeLayout xmlns:android="http://schemas.android.com/apk/res/android"
    xmlns:app="http://schemas.android.com/apk/res-auto"
    xmlns:tools="http://schemas.android.com/tools"
    android:layout_width="match_parent"
    android:layout_height="match_parent"
    android:orientation="vertical"
    tools:context=".MainActivity">

    <fragment
        android:id="@+id/newtitlefrag"
        android:name="com.demo.news.NewsTitleFragment"
        android:layout_width="match_parent"
        android:layout_height="match_parent"/>

</RelativeLayout>
最后完成适配器NewsAdapter,并在onCreateViewHolder中添加点击事件,启动NewsContentActivity,并传入相应的title与content:
class NewsAdapter(val news:List<News>):RecyclerView.Adapter<NewsAdapter.ViewHolder>() {
    inner class ViewHolder(itemView: View) : RecyclerView.ViewHolder(itemView) {
        val newstitle:TextView = itemView.findViewById(R.id.news_title)
    }
    override fun onCreateViewHolder(parent: ViewGroup, viewType: Int): ViewHolder {
        val view = LayoutInflater.from(parent.context).inflate(R.layout.new_title_item,parent,false)
        val viewHolder = ViewHolder(view)
        viewHolder.newstitle.setOnClickListener {
            val position = viewHolder.adapterPosition
            val news = news[position]
            NewsContentActivity.actionStart(parent.context,news.title,news.content)
        }
        return  viewHolder
    }

    override fun getItemCount(): Int = news.size

    override fun onBindViewHolder(holder: NewsAdapter.ViewHolder, position: Int) {
        val news = news[position]
        holder.newstitle.text = news.title
    }

}
效果如下: