字节流可以解决文件,图片,视频等的传输工作,很厉害啊;
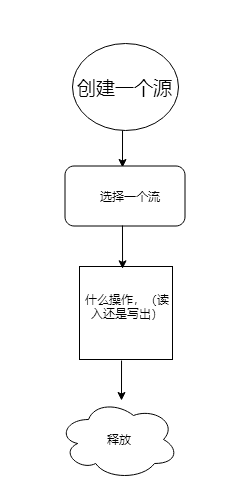
1. 操作字节流时的步骤
我也发现基本上,所有与输入输出流相关的操作都遵循这四步;
2. FileInputSteam和FileoutStream
- 以下代码就是FileInputStream的使用
public class Filetext {
    public static void main(String[] args) {
        File file = new File("./src/Text");
        InputStream in = null;
        try {
            in = new FileInputStream(file);
            byte[] arr = new byte[3];//定义一个字节数组,规定每次读取多少个字节;(缓冲器)
            int len = -1;//定义一个len等于-1;到时候好结束;
            while ((len = in.read(arr)) != -1) {//这个while循环就是判断字节是否全部传输完毕,若是没有字节,就退出循环;
                //那个从字节转变成字符,叫解码;
                //这个String,有这个构造器;
                //public String(byte bytes[], int offset, int length)
                String s = new String(arr,0,len);
                System.out.println(s);
            }
        } catch (FileNotFoundException e) {
            e.printStackTrace();
        } catch (IOException e) {
            e.printStackTrace();
        }
    }
}
以下是源文档内容;

输出的结果如下图,按每一次3个字节的输出(空格也算);

2. FileOutputStream简单的使用
public class FileOutput {
    public static void main(String[] args) {
        OutputStream ots = null;
        //一:先选择目的源
        File file = new File("dest.txt");
        String msg = "莫须有";
        //这里是得到一个msg的字节数组,也就是把字符串转换成字节数组;(编码)
        byte[] datas = msg.getBytes();
        try {
            //二、选择一种流
        ots = new FileOutputStream(file);
        //三、操作
            //这里使用write方法进行写入;
            ots.write(datas,0,datas.length);
            //使用write方法时,最好是刷新一下,当然文件的字节如果很多不刷新的话,很容易导致数据驻留,不利于使用;
            ots.flush();
        } catch (IOException e) {
            e.printStackTrace();
        }finally {
            try {
                //释放资源
                ots.close();
            } catch (IOException e) {
                e.printStackTrace();
            }
        }
    }
}
程序的结果:

在上述程序中,就算File指定的路径并没有文件,他也会自动创建一个文件;
如何在一个已有的文件后头添加数据,而不将其原先的数据覆盖呢?以下就是答案;
public class OutFileText {
    public static void main(String[] args) {
        OutputStream appendfile = null;
        String s ="的博客";
        File file = new File("dest.txt");
        try {
        //以下的构造方法,就是可以使得输出的字节在已有的字节之后显示
            appendfile = new FileOutputStream(file,true);
            byte[] data = s.getBytes();
            //以下是一个write方法写入;
            appendfile.write(data,0,data.length);
            appendfile.flush();
        }catch (FileNotFoundException e){
            e.printStackTrace();
        }catch (IOException e){
            e.printStackTrace();
        }finally{
            try {
                //之所以把close写在这里,我觉得,只有这里才是一定会执行的,
                //在前面可能由于异常,而导致他没有关闭;
                appendfile.close();
            } catch (IOException e) {
                e.printStackTrace();
            }
        }
    }
}

3. 文件的拷贝
虽然了解了皮毛,但是我还是觉的应该系统的了解一遍,这样对于我这种初学者,可能是很好的;
public class TextCopy {
    public static void main(String[] args) {
        //之所以要在这里提前定义outputstream是希望能够在这个主方法中都能使用;
        OutputStream out = null;
        InputStream in = null;
        //复制的初始路径;
        File file = new File("./src/FileOutput.java");
        //复制的目的路径;这个路径,就是无论是否存在文件都没有关系;
        File distination = new File("Copy.text");
        try {
            //定义好输入输出的字节流
             in = new FileInputStream(file);
             out = new FileOutputStream(distination);
            //定义一个字节数组,用来规定一次读取的字节数;
            byte[] arr = new byte[1024*2];
            int len=-1;
            //在这里将通过while进行循环读值,直到读取到的字节数为空;
            while((len=in.read(arr))!=-1){
                out.write(arr,0,len);
            }
            out.flush();
        } catch (FileNotFoundException e) {
            e.printStackTrace();
        }catch(IOException e){
            e.printStackTrace();
        }finally {
            try {
                //一般遵循的规则是,先打开后关,后打开先关;
                out.close();
                in.close();
            } catch (IOException e) {
                e.printStackTrace();
            }
        }
    }
}
当然,也可以单独将其写成一个类,这样也方便使用;
4.FileReader和FileWriter(基础使用);只允许拷贝字符文件;
使用FileReader和FileWriter复制字符文件;这里是指字符文件(不能是其他如音频,图像类文件,否则文件无法打开使用,被损坏);
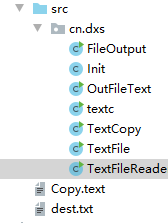
 public class TextFileReader {
    public static void main(String[] args) {
        Reader reader = null;
        Writer writer = null;
        int len = -1;//方便终止while循环;不易出错;
        //先要找到一个字符文件,并加入File路径;就是源
        File file = new File("dest.txt");
        File dena = new File("copydest.txt");//这个文件即便不存在他也会自己创建;
        try {
            //定义一个输入和输出字符流
            reader = new FileReader(file);
            writer = new FileWriter(dena);
            //这里由于是字符流,所以传递的是字符数组,为最小单位;
            char[] crr = new char[1024];
            //通过while循环,不断读取数据;
            while((len=reader.read(crr))!=-1){
                writer.write(crr,0,len);
            }
            //写了之后还是要刷新一下,不要让数据残留;
            writer.flush();
        } catch (FileNotFoundException e) {
            e.printStackTrace();
        }catch(IOException e){
            e.printStackTrace();
        }finally {
            try {
                //在所有工作做完之后,要关闭流;(老方法,谁先开谁后关)
                writer.close();
                reader.close();
            } catch (IOException e) {
                e.printStackTrace();
            }
        }
    }
}
5. 关于close关闭流的简写
关于close,关闭流,在jdk7的时候就有了一个try..with..resource,这是一个简化版的关闭流的方法;主要用法如下;
public class TestClose {
    public static void main(String[] args) {
        //复制的初始路径;
        File file = new File("./src/FileOutput.java");
        //复制的目的路径;这个路径,就是无论是否存在文件都没有关系;
        File distination = new File("Copy.text");
        try (InputStream in = new FileInputStream(file); OutputStream out = new FileOutputStream(distination)) {
            //定义好输入输出的字节流
            //定义一个字节数组,用来规定一次读取的字节数;
            byte[] arr = new byte[1024 * 2];
            int len = -1;
            //在这里将通过while进行循环读值,直到读取到的字节数为空;
            while ((len = in.read(arr)) != -1) {
                out.write(arr, 0, len);
            }
            out.flush();
        } catch (FileNotFoundException e) {
            e.printStackTrace();
        } catch (IOException e) {
            e.printStackTrace();
        }
    }
}
注意:
在使用这个方法时,不知道为什么,try中间必须要声明一下变量,否则就会报错,我的jdk版本是1.8;当然1.7好像可以不用声明;
然后就是只要是实现了close方法的都可以使用try-with-resource;即使是后面的bytearraystream(字节数组流);当然字节数据流就算你不关问题也不大;他源码里面的close方法就是个空壳子,完全没有用;
只要你的类实现了AutoCloseable,那么就可以使用这个方法了,又由于Closeable接口实现了上面的AutoCloseable接口,所以最后也就是说,只要实现了Closeable就可以使用try-with-resource;
最重要的还是要把finally删掉;