文章目录
基于ns3模拟实验
安装与仿真过程
环境搭建
ns3是一款linux平台上的仿真软件,所以需要先准备Linux环境,本次安装采用的是虚拟机,我安装的是Ubuntu18.04.4带图形化桌面的版本。
首先下载vm虚拟机软件,下载Ubuntu系统的镜像文件挂载到虚拟机上,配置内存,开机。对于linux来说安装大多需要权限,所以我直接登录了root账户。
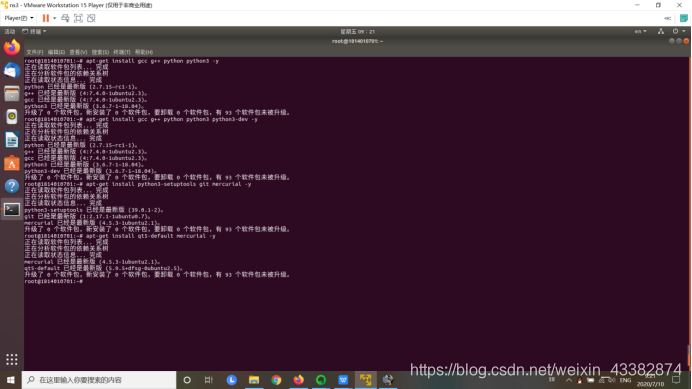
安装ns-3的依赖环境
sudo apt-get install gcc g++ python python3 -y
sudo apt-get install gcc g++ python python3 python3-dev -y
sudo apt-get install python3-setuptools git mercurial -y
sudo apt-get install qt5-default mercurial -y
sudo apt-get install gir1.2-goocanvas-2.0 python-gi python-gi-cairo python-pygraphviz python3-gi python3-gi-cairo python3-pygraphviz gir1.2-gtk-3.0 ipython ipython3 -y
sudo apt-get install openmpi-bin openmpi-common openmpi-doc libopenmpi-dev -y
sudo apt-get install autoconf cvs bzr unrar -y
sudo apt-get install gdb valgrind -y
sudo apt-get install uncrustify -y
sudo apt-get install doxygen graphviz imagemagick -y
sudo apt-get install texlive texlive-extra-utils texlive-latex-extra texlive-font-utils dvipng latexmk -y
sudo apt-get install python3-sphinx dia -y
sudo apt-get install gsl-bin libgsl-dev libgsl23 libgslcblas0 -y
sudo apt-get install tcpdump -y
sudo apt-get install sqlite sqlite3 libsqlite3-dev -y
sudo apt-get install libxml2 libxml2-dev -y
sudo apt-get install cmake libc6-dev libc6-dev-i386 libclang-6.0-dev llvm-6.0-dev automake -y
sudo apt-get install libgtk2.0-0 libgtk2.0-dev -y
sudo apt-get install vtun lxc uml-utilities
sudo apt-get install libboost-signals-dev libboost-filesystem-dev
sudo apt-get install python-dev python-pygraphviz python-kiwi python-pygoocanvas python-gnome2 gir1.2-goocanvas-2.0 python-rsvg
Ubuntu使用的是apt-get包管理系统,所以使用apt-get install安装所需要的的依赖包。因为是root用户所以不用加sudo。
因为我提前安装过了,所以提示已经是最新版了。
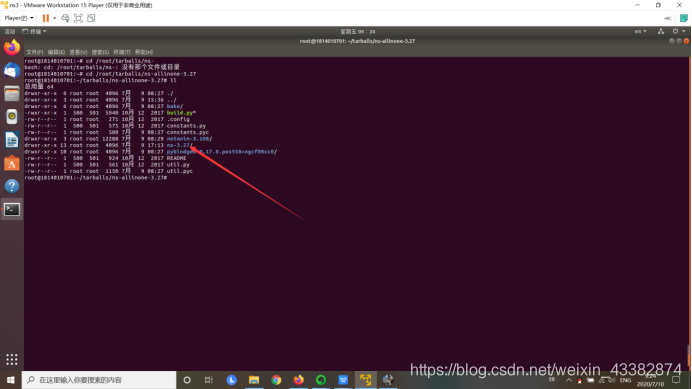
安装ns3
先创建一个文件夹存放ns3软件,使用wget命令从官网下载ns3的压缩包。
使用tar-xjvf命令解压。
进入解压目录,进行构建安装./build.py。编译成功就会看见ns-3.27目录
 将可视化工具解压

进入目录进行编译
./waf clean 对目录进行清理
./waf -d debug --enable-example --enable-tests configure
./waf 编译
输入./waf --run hello-simulator测试是否成功安装
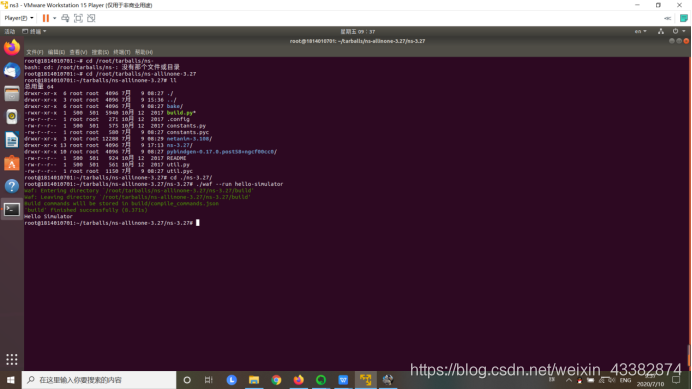 输出Hello Simulator成功安装。
以上软件可能因为网络原因无法下载,可以从网盘下载。
实验过程
ns3仿真实验首先需要编写c++脚本放在ns-3.27/scratch然后使用命令在安装目录下使用./waf --run scratch/test命令。对于脚本的编写我分为两大部分,一个是网络配置和应用配置。
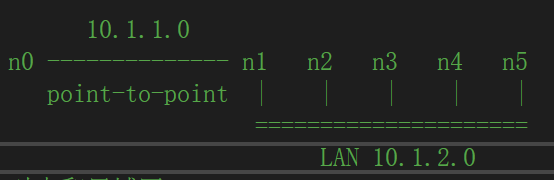
P2P加局域网拓扑结构图
IPv4是互联网中重要协议,我采用ns3模拟2个P2P节点和CSMA局域网中4个装有IPv4协议,共6个节点,之间如何发送数据包,通过该实验解析各层协议之间如何工作的流程。
编写c++代码
对于网络配置
1、创建节点使用NodeContainer类的Create方法参数是节点个数
uint32_t nCsma = 4;
NodeContainer p2pNodes;
p2pNodes.Create(2);//创建两个个P2P节点n1和n2
NodeContainer csmaNodes;
csmaNodes.Add(p2pNodes.Get(1));//将一个n1加入csma网络
csmaNodes.Create(nCsma);//再创建4个节点
2、对链路属性进行配置
PointToPointHelper类可以进行对P2P链路的配置
主要可以模拟三类链路,PointToPointHelper , CsmaHelper, WifiHelper
本次实验模拟的是CsmaChannel
CsmaChannel信道模拟了用于一个可以实现载波侦听多路访问通信子网中的媒介。这个信道具有和以太网相似的功能。
PointToPointHelper pointToPoint;
设置传送速率
pointToPoint.SetDeviceAttribute(“DataRate”, StringValue(“5Mbps”));//
设置信道延迟
pointToPoint.SetChannelAttribute(“Delay”, StringValue(“2ms”));
将信道安装到节点
NetDevice类提供了管理连接其他节点和信道对象的各种方法,并且允许开发者以面向对象的方法来自定义。本例中用到了CsmaNetDevice和PointToPointNetDevice。CsmaNetDevice被设计成在csma信道中工作,而PointToPointNetDevice 在PointToPoint信道中工作。以后还会遇见WifiNetNevice,这是在wifi信道中工作。
NetDeviceContainer p2pDevices;
p2pDevices = pointToPoint.Install(p2pNodes);
CsmaHelper类设置Csma局域网属性
CsmaHelper csma;
csma.SetChannelAttribute(“DataRate”, StringValue(“100Mbps”));
csma.SetChannelAttribute(“Delay”, TimeValue(NanoSeconds(6560)));
将信道安装到csma节点上
NetDeviceContainer csmaDevices;
csmaDevices = csma.Install(csmaNodes);
3、对节点安装协议栈
InternetStackHelper类用来给节点安协议栈
InternetStackHelper stack;
//P2P链路中的第一个节点
stack.Install(p2pNodes.Get(0));
stack.Install(csmaNodes);
4、对节点进行分配ip
Ipv4AddressHelper 类用来分配ipv4地址
//安排P2P网段的地址
Ipv4AddressHelper address;
address.SetBase(“10.1.1.0”, “255.255.255.0”); //p2p网段
Ipv4InterfaceContainer p2pInterfaces;
p2pInterfaces = address.Assign(p2pDevices);
//安排CSMA网段地址
address.SetBase(“10.1.2.0”, “255.255.255.0”); //总线网段
Ipv4InterfaceContainer csmaInterfaces;
csmaInterfaces = address.Assign(csmaDevices);
6个节点的ip分别为
n0:10.1.1.1
n1:10.1.2.1
n2:10.1.2.2
n3:10.1.2.3
n4:10.1.2.4
n5:10.1.2.5
对于应用配置
1、将服务器和客户端应用安装在节点上
服务器启动在端口9上
UdpEchoServerHelper echoServer(9);
//服务器在最后一个节点上
ApplicationContainerserverApps=echoServer.Install(csmaNodes.Get(nCsma)))
serverApps.Start(Seconds(1.0));//在1.0秒开始
serverApps.Stop(Seconds(10.0));//在10.0秒结束
UdpEchoClientHelper echoClient(csmaInterfaces.GetAddress(nCsma), 9);
echoClient.SetAttribute(“MaxPackets”, UintegerValue(4));//发送包的次数
echoClient.SetAttribute(“Interval”, TimeValue(Seconds(1.0)));
//设置发包的大小
echoClient.SetAttribute(“PacketSize”, UintegerValue(1024));
//将Client服务安装在P2P网段的第一个节点上
ApplicationContainer clientApps = echoClient.Install(p2pNodes.Get(0));
clientApps.Start(Seconds(2.0));//在2.0秒开始
clientApps.Stop(Seconds(10.0));//在10.0秒开始
运行c++进行仿真
运行命令 ./waf --run scratch/nodes_6
可以看出n0与n5进行收发数据报,传输如图所示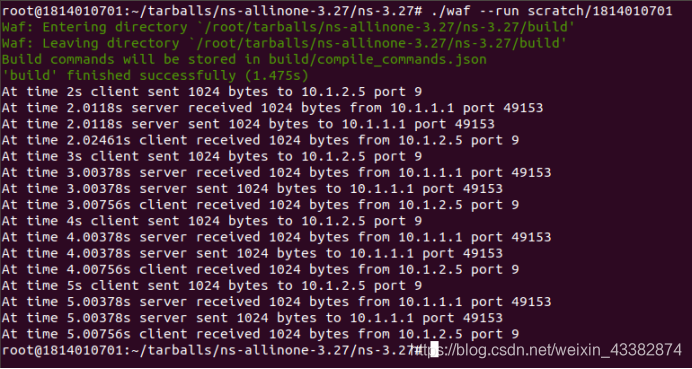 可以看出在第2s客户端n0向n5发送数据包,n5收到并且回应一个1024字节的数据包,n0收到数据包,3s,4s,5s同理,可以看出客户端与服务器端的数据传送顺利。
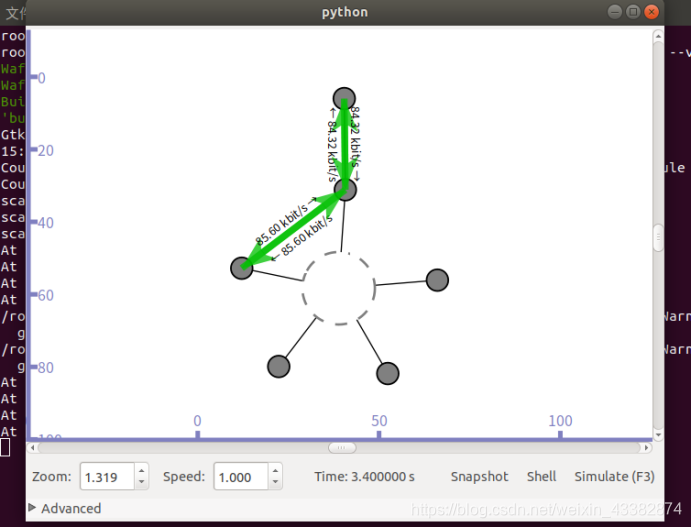
节点间通信效果展示
使用Pyviz工具可以更加直观的看出节点间通信的效果
在c++代码中创建节点的上面加入
CommandLine cmd;
cmd.Parse(argc, argv);
在虚拟机中输入命令:
./waf --run scratch/nodes_6 --vis
可以看出在刚开始的第2s,路由选择阶段,数据流向多个节点。
 一旦两个节点之间明确了路由,数据流比较稳定,如图所示。
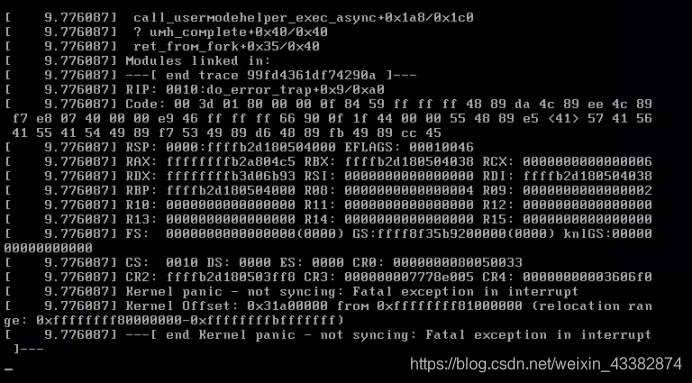
问题解决
在第三步安装时编译到build/src/lte/bindings/ns3module.cc报错
看报错日志应该是gcc编译器的问题,尝试过降级和安装指定版本的gcc编译器,问题并没解决。提高了虚拟机内存大小问题解决。
在第二部安装依赖包时出现找不到软件包
更新软件源问题解决
apt-get update
在第一步安装Ubuntu时系统启动不了,卡死在启动界面。
重装问题并没解决,怀疑可能是vm12和Ubuntu18.04.4不兼容,升级vm15问题解决。
下载ns-3时访问不了官网,使用wget命令也下载不到
更换多次网络未果,使用阿里云服务器wget命令下载,然后使用FileZilla软件使用FTP协议上传至Ubuntu中。
若出现apt-get install E: 无法定位软件包问题,编辑/etc/apt/sources.list文件
添加源 deb http://archive.ubuntu.com/ubuntu/ trusty main universe restricted multiverse 即可。
编辑sources.list :
sudo vim /etc/apt/sources.list
添加源: 在sources.list文件末尾添加
deb http://archive.ubuntu.com/ubuntu/ trusty main universe restricted multiverse
保存退出
若出现sudo vim找不到命令,则是没有安装vim。
sudo apt-get install vim-gtk
附录
ns3软件
链接:https://pan.baidu.com/s/1hZDftXYtcxfNyy5KWqAC7A
提取码:z6y6
ns3可视化工具
链接:https://pan.baidu.com/s/1yIjVzsAw10Wk_vW9gn8TAw
提取码:kinf
ubuntu 18.04.4
链接:https://pan.baidu.com/s/1Y6TEfGOiwxorB0WSlIMZHg
提取码:rrx5
c++代码
/* -*- Mode:C++; c-file-style:"gnu"; indent-tabs-mode:nil; -*- */
/*
 * This program is free software; you can redistribute it and/or modify
 * it under the terms of the GNU General Public License version 2 as
	 * published by the Free Software Foundation;
 *
	 * This program is distributed in the hope that it will be useful,
 * but WITHOUT ANY WARRANTY; without even the implied warranty of
 * MERCHANTABILITY or FITNESS FOR A PARTICULAR PURPOSE.  See the
 * GNU General Public License for more details.
 *
 * You should have received a copy of the GNU General Public License
 * along with this program; if not, write to the Free Software
 * Foundation, Inc., 59 Temple Place, Suite 330, Boston, MA  02111-1307  USA
 */

#include "ns3/core-module.h"
#include "ns3/network-module.h"
#include "ns3/csma-module.h"
#include "ns3/internet-module.h"
#include "ns3/point-to-point-module.h"
#include "ns3/applications-module.h"
#include "ns3/ipv4-global-routing-helper.h"

 // Default Network Topology
 //
 //       10.1.1.0
 // n0 -------------- n1   n2   n3   n4   n5    n6
 //    point-to-point  |    |    |    |    |     |
 //                    ============================
 //                         LAN 10.1.2.0
//点对点和局域网

using namespace ns3;

//声明了一个叫NetWorkHomeWork的日志构件,通过引用NetWorkHomeWork这个名字的操作,
//可以实现打开或者关闭控制台日志的输出。
NS_LOG_COMPONENT_DEFINE("NetWorkHomeWork");//日志

int
main(int argc, char* argv[])
{
//定义变量,用于决定是否开启两个UdpApplication的Logging组件;默认true开启
bool verbose = true;
//局域网节点数量
uint32_t nCsma = 4;//我是节点数修改我。

//命令行参数,允许用户指定脚本运行时的参数
CommandLine cmd;
cmd.AddValue("nCsma", "Number of \"extra\" CSMA nodes/devices", nCsma);
//命令行参数设置是否开启logging
cmd.AddValue("verbose", "Tell echo applications to log if true", verbose);
cmd.Parse(argc, argv);

//根据用户命令行参数,启用Logging
if (verbose)
{
    LogComponentEnable("UdpEchoClientApplication", LOG_LEVEL_INFO);
    LogComponentEnable("UdpEchoServerApplication", LOG_LEVEL_INFO);
}


/**************开始定义网络拓扑***************/
//两个p2p节点:n0和n1

NodeContainer p2pNodes;
p2pNodes.Create(2);

//创建另一个NodeContainer类对象,用于总线(CSMA)网络,总线型局域网
//4个CSMA节点
NodeContainer csmaNodes;
csmaNodes.Add(p2pNodes.Get(1));//把n1节点添加到局域网
//再创建5个节点
csmaNodes.Create(nCsma);

//对链路进行配置
//-----------------------------------------------------------------------------------
//P2P链路属性
//设置传送速率和信道延迟
PointToPointHelper pointToPoint;
pointToPoint.SetDeviceAttribute("DataRate", StringValue("5Mbps"));//
pointToPoint.SetChannelAttribute("Delay", StringValue("2ms"));

NetDeviceContainer p2pDevices;
p2pDevices = pointToPoint.Install(p2pNodes);//将链路安装到节点

//总线网络属性
 //创建和连接CSMA设备及信道
CsmaHelper csma;
csma.SetChannelAttribute("DataRate", StringValue("100Mbps"));
csma.SetChannelAttribute("Delay", TimeValue(NanoSeconds(6560)));//纳秒

NetDeviceContainer csmaDevices;
csmaDevices = csma.Install(csmaNodes);
//------------------------------------------------------------------------------


//安装协议栈
InternetStackHelper stack;
//P2P链路中的第一个节点
stack.Install(p2pNodes.Get(0));
stack.Install(csmaNodes);

//分配IP地址
 //安排P2P网段的地址
Ipv4AddressHelper address;
address.SetBase("10.1.1.0", "255.255.255.0");   //p2p网段
Ipv4InterfaceContainer p2pInterfaces;
p2pInterfaces = address.Assign(p2pDevices);
//安排CSMA网段地址
address.SetBase("10.1.2.0", "255.255.255.0");   //总线网段
Ipv4InterfaceContainer csmaInterfaces;
csmaInterfaces = address.Assign(csmaDevices);

/**************网络拓扑定义结束***************/


/**************应用程序开始***************/
UdpEchoServerHelper echoServer(9);

//服务器在最后一个节点上
ApplicationContainer serverApps = echoServer.Install(csmaNodes.Get(nCsma));
serverApps.Start(Seconds(1.0));//在1.0秒开始
serverApps.Stop(Seconds(10.0));//在10.0秒结束

UdpEchoClientHelper echoClient(csmaInterfaces.GetAddress(nCsma), 9);
echoClient.SetAttribute("MaxPackets", UintegerValue(4));//发送包的次数
echoClient.SetAttribute("Interval", TimeValue(Seconds(1.0)));//间隔
echoClient.SetAttribute("PacketSize", UintegerValue(1024));//包的大小

//将Client服务安装在P2P网段的第一个节点上
ApplicationContainer clientApps = echoClient.Install(p2pNodes.Get(0));
clientApps.Start(Seconds(2.0));//在2.0秒开始
clientApps.Stop(Seconds(10.0));//在10.0秒开始
/**************应用程序结束***************/


//全局路由管理器根据节点产生的链路通告为每个节点建立路由表
Ipv4GlobalRoutingHelper::PopulateRoutingTables();


/****************开启pcap跟踪*******************/
//开启P2PHelper类对象的pcap
//开启pcap跟踪,生成以"homeWork"为前缀的文件名
pointToPoint.EnablePcapAll("homeWork");


//开启csmaHelper类对象的pcap
//使用csma网段第二个节点进行sniff,True开启混杂模式
csma.EnablePcap("homeWork", csmaDevices.Get(1), true);

Simulator::Run();
Simulator::Destroy();

return 0;
}