环境
CentOS Linux release 7.7.1908 (Core)
Maridb: mariadb-10.4.13 二进制包
Nginx: nginx-1.18.0
Php: php-7.4.6
一、二进制安装配置mariadb
1、下载并解压至安装目录/usr/local/mysql
[root@localhost src]#wget http://mirrors.dotsrc.org/mariadb//mariadb-10.4.13/bintar-linux-x86_64/mariadb-10.4.13-linux-x86_64.tar.gz
[root@localhost src]# tar -zxvf mariadb-10.4.13-linux-x86_64.tar.gz
[root@localhost src]# mv mariadb-10.4.13-linux-x86_64 /usr/local/mysql
[root@localhost mysql]# ls
bin      CREDITS  docs               include         lib  mysql-test  README-wsrep  share      support-files
COPYING  data     EXCEPTIONS-CLIENT  INSTALL-BINARY  man  README.md   scripts       sql-bench  THIRDPARTY
2、创建mysql用户组
[root@localhost mysql]# groupadd mysql
[root@localhost mysql]# useradd -s /sbin/nologin -r -g mysql mysql
3、配置启动服务
[root@localhost mysql]# useradd -s /sbin/nologin -r -g mysql mysql
[root@localhost mysql]# cp support-files/mysql.server /etc/init.d/mysqld
4、数据目录及权限
[root@localhost mysql]# mkdir -p /data/mysql
[root@localhost mysql]# chown -R mysql. /data/mysql/
[root@localhost mysql]# chown -R mysql:mysql /usr/local/mysql/	安装目录权限
5、配置mysql配置文件
[root@localhost mysql]# vim my.cnf
[mysqld]
basedir=/usr/local/mysql/
datadir=/data/mysql/
port=3306
pid-file=/data/mysql/mysql.pid
socket=/tmp/mysql.sock

[mysqld_safe]
log-error=/data/mysql/mysql.log

[client]
port=3306
socket=/tmp/mysql.sock
default-character-set=utf8
6、配置mysql环境变量
[root@localhost mysql]# echo "export PATH=/usr/local/mysql/bin:$PATH" >/etc/profile.d/mysql.sh
[root@localhost mysql]# . /etc/profile.d/mysql.sh
7、数据库初始化
[root@localhost mysql]# /usr/local/mysql/scripts/mysql_install_db --user=mysql
[root@localhost mysql]# /etc/init.d/mysqld start
Reloading systemd:                                         [  OK  ]
Starting mysqld (via systemctl):  ps ^H^HJob for mysqld.service failed because the control process exited with error code. See "systemctl status mysqld.service" and "journalctl -xe" for details.
                                                           [FAILED]
报错了:
解决方法:
删除数据目录,重启执行初始化,见下
[root@localhost mysql]# rm -rf /data/mysql/*
[root@localhost mysql]#  /usr/local/mysql/scripts/mysql_install_db --user=mysql --datadir=/data/mysql/ --basedir=/usr/local/mysql/
Installing MariaDB/MySQL system tables in '/data/mysql/' ...
OK

To start mysqld at boot time you have to copy
support-files/mysql.server to the right place for your system


Two all-privilege accounts were created.
One is root@localhost, it has no password, but you need to
be system 'root' user to connect. Use, for example, sudo mysql
The second is mysql@localhost, it has no password either, but
you need to be the system 'mysql' user to connect.
After connecting you can set the password, if you would need to be
able to connect as any of these users with a password and without sudo

See the MariaDB Knowledgebase at http://mariadb.com/kb or the
MySQL manual for more instructions.

You can start the MariaDB daemon with:
cd '/usr/local/mysql/' ; /usr/local/mysql//bin/mysqld_safe --datadir='/data/mysql/'

You can test the MariaDB daemon with mysql-test-run.pl
cd '/usr/local/mysql//mysql-test' ; perl mysql-test-run.pl

Please report any problems at http://mariadb.org/jira

The latest information about MariaDB is available at http://mariadb.org/.
You can find additional information about the MySQL part at:
http://dev.mysql.com
Consider joining MariaDB is strong and vibrant community:

https://mariadb.org/get-involved/
[root@localhost mysql]# mysql		登录mysql
Welcome to the MariaDB monitor.  Commands end with ; or \g.
Your MariaDB connection id is 9
Server version: 10.4.13-MariaDB MariaDB Server

Copyright (c) 2000, 2018, Oracle, MariaDB Corporation Ab and others.

Type 'help;' or '\h' for help. Type '\c' to clear the current input statement.

MariaDB [(none)]>
8、配置安全模式,设置密码等
[root@localhost mysql]# mysql_secure_installation

NOTE: RUNNING ALL PARTS OF THIS SCRIPT IS RECOMMENDED FOR ALL MariaDB
      SERVERS IN PRODUCTION USE!  PLEASE READ EACH STEP CAREFULLY!

In order to log into MariaDB to secure it, we'll need the current
password for the root user. If you've just installed MariaDB, and
haven't set the root password yet, you should just press enter here.

Enter current password for root (enter for none):
OK, successfully used password, moving on...

Setting the root password or using the unix_socket ensures that nobody
can log into the MariaDB root user without the proper authorisation.

You already have your root account protected, so you can safely answer 'n'.

Switch to unix_socket authentication [Y/n] y
Enabled successfully!
Reloading privilege tables..
 ... Success!


You already have your root account protected, so you can safely answer 'n'.

Change the root password? [Y/n] y
New password:
Re-enter new password:
Password updated successfully!
Reloading privilege tables..
 ... Success!


By default, a MariaDB installation has an anonymous user, allowing anyone
to log into MariaDB without having to have a user account created for
them.  This is intended only for testing, and to make the installation
go a bit smoother.  You should remove them before moving into a
production environment.

Remove anonymous users? [Y/n] y
 ... Success!

Normally, root should only be allowed to connect from 'localhost'.  This
ensures that someone cannot guess at the root password from the network.

Disallow root login remotely? [Y/n] n
 ... skipping.

By default, MariaDB comes with a database named 'test' that anyone can
access.  This is also intended only for testing, and should be removed
before moving into a production environment.

Remove test database and access to it? [Y/n] y
 - Dropping test database...
 ... Success!
 - Removing privileges on test database...
 ... Success!

Reloading the privilege tables will ensure that all changes made so far
will take effect immediately.

Reload privilege tables now? [Y/n] y
 ... Success!

Cleaning up...

All done!  If you've completed all of the above steps, your MariaDB
installation should now be secure.

Thanks for using MariaDB!
二、源码安装配置nginx1.18.0
1、安装软件环境支持
[root@localhost ~]# yum install pcre-devel pcre gcc gcc-c++ openssl openssl-devel zlib-devel –y
2、下载nginx-1.18.0.tar.gz包
[root@localhost ~]# cd /usr/src/
[root@localhost src]# wget http://nginx.org/download/nginx-1.18.0.tar.gz
3、新建组与用户
[root@localhost src]# groupadd nginx
[root@localhost src]# useradd -s /sbin/nologin  -r nginx -g nginx
4、解压、编译、安装
[root@localhost src]# tar -zxvf nginx-1.18.0.tar.gz
[root@localhost src]# cd nginx-1.18.0
[root@localhost nginx-1.18.0]#./configure \
 --user=nginx \
 --group=nginx \
 --prefix=/usr/local/nginx \
 --with-http_stub_status_module \
 --with-http_ssl_module \
 --with-http_mp4_module \
 --with-http_realip_module \
 --with-pcre \
 --with-http_gunzip_module \
 --with-http_gzip_static_module \
 --with-stream
[root@localhost nginx-1.18.0]# make
[root@localhost nginx-1.18.0]# make install
5、启动
[root@localhost nginx-1.18.0]# /usr/local/nginx/sbin/nginx
[root@localhost nginx-1.18.0]# ps -ef|grep nginx
root     21679     1  0 13:43 ?        00:00:00 nginx: master process /usr/local/nginx/sbin/nginx
nginx    21680 21679  0 13:43 ?        00:00:00 nginx: worker process
root     21682  2265  0 13:44 pts/0    00:00:00 grep --color=auto nginx
三、源码安装配置php-7.4.6
1、安装环境支持
[root@localhost src]# yum install -y libjpeg libpng-devel freetype freetype-devel libxslt libxslt-devel libXpm-devel sqlite-devel bzip2 bzip2-devel libjpeg libjpeg-devel libpng libpng-devel oniguruma oniguruma-devel libcurl libcurl-devel postgresql-devel openssl openssl-devel libzip libxml2 libxml2-devel pcre2
2、软件下载
[root@localhost src]# wget https://www.php.net/distributions/php-7.4.6.tar.gz
3、解压、编译、安装
[root@localhost src]# tar -zxvf php-7.4.6.tar.gz
[root@localhost src]# cd php-7.4.6
[root@localhost php-7.4.6]# ./configure \
 --prefix=/usr/local/php7  \
 --enable-fpm \
 --with-fpm-user=nginx \
 --with-fpm-group=nginx \
 --enable-debug \
 --enable-gd \
 --with-jpeg \
 --with-pgsql \
 --enable-inline-optimization \
 --with-bz2 \
 --with-zlib-dir \
 --with-freetype \
 --enable-mbstring \
 --enable-soap \
 --with-openssl \
 --enable-calendar \
 --with-curl \
 --enable-ftp \
 --with-gettext \
 --with-xmlrpc \
 --with-xsl \
 --enable-opcache \
 --with-iconv \
 --with-pdo-mysql=mysqlnd \
 --with-mysqli=mysqlnd \
 --with-kerberos \
 --with-pdo-sqlite \
 --with-pear \
 --enable-shmop \
 --enable-xml \
 --with-zlib \
 --enable-sockets \
 --enable-sysvsem \
 --enable-pcntl \
 --enable-mbregex \
 --enable-exif \
 --enable-bcmath \
 --with-mhash \
 --with-zlib-dir \
 --with-pcre-jit \
 --with-config-file-path=/usr/local/php7/etc
[root@localhost php-7.4.6]# make
[root@localhost php-7.4.6]# make install
4、配置php-fpm
主配置文件
[root@localhost php-7.4.6]# cp php.ini-development /usr/local/php7/etc/php.ini
次配置文件
[root@localhost php-7.4.6]# cp /usr/local/php7/etc/php-fpm.conf.default /usr/local/php7/etc/php-fpm.conf
修改Php-fpm配置文件中的include默认文件名
[root@localhost php-7.4.6]# cp /usr/local/php7/etc/php-fpm.d/www.conf.default /usr/local/php7/etc/php-fpm.d/default.conf
配置启动文件php-fpm及软链接
[root@localhost php-7.4.6]# cp /usr/src/php-7.4.6/sapi/fpm/init.d.php-fpm /etc/init.d/php-fpm
[root@localhost php-7.4.6]# chmod +x /etc/init.d/php-fpm
[root@localhost php-7.4.6]# ln -s /etc/init.d/php-fpm /usr/sbin/php-fpm
5、启动php-fpm
[root@localhost php-7.4.6]# php-fpm start
Starting php-fpm  done
[root@localhost php-7.4.6]# ps -ef|grep php
root     56394     1  0 15:45 ?        00:00:00 php-fpm: master process (/usr/local/php7/etc/php-fpm.conf)
nginx    56395 56394  0 15:45 ?        00:00:00 php-fpm: pool www
nginx    56396 56394  0 15:45 ?        00:00:00 php-fpm: pool www
root     56398  2265  0 15:45 pts/0    00:00:00 grep --color=auto php
四、安装博客网站wordpress
1、下载wordpress
[root@localhost src]# wget -c https://cn.wordpress.org/latest-zh_CN.zip -O /usr/local/nginx/html/wordpress.zip
解压
[root@localhost src]# cd /usr/local/nginx/html/
[root@localhost html]# unzip wordpress.zip
2、配置vhost/blog.yjy.com.conf
[root@localhost html]# vim /usr/local/nginx/conf/vhost/blog.yjy.com.conf
server {
        listen       80;
        server_name  blog.yjy.com;
        charset utf8;
        access_log  logs/blog.yjy.com.access.log  main;

        location / {
                root   html/wordpress/;
                index  index.php index.html index.htm;
        }
        error_page  404              /404.html;
        error_page   500 502 503 504  /50x.html;
        location = /50x.html {
                root   html;
        }

        location ~ \.php$ {
                root           html/wordpress/;
                fastcgi_pass   127.0.0.1:9000;
                fastcgi_index  index.php;
                fastcgi_param  SCRIPT_FILENAME  $document_root$fastcgi_script_name;
                include        fastcgi_params;
        }
}
3、配置nginx.conf及添加include
17 http {
 18     include       mime.types;
 19     default_type  application/octet-stream;
 20   #  include /usr/local/nginx/conf/vhost/*.conf;
 21     log_format  main  '$remote_addr - $remote_user [$time_local] "$request" '
 22                       '$status $body_bytes_sent "$http_referer" '
 23                       '"$http_user_agent" "$http_x_forwarded_for"';
 24
 25     access_log  logs/access.log  main;
 26
 27     include /usr/local/nginx/conf/vhost/*.conf;
 28     sendfile        on;
4、配置项目目录wordpress的用户权限
[root@localhost ~]# chown -R nginx:nginx /usr/local/nginx/html/wordpress
5、数据库授权
MariaDB [(none)]> create database wordpress charset utf8;
Query OK, 1 row affected (0.003 sec)

MariaDB [(none)]> grant all on wordpress.* to "wordpress"@localhost identified by "123456";
Query OK, 0 rows affected (0.166 sec)

MariaDB [(none)]> flush privileges;
Query OK, 0 rows affected (0.005 sec)
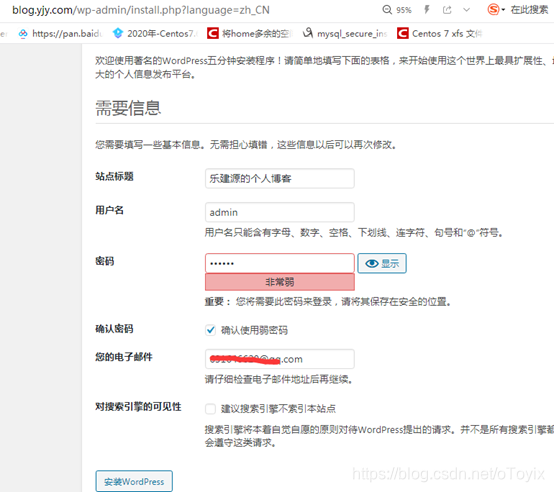
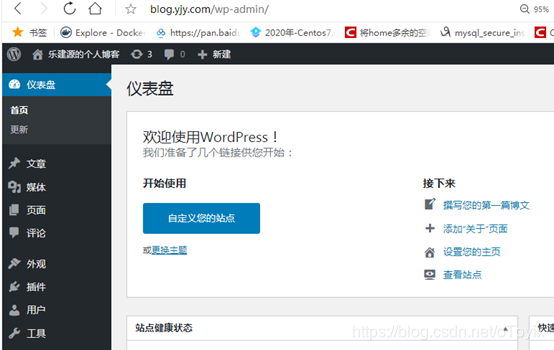
6、浏览器输入http://blog.yjy.com/,来安装wordpress
五、安装phpmyadmin
1、下载phpmyadmin
[root@localhost src]# wget https://files.phpmyadmin.net/phpMyAdmin/5.0.2/phpMyAdmin-5.0.2-all-languages.zip
2、解压
[root@localhost src]# unzip phpMyAdmin-5.0.2-all-languages.zip
3、移动至nginx项目目录
[root@localhost src]# mv phpMyAdmin-5.0.2-all-languages /usr/local/nginx/html/phmyadmin
4、改用户权限
[root@localhost src]# chown -R nginx:nginx /usr/local/nginx/html/phpmyadmin/
5、配置虚拟主机,这里直接通过phpmyadmin.yjy.com来访问管理
[root@localhost src]# vim /usr/local/nginx/conf/vhost/phpmyadmin.yjy.com.conf
server {
        listen       80;
        server_name  phpmyadmin.yjy.com;
        charset utf8;
        access_log  logs/phpmyadmin.yjy.com.access.log  main;

        location / {
                root   html/phpmyadmin/;
                index  index.php index.html index.htm;
        }
        error_page  404              /404.html;
        error_page   500 502 503 504  /50x.html;
        location = /50x.html {
                root   html;
        }

        location ~ \.php$ {
                root           html/phpmyadmin/;
                fastcgi_pass   127.0.0.1:9000;
                fastcgi_index  index.php;
                fastcgi_param  SCRIPT_FILENAME  $document_root$fastcgi_script_name;
                include        fastcgi_params;
        }
}
6、重启服务
[root@localhost html]# nginx -s reload
7、修改phpmysql连接数据库的默认配置文件
vim libraries/config.default.php
[root@localhost phpmyadmin]# vim libraries/config.default.php
111 $cfg['blowfish_secret'] = '123456';
141 $cfg['Servers'][$i]['port'] = '3306';
148 $cfg['Servers'][$i]['socket'] = '/tmp/mysql.sock';
272 $cfg['Servers'][$i]['password'] = '123456';
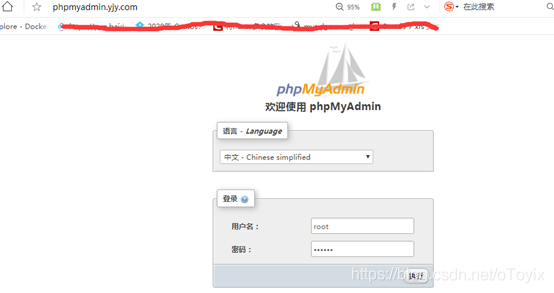
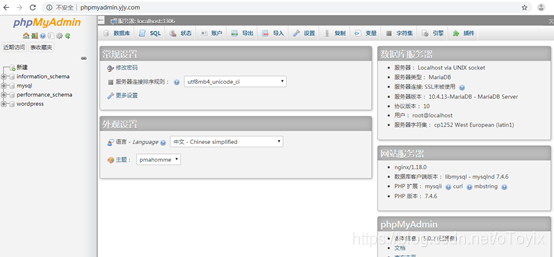
8、浏览器登录
用户名:root 密码:123456
-------------end