环境要求
| 工具 | ip |
| git jenkins maven | 192.168.253.156 |
| tomcat8 jdk1.8 | 192.168.253.51 |
1.git安装
1.1 linux安装
(1)安装yum依赖及软件
  yum install curl-devel expat-devel gettext-devel openssl-devel zlib-devel perl-devel -y
  yum install -y git
(2)创建用户及组
groupadd git
useradd git -g git
(3)初始化git仓库
[root@localhost ~]# cd /home/
[root@localhost home]# mkdir gitrepo
[root@localhost home]# chown -R git:git gitrepo/
[root@localhost home]# cd gitrepo/
[root@localhost gitrepo]# git init --bare runoob.git
[root@localhost gitrepo]# chown -R git:git runoob.git/
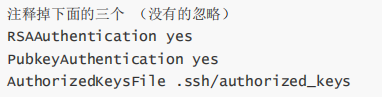
(4).ssh的配置
[root@localhost gitrepo]# cd /etc/ssh/
[root@localhost ssh]# vim sshd_config
(5)重启sshd服务
[root@localhost ssh]# systemctl restart sshd
[root@localhost ssh]# cd /home/git #git家目录
[root@localhost git]# mkdir .ssh
[root@localhost git]# chown -R git:git .ssh/
(6)git初始化
查看版本
[root@localhost local]# git --version
git version 1.8.3.1

针对于git用户配置
[git@localhost ~]$ git config --global user.name "lanist"
[git@localhost ~]$ git config --global user.email "[email protected]"
针对与全局设置别名
[root@localhost ~]# git config --system alias.st status
[root@localhost ~]# git config --system alias.ci commit
[root@localhost ~]# git config --system alias.co checkout
[root@localhost ~]# git config --system alias.br branch
[root@localhost ~]# cat /etc/gitconfig
[alias]
    st = status
    ci = commit
    co = checkout
    br = branch
在git命令中高亮显示(有颜色区别)
[root@localhost ~]# git config --global color.ui true

local、global、system三种级别
local:当前项目有效(工作目录下/.git/config)
global:当前用户有效(用户目录下/.gitconfig)
system:所有用户有效(GIT目录/etc/gitconfig)4
版本库创建
创建一个新的工作目录,进入该目录中,执行git init创建版本库
[git@localhost ~]$ mkdir workspace
[git@localhost ~]$ ls
workspace
[git@localhost ~]$ cd workspace/
[git@localhost workspace]$ ls
#创建工作区
[git@localhost workspace]$ mkdir my
[git@localhost workspace]$ cd my/
[git@localhost my]$ ls
[git@localhost my]$ git init
Initialized empty Git repository in /home/git/workspace/my/.git/
[git@localhost dome]$ ls
[git@localhost dome]$ ls -a
.  ..  .git
(7) 创建远程仓库
注册账户以及创建仓库
https://github.com/
本地git仓库和github仓库之间的传输是通过SSH加密的,所以我们需要配置验证信息:
[root@localhost local]# su git
[git@localhost local]$ cd ~

[git@localhost local]$ ssh-keygen -t rsa -C "[email protected]" #邮箱为github上注册的邮箱
[git@localhost ~]$ cd .ssh/
[git@localhost .ssh]$ ls
authorized_keys id_rsa id_rsa.pub known_hosts
1.2 windows安装
1.2.1下载地址
Git客户端官网下载链接:https://git-scm.com/downloads
1.2.2 安装
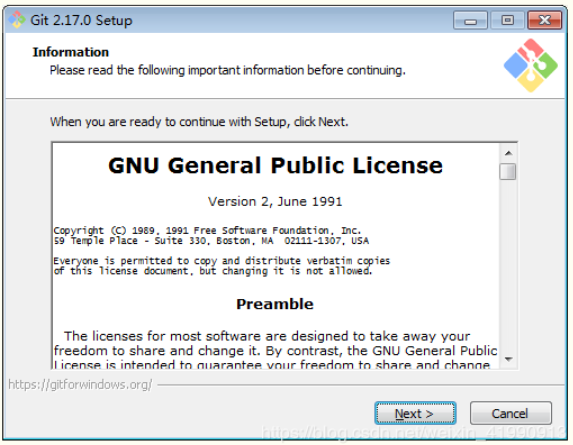
双击“Git-2.17.0-64-bit.exe”,进入安装导向界面,点击Next>
点击Next>
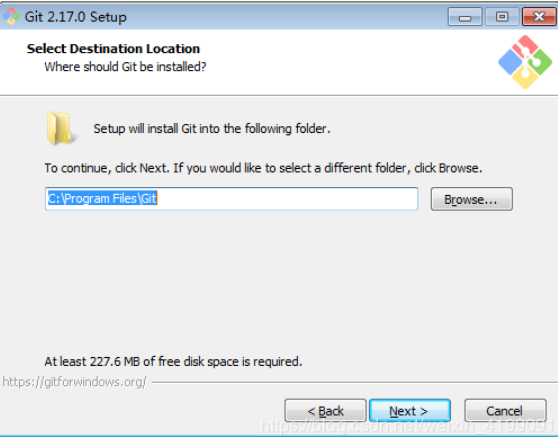
选择组建安装,默认配置即可,点击Next>
开始菜单快捷方式目录,默认配置即可,点击Next>
选择默认的编辑器:Vim,点击Next>
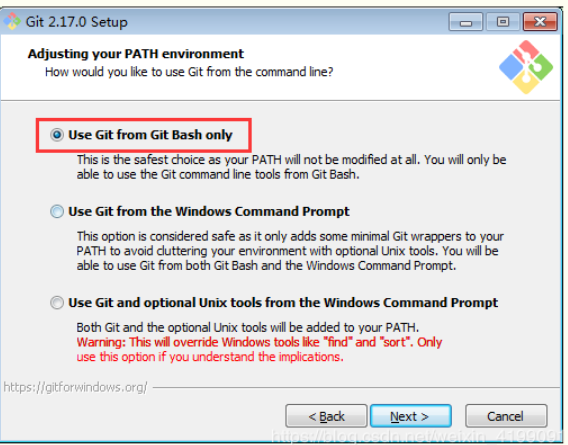
选择命令行工具,一般选择:User Git from Git Bash only,点击Next>
默认选择,点击Next>
选择换行格式,默认选择,点击Next>
默认选择,点击Next>
默认选择,点击Install
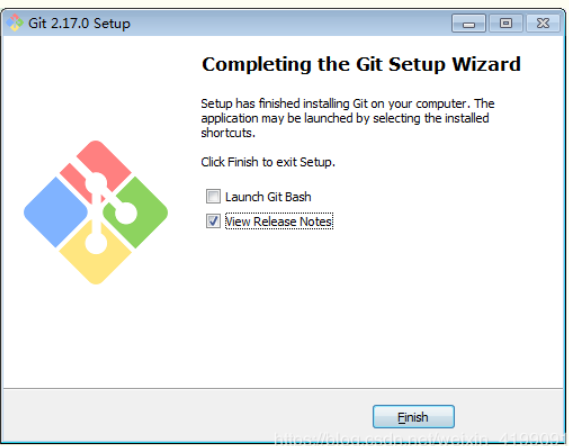
客户端安装完成,点击Finish
1.2.3 设置用户名和邮箱
git config --global user.name "fionazhong"

git config --global user.email "[email protected]"
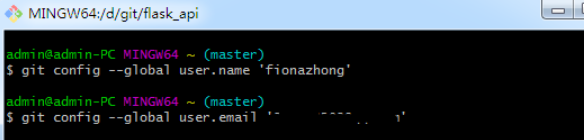
注:git config --global 参数:有了这个参数,表示你这台机器上的所有的Git仓库都会使用这个配置。当然也可以针对某个仓库单独指定不同的邮箱和用户名
1.2.4 使用本地仓库
1)创建版本库:
版本库(repository):简单理解就是一个目录,一个可以被git管理的目录,目录中所有的文件的增删改都可以被git跟踪管理,以便将来追溯或还原版本
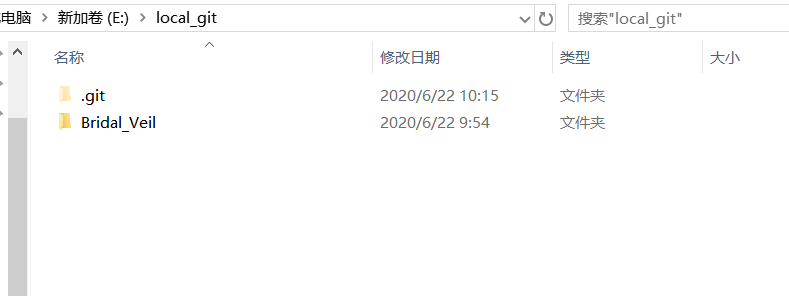
通过git init 把目录变成git可管理仓库
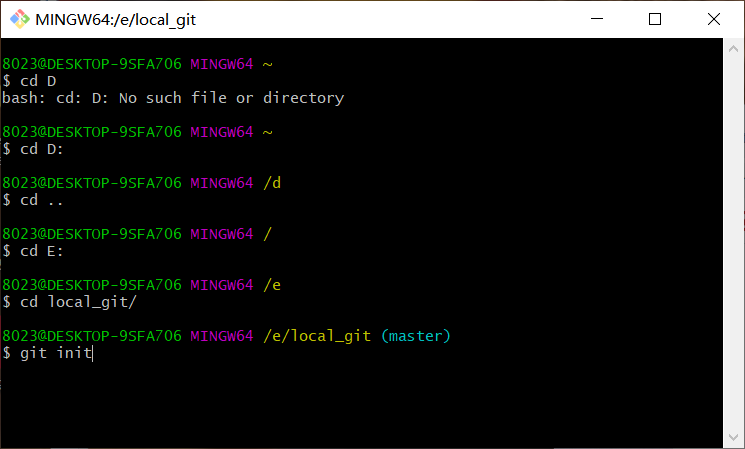
这时候,我的flask_api目录下面就多了一个.git文件夹目录,这个目录是Git用来跟踪管理版本的
2)把目标项目添加到版本库中


要把这个文件添加到版本库中,有两步:
1)使用git add test.txt,将文件添加到暂存区里
2)使用git commit -m "提交说明",将文件提交到仓库
3)工作区和暂存区
上面已经说过,通过git add 将文件添加到了暂存区,通过git commit实质就是讲暂存区的所有内容提交到当前分支上。
比如,我现在修改我的文件test.txt,在里面添加 11111111 然后使用git add test.txt,然后在修改文件添加22222222,接下来使用git reset -- test.txt,再查看文件,发现后来添加的2222222没有了。
4)使用远程仓库
1)创建一个GitHub账号
https://github.com
2)由于本地仓库和GitHub仓库之间是通过SSH加密传输的,因此需要设置ssh key
先打开自己电脑的主目录,看是否有id_rsa和id_rsa.pub两个文件,如果没有的话,在git客户端命令行中输入如下命令:
ssh-keygen -t rsa -C "[email protected]"
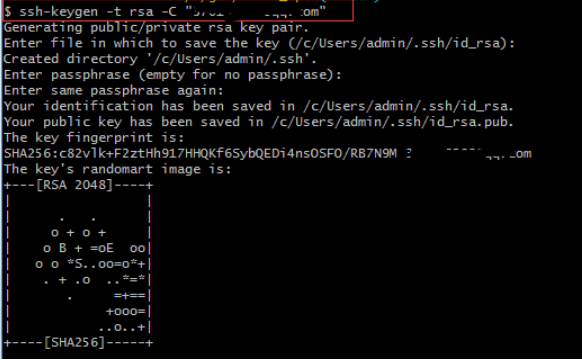
--------》会生成如下两个文件,id_rsa是私钥,id_rsa.pub是公钥

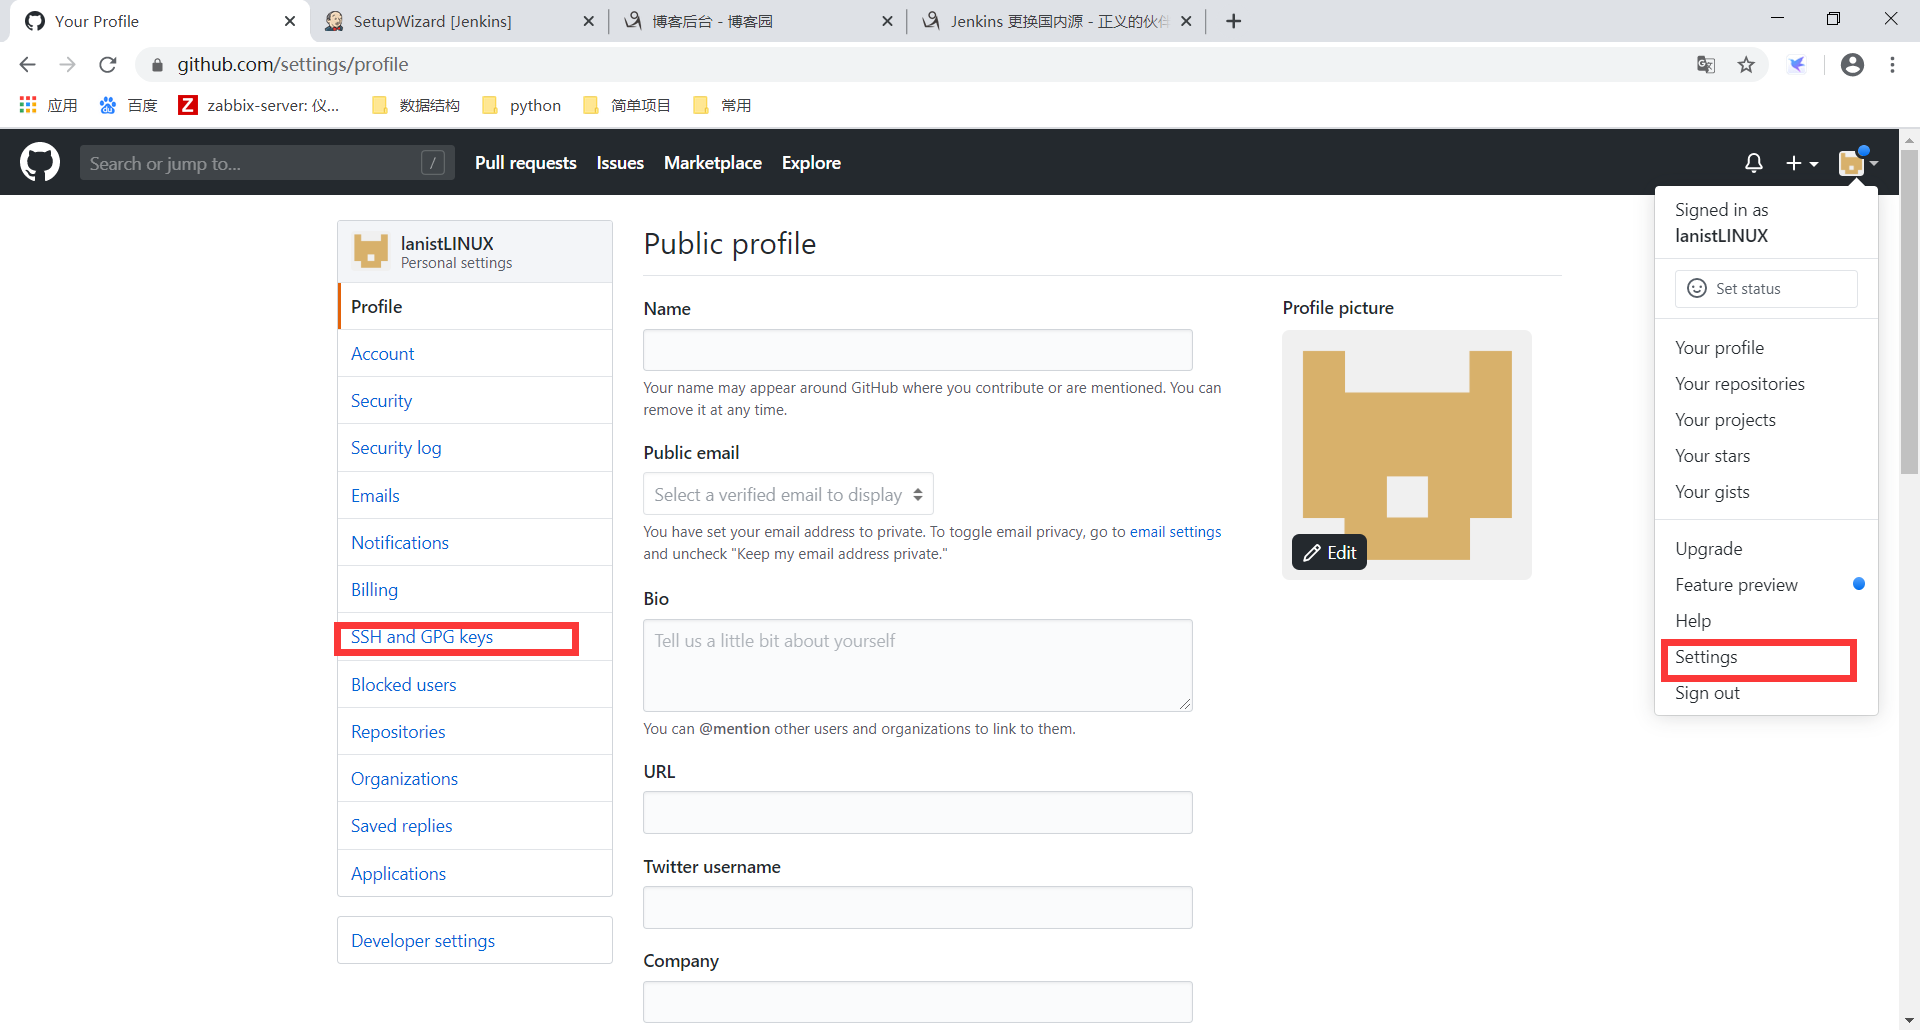
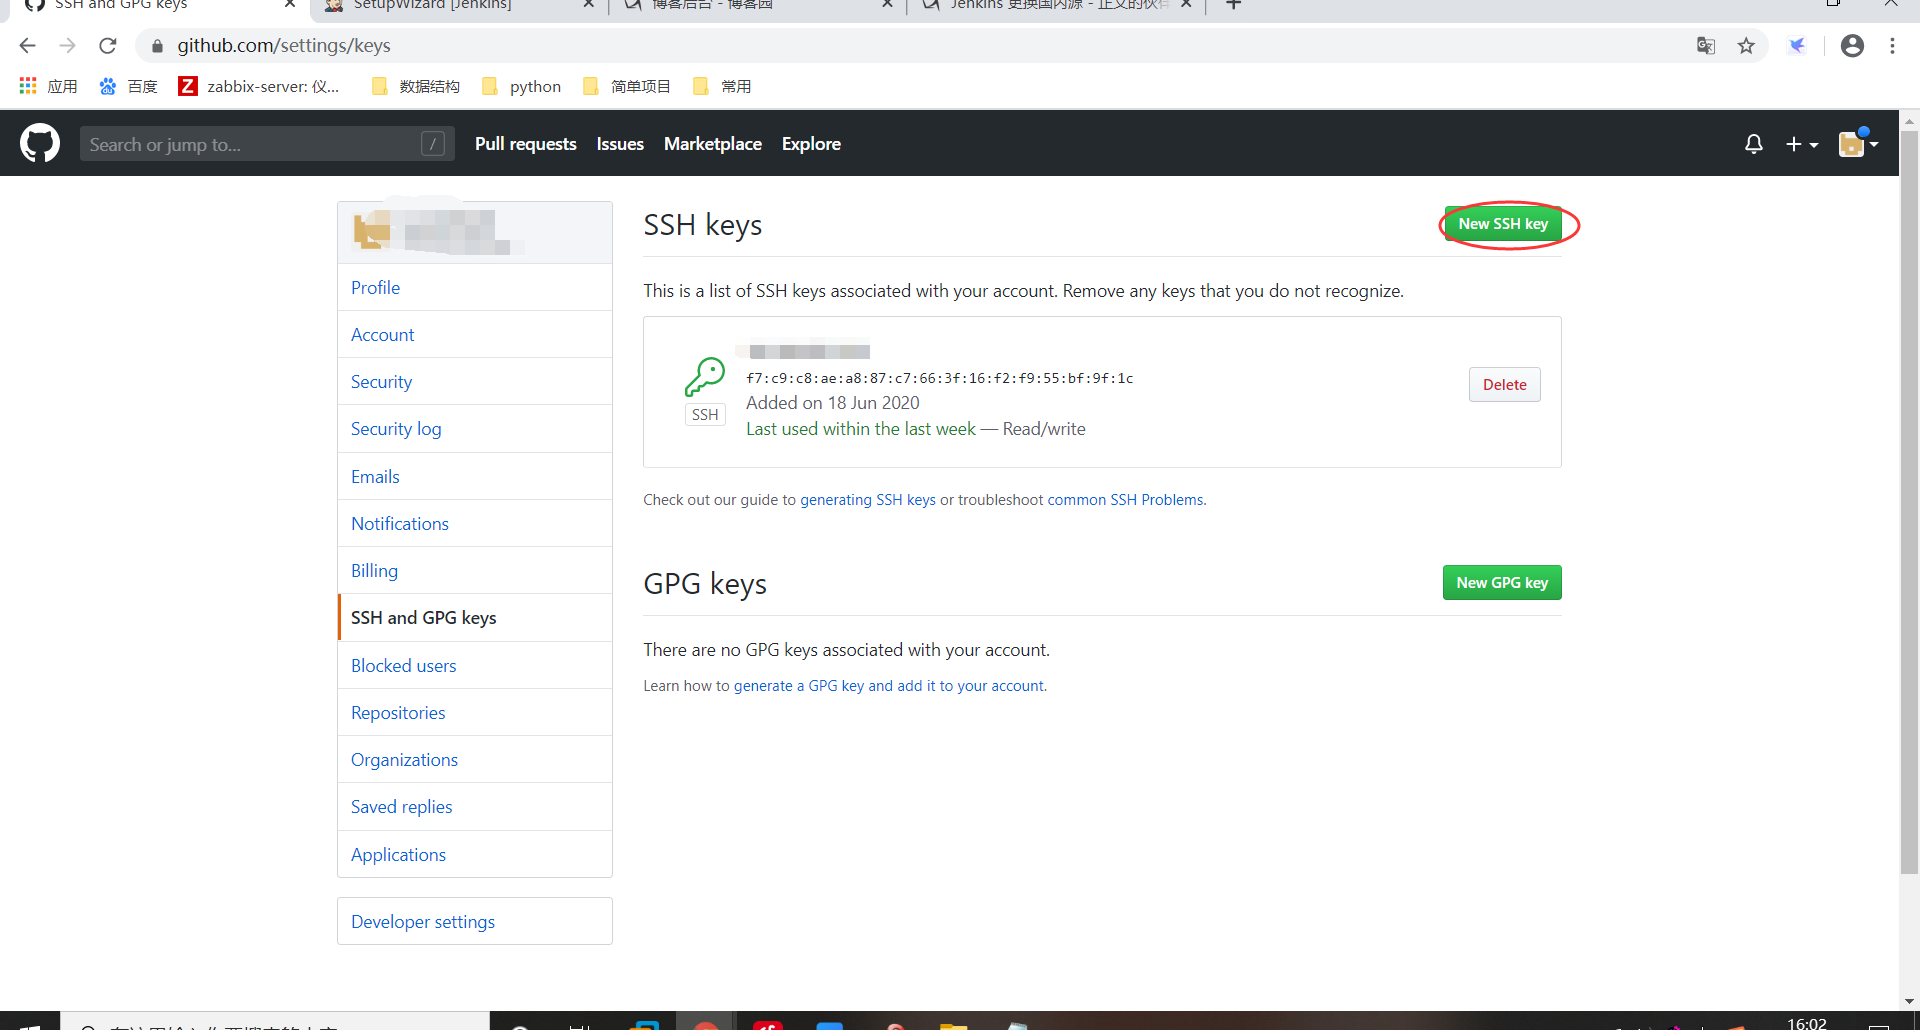
1.3设置公钥
1)复制id_rsa.pub里面的公钥到github上(如果为linux上的git客户端,请在git用户下生成公钥,拷贝过来)
2)验证是否成功
[git@localhost .ssh]$ ssh -T [email protected]
Hi lanistLINUX! You've successfully authenticated, but GitHub does not provide shell access.
3)在github上创建一个远程仓库

4)本地仓库和远程仓库同步:
1)git init:将本地仓库变成可git管理
2)在本地仓库运行如下命令:
git remote add origin 你的远程仓库地址

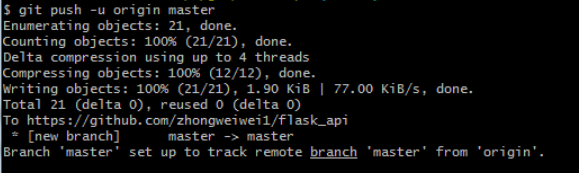
3)再运行git push -u origin master,将本地仓库中当前分支的内容同步到远程仓库去
由于远程仓库是空的,我们第一次推送master分支时,加上了-u参数,Git不但会把本地master分支的内容推送到远程新的master分支,还会把本地master分支和远程master分支关联起来。
以后再推送或者拉取的时候,可以简化命令,推送成功过后,我们再去GitHub上面查看我们的分支,可以看到和我们本地一样的内容了。
报错:
! [rejected] master -> master (fetch first) error: failed to push some refs to ' 。。。'
出现这个问题是原因是:远程仓库中存在本地不存在的文件,可以通过如下命令进行代码合并
解决方案:按照提示中的使用git pull... 将远程的文件拉到本地仓库中:
git pull --rebase origin master
5)从远程分支上克隆代码到本地
git clone github地址
9、Git常用命令:
    1)mkdir XX:创建一个名为XX的目录

  2)pwd:显示当前目录的路径

  3)git init:把当前目录变成可以管理的git仓库,生成隐藏的.git文件

  4)git add xx:把xx文件添加到暂存区

  5)git commit -m "提交说明":将暂存区的内容推送到git仓库中

  6)git status:查看仓库状态

  7)git diff xx:查看xx文件修改了哪些内容

  8)git log:查看历史记录(Q退出)

  9)git reset --hard HEAD^ 或者git reset --hard HEAD~回退到上个版本

  10)cat XX:查看XX文件的内容

  11)git reflog:查看历史记录的版本号id

  12)git checkout -- xx:把xx文件在工作区的修改内容全部撤销

  13)git rm xx:删除xx文件

  14)git remote add origin git仓库地址:关联一个git远程仓库

  15)git push -u origin master:把当前master分支推送到远程库(第一次使用的时候,需要加上-u,后面不再需要-u)

  16)git clone git仓库地址:从远程仓库中克隆

  17)git checkout -b dev:创建dev分支并切换到dev分支

  18)git checkout master:切换分支到master

  19)git branch:查看当前所有分支

  20)git branch name:创建名为name的分支

  21)git merge dev:在当前分支上合并dev

  22)git stash:把当前工作隐藏起来,等以后恢复现场后再继续使用

  23)git stash list:查看隐藏的所有文件列表

  24)git stash apply:恢复隐藏的文件,但是隐藏的内容不删除

  25)git stash drop:删除隐藏文件

  26)git stash pop:恢复隐藏文件并删除

  27)git remote:查看远程库的信息

  28)git remote -v:查看远程库的详细信息

  29)git push origin master:git会把master分支推送到远程仓库对应的分支上
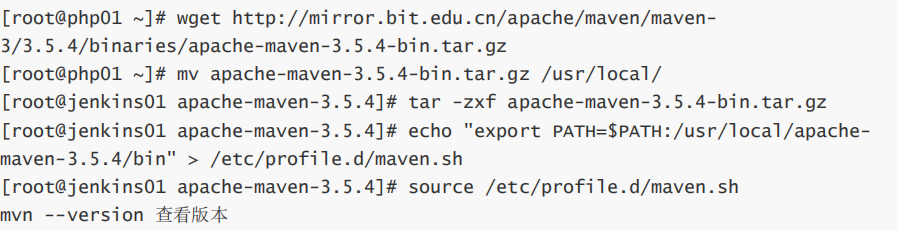
2.maven安装
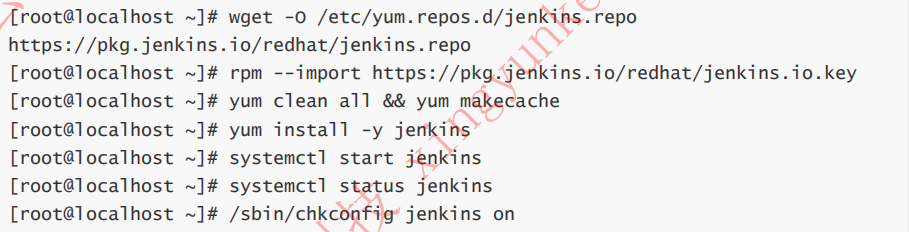
3.jenkins安装和部署
3.1jdk安装

3.2jenkins安装
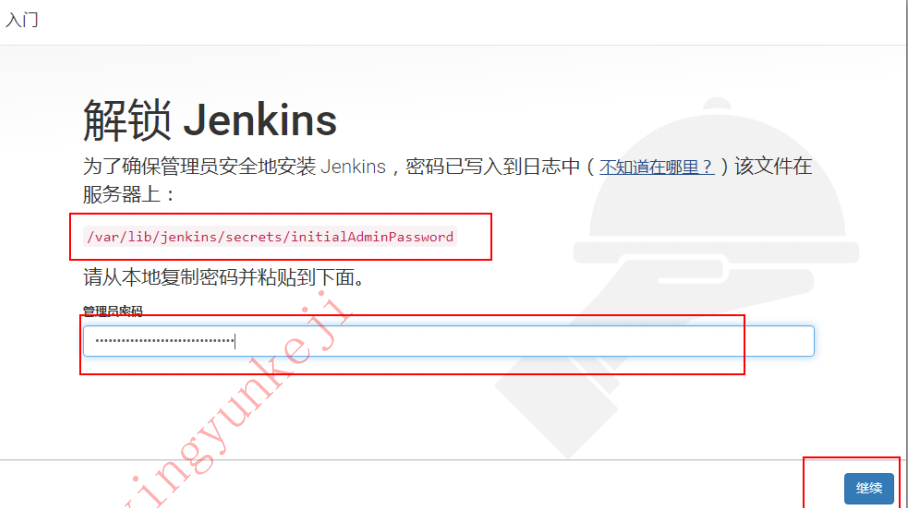
3.3访问:ip:8080
进行安装
安装插件,之后集成部署代码可能会安装更多插件

3.4 全局工具配置
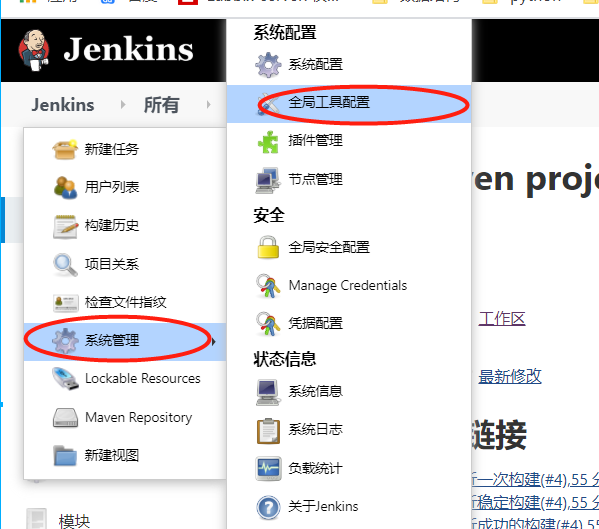
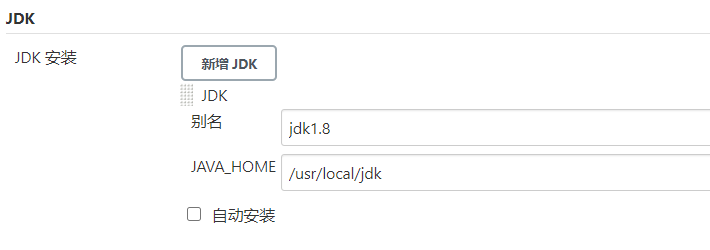
jdk配置----jdk安装路径
git配置----(which git 获取)

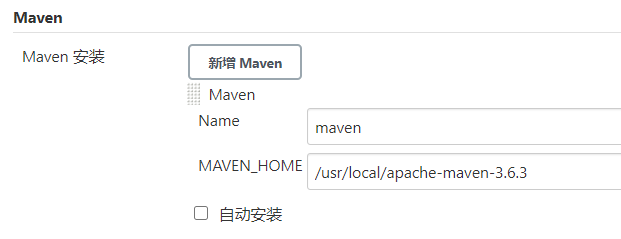
maven配置-----maven安装路径
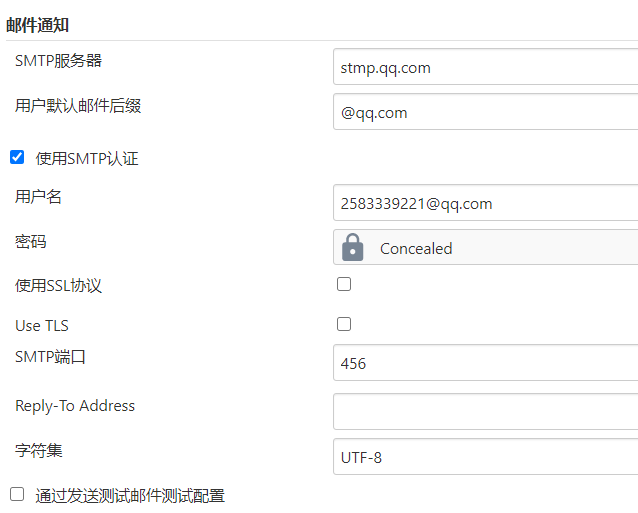
3.5配置系统环境

4.实战java项目自动发布,自动部署
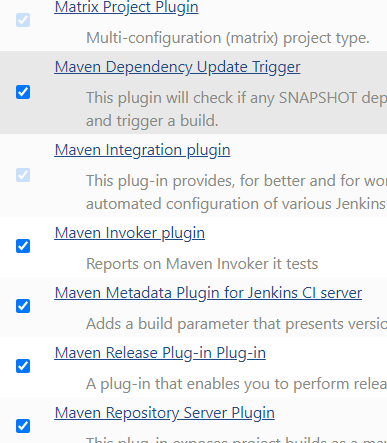
4.1插件安装
系统管理--管理插件


使用maven相关插件打包部署代码----(我把有关的都安装了)
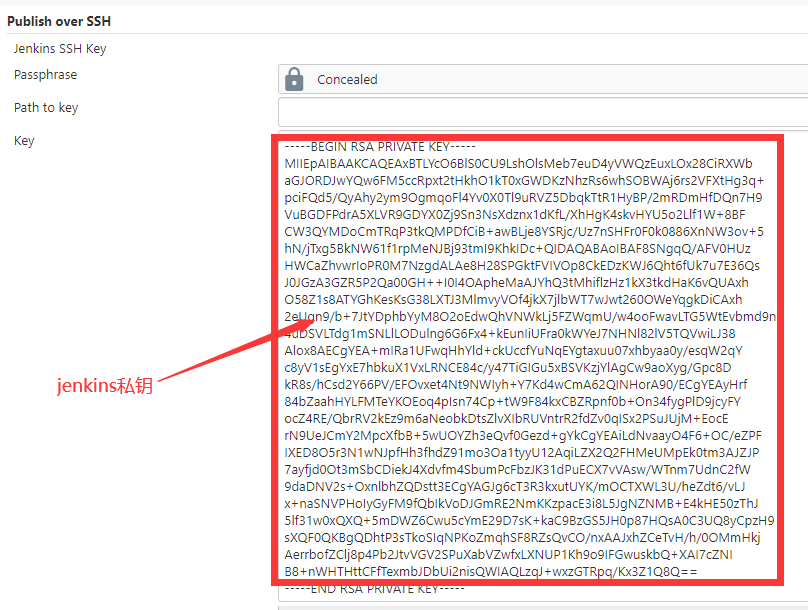
4.2ssh配置
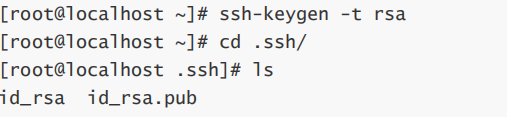
在jenkins服务器上生成公钥和私钥
将私钥复制到jenkins中ssh中,公钥拷贝到代码发布的目标服务器上,此项目发布到192.168.253.51的服务区上
ssh-copy-id -i /root/.ssh/id_rsa.pub root@192.168.253.51
name:目标服务器的名称可自定义
Hostname:目标服务器IP
Username:此处填写进行秘钥互信的用户,此处为root用户
Remote Directory:此处为发布到目标服务器的相对根路径,例子为tomcat的安装路径,不清楚是可写/
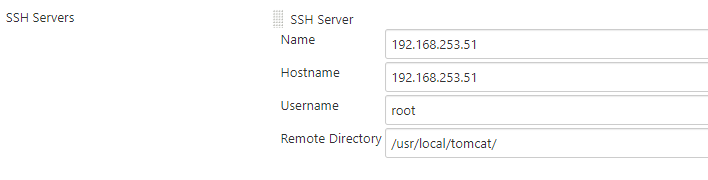
注:如果目标服务器为多台,可继续添加,如果目标服务器存在代理,也可设置proxy