springboot + durid + mybatis + docker实现mysql读写分离 - 2
前言
上一篇文章我们搭建了一主二从的mysql复制集群,现在我们通过测试项目来实现读写分离
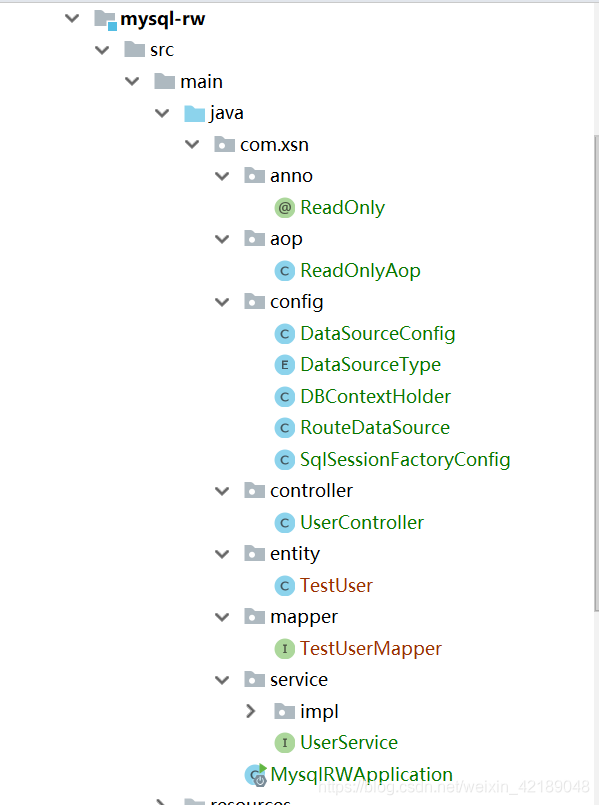
项目结构
代码解读
数据源配置
spring:
  datasource:
    type: com.alibaba.druid.pool.DruidDataSource
    driver-class-name: com.mysql.jdbc.Driver
    url: jdbc:mysql://10.18.32.90:3306/copy_test?characterEncoding=utf-8
    username: test
    password: test
    slave1:
      url: jdbc:mysql://10.18.32.90:3307/copy_test?characterEncoding=utf-8
      username: test
      password: test
    slave2:
      url: jdbc:mysql://10.18.32.90:3308/copy_test?characterEncoding=utf-8
      username: test
      password: test
配置三个数据源,对应一主二从
DataSourceType
定义一个枚举类,用于声明数据源key值
public enum DataSourceType {
    MASTER,
    SLAVE1,
    SLAVE2
}
DBContextHolder
切换数据源的关键类,我们通过ThreadLocal来持有上述的枚举变量,通过切面(后续介绍)来针对查询操作切换从库数据源。ThreadLocal为空时默认使用master源。使用小算法随机调度从库
@Slf4j
public class DBContextHolder {

    private static ThreadLocal<DataSourceType> threadLocal = new ThreadLocal<>();

    private static void set(DataSourceType dataSourceType) {
        threadLocal.set(dataSourceType);
    }

    public static DataSourceType get() {
        return threadLocal.get() == null ? DataSourceType.MASTER : threadLocal.get();
    }

    public static void remove() {
        threadLocal.remove();
    }

    public static void slave() {
        SecureRandom secureRandom = new SecureRandom();
        int i = secureRandom.nextInt(DataSourceType.values().length - 1) + 1;
        log.info("使用从库" +i+ "读取");
        set(DataSourceType.values()[i]);
    }
}
RouteDataSource
多数据源切换的关键,继承AbstractRoutingDataSource并实现determineCurrentLookupKey方法
public class RouteDataSource extends AbstractRoutingDataSource {

    @Override
    protected Object determineCurrentLookupKey() {
        return DBContextHolder.get();
    }
}
DataSourceConfig
数据源配置,将配置文件中的数据源都注册进容器,此处需要多注册一个targetDataSource,是针对多数据源的配置。
@Configuration
public class DataSourceConfig {

    @Bean("master")
    @ConfigurationProperties(prefix = "spring.datasource")
    @Primary
    public DataSource master() {
        return new DruidDataSource();
    }

    @Bean("slave1")
    @ConfigurationProperties(prefix = "spring.datasource.slave1")
    public DataSource slave1() {
        return new DruidDataSource();
    }

    @Bean("slave2")
    @ConfigurationProperties(prefix = "spring.datasource.slave2")
    public DataSource slave2() {
        return new DruidDataSource();
    }

    @Bean("targetDataSource")
    public DataSource targetDataSource(
            @Qualifier("master") DataSource master
            , @Qualifier("slave1") DataSource slave1
            , @Qualifier("slave2") DataSource slave2
            ) {

        Map<Object, Object> dataSources = new HashMap<>();
        dataSources.put(DataSourceType.MASTER, master);
        dataSources.put(DataSourceType.SLAVE1, slave1);
        dataSources.put(DataSourceType.SLAVE2, slave2);

        RouteDataSource routeDataSource = new RouteDataSource();
        routeDataSource.setDefaultTargetDataSource(master);
        routeDataSource.setTargetDataSources(dataSources);

        return routeDataSource;
    }
}
SqlSessionFactoryConfig
多数据源下我们需要手动注册SqlSessionFactoryConfig,其中targetDataSource即之前我们注册的dataSource bean,mybatis相关配置不再赘述,注意事务需要单独配置才能生效
@Configuration
public class SqlSessionFactoryConfig {

    @Autowired
    @Qualifier("targetDataSource")
    private DataSource targetDataSource;

    @Bean
    public SqlSessionFactory sqlSessionFactory() throws Exception {
        SqlSessionFactoryBean bean = new SqlSessionFactoryBean();
        bean.setDataSource(targetDataSource);
        ResourcePatternResolver resolver = new PathMatchingResourcePatternResolver();
        // 实体类对应的位置
        bean.setTypeAliasesPackage("com.xsn.entity");
        // mybatis的XML的配置
        bean.setMapperLocations(resolver.getResources("classpath:mappers/*.xml"));
        return bean.getObject();
    }

    @Bean
    public DataSourceTransactionManager dataSourceTransactionManager() {
        return new DataSourceTransactionManager(targetDataSource);
    }
}
ReadOnly
注解类,用于标注执行读操作的类,用切面进行数据源切换
@Target(ElementType.METHOD)
@Retention(RetentionPolicy.RUNTIME)
public @interface ReadOnly {
}
ReadOnlyAop
切面处理类,数据源切换的关键,针对添加了ReadOnly注解(即执行读操作)的方法,将数据源切换至slave,最后清空ThreadLocal变量避免内存泄露(即便ThreadLocal是一个WeakRefrence变量,这也是个好习惯)
@Component
@Aspect
@Order(-100)
@Slf4j
public class ReadOnlyAop {

    @Pointcut(value = "@annotation(com.xsn.anno.ReadOnly)")
    public void pointCut() {

    }

    @Around(value = "pointCut()")
    public  Object changeDb(ProceedingJoinPoint proceedingJoinPoint) {
        try {
            DBContextHolder.slave();
            return proceedingJoinPoint.proceed();
        } catch (Throwable e) {
            log.error(e.getMessage(), e);
        } finally {
            DBContextHolder.remove();
        }

        return null;
    }
}
mapper相关类
通过maven插件自动生成,不再赘述,后续给出源码地址
业务类
我们在获取用户信息方法上添加@ReadOnly注册标识此查询由从库执行
测试
新增用户
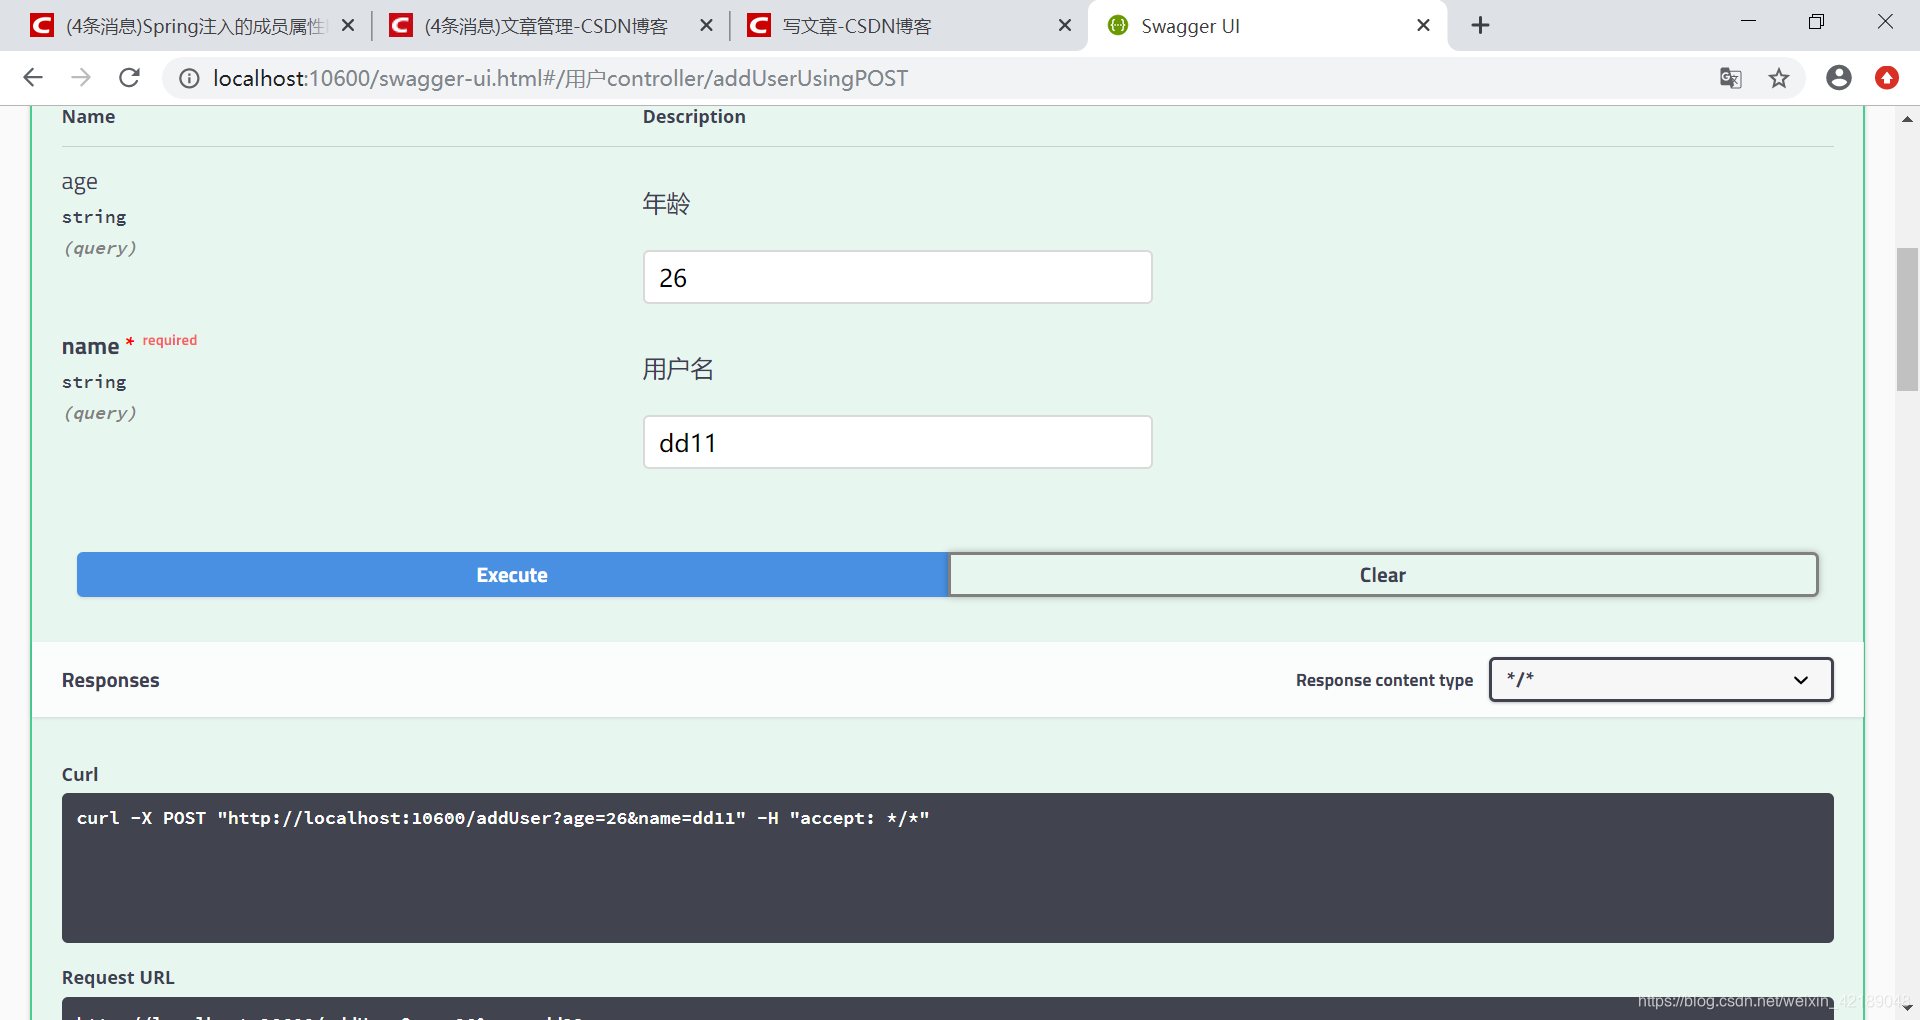
查看所有数据库,均新增成功,日志台也并未打印切换从库信息,即写入操作由master数据源实现
获取用户信息
同样地,获取用户信息,会发现
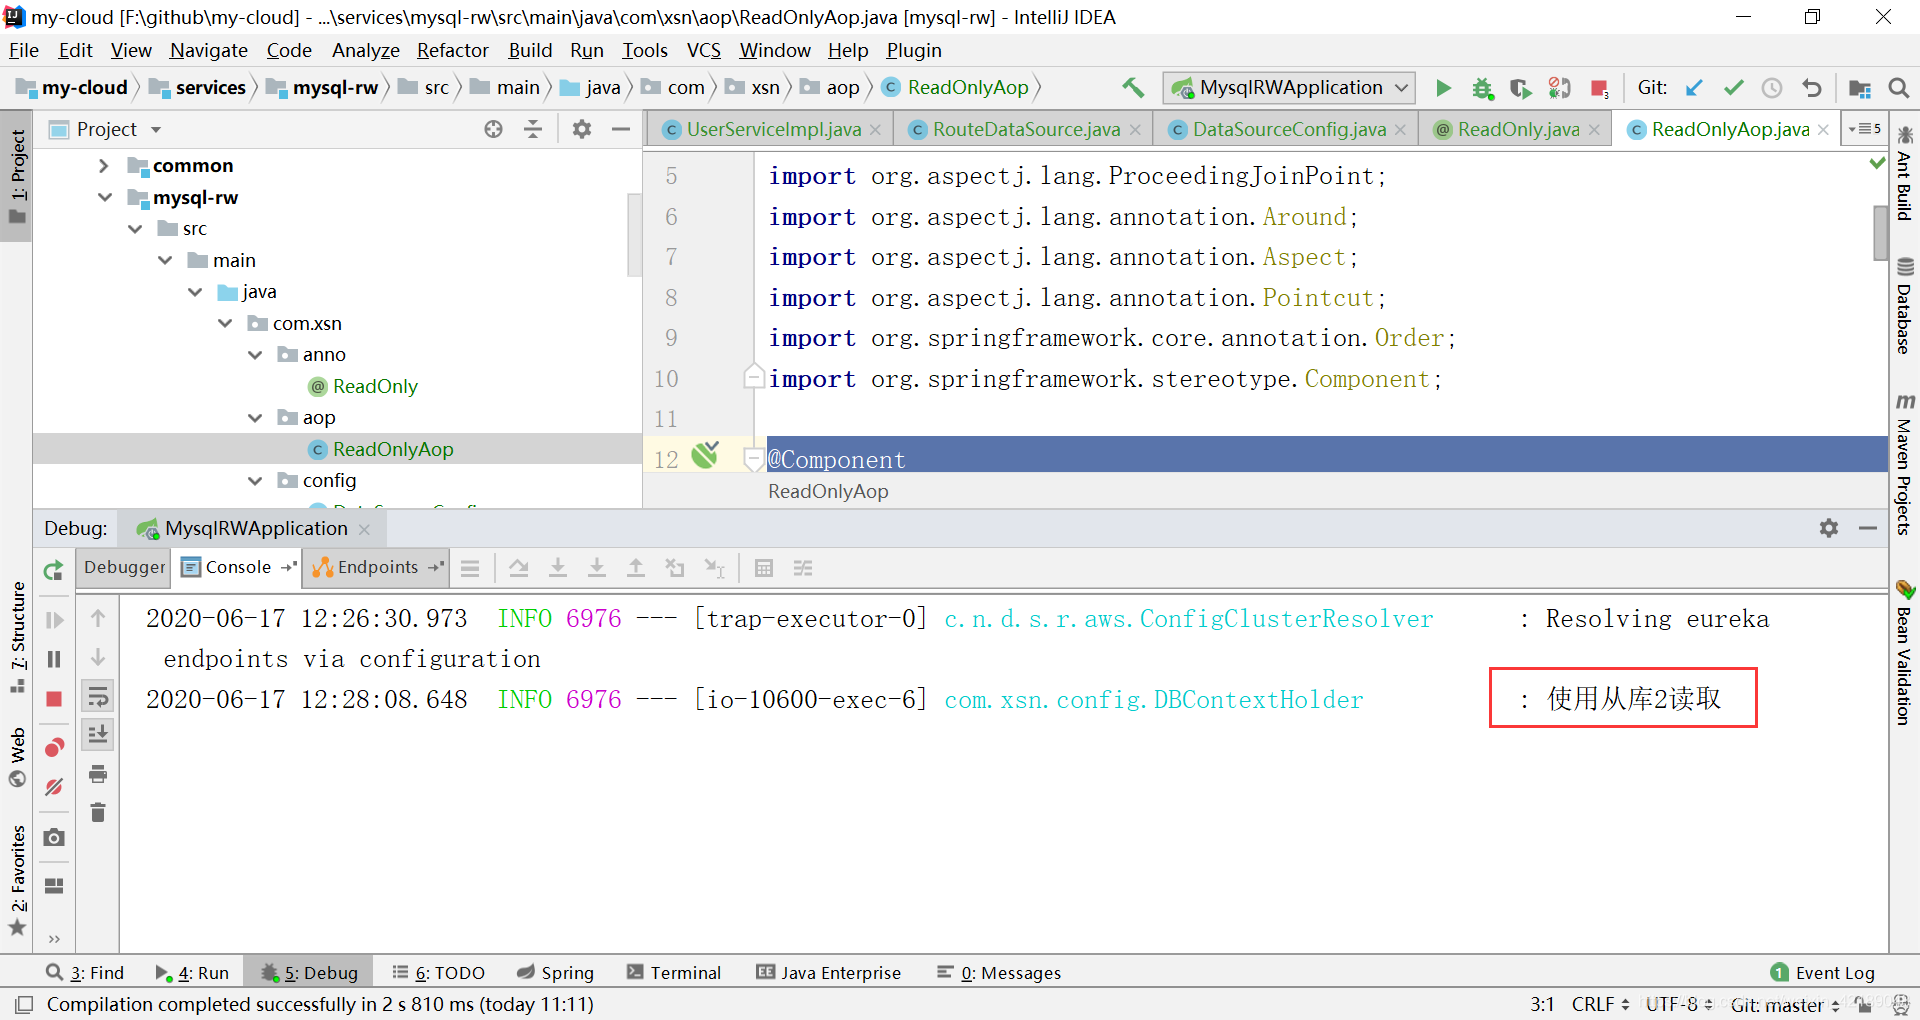
数据源随机切换到从库执行读操作
总结
至此,我们实现了简单的读写分离,尽管数据源的切换实际上是由程序员自行控制(通过注解),因此需要避免漏加、错加注解的情况,事实上这并不难。
上一篇:springboot + durid + mybatis + docker实现mysql读写分离 - 1
源码地址
https://github.com/dangzhicairang/my-cloud.git
配置中心地址
https://github.com/dangzhicairang/my-config.git