- 工具:VS Code
- 环境:nodeJs
- 下载安装好node以后创建一个具备基本框架的vue项目:1)安装vue-cli服务,npm install -g vue-cli回车;2)vue init webpack 项目文件夹名回车;3)会出现一些项目需要设置的东西,一般就是回车或Y或N
- 运行方式,cd到项目文件夹下:npm install回车然后npm run dev
- 一般情况下上一步会给出一个地址,如果只有一个项目在运行,在浏览器输入地址:http://localhost:8080
- 在VS Code中打开文件夹,初次运行一般会有插件提醒,可下载插件,打开选定项目以后就可以进行编辑了
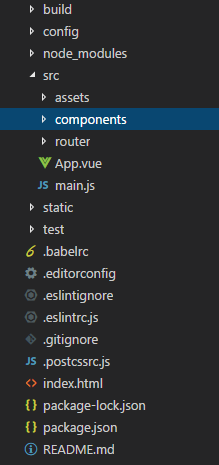
- vue文件基本结构:template(理解为html)、script(理解为js)、style(理解为CSS)
- 以下示例均在默认的src\components\路径下编写
-
数据绑定示例:
创建一个vue文件BindData.vue,从它们不同的注释方式就可以理解各自的作用
<template>
<!--视图-->
  <div class="first">
   <h1>{{bind_data1}}</h1>
   <h2>{{bind_data2}}</h2>
  </div>
</template>

<script>
//name组件名,data数据,methods方法定义,components组件注册
export default{
    name:'BindData',
    data(){
        return{
            bind_data1:"数据绑定测试1",
            bind_data2:"数据绑定测试2"
        }
    }
}
</script>

<style>
/*样式*/
.first{
    color: blue;
    text-shadow: 1px 1px gray;
}
</style>
在HelloWorld.vue中调用,只需要添加两处,即template和script
<template>
  <div class="hello">
    <BindData/>
    <!--其它视图-->
  </div>
</template>

<script>
import BindData from '../components/BindData'
export default {
  //其他属性设置
  components: {
    BindData
  }
}
</script>

<style>
/*其它样式*/
</style>
测试通过

-
事件绑定示例:
v-bind:绑定数据(简写可直接用冒号),v-on:绑定事件(用@简写)
同样的创建BindVue.vue,并像数据绑定一样在HelloWorld.vue里注册进去
<template>
    <div class="second">
        <button class="btn1" v-on:click="singleClick()">{{btn_msg1}}</button>
        <button class="btn2" @mouseenter="enter()" @mouseleave="leave()">{{btn_msg2}}</button>
    </div>
</template>
<script>
export default {
    name:'BindEvent',
    data(){
        return{
            btn_msg1:'按钮单击事件绑定',
            btn_msg2:'鼠标移除移入绑定'
        }
    },
    methods:{
        singleClick:function(){
            this.btn_msg1="单击事件触发,改变文本内容"
        },
        leave:function(){
            this.btn_msg2="鼠标移出了"
        },
        enter:function(){
            this.btn_msg2='鼠标移入了'
        }

    }
}
</script>
<style>
button{
    width: 20rem;
    height: 2.5rem;
}
</style>
测试通过
-
表单信息收集示例:v-model实现双向绑定,通过ref属性取得某个input文本输入框的值
创建GetInput.vue并在HelloWorld中注册使用
<template>
<div class="third">
    输入信息:<input type="text"  name="txt1" ref="txt1"/><input type="button"  value="控制台输出信息" @click="logTxt()"/>
    <h3>双向绑定</h3>
    <input type="text" id="txt2"  v-model="name"/>
    <h1 id="show">{{name}}</h1>
</div>
</template>

<script>

export default{
    name:'GetInput',
    data(){
        return{
           name:"随着文本框输入而改变"
        }
    },
    methods:{
        logTxt:function(){
            var txt1 = this.$refs.txt1.value;//拿到文本框信息
            console.log("####"+txt1 +"#####");
        }
    }
}
</script>

<style>
.third{
    margin: 2rem;
}

</style>
测试通过