场景
Angular介绍、安装Angular Cli、创建Angular项目入门教程:
https://blog.csdn.net/BADAO_LIUMANG_QIZHI/article/details/105570017
Angular新建组件以及组件之间的调用:
https://blog.csdn.net/BADAO_LIUMANG_QIZHI/article/details/105694997
通过以上搭建起Angular项目。
Angular中的路由配置、路由重定向、默认选中路由:
https://blog.csdn.net/BADAO_LIUMANG_QIZHI/article/details/106182994
注:
博客:
https://blog.csdn.net/badao_liumang_qizhi
关注公众号
霸道的程序猿
获取编程相关电子书、教程推送与免费下载。
实现
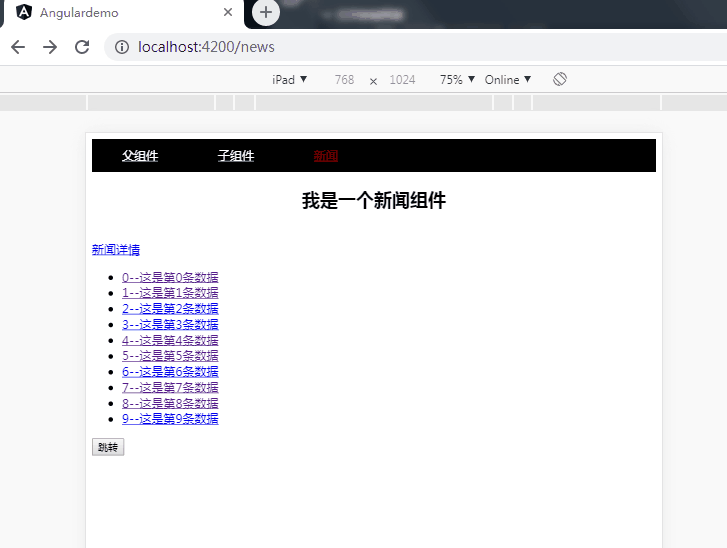
除了在超链接中进行路由跳转,有时还需要在js中控制进行路由的跳转
JS控制路由跳转
首先在app.routing.module.ts中引入要跳转的组件并配置要跳转的路由

const routes: Routes = [
  {path:'parent',component:ParentComponent}
];
然后在页面中添加一个button并添加点击事件
<button (click)="goParent()">跳转</button>
然后在ts中需要引入Router
import {Router} from '@angular/router';
并进行声明
constructor(private router:Router) { }
然后在对应的方法中
  goParent()
  {
    this.router.navigate(['/parent']);
  }
效果
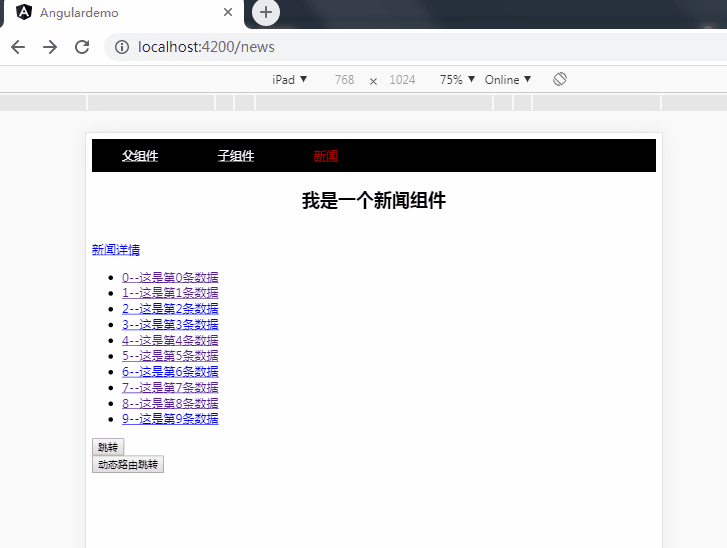
JS控制动态路由
Angular中实现动态路由跳转并传递参数:
https://blog.csdn.net/BADAO_LIUMANG_QIZHI/article/details/106203529
动态路由的配置同上面一样
在页面新建按钮并设置点击事件
<button (click)="goDetails()">动态路由跳转</button>
然后在app.routing.module.ts中引入要跳转的组件并配置动态路由
const routes: Routes = [
  {path:'newsdetail/:id',component:NewsdetailComponent}

];
在点击事件中
  goDetails()
  {
    this.router.navigate(['/newsdetail/','123']);
  }
效果
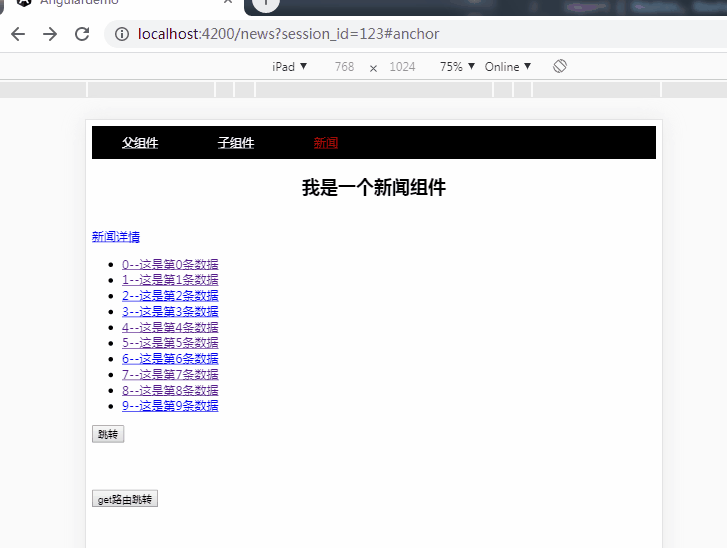
JS控制路由get传值跳转
Angular中实现路由跳转并通过get方式传递参数:
https://blog.csdn.net/BADAO_LIUMANG_QIZHI/article/details/106203220
配置get传值方式同上。
在页面新建按钮并设置点击事件
<button (click)="goDetails2()">get路由跳转</button>
除了需要引入Router外还要引入NavigationExtras
import {Router,NavigationExtras} from '@angular/router';
然后在app.routing.module.ts中引入要跳转的组件并配置路由
const routes: Routes = [
   {path:'newsdetail',component:NewsdetailComponent}
];
在点击事件中
  goDetails2()
  {
    let navigationExtras: NavigationExtras = {
      queryParams: { 'session_id': '123' },
      fragment: 'anchor'
      };

      this.router.navigate(['/newsdetail'],navigationExtras);
  }
效果