文章目录
一、导航部分
1.引入 bootstrap 和 jquery
- 修改以下文件
\resources\views\partials\head.blade.php: - 原文件:
<head>
  <meta charset="utf-8">
  <meta http-equiv="x-ua-compatible" content="ie=edge">
  <meta name="viewport" content="width=device-width, initial-scale=1, shrink-to-fit=no">
  @php wp_head() @endphp
</head>
- 修改为:
<head>
  <meta charset="utf-8">
  <meta http-equiv="x-ua-compatible" content="ie=edge">
  <meta name="viewport" content="width=device-width, initial-scale=1, shrink-to-fit=no">

  <link rel="stylesheet" href="https://cdn.bootcss.com/bootstrap/3.3.7/css/bootstrap.min.css" rel="stylesheet">
  <script src="https://cdn.bootcss.com/jquery/2.1.1/jquery.min.js"></script>
  <script src="https://cdn.bootcss.com/bootstrap/3.3.7/js/bootstrap.min.js"></script>

  @php wp_head() @endphp
</head>
2.添加导航
- 修改以下文件
\resources\views\partials\header.blade.php: - 原文件:
<header class="banner">
  <div class="container">
    <a class="brand" href="{{ home_url('/') }}">{{ get_bloginfo('name', 'display') }}</a>
    <nav class="nav-primary">
      @if (has_nav_menu('primary_navigation'))
        {!! wp_nav_menu(['theme_location' => 'primary_navigation', 'menu_class' => 'nav']) !!}
      @endif
    </nav>
  </div>
</header>
- 修改为:
<header class="banner">
  <div class="container">
      <nav class="nav-primary navbar navbar-static-top navbar-default">

    <div class="navbar-header">
      <button type="button" class="navbar-toggle" data-toggle="collapse" data-target=".navbar-collapse">
        <span class="icon-bar"></span>
        <span class="icon-bar"></span>
        <span class="icon-bar"></span>
      </button>
      <a class="navbar-brand" href="index.html"><img src="http://wordpress.test/media/logo.png" alt="Bootstrappin'" width="120"></a>
    </div>
    <div class="navbar-collapse collapse">
        @if (has_nav_menu('primary_navigation'))
          {!! wp_nav_menu(['theme_location' => 'primary_navigation', 'menu_class' => 'nav navbar-nav']) !!}
        @endif
    </div><!--/.nav-collapse -->
      </nav>
  </div>
</header>
- 此时调试发现小屏button并不显示,但可用,先不管它。。
二、添加首页内容
1.上传并处理图片
- 添加图片:媒体-添加-选择图片拖拽上传
- 为图片添加相应替代文本
2.添加首页内容
- 复制
main的所有代码,不包括main标签(#homepage-feature.carousel、.container) - 先粘贴到其他代码编辑器中,做以下处理
- 修改img的src属性为新链接
- 打开页面-Home-编辑页面,切换至
文本字样的编辑器 - 粘贴在外面编辑的代码
- 更新,查看效果(效果大致都在了)
注:wordpress5.0以上版本可能会出现
更新失败。错误信息:此响应不是合法的JSON响应。,更换Classic Editor插件即可。
三、自定义页面模板
- 在当前模板的
resources\views目录找到template-custom.blade.php模板示例文件 - 复制一份重命名为
page-home.blade.php,点进去,并把模板名(注释里的)修改为如下:
{{--
  Template Name: Homepage Template
--}}
- 打开 页面- Home页面的快速编辑
- 将默认模板修改为Homepage Template,更新
- 编辑器中打开
page-home.blade.php,目前代码如下:
{{--
  Template Name: Homepage Template
--}}

@extends('layouts.app')

@section('content')
  @while(have_posts()) @php the_post() @endphp
    @include('partials.page-header')
    @include('partials.content-page')
  @endwhile
@endsection
- 修改为:
{{--
  Template Name: Homepage Template
--}}

@extends('layouts.app')

@section('content')
  @while(have_posts()) @php the_post() @endphp
    <!-- @include('partials.page-header') -->
    @include('partials.content-page')
  @endwhile
@endsection
- 所作操作如下:
- 注释掉header
四、理解Roots的基准模板
- 打开
resources\views\layouts下的app.blade.php(旧版本是base.php),源码如下:
<!doctype html>
<html {!! get_language_attributes() !!}>
  @include('partials.head')
  <body @php body_class() @endphp>
    @php do_action('get_header') @endphp
    @include('partials.header')
    <div class="wrap container" role="document">
      <div class="content">
        <main class="main">
          @yield('content')
        </main>
        @if (App\display_sidebar())
          <aside class="sidebar">
            @include('partials.sidebar')
          </aside>
        @endif
      </div>
    </div>
    @php do_action('get_footer') @endphp
    @include('partials.footer')
    @php wp_footer() @endphp
  </body>
</html>
- 简单理解:
- @include(‘partials.head’)
- @include(‘partials.header’)
- @include(‘partials.sidebar’)
- @include(‘partials.footer’)
- .container:用来约束宽度,避免全宽
- App\display_sidebar():app/helpers.php
PHP laravel系列之Blade模版 - 蓝空 - 博客园
https://www.cnblogs.com/zswbky/p/8454120.html
五、创建自定义的基本模板
- 把
app.blade.php复制一份,重命名为app-page-home.blade.php - 去掉带
wrap类的container类:<div class="wrap" role="document"> - 修改
page-home.blade.php的@extends('layouts.app')为@extends('layouts.app-page-home') - 刷新查看效果:传送带部分与屏幕等宽了
六、在自定义结构中使用自定义栏目
- 打开Home页面的编辑界面
- 复制四个img标签,为每一个创建自定义栏目命名为
item1~4(自定义栏目如找不到可在右上角显示选项打开) - 分栏内容分别命名为column1~3,内容为每个
.col-sm-4的所有内容。 - 更新页面
七、创建自定义的内容模板
- 复制
content-page.blade.php重命名为content-home.blade.php,原内容如下:
@php the_content() @endphp
{!! wp_link_pages(['echo' => 0, 'before' => '<nav class="page-nav"><p>' . __('Pages:', 'sage'), 'after' => '</p></nav>']) !!}
- 去掉页面编辑器中的内容:
@php the_content() @endphp - 去掉分页链接:
{!! wp_link_pages(['echo' => 0, 'before' => '<nav class="page-nav"><p>' . __('Pages:', 'sage'), 'after' => '</p></nav>']) !!} - 输入
Hello this is a test!作为测试内容 - 修改
page-home.blade.php把@include('partials.content-page')修改为:@include('partials.content-home') - 保存修改,刷新主页
八、通过自定义栏目构建传送带
- 在
content-home.blade.php中删掉测试代码,添加如下内容:
    <div id="homepage-feature" class="carousel slide">
	    <ol class="carousel-indicators">
	        <li data-target="#homepage-feature" data-slide-to="0" class="active"></li>
	        <li data-target="#homepage-feature" data-slide-to="1"></li>
	        <li data-target="#homepage-feature" data-slide-to="2"></li>
	        <li data-target="#homepage-feature" data-slide-to="3"></li>
	    </ol>

	    <!-- Wrapper for slides -->
	    <div class="carousel-inner">
	        <div class="item active">
				<?php $item="item1"; echo get_post_meta($post->ID, $item, true); ?>
			</div>
	        <div class="item">
				<?php $item="item2"; echo get_post_meta($post->ID, $item, true); ?>
			</div>
	        <div class="item">
				<?php $item="item3"; echo get_post_meta($post->ID, $item, true); ?>
			</div>
	        <div class="item">
				<?php $item="item4"; echo get_post_meta($post->ID, $item, true); ?>
			</div>
		</div><!-- /.carousel-inner -->

	    <!-- Controls -->
	    <a class="left carousel-control" href="#homepage-feature" data-slide="prev">
	        <span class="icon fa fa-chevron-left"></span>
	    </a>
	    <a class="right carousel-control" href="#homepage-feature" data-slide="next">
	        <span class="icon fa fa-chevron-right"></span>
	    </a>
	</div><!-- /#homepage-feature.carousel -->
	<div class="page-contents container">
		<div class="row">
			<div class="col-sm-4">
			    <?php $column="column1"; echo get_post_meta($post->ID, $column, true); ?>
			</div>
			<div class="col-sm-4">
			    <?php $column="column2"; echo get_post_meta($post->ID, $column, true); ?>
			</div>
			<div class="col-sm-4">
			    <?php $column="column3"; echo get_post_meta($post->ID, $column, true); ?>
			</div>
		</div><!-- /.row -->
	</div><!-- /.container -->
- 其中
<?php $item="item1"; echo get_post_meta($post->ID, $item, true); ?>为自定义栏目创建了一个php变量,并在get_post_meta()模板标签中引用了它,参数列表$post->ID, $item, true表示取得当前页面名为item1的栏目,并返回其字符串表示(false则返回数组) - 刷新首页查看效果(效果成功显示)
九、加入页脚内容
- 打开仪表盘的 外观-小工具,最右边可以看到页脚,点开,把文本拖进去,代码片段(如下)复制到大文本框,标题空着,保存
<p><a href="index.html"><img src="img/logo.png" width="80" alt="Bootstrappin'"></a></p>

<ul class="social">
   <li><a href="#" title="Twitter Profile"><span class="icon fa fa-twitter"></span></a></li>
   <li><a href="#" title="Facebook Page"><span class="icon fa fa-facebook"></span></a></li>
   <li><a href="#" title="LinkedIn Profile"><span class="icon fa fa-linkedin"></span></a></li>
   <li><a href="#" title="Google+ Profile"><span class="icon fa fa-google-plus"></span></a></li>
   <li><a href="#" title="GitHub Profile"><span class="icon fa fa-github-alt"></span></a></li>
</ul>
十、更换我们的assets资源
文档:https://roots.io/sage/docs/theme-development-and-building/#theme-assets
config.json是assets的清单文件,默认情况下
{
  "entry": {
    "main": [
      "./scripts/main.js",
      "./styles/main.scss"
    ],
    "customizer": [
      "./scripts/customizer.js"
    ]
  },
  "publicPath": "/app/themes/sage",
  "devUrl": "http://example.test",
  "proxyUrl": "http://localhost:3000",
  "cacheBusting": "[name]_[hash:8]",
  "watch": [
    "app/**/*.php",
    "config/**/*.php",
    "resources/views/**/*.php"
  ]
}
- 源assets文件夹复制一份重命名为
__ROOTS_ASSETS_ORIGINAL - build不动
- fonts和img直接全复制过来
main.js代码直接复制进默认main.jsplugins.js直接复制到script文件夹- main.css直接复制到style文件夹(会自动“挂载”到main.scss文件下)
- 在
config.json的"entry"下新增如下内容
"entry": {
    "main": [
      "./scripts/main.js",
      "./styles/main.scss",
      "./styles/main.css"
    ],
    "customizer": [
      "./scripts/customizer.js"
    ],
    "plugins": [
      "./scripts/plugins.js"
    ]
  },
在app/setup.php的add_action('wp_enqueue_scripts', function () {}, 100);方法中添加:
add_action('wp_enqueue_scripts', function () {
    wp_enqueue_style('sage/main.css', asset_path('styles/main.css'), false, null);
    wp_enqueue_script('sage/main.js', asset_path('scripts/main.js'), ['jquery'], null, true);
    wp_enqueue_script('sage/plugins.js', asset_path('scripts/plugins.js'), ['jquery'], null, true);

    if (is_single() && comments_open() && get_option('thread_comments')) {
        wp_enqueue_script('comment-reply');
    }
}, 100);
- 在装好如下环境条件下:
- npm
- cnpm(npm install -g cnpm --registry=https://registry.npm.taobao.org)
- node
- webpack(cnpm install -g webpack)
- python2
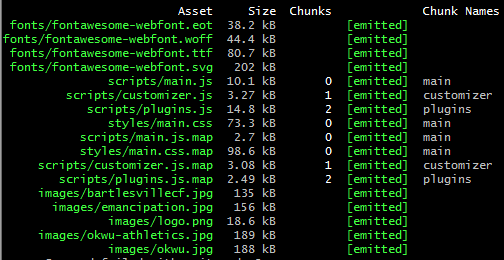
- 在自定义主题根目录运行:yarn build,得到结果如下:
- 刷新查看首页
wordpress主题添加资源文件(js、css)还是不熟悉
- 暂停
拓展:
