环境:WIN7 Python3.6.2
教程:https://www.pyimagesearch.com/2018/09/24/opencv-face-recognition/
本博客参考:http://baijiahao.baidu.com/s?id=1604481732334342594&wfr=spider&for=pc
一、构建采集人脸数据集的python脚本build_face_dataset.py
- 第一段程序为两个命令行参数的配置
- 命令行参数可以通过 argparse 库在运行时解析,这个库是包含在 Python 安装中的。
我们有两个命令行参数:- –cascade:硬盘中的 Haar cascade 文件路径,用于 OpenCV 检测人脸
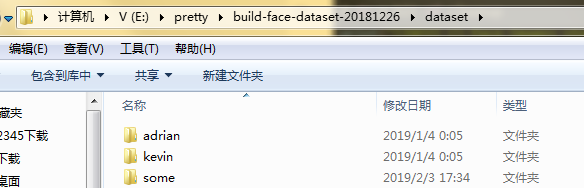
- –output:输出的文件路径。人脸图像将会被保存到该路径中,因此最好按照人名将人脸分类保存,比如将『John Smith』的人脸图像保存到 dataset/john_smith 的路径下,此路径下的文件需要自己自行建立
- 命令行参数可以通过 argparse 库在运行时解析,这个库是包含在 Python 安装中的。
- 第二段程序加载人脸的 Haar cascade 文件:
- 程序第21行加载了 OpenCV 的 Haar 人脸检测器 detector。 这个 detector 将会在接下来每帧的循环中检测人脸
- 第三段程序为初始化视频流:
- 在 27 行会初始化并开启视频流 VideoStreem;(参数src设置为1,使用内置摄像头)
- 如果使用的是树莓派的话,注释掉第 27 行的代码,使用第 28 行的代码;
- 第 29 行让摄像头先热个身,暂停两秒钟;
- 第30行代码初始化了 total 计数器来表示保存的人脸图片的数量。
- 第四段程序用来对视频流的每帧图像进行处理:
- 在第 33 行, 开始循环(循环在『q』键被按下之后结束);
- 第37-39 行,捕捉一帧画面:frame,创建一个copy,改变大小。
- 接下来进行人脸检测
- 程序第42行使用 detectMultiScale 方法在每帧画面中检测人脸,这个函数需要如下参数:
- image:一个灰度图像
- scaleFactor:指定在每个维度图像尺寸减少的比例
- minNeighbor:该参数指定候选的检测框数量,以保证检测是有效的
- minSize:最小的人脸图像尺寸
- 在某些特殊场景下,可能需要精调这些参数以减少 false positive 的数量或提高人脸的检测率,但是对于一些普通的人脸检测任务来说,这些参数就可以很好的工作了。
- 人脸检测的结果被保存在一个 rects 的列表中(矩形检测框)。为了将这些矩形画在图像上,在 47、48 行中遍历所有矩形框,并将他们画在图片上。
- 最后一步就是将检测框显示在屏幕上,以及解决按键退出的问题:
- 第 51 行执行将该帧图像显示在屏幕上
- 第 52 行执行捕捉键盘指令
- cv2.waitKey(1) 1为参数,单位毫秒,表示间隔时间
- 0xFF是十六进制常数,二进制值为11111111。通过使用位和(和)这个常数,它只留下原始的最后8位,此处是防止BUG。
- 『k』、『q』键盘指令对应不同的命令:
- k:保留该帧图像并保存到硬盘中(53-56 行),同时增加 total 计数器。对每个想要保存的图像帧,都需要按『k』来保存。为了能够更好地训练模型,最好要保存不同角度、人脸在画面不同位置、带/不带眼镜的图像。
- q:退出循环,退出脚本
- 第五段程序用来将保存的图片数量打印到屏幕上,并清空缓存:
- 如此,采集人脸数据集的python脚本就算构建完成了。
# USAGE
# python build_face_dataset.py --cascade haarcascade_frontalface_default.xml --output dataset/adrian

# import the necessary packages
from imutils.video import VideoStream
import argparse
import imutils
import time
import cv2
import os

# construct the argument parser and parse the arguments
ap = argparse.ArgumentParser()
ap.add_argument("-c", "--cascade", required=True,
	help = "path to where the face cascade resides")
ap.add_argument("-o", "--output", required=True,
	help="path to output directory")
args = vars(ap.parse_args())

# load OpenCV's Haar cascade for face detection from disk
detector = cv2.CascadeClassifier(args["cascade"])

# initialize the video stream, allow the camera sensor to warm up,
# and initialize the total number of example faces written to disk
# thus far
print("[INFO] starting video stream...")
vs = VideoStream(src=1).start()
# vs = VideoStream(usePiCamera=True).start()
time.sleep(2.0)
total = 0

# loop over the frames from the video stream
while True:
	# grab the frame from the threaded video stream, clone it, (just
	# in case we want to write it to disk), and then resize the frame
	# so we can apply face detection faster
	frame = vs.read()
	orig = frame.copy()
	frame = imutils.resize(frame, width=400)

	# detect faces in the grayscale frame
	rects = detector.detectMultiScale(
		cv2.cvtColor(frame, cv2.COLOR_BGR2GRAY), scaleFactor=1.1,
		minNeighbors=5, minSize=(30, 30))

	# loop over the face detections and draw them on the frame
	for (x, y, w, h) in rects:
		cv2.rectangle(frame, (x, y), (x + w, y + h), (0, 255, 0), 2)

	# show the output frame
	cv2.imshow("Frame", frame)
	key = cv2.waitKey(1) & 0xFF

	# if the `k` key was pressed, write the *original* frame to disk
	# so we can later process it and use it for face recognition
	if key == ord('k') or key == 'k':
		p = os.path.sep.join([args["output"], "{}.png".format(
			str(total).zfill(5))])
		cv2.imwrite(p, orig)
		total += 1

	# if the `q` key was pressed, break from the loop
	elif key == ord('q') or key == 'q':
		break

# do a bit of cleanup
print("[INFO] {} face images stored".format(total))
print("[INFO] cleaning up...")
cv2.destroyAllWindows()
vs.stop()
二、运行脚本程序
- 在包含脚本程序以及Haar cascade 文件和dataset文件的路径下开启cmd,运行如下命令

-
首先激活自己配置的环境,如 activate py36

-
然后输入python build_face_dataset.py -c haarcascade_frontalface_default.xml -o dataset/some-name

-
其中some-name需要更改为被检测人的姓名,同时注意也需要在运行上述命令前手动在dataset下创建同样姓名的文件夹
-
运行之后按k保存图片,按q退出


-
三、附录
- 此程序的requirements.txt文件
absl-py==0.7.0
astor==0.7.1
backcall==0.1.0
bleach==3.1.0
certifi==2018.11.29
chardet==3.0.4
cloudpickle==0.7.0
colorama==0.4.1
cycler==0.10.0
dask==1.1.1
decorator==4.3.2
defusedxml==0.5.0
entrypoints==0.3
gast==0.2.2
grpcio==1.18.0
h5py==2.9.0
idna==2.8
imageio==2.4.1
imutils==0.5.2
ipykernel==5.1.0
ipython==7.2.0
ipython-genutils==0.2.0
ipywidgets==7.4.2
jedi==0.13.2
Jinja2==2.10
jsonschema==2.6.0
jupyter==1.0.0
jupyter-client==5.2.4
jupyter-console==6.0.0
jupyter-core==4.4.0
Keras==2.2.4
Keras-Applications==1.0.7
Keras-Preprocessing==1.0.8
kiwisolver==1.0.1
Markdown==3.0.1
MarkupSafe==1.1.0
matplotlib==3.0.2
mistune==0.8.4
moviepy==0.2.3.5
nbconvert==5.4.0
nbformat==4.4.0
networkx==2.2
notebook==5.7.4
numpy==1.16.1
opencv-contrib-python==4.0.0.21
opencv-python==4.0.0.21
pandocfilters==1.4.2
parso==0.3.2
pickleshare==0.7.5
Pillow==5.4.1
prometheus-client==0.5.0
prompt-toolkit==2.0.8
protobuf==3.6.1
Pygments==2.3.1
pyparsing==2.3.1
python-dateutil==2.7.5
PyWavelets==1.0.1
pywinpty==0.5.5
PyYAML==3.13
pyzmq==17.1.2
qtconsole==4.4.3
requests==2.21.0
scikit-image==0.14.2
scikit-learn==0.20.2
scipy==1.2.0
Send2Trash==1.5.0
six==1.12.0
tensorboard==1.12.2
tensorflow==1.12.0
termcolor==1.1.0
terminado==0.8.1
testpath==0.4.2
toolz==0.9.0
tornado==5.1.1
tqdm==4.30.0
traitlets==4.3.2
urllib3==1.24.1
wcwidth==0.1.7
webencodings==0.5.1
Werkzeug==0.14.1
widgetsnbextension==3.4.2
wincertstore==0.2
- 或者此requirements.txt文件也可以
numpy
scipy
scikit-learn
scikit-image
matplotlib
jupyter
opencv-python
opencv-contrib-python
pillow
moviepy
imutils
tensorflow
keras
requests
