Spring Cloud Eureka:服务注册与发现
Spring Cloud Eureka是Spring Cloud Netflix 子项目的核心组件之一,主要用于微服务架构中的服务治理。 本文将对搭建Eureka注册中心,搭建Eureka客户端,搭建Eureka集群及给Eureka注册中心添加登录认证进行介绍。
Eureka简介
在微服务架构中往往会有一个注册中心,每个微服务都会向注册中心去注册自己的地址及端口信息,注册中心维护着服务名称与服务实例的对应关系。每个微服务都会定时从注册中心获取服务列表,同时汇报自己的运行情况,这样当有的服务需要调用其他服务时,就可以从自己获取到的服务列表中获取实例地址进行调用,Eureka实现了这套服务注册与发现机制。
搭建Eureka注册中心
这里我们以创建并运行Eureka注册中心来看看在IDEA中创建并运行SpringCloud应用的正确姿势。
使用IDEA来创建SpringCloud应用
-
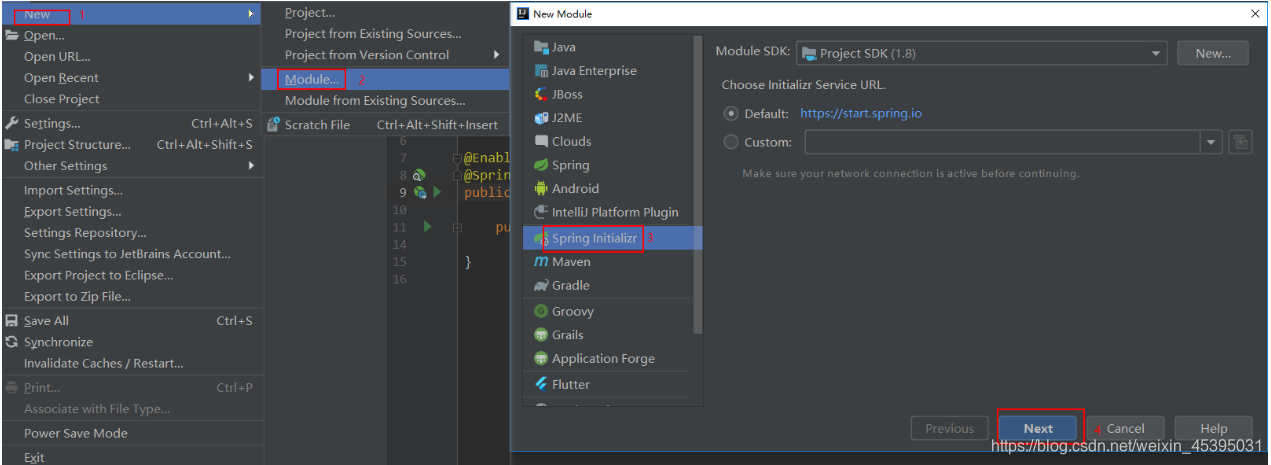
创建一个eureka-server模块,并使用Spring Initializer初始化一个SpringBoot项目
-
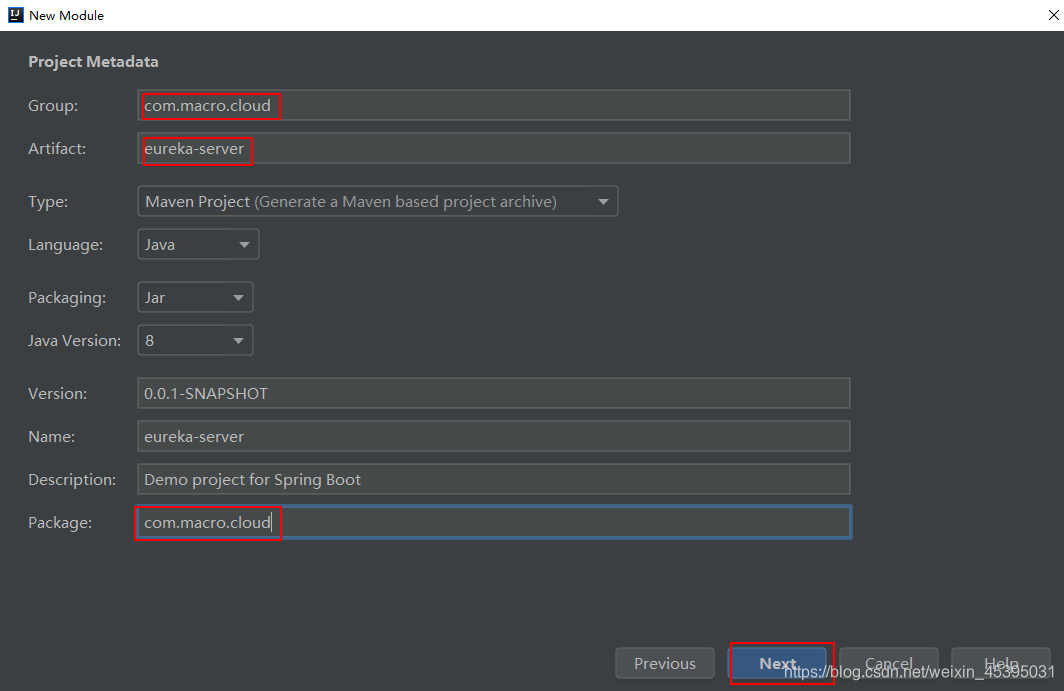
填写应用信息
-
选择你需要的SpringCloud组件进行创建

-
创建完成 pom.xml文件中会存在 eureka-server的依赖
<dependency>
    <groupId>org.springframework.cloud</groupId>
    <artifactId>spring-cloud-starter-netflix-eureka-server</artifactId>
</dependency>
- 在启动类上添加 @EnableEurekaServer注解来启用Euerka注册中心功能
@EnableEurekaServer
@SpringBootApplication
public class EurekaServerApplication {

    public static void main(String[] args) {
        SpringApplication.run(EurekaServerApplication.class, args);
    }

}
- 配置文件 application.properties中添加Eureka注册中心的配置
# 指定服务名称
spring.application.name=eureka-server

# 应用服务web访问端口
server.port=8001

# Eureka注册中心的配置
eureka.instance.hostname=localhost    # 指定主机地址
eureka.client.fetch-registry=false   # 指定是否要从注册中心获取服务(注册中心不需要开启)
eureka.client.register-with-eureka=false   # 指定是否要注册到注册中心(注册中心不需要开启)
eureka.server.enable-self-preservation=false   # 关闭保护模式
使用IDEA的Run Dashboard来运行SpringCloud应用
idea Run Dashboard 安装
https://blog.csdn.net/weixin_45395031/article/details/104532287
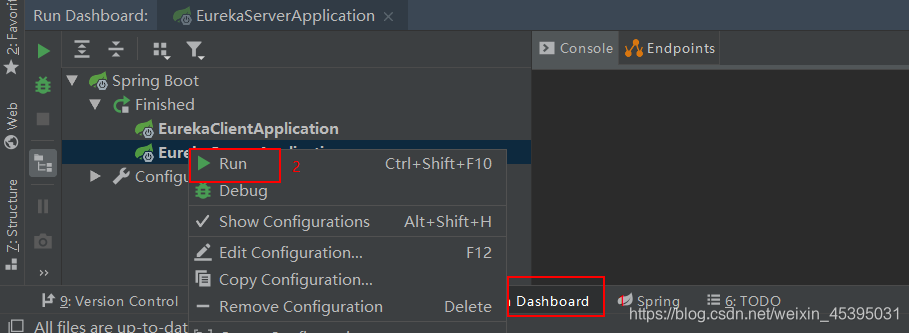
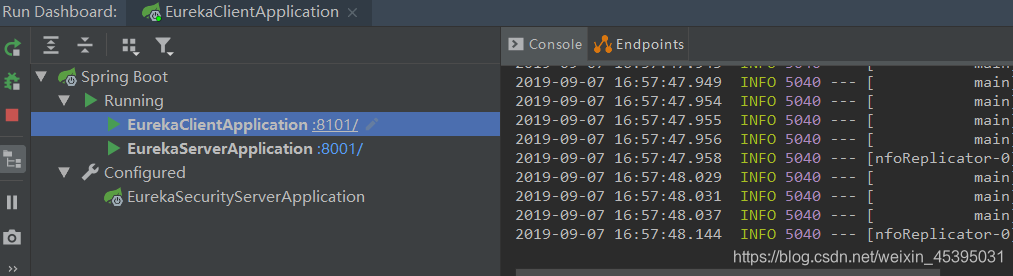
此时服务已经创建完成,点击启动类的main方法就可以运行了。但是在微服务项目中我们会启动很多服务,为了便于管理,我们使用IDEA的Run Dashboard来启动。
- 打开Run Dashboard,默认情况下,当IDEA检查到你的项目中有SpringBoot应用时,会提示你开启,如果你没开启,可以用以下方法开启。

- 运行SpringCloud应用
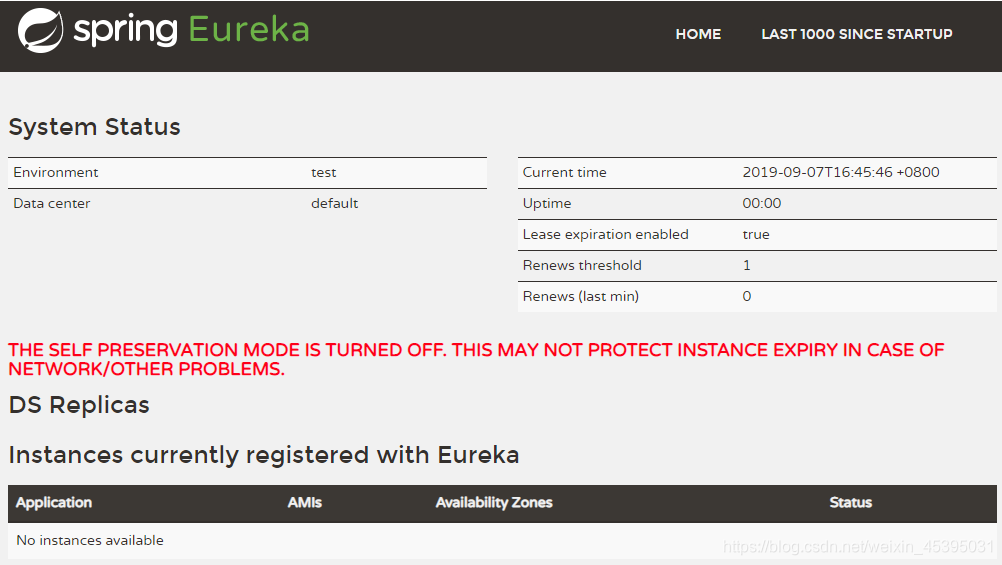
- 运行完成后访问地址http://localhost:8001/可以看到Eureka注册中心的界面
-------------------------------------------------------------
搭建Eureka客户端
- 新建一个eureka-client模块,并在pom.xml中添加如下依赖
<dependency>
    <groupId>org.springframework.cloud</groupId>
    <artifactId>spring-cloud-starter-netflix-eureka-client</artifactId>
</dependency>

<dependency>
    <groupId>org.springframework.boot</groupId>
    <artifactId>spring-boot-starter-web</artifactId>
</dependency>
- 在启动类上添加 @EnableDiscoveryClient注解表明是一个Eureka客户端
@EnableDiscoveryClient
@SpringBootApplication
public class EurekaClientApplication {

    public static void main(String[] args) {
        SpringApplication.run(EurekaClientApplication.class, args);
    }

}
- 在配置文件application.properties中添加Eureka客户端的配置
# 服务名称
spring.application.name=eureka-client

# 应用服务web访问端口
server.port=8101

# Eureka注册中心的配置
eureka.client.register-with-eureka=true   # 注册到Eureka的注册中心
eureka.client.fetch-registry=true   # 获取注册实例列表
eureka.client.service-url.defaultZone=http://localhost:8001/eureka/   # 配置注册中心地址
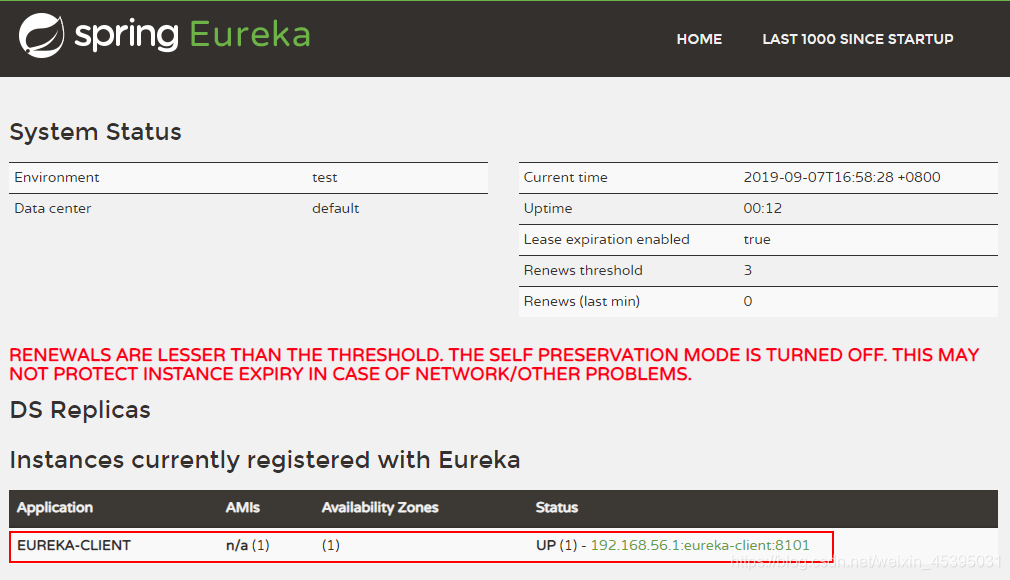
- 运行eureka-client
- 查看注册中心http://localhost:8001/发现Eureka客户端已经成功注册
-------------------------------
搭建Eureka注册中心集群
搭建两个注册中心
由于所有服务都会注册到注册中心去,服务之间的调用都是通过从注册中心获取的服务列表来调用,注册中心一旦宕机,所有服务调用都会出现问题。所以我们需要多个注册中心组成集群来提供服务,下面将搭建一个双节点的注册中心集群。
给eureka-sever添加配置文件application-replica1.properties配置第一个注册中心
# 指定服务名称
spring.application.name=eureka-server

# 应用服务web访问端口
server.port=8002

# Eureka注册中心的配置
spring.application.name=eureka-replica1    # 服务名称
eureka.client.register-with-eureka=true     # 注册到Eureka的注册中心
eureka.client.fetch-registry=true    # 获取注册实例列表

# 注册到另一个Eureka注册中心
eureka.client.serviceUrl.defaultZone=http://replica2:8003/eureka/
给eureka-sever添加配置文件application-replica2.properties配置第二个注册中心
# 指定服务名称
spring.application.name=eureka-server

# 应用服务web访问端口
server.port=8003

# Eureka注册中心的配置
spring.application.name=eureka-replica2    # 服务名称
eureka.client.register-with-eureka=true     # 注册到Eureka的注册中心
eureka.client.fetch-registry=true    # 获取注册实例列表

# 注册到另一个Eureka注册中心
eureka.client.serviceUrl.defaultZone=http://replica1:8002/eureka/
这里我们通过两个注册中心互相注册,搭建了注册中心的双节点集群,由于defaultZone使用了域名,所以还需在本机的host文件中配置一下。
- 修改本地host文件
127.0.0.1 replica1
127.0.0.1 replica2
运行Eureka注册中心集群
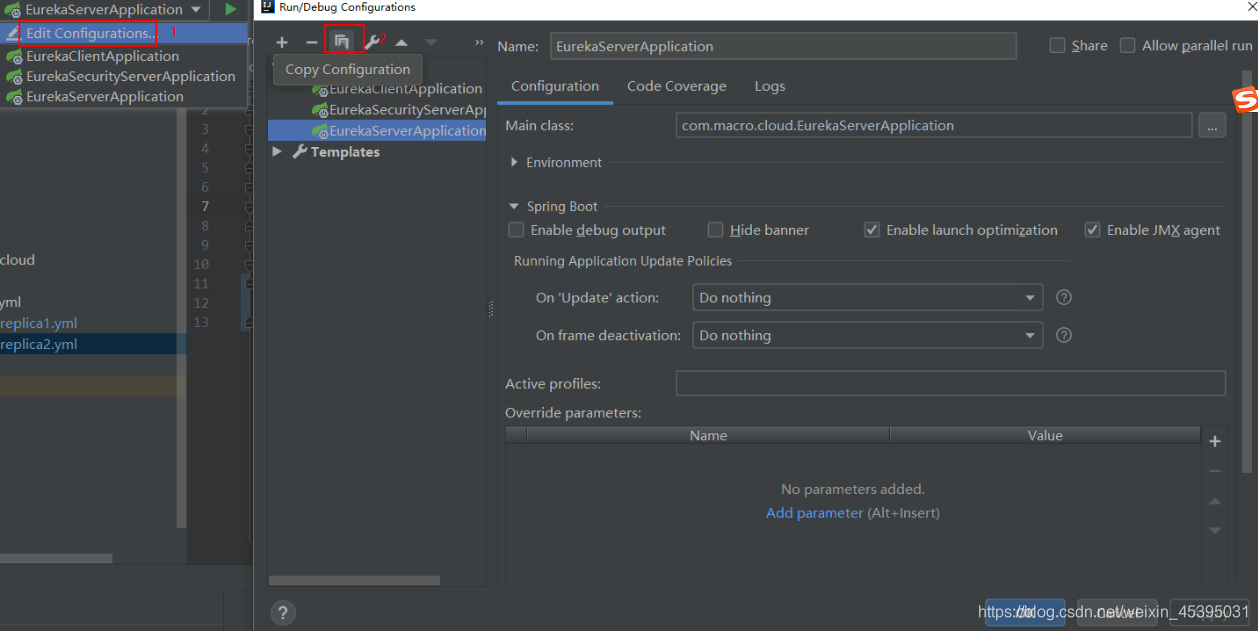
在IDEA中我们可以通过使用不同的配置文件来启动同一个SpringBoot应用。
- 添加两个配置,分别以application-replica1.yml和application-replica2.yml来启动eureka-server
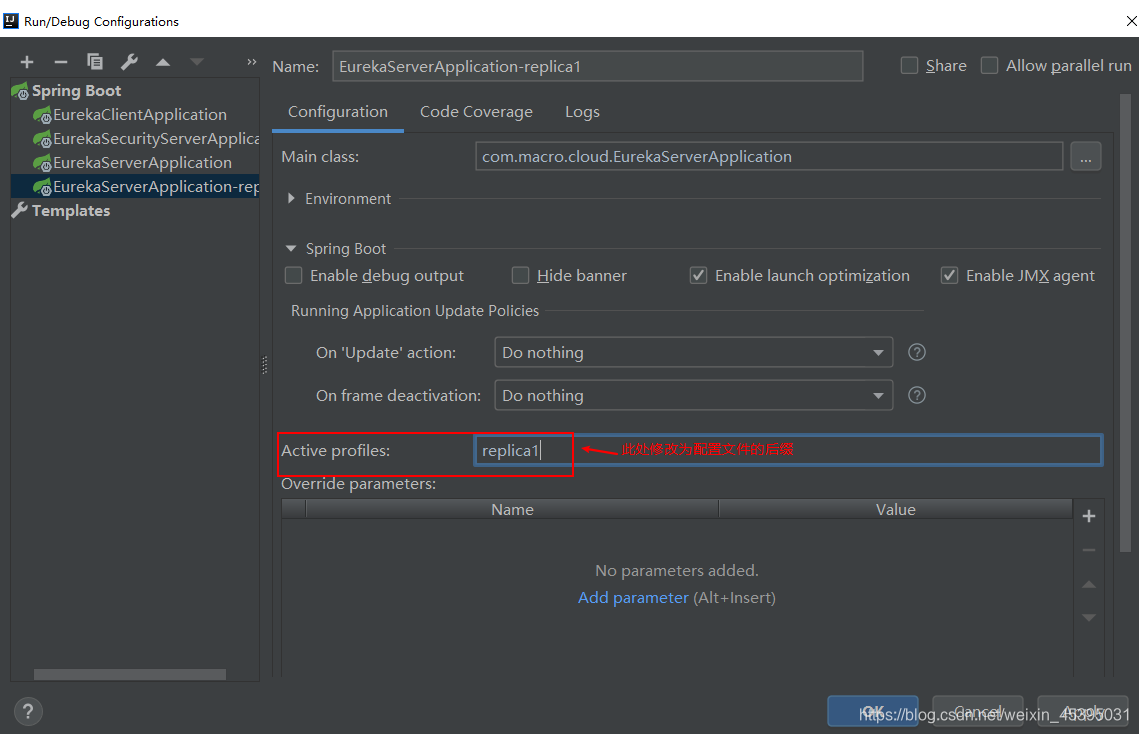
从原启动配置中复制一个出来
配置启动的配置文件
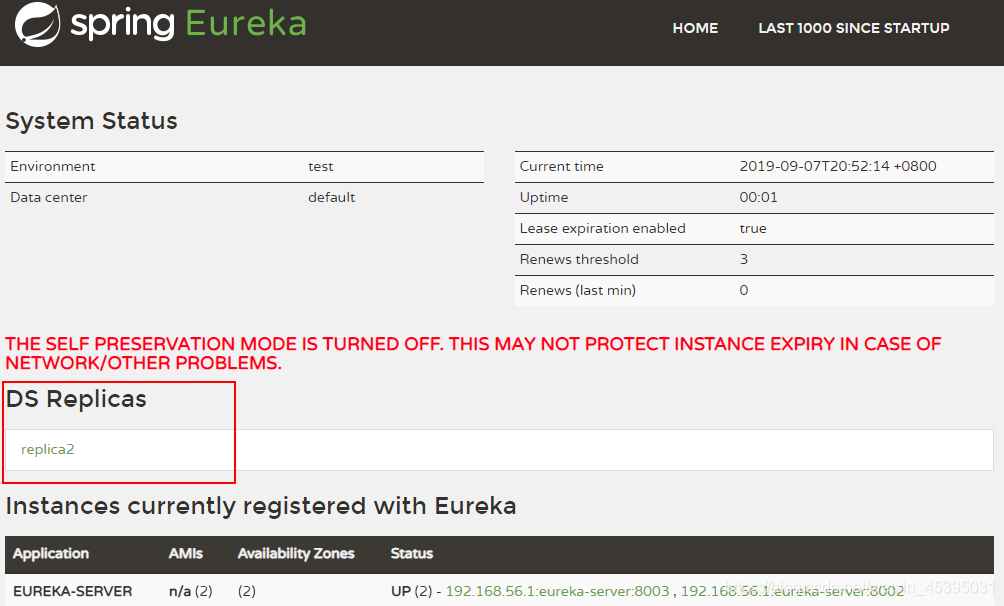
- 启动两个eureka-server,访问其中一个注册中心http://replica1:8002/发现另一个已经成为其备份
- 修改Eureka-client,让其连接到集群
添加eureka-client的配置文件application-replica.yml,让其同时注册到两个注册中心。
# 服务名称
spring.application.name=eureka-client

# 应用服务web访问端口
server.port=8102

# 注册到Eureka的注册中心
eureka.client.register-with-eureka=true
# 获取注册实例列表
eureka.client.fetch-registry=true
# 配置注册中心地址  (同时注册两个注册中心)
eureka.client.service-url.defaultZone=http://replica1:8002/eureka/,http://replica2:8003/eureka/
以该配置文件启动后访问任意一个注册中心节点都可以看到eureka-client

给Eureka注册中心添加认证
创建一个eureka-security-server模块,在pom.xml中添加以下依赖
需要添加SpringSecurity模块。
<dependency>
    <groupId>org.springframework.cloud</groupId>
    <artifactId>spring-cloud-starter-netflix-eureka-server</artifactId>
</dependency>

<dependency>
    <groupId>org.springframework.boot</groupId>
    <artifactId>spring-boot-starter-security</artifactId>
</dependency>
添加application.yml配置文件
主要是配置了登录注册中心的用户名和密码。
# 服务名称
spring.application.name=eureka-security-server

# 应用服务web访问端口
server.port=8004

eureka.instance.hostname=localhost    # 指定主机地址
eureka.client.register-with-eureka=false
eureka.client.fetch-registry=false

# 配置SpringSecurity登录用户名和密码
spring.security.user.name=xin
spring.security.user.password=1234
添加Java配置WebSecurityConfig
默认情况下添加SpringSecurity依赖的应用每个请求都需要添加CSRF token才能访问,Eureka客户端注册时并不会添加,所以需要配置/eureka/**路径不需要CSRF token。
@EnableWebSecurity
public class WebSecurityConfig extends WebSecurityConfigurerAdapter {

    @Override
    protected void configure(HttpSecurity http) throws Exception {
        http.csrf().ignoringAntMatchers("/eureka/**");
        super.configure(http);
    }
}
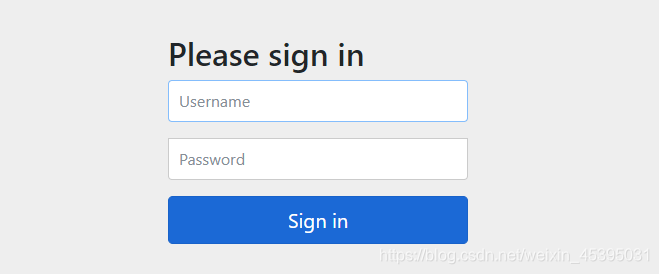
运行eureka-security-server,访问http://localhost:8004发现需要登录认证
eureka-client注册到有登录认证的注册中心
配置文件中需要修改注册中心地址格式
http://${username}:${password}@${hostname}:${port}/eureka/
添加application-security.yml配置文件,按格式修改用户名和密码
# 注册到Eureka的注册中心
eureka.client.register-with-eureka=true
# 获取注册实例列表
eureka.client.fetch-registry=true
#
eureka.client.serviceUrl.defaultZone=http://macro:123456@localhost:8004/eureka/
Eureka的常用配置
# 指定服务名称
spring.application.name=eureka-server

# 应用服务web访问端口
server.port=8001

# eureka客户端配置
## 是否将自己注册到eureka服务端上去
eureka.client.register-with-eureka=true
## 是否获取eureka服务端上注册的服务列表
eureka.client.fetch-registry=true
# 关闭保护模式(开启上边为true)
eureka.server.enable-self-preservation=false
## 指定注册中心地址
eureka.client.serviceUrl.defaultZone=http://localhost:8001/eureka/
# 配置注册中心地址  (同时注册两个注册中心)
eureka.client.service-url.defaultZone=http://replica1:8002/eureka/,http://replica2:8003/eureka/

## 启用eureka客户端
eureka.client.enabled=true
## 定义去eureka服务端获取服务列表的时间间隔
eureka.client.registry-fetch-interval-seconds=30

# eureka客户端实例配置
## 定义服务多久去注册中心续约
eureka.instance.lease-renewal-interval-in-seconds=30
## 定义服务多久不去续约认为服务失效
eureka.instance.lease-expiration-duration-in-seconds=90
## 所在区域 hebei
eureka.instance.metadata-map.zone=jiangsu
## 服务主机名称
eureka.instance.hostname=localhost
## 是否优先使用ip来作为主机名
eureka.instance.prefer-ip-address=false

# eureka服务端配置
## 关闭eureka服务端的保护机制
eureka.server.enable-self-preservation=false
依赖
<dependency>
    <groupId>org.springframework.cloud</groupId>
    <artifactId>spring-cloud-starter-netflix-eureka-server</artifactId>
</dependency>

<dependency>
    <groupId>org.springframework.cloud</groupId>
    <artifactId>spring-cloud-starter-netflix-eureka-client</artifactId>
</dependency>
1、在启动类上添加 @EnableEurekaServer 注解来启用Euerka注册中心功能
2、在启动类上添加 @EnableDiscoveryClient 注解表明是一个Eureka客户端
@EnableEurekaServer
@EnableDiscoveryClient
@SpringBootApplication
public class EurekaServerApplication {

    public static void main(String[] args) {
        SpringApplication.run(EurekaServerApplication.class, args);
    }

}
