Drawer for Android

上述为真机运行效果
布局部分(.xml)
activity_main.xml
<?xml version="1.0" encoding="utf-8"?>
<androidx.drawerlayout.widget.DrawerLayout xmlns:android="http://schemas.android.com/apk/res/android"
    xmlns:tools="http://schemas.android.com/tools"
    android:id="@+id/drawer_layout"
    android:layout_width="match_parent"
    android:layout_height="match_parent"
    tools:context=".MainActivity">
    <!--主页-->
    <LinearLayout xmlns:android="http://schemas.android.com/apk/res/android"
        android:layout_width="match_parent"
        android:layout_height="match_parent"
        android:background="#f6f5ec"
        android:orientation="vertical">
        <LinearLayout
            android:layout_width="match_parent"
            android:layout_height="50dp"
            android:background="#7adfb8"
            android:orientation="horizontal">

            <ImageView
                android:id="@+id/img"
                android:layout_width="0dp"
                android:layout_weight="2"
                android:layout_height="match_parent"
                android:src="@mipmap/ic_launcher_round"
                />

            <TextView
                android:layout_width="0dp"
                android:layout_weight="10"
                android:layout_height="match_parent"
                android:layout_marginTop="5dp"
                android:gravity="center"
                android:text="主页"
                android:textColor="#ffffff"
                android:textSize="20dp" />
            <ImageView
                android:src="@drawable/ic_launcher_foreground"
                android:layout_width="0dp"
                android:layout_weight="2"
                android:layout_height="match_parent"
                />

        </LinearLayout>
    </LinearLayout>

    <!--左滑栏-->
    <com.google.android.material.navigation.NavigationView xmlns:app="http://schemas.android.com/apk/res-auto"
        android:id="@+id/navigation_view"
        android:layout_width="wrap_content"
        android:layout_height="match_parent"
        android:layout_gravity="left"
        android:fitsSystemWindows="true"
        app:headerLayout="@layout/head_view"
        app:menu="@menu/new_menu" />

</androidx.drawerlayout.widget.DrawerLayout>
这里用的 androidx 和 Google 的 navigation,注意好你自己用的是什么,maybe support maybe others,,一定对应好,不然不行(闪退)。
navigation 我导入的此依赖
implementation 'com.google.android.material:material:1.1.0'Next

head_view.xml
<?xml version="1.0" encoding="utf-8"?>
<LinearLayout xmlns:android="http://schemas.android.com/apk/res/android"
    android:layout_width="match_parent"
    android:layout_height="match_parent"
    android:background="#7adfb8"
    android:gravity="center"
    android:orientation="vertical">

    <LinearLayout

        android:layout_width="match_parent"
        android:layout_height="75dp"
        android:orientation="horizontal">

        <ImageView
            android:id="@+id/userHeadImg"
            android:layout_width="72dp"
            android:layout_height="72dp"
            android:layout_marginLeft="20dp"
            android:src="@mipmap/ic_launcher_round" />

        <LinearLayout
            android:layout_width="match_parent"
            android:layout_height="match_parent"
            android:orientation="vertical">

            <TextView
                android:id="@+id/nickName"
                android:layout_width="match_parent"
                android:layout_height="0dp"
                android:layout_marginLeft="20dp"
                android:layout_weight="1"
                android:text="SkySong"
                android:textColor="#ffffff"
                android:textSize="16sp" />

            <TextView
                android:layout_width="match_parent"
                android:layout_height="0dp"
                android:layout_marginLeft="20dp"
                android:layout_weight="1"
                android:text="光阴荏苒,我呵呵"
                android:textColor="#ffffff"
                android:textSize="16sp" />
        </LinearLayout>

    </LinearLayout>

    <TextView
        android:layout_width="wrap_content"
        android:layout_height="wrap_content"
        android:layout_marginTop="12dp"
        android:layout_marginBottom="18dp"
        android:text="努力的道路依旧长,风景还有很多要赏."
        android:textColor="#ffffff"
        android:textSize="16sp" />

</LinearLayout>
new_menu.xml
<?xml version="1.0" encoding="UTF-8" ?>
<menu xmlns:android="http://schemas.android.com/apk/res/android">

    <item
        android:id="@+id/item_personal"
        android:icon="@mipmap/ic_launcher_round"

        android:title="    个人"/>
    <item
        android:id="@+id/item_setting"
        android:icon="@mipmap/ic_launcher"
        android:title="    设置"/>
</menu>
布局就这么多,我们稍微回溯一下:
召唤菜鸡真我

菜鸡(我):Androidx 和 support 能混用吗?
当然不能,里面有很多冲突,Androidx的规则更严格一些,当然也有一定的优势(新,就知道新)。
菜鸡(我):咱们这个怎么没用 toolbar 啊,听说内个经典。
不是不想用,是用过之后发现了一些问题,于是放弃了(就是不会了)
发问:NavigationIcon 怎么改?
我试了很多方法都无济于事,那位大佬知道希望可以点化一下我(私信)
Java(.java)
MainActivity
public class MainActivity extends AppCompatActivity {
    private DrawerLayout drawerLayout;
    private NavigationView navigationView;
    private ImageView img;//点击该头像 弹出抽屉
    private ImageView headImg;//抽屉里的头像
    private TextView nickName;//用户名

    @Override
    protected void onCreate(Bundle savedInstanceState) {
        super.onCreate(savedInstanceState);
        //不要标题栏了(因为标题栏的 NavigationIcon不容易改,所以我们主页面自己画了)
        requestWindowFeature(Window.FEATURE_NO_TITLE);
        setContentView(R.layout.activity_main);
        findViews();
        /**
         * 头像的动态设置,因为每个用户的头像都不一样,所以这不能在xml里写死
         * headView非常有必要,因为Android的findViewById一般找不到更深层布局的视图
         * 所以要想动态修改抽屉里头部(head_view.xml)的控件,必须通过headView
         */
        View headView = navigationView.getHeaderView(0);//get hedaView
        headImg = headView.findViewById(R.id.userHeadImg);//不通过headView找不到
        headImg.setImageResource(R.mipmap.ic_launcher_round);
        //设置昵称
        nickName = headView.findViewById(R.id.nickName);
        nickName.setText("SkySong");

        //点击头像划出测边框
        img.setOnClickListener(v -> {
            if(drawerLayout.isDrawerOpen(navigationView)){
                drawerLayout.closeDrawer(navigationView);
            }else{
                drawerLayout.openDrawer(navigationView);
            }
        });
        navigationView.setNavigationItemSelectedListener(item -> {
            switch (item.getItemId()){
                case R.id.item_personal://个人
                    Toast.makeText(MainActivity.this,"个人页面",Toast.LENGTH_SHORT).show();
                    drawerLayout.closeDrawer(navigationView);
                    break;
                case R.id.item_setting://设置
                    Toast.makeText(MainActivity.this,"设置页面",Toast.LENGTH_SHORT).show();
                    drawerLayout.closeDrawer(navigationView);
                    break;
            }
            return true;
        });

    }

    private void findViews() {
        drawerLayout = findViewById(R.id.drawer_layout);
        navigationView = findViewById(R.id.navigation_view);
        img = findViewById(R.id.img);
    }
}
里面的注释已经说的很详细了,再提一下标题栏这;
可见在获得视图前有这么一句话:
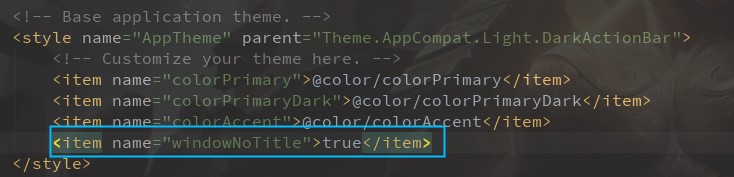
requestWindowFeature(Window.FEATURE_NO_TITLE);就是不要标题的意思,在style里加上一个标签更保险
Points
再多提一下 findViewById 这个方法
- 首先这个方法很常用
- 视图对象的绑定靠它
- 对嵌套的支持性有点低
findViewById 不能直接找到嵌套内层的视图,而在写代码的时候也不报错
最可气的是按 Ctrl 还能点进去,但运行时空指针(你直接杀了我算了)
所以一定要通过中间人,无论时 include 的 id 还是这里的 navigation 的 headView。
