经常写video,audio等html元素在带的控制条或者模块,但是这这些模块哪里来的用什么实现的

发现步骤

进入setttins, 在elements里勾选

如此打开新世界的大门

隐藏有点深刻,难以发现。
那什么是影子DOM
- 影子dom这个东西的存在,主要解决dom树建立时能够实现维护自身边界的问题。这么说有点像vue的scope保证自身不会被外来修饰入侵或者污染。
- 影子dom将对应的dom信息隐藏起来依然能在html文档里渲染出来。但不能通过普通的js方法获取到dom信息
- 影子dom事件捕获遵从常规dom事件,在影子dom内部依然传递,同时也遵从事件冒泡,向整个文档的dom上传递事件。
影子树和文档

创建影子树
通过createShadowRoot创建影子树root节点
<!DOCTYPE html>
<html>
<head>
	<title>影子dom</title>
	<link rel="dns-prefetch" href="//dfhs.tanx.com">
	<style>
		.box {
			height: 80px;
			width: 80px;
			background-color: red;
		}
	</style>
</head>
<body>
	<div id="box" class="box"></div>
</body>
<script>
	var $box = document.getElementById('box');
	var shadowRoot = $box.createShadowRoot(); // 获得root
	//var showRoot = $box.webkitGetShadowRoot() // webkit 支持
	var children = document.createElement('div');
	children.setAttribute('style', 'height: 40px; width: 40px; background-color: blue');
	shadowRoot.appendChild(children);
</script>
</html>
效果图

再给影子树节点添加css时不能用过class或者元素选择来添加,否则无效果
<!DOCTYPE html>
<html>
<head>
	<title>影子dom</title>
	<link rel="dns-prefetch" href="//dfhs.tanx.com">
	<style>
		.box {
			height: 80px;
			width: 80px;
			background-color: red;
		}
		.children {
			height: 40px;
			width: 40px;
			background-color: blue;
		}
		div {
			height: 40px;
			width: 40px;
			background-color: blue;
		}
	</style>
</head>
<body>
	<video src="test.mp4" height="200px" controls></video>
	<audio src="mp3.mp3" controls></audio>
	<canvas></canvas>
	<div id="box" class="box"></div>
</body>
<script>
		var $box = document.getElementById('box');
		var shadowRoot = $box.createShadowRoot(); // 获得root
		//var showRoot = $box.webkitGetShadowRoot() // webkit 支持
		var children = document.createElement('div');
		children.setAttribute('class', 'children');
		shadowRoot.appendChild(children);
</script>
</html>

通过class选择dom时需要将style也放入影子节点里
<script>
	var $box = document.getElementById('box');
	var shadowRoot = $box.createShadowRoot(); // 获得root
	//var showRoot = $box.webkitGetShadowRoot() // webkit 支持
	var children = document.createElement('div');
	children.setAttribute('class', 'children')
	shadowRoot.innerHTML += '<style>.children { height: 40px; width: 40px; background-color: blue;}</style>';
	shadowRoot.appendChild(children);
</script>
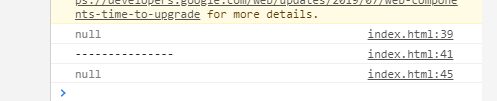
不能直接获得影子DOM
通过js常规方法不能直接获取到dom节点
	var $box = document.getElementById('box');
	var shadowRoot = $box.createShadowRoot(); // 获得root
	//var showRoot = $box.webkitGetShadowRoot() // webkit 支持
	var children = document.createElement('div');
	children.setAttribute('class', 'children');
	children.setAttribute('id', 'children');
	shadowRoot.appendChild(children);

	// 获得影子dom
	// 通过id
	var getShadowRootById = document.getElementById('children');
	console.log(getShadowRootById)
	// 通过节点选择
	console.log('---------------')
	var getShadowRootByDomBox = document.body.firstChild.nextSibling; // 获得到box
	//var getShadowRootByDom = getShadowRootByDomBox.firstChild
	var getShadowRootByDom = getShadowRootByDomBox.firstElementChild;
	console.log(getShadowRootByDom)
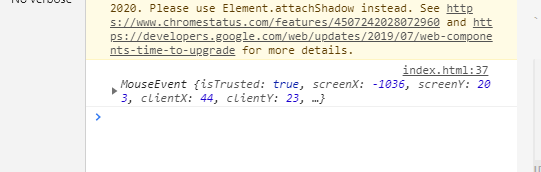
影子dom事件绑定
在createElement时拿到的元素,添加addEventListener事件
	var $box = document.getElementById('box');
	var shadowRoot = $box.createShadowRoot(); // 获得root
	//var showRoot = $box.webkitGetShadowRoot() // webkit 支持
	var children = document.createElement('div');
	children.setAttribute('class', 'children')
	shadowRoot.innerHTML += '<style>.children { height: 40px; width: 40px; background-color: blue;}</style>';
	shadowRoot.appendChild(children);

	children.addEventListener('click', function(e) {
		console.log(e)
	})
通过template完整的操纵影子dom
template也是documentfragment
<!DOCTYPE html>
<html>
<head>
	<title>影子dom</title>
	<link rel="dns-prefetch" href="//dfhs.tanx.com">
	<style>
		.box {
			height: 80px;
			width: 80px;
			background-color: red;
		}
		.children {
			height: 40px;
			width: 40px;
			background-color: blue;
		}
	</style>
</head>
<body>
	<div id="box" class="box"></div>
	<div class="box-test"></div>
	<template class="root-tlp">
		<style>
			.test-ctn {
				color: white;
			}
		</style>
		<div>
			<div class="test-ctn" id="test">测试</dt>
		</div>
		<script>
			document.addEventListener('click', function(e) {
				console.log(e)
			})
		</script>
	</template>
</body>
<script>
	var $box = document.getElementById('box');
	var shadowRoot = $box.createShadowRoot(); // 获得root
	var children = document.createElement('div');
	children.setAttribute('class', 'children')
	shadowRoot.innerHTML += '<style>.children { height: 40px; width: 40px; background-color: blue;}</style>';
	var template = document.querySelector('.root-tlp');
	shadowRoot.appendChild(template.content);
</script>
</html>

当然绑定事件同样有输出

利用content元素select属性将目标内容匹配到template中指定位置,并且目标内容只能在影子元素里
<!DOCTYPE html>
<html>
<head>
	<title>影子dom</title>
	<link rel="dns-prefetch" href="//dfhs.tanx.com">
	<style>
		.box {
			height: 160px;
			width: 160px;
			background-color: red;
		}
		.children {
			height: 80px;
			width: 80px;
			background-color: blue;
		}
		.test-content {
			background-color: yellow;
		}
	</style>
</head>
<body>
	<div id="box" class="box">
		<div class="test-content">我接着测试</div>
	</div>
	<template class="root-tlp">
		<style>
			.test-ctn {
				color: white;
			}
		</style>
		<div>
			<div class="test-ctn" id="test">测试</dt>
		</div>
		<content select=".test-content"></content>
	</template>
</body>
<script>
	var $box = document.getElementById('box');
	var shadowRoot = $box.createShadowRoot(); // 获得root
	var children = document.createElement('div');
	var template = document.querySelector('.root-tlp');
	shadowRoot.appendChild(document.importNode(template.content, true));
	document.addEventListener('click', function() {
		console.log('test-content')
	})
</script>
</html>
这种方式改变文档流顺序还能直接获得dom节点和绑定事件

CSS 选择器:
:host, :host(), :host-context()
:host
<template class="root-tlp">
		<style>
			.test-ctn {
				color: white;
			}
			:host {
  				font-weight: bold;
			}
		</style>
		<div>
			<div class="test-ctn" id="test">测试</dt>
		</div>
		<content select=".test-content"></content>
	</template>

:host()选择器,选择影子dom宿主元素
<body>
	<div id="box" class="box">
		<div class="test-content">我接着测试</div>
	</div>
	<template class="root-tlp">
		<style>
			.test-ctn {
				color: white;
			}
			:host {
  				font-weight: bold;
			}
			:host(.box) {
				color: blue;
			}
		</style>
		<div>
			<div class="test-ctn" id="test">测试</dt>
		</div>
		<content select=".test-content"></content>
	</template>
</body>

:host-context()与后代选择器表达式一起使用,以仅选择特定祖先内部的自定义元素的实例
<!DOCTYPE html>
<html>
<head>
	<title>影子dom</title>
	<link rel="dns-prefetch" href="//dfhs.tanx.com">
	<style>
		.box {
			height: 160px;
			width: 160px;
		}
		.children {
			height: 80px;
			width: 80px;
		}
	</style>
</head>
<body>
	<div id="box" class="test">
		<div class="box-content" id="box-content">
			<div class="box-ctn">213</div>
		</div>
	</div>
	<template class="root-tlp">
		<style>
			.test-ctn {
				color: white;
			}
			:host {
  				font-weight: bold;
			}
			:host(.box-content) {
				color: blue;
				background-color:red;
			}
			:host-context(.test) {
				height:  300px;
				background-color: blueviolet
			}
		</style>
		<div>
			<div class="test-ctn" id="test">测试</dt>
		</div>
		<content select=".box-ctn"></content>
	</template>
</body>
<script>
	var $box = document.getElementById('box-content');
	var shadowRoot = $box.createShadowRoot(); // 获得root
	var children = document.createElement('div');
	var template = document.querySelector('.root-tlp');
	shadowRoot.appendChild(document.importNode(template.content, true));
</script>
</html>

