学习RabbitMQ消息队列
windows下安装RabbitMQ Server
安装了一整天都没好,心累。最开始在windows下安装,安装的有问题。又在cent os下安装,依然没有成功,满满的挫败感。晚上又试了一下,终于安装成功了
如下图:

RabbitMQ的安装的注意事项
- RabbitMQ 和redis一样,也是采用c/s架构 由服务端与客户端组成, 我们需要安装它的服务端
- RabbitMQ服务端是由Erlang语言编写,所以我们必须先安装Erlang语言的环境
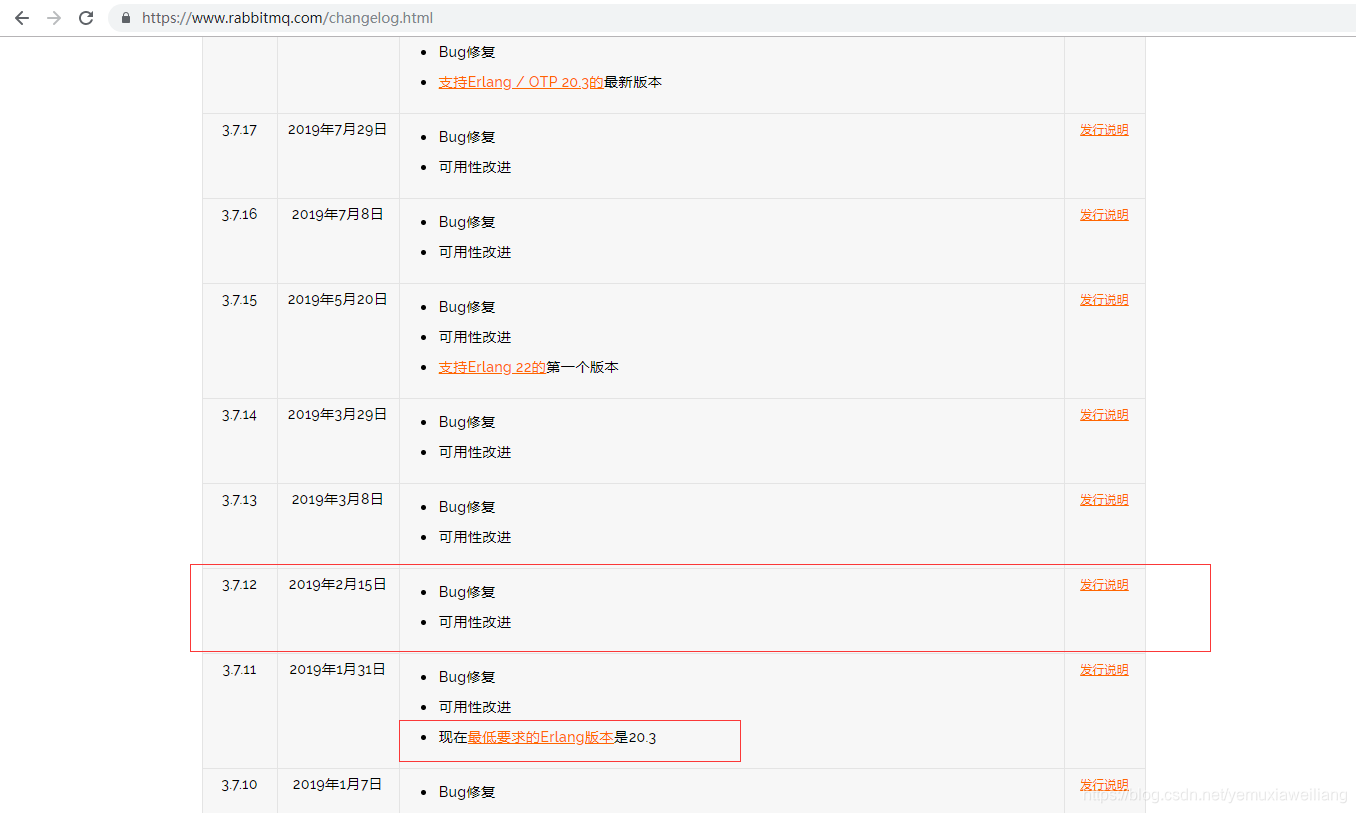
- 注意版本一定要对应,否则安装注定失败,给一个官网的说明。笔者安装的Erlang版本是otp_win64_21.0.1。RabbitMQ Server的版本是rabbitmq-server-3.7.12
- 安装完Erlang环境之后,需要配置path环境变量。
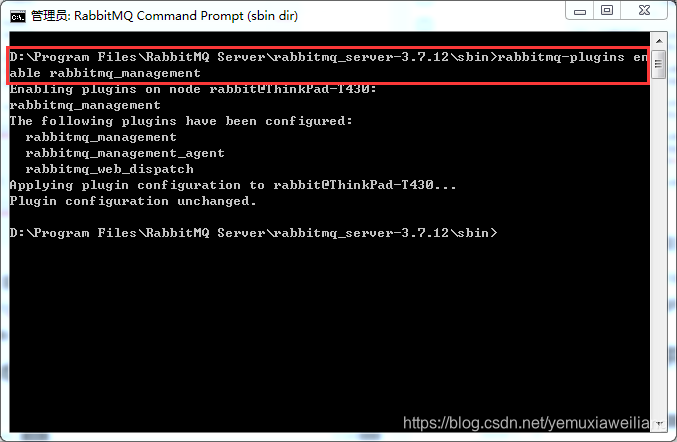
- 安装的 RabbitMQ Server\rabbitmq_server-3.7.12\sbin 目录下面 执行一条cmd命令:rabbitmq-plugins enable rabbitmq_management
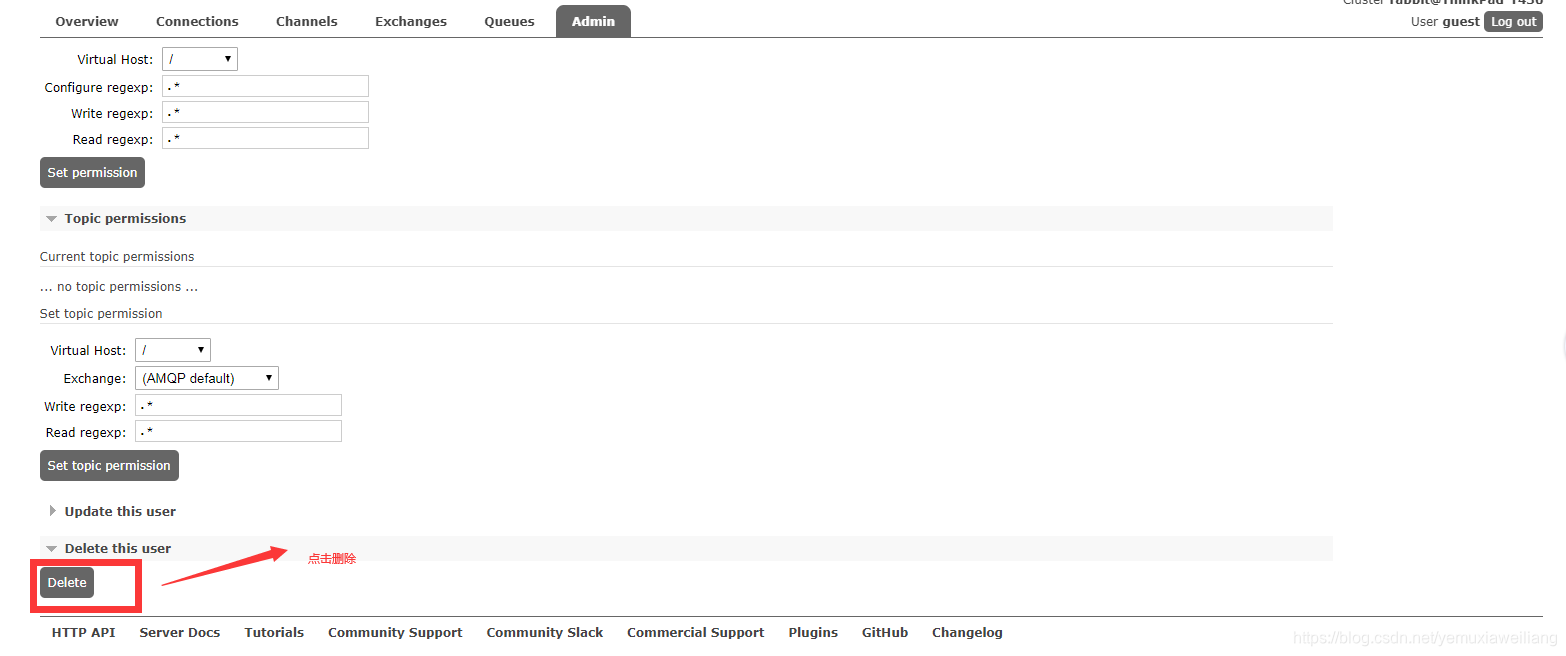
演示删除guest用户并新增用户
线上环境下一定要把guest用户(当然 guest这个用户只能本机才能登陆)删掉并且新加一个用户
添加Virtual host级别的权限
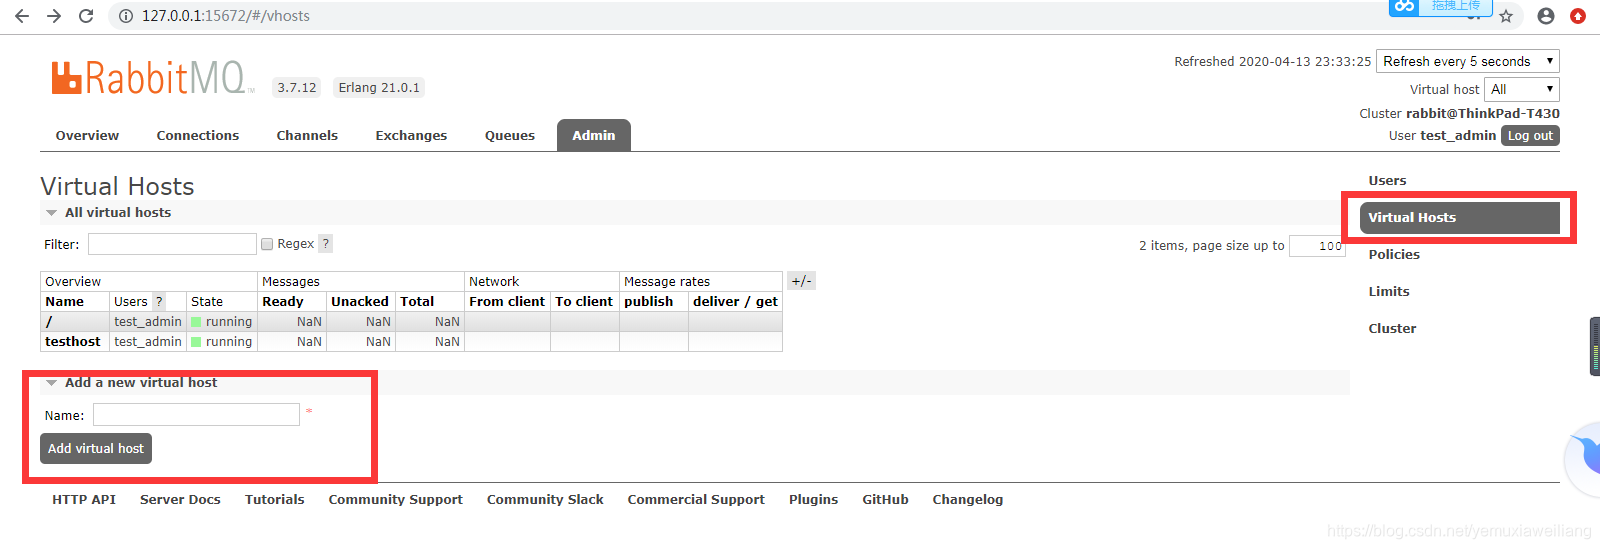
给用户设置Virtual host的权限,正则匹配都是* 也就是所有权限

案例演示
入门案例演示
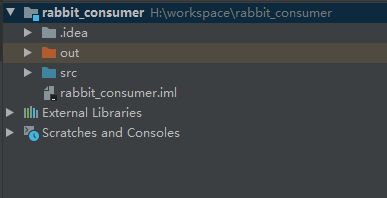
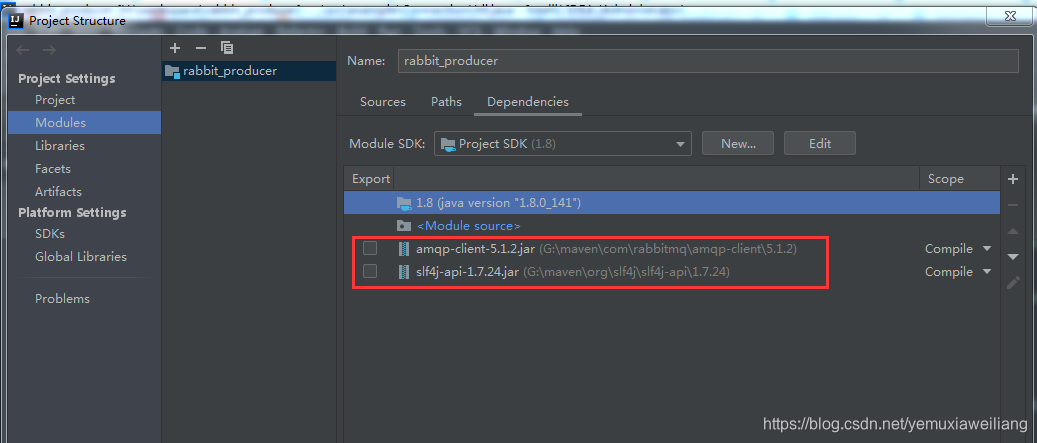
- 1.创建两个java项目,并导入依赖包

- 2.编写ConnectionUtil类
package example;

import com.rabbitmq.client.Connection;
import com.rabbitmq.client.ConnectionFactory;

public class ConnectionUtil {
    public static final String QUEUE_NAME  = "testQueue";

    public static  final  String EXCHANGE_NAME = "exchange";


    public static Connection getConnection() throws Exception{
        //创建一个连接工厂
        ConnectionFactory connectionFactory = new ConnectionFactory();
        //设置rabbitmq 服务端所在地址 我这里在本地就是本地
        connectionFactory.setHost("127.0.0.1");
        //设置端口号,连接用户名,虚拟地址等
        connectionFactory.setPort(5672);
        connectionFactory.setUsername("test_admin");
        connectionFactory.setPassword("123456");
        connectionFactory.setVirtualHost("testhost");
        return connectionFactory.newConnection();
    }
}
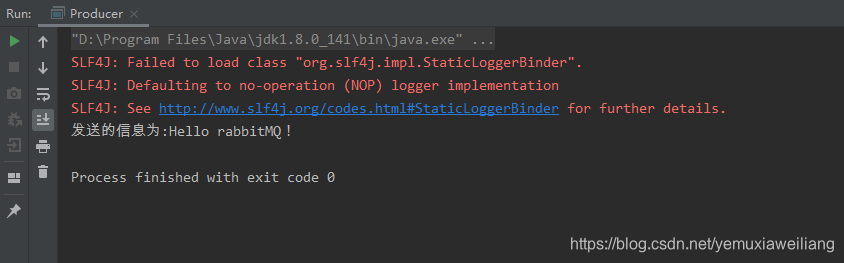
- 3.在生产者java项目中编写消息生产者类
package example;
import com.rabbitmq.client.*;
public class Producer {
public static void main(String[] args) throws Exception{
sendByExchange("Hello rabbitMQ!");
}
public static void sendByExchange(String message) throws Exception {
Connection connection = ConnectionUtil.getConnection();
Channel channel = connection.createChannel();
//声明队列
channel.queueDeclare(ConnectionUtil.QUEUE_NAME,true,false,false,null);
// 声明exchange
channel.exchangeDeclare(ConnectionUtil.EXCHANGE_NAME, "fanout");
//交换机和队列绑定
channel.queueBind(ConnectionUtil.QUEUE_NAME, ConnectionUtil.EXCHANGE_NAME, "");
channel.basicPublish(ConnectionUtil.EXCHANGE_NAME, "", null, message.getBytes());
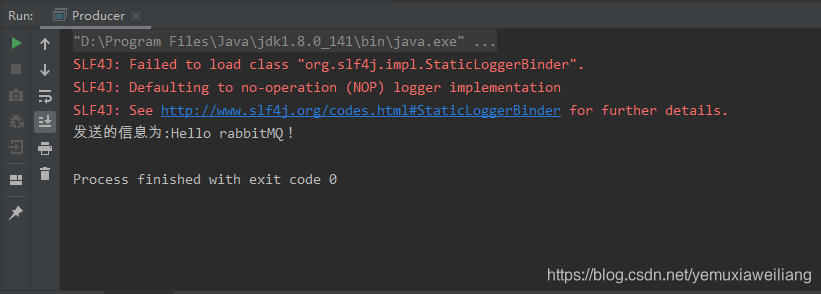
System.out.println("发送的信息为:" + message);
channel.close();
connection.close();
}
}
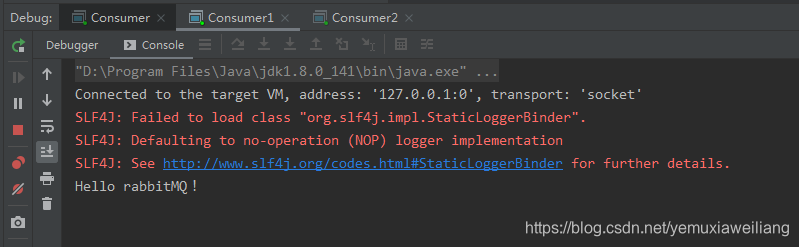
- 4.在消费者java项目中编写消息消费者类
package example;

import com.rabbitmq.client.*;

import java.io.IOException;

public class Consumer {
    public static void main(String[] args) throws Exception{
        getMessage();
    }
    public static void getMessage() throws Exception {
        Connection connection = ConnectionUtil.getConnection();
        Channel channel = connection.createChannel();
//        channel.queueDeclare(ConnectionUtil.QUEUE_NAME,true,false,false,null);
        //定义消费者
        DefaultConsumer deliverCallback = new DefaultConsumer(channel) {
            @Override
            public void handleDelivery(String consumerTag, Envelope envelope, AMQP.BasicProperties properties, byte[] body) throws IOException {
                System.out.println(new String(body, "UTF-8"));
            }
        };
        //开始消费
        channel.basicConsume(ConnectionUtil.QUEUE_NAME, deliverCallback);
    }
}
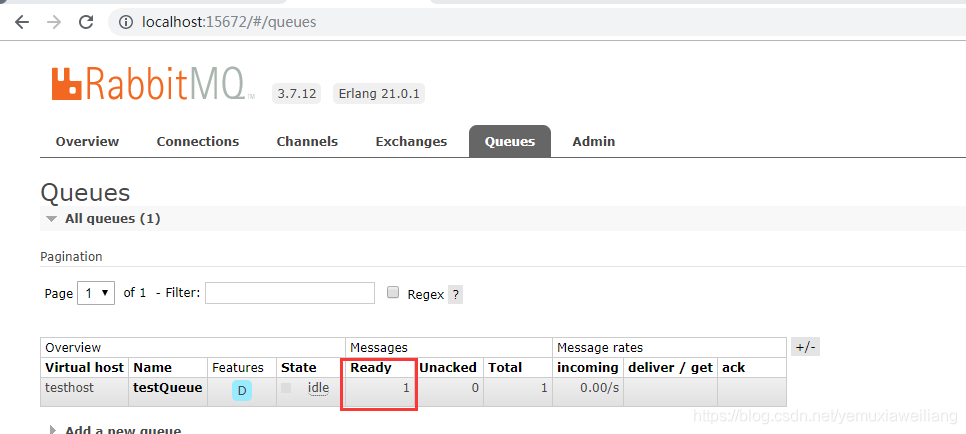
- 5.运行生产者项目,查看rabbitMQ管理面板
- 6.运行消费者项目,查看管理面板
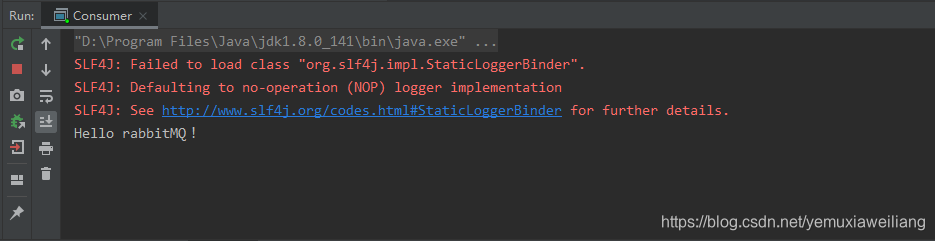
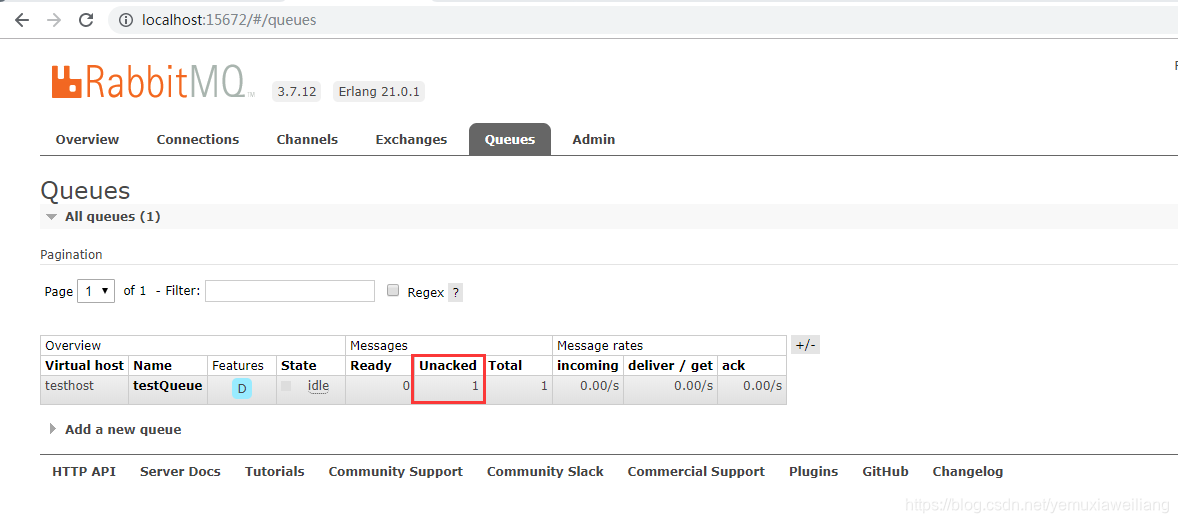
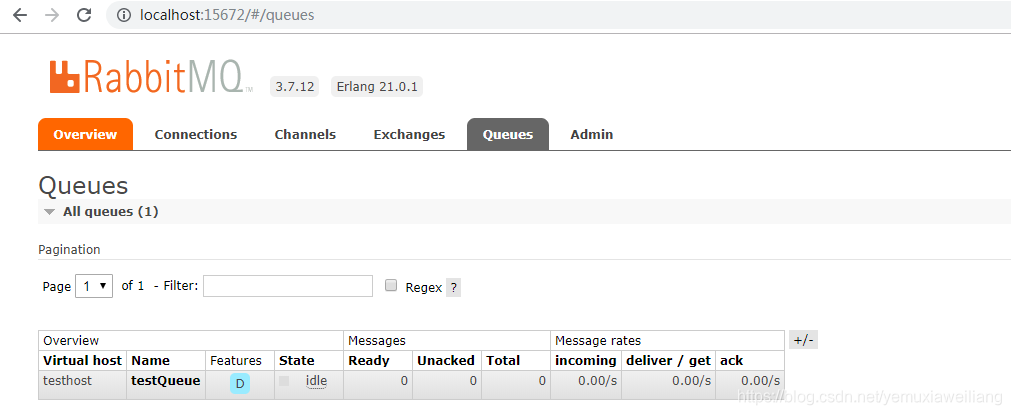
- 7.开启消费者端自动确认,重启服务,并查看管理面板
/**
 * Start a non-nolocal, non-exclusive consumer, with
 * a server-generated consumerTag.
 * @param queue the name of the queue
 * @param autoAck true if the server should consider messages
 * acknowledged once delivered; false if the server should expect
 * explicit acknowledgements
 * @param callback an interface to the consumer object
 * @return the consumerTag generated by the server
 * @throws java.io.IOException if an error is encountered
 * @see com.rabbitmq.client.AMQP.Basic.Consume
 * @see com.rabbitmq.client.AMQP.Basic.ConsumeOk
 * @see #basicConsume(String, boolean, String, boolean, boolean, Map, Consumer)
 */
String basicConsume(String queue, boolean autoAck, Consumer callback) throws IOException;
//开始消费,并自动确认
channel.basicConsume(ConnectionUtil.QUEUE_NAME,true,deliverCallback);
- 8.开启消费者端手动确认,重启服务
/**
 * Acknowledge one or several received
 * messages. Supply the deliveryTag from the {@link com.rabbitmq.client.AMQP.Basic.GetOk}
 * or {@link com.rabbitmq.client.AMQP.Basic.Deliver} method
 * containing the received message being acknowledged.
 * @see com.rabbitmq.client.AMQP.Basic.Ack
 * @param deliveryTag the tag from the received {@link com.rabbitmq.client.AMQP.Basic.GetOk} or {@link com.rabbitmq.client.AMQP.Basic.Deliver}
 * @param multiple true to acknowledge all messages up to and
 * including the supplied delivery tag; false to acknowledge just
 * the supplied delivery tag.
 * @throws java.io.IOException if an error is encountered
 */
void basicAck(long deliveryTag, boolean multiple) throwsIOException;
DefaultConsumer deliverCallback = new DefaultConsumer(channel) {
 @Override
 public void handleDelivery(String consumerTag, Envelope envelope, AMQP.BasicProperties properties, byte[] body) throws IOException {
     System.out.println(new String(body, "UTF-8"));
     System.out.println("消息消费成功");
     //手动确认
     channel.basicAck(envelope.getDeliveryTag(),false);
 }
};

fanout交换器的使用案例
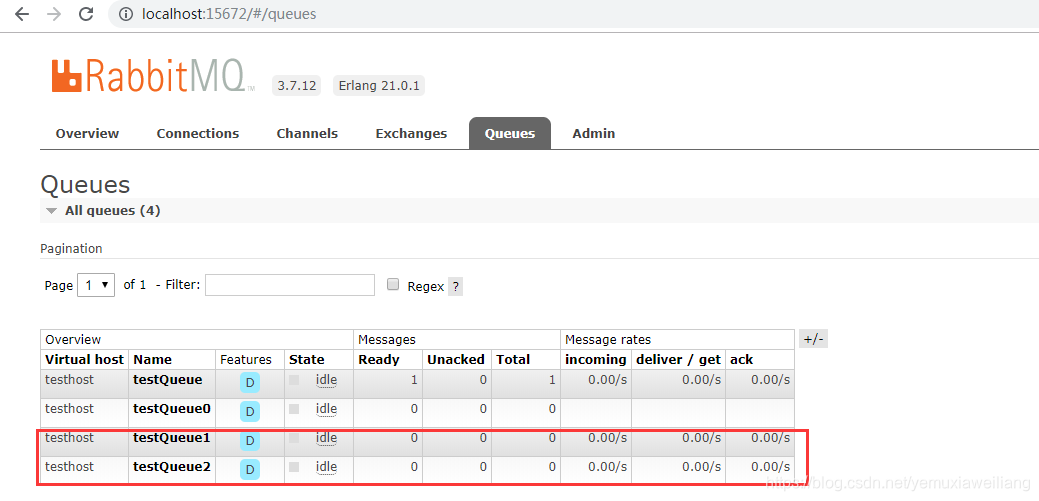
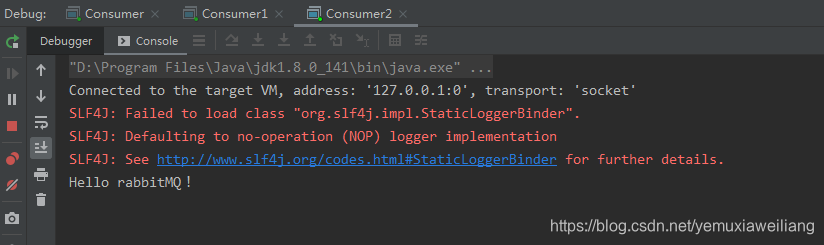
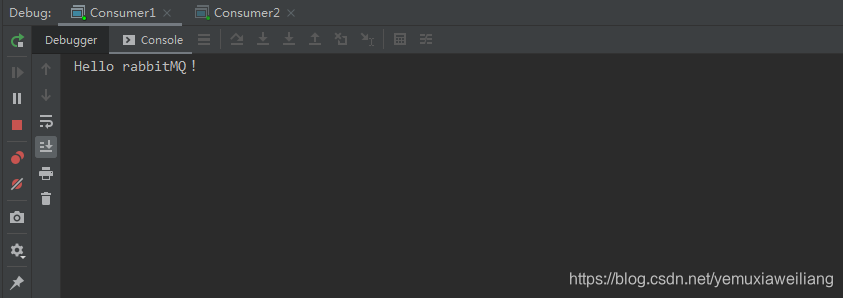
- 声明交换器的类型为fanout(广播,绑定的队列都可以收到消息),并为其绑定两个队列testQueue1,testQueue2
package example;

import com.rabbitmq.client.*;

public class Producer {
    public static void main(String[] args) throws Exception{
        sendByExchange("Hello rabbitMQ!");
    }

    public static void sendByExchange(String message) throws Exception {
        Connection connection = ConnectionUtil.getConnection();
        Channel channel = connection.createChannel();
        // 声明exchange
        channel.exchangeDeclare(ConnectionUtil.EXCHANGE_NAME, "fanout");
        //此交换机绑定两个队列
        channel.queueBind("testQueue1", ConnectionUtil.EXCHANGE_NAME, "");
        channel.queueBind("testQueue2", ConnectionUtil.EXCHANGE_NAME, "");
        channel.basicPublish(ConnectionUtil.EXCHANGE_NAME, "", null, message.getBytes());
        System.out.println("发送的信息为:" + message);
        channel.close();
        connection.close();
    }
}
package example;

import com.rabbitmq.client.*;

import java.io.IOException;

public class Consumer1 {
    public static void main(String[] args) throws Exception{
        getMessage();
    }
    public static void getMessage() throws Exception {
        Connection connection = ConnectionUtil.getConnection();
        Channel channel = connection.createChannel();
        channel.queueDeclare("testQueue1",true,false,false,null);
        //定义消费者
        DefaultConsumer deliverCallback = new DefaultConsumer(channel) {
            @Override
            public void handleDelivery(String consumerTag, Envelope envelope, AMQP.BasicProperties properties, byte[] body) throws IOException {
                System.out.println(new String(body, "UTF-8"));
            }
        };
        //开始消费
        channel.basicConsume("testQueue1",true, deliverCallback);
    }
}
package example;

import com.rabbitmq.client.*;

import java.io.IOException;

public class Consumer2 {
    public static void main(String[] args) throws Exception{
        getMessage();
    }
    public static void getMessage() throws Exception {
        Connection connection = ConnectionUtil.getConnection();
        Channel channel = connection.createChannel();
        channel.queueDeclare("testQueue2",true,false,false,null);
        //定义消费者
        DefaultConsumer deliverCallback = new DefaultConsumer(channel) {
            @Override
            public void handleDelivery(String consumerTag, Envelope envelope, AMQP.BasicProperties properties, byte[] body) throws IOException {
                System.out.println(new String(body, "UTF-8"));
            }
        };
        //开始消费
        channel.basicConsume("testQueue2",true, deliverCallback);
    }
}
- 先运行消费者程序,再运行生产者程序
direct交换器的使用案例
- 声明交换器类型为direct,设置路由键为info.user
package example;

import com.rabbitmq.client.*;

public class Producer {
    public static void main(String[] args) throws Exception{
        sendByExchange("Hello rabbitMQ!");
    }

    public static void sendByExchange(String message) throws Exception {
        Connection connection = ConnectionUtil.getConnection();
        Channel channel = connection.createChannel();
        //删除交换机
        channel.exchangeDelete(ConnectionUtil.EXCHANGE_NAME);
        // 声明exchange
        channel.exchangeDeclare(ConnectionUtil.EXCHANGE_NAME, "direct");
        //此交换机绑定两个队列
        channel.queueBind("testQueue1", ConnectionUtil.EXCHANGE_NAME, "info.user");
        channel.queueBind("testQueue2", ConnectionUtil.EXCHANGE_NAME, "error.user");
        channel.basicPublish(ConnectionUtil.EXCHANGE_NAME, "info.user", null, message.getBytes());
        System.out.println("发送的信息为:" + message);
        channel.close();
        connection.close();
    }

}
- 消费者程序不用变
topic交换器的使用案例
- 声明交换器类型为topic,并绑定三个队列
package example;
import com.rabbitmq.client.*;
public class Producer {
public static void main(String[] args) throws Exception{
sendByExchange();
}
public static void sendByExchange() throws Exception {
String message = "";
Connection connection = ConnectionUtil.getConnection();
Channel channel = connection.createChannel();
//删除交换机
channel.exchangeDelete(ConnectionUtil.EXCHANGE_NAME);
// 声明exchange
channel.exchangeDeclare(ConnectionUtil.EXCHANGE_NAME, BuiltinExchangeType.TOPIC);
//此交换机绑定三个队列
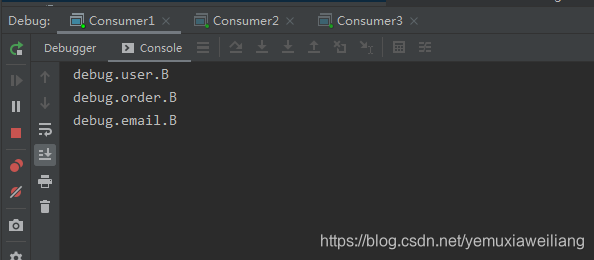
channel.queueBind("testQueue1", ConnectionUtil.EXCHANGE_NAME, "debug.*.B");
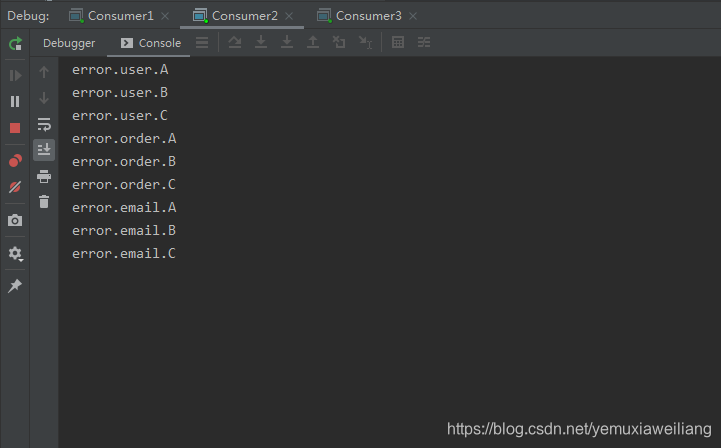
channel.queueBind("testQueue2", ConnectionUtil.EXCHANGE_NAME, "error.#");
channel.queueBind("testQueue3", ConnectionUtil.EXCHANGE_NAME, "*.email.*");
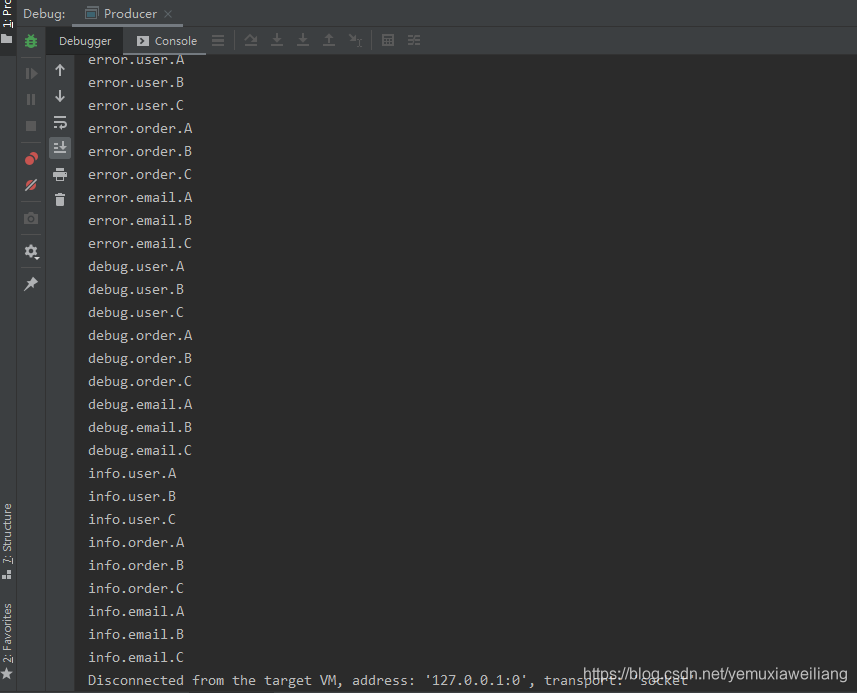
//模拟数据并发送
String[] str1 = new String[]{"error","debug","info"};
String[] str2 = new String[]{"user","order","email"};
String[] str3 = new String[]{"A","B","C"};
for (int i = 0; i < 3; i++) {
for (int j = 0; j < 3; j++) {
for (int k = 0; k < 3; k++) {
message = str1[i]+"."+str2[j]+"."+str3[k];
System.out.println(message);
channel.basicPublish(ConnectionUtil.EXCHANGE_NAME, message, null, message.getBytes());
}
}
}
channel.close();
connection.close();
}
}
- 消费者1,2,3代码类似,队列名称修改一下
package example;

import com.rabbitmq.client.*;

import java.io.IOException;

public class Consumer1 {
    public static void main(String[] args) throws Exception{
        getMessage();
    }
    public static void getMessage() throws Exception {
        Connection connection = ConnectionUtil.getConnection();
        Channel channel = connection.createChannel();
        channel.queueDeclare("testQueue1",true,false,false,null);
        //定义消费者
        DefaultConsumer deliverCallback = new DefaultConsumer(channel) {
            @Override
            public void handleDelivery(String consumerTag, Envelope envelope, AMQP.BasicProperties properties, byte[] body) throws IOException {
                System.out.println(new String(body, "UTF-8"));
            }
        };
        //开始消费
        channel.basicConsume("testQueue1",true, deliverCallback);
    }
}
- 运行结果如下
消费者1:
消费者2:
消费者3:

在SpringBoot项目中使用rabbitMQ
- 1.创建订单服务(rabbit_order)和库存服务(rabbit_stock),并引入以下依赖
<dependencies>
        <dependency>
            <groupId>org.springframework.boot</groupId>
            <artifactId>spring-boot-starter-web</artifactId>
        </dependency>
        <dependency>
            <groupId>org.springframework.boot</groupId>
            <artifactId>spring-boot-starter-amqp</artifactId>
        </dependency>
        <dependency>
            <groupId>com.alibaba</groupId>
            <artifactId>fastjson</artifactId>
            <version>1.2.54</version>
        </dependency>
    </dependencies>
    <dependencyManagement>
        <dependencies>
            <dependency>
                <groupId>org.springframework.cloud</groupId>
                <artifactId>spring-cloud-dependencies</artifactId>
                <version>Finchley.SR2</version>
                <type>pom</type>
                <scope>import</scope>
            </dependency>
        </dependencies>
    </dependencyManagement>
- 2.订单服务代码编写如下:
AppConfig类
package com.example.config;

import org.springframework.amqp.core.Binding;
import org.springframework.amqp.core.BindingBuilder;
import org.springframework.amqp.core.DirectExchange;
import org.springframework.amqp.core.Queue;
import org.springframework.amqp.rabbit.connection.CachingConnectionFactory;
import org.springframework.amqp.rabbit.connection.ConnectionFactory;
import org.springframework.amqp.rabbit.core.RabbitTemplate;
import org.springframework.boot.web.embedded.tomcat.TomcatServletWebServerFactory;
import org.springframework.context.annotation.Bean;
import org.springframework.context.annotation.ComponentScan;
import org.springframework.context.annotation.Configuration;


@Configuration
@ComponentScan("com")
public class RabbitmqConfig {
    @Bean
    public ConnectionFactory connectionFactory(){
        CachingConnectionFactory connectionFactory = new CachingConnectionFactory("localhost",5672);
        connectionFactory.setUsername("test_admin");
        connectionFactory.setPassword("123456");
        connectionFactory.setVirtualHost("testhost");
        //是否开启消息确认机制
        connectionFactory.setPublisherConfirms(true);
        return connectionFactory;
    }

    /**
     * 使用direct类型的交换器
     * @return
     */
    @Bean
    public DirectExchange  defaultExchange() {
        return new DirectExchange("directExchange");
    }

    @Bean
    public Queue queue() {
        //名字是否持久化
        return new Queue("testQueue4", true);
    }

    @Bean
    public Binding binding() {
        //绑定一个队列to: 绑定到哪个交换机上面 with:绑定的路由建(routingKey)
        return BindingBuilder.bind(queue()).to(defaultExchange()).with("direct.key");
    }
    @Bean
    public TomcatServletWebServerFactory tomcatServletWebServerFactory(){
        TomcatServletWebServerFactory tomcatServletWebServerFactory
                =new TomcatServletWebServerFactory(8081);
        return tomcatServletWebServerFactory;
    }

    @Bean
    public RabbitTemplate rabbitTemplate(ConnectionFactory connectionFactory){
        RabbitTemplate rabbitTemplate = new RabbitTemplate(connectionFactory);
        return  rabbitTemplate;
    }
}
Rabbit工具类
package com.example.util;

import org.springframework.amqp.rabbit.core.RabbitTemplate;
import org.springframework.beans.factory.annotation.Autowired;
import org.springframework.stereotype.Component;
@Component
public class RabbitmqMessageSend {

    @Autowired
    RabbitTemplate rabbitTemplate;

    /**
     * String exchange, String routingKey, final Object object
     * @param exchange
     * @param routingKey
     * @param message
     */
    public void  sendMessage(String exchange,String routingKey,String message){
        rabbitTemplate.convertAndSend(exchange, routingKey, message);
    }
}
订单Controller
package com.example.controller;
import com.example.util.RabbitmqMessageSend;
import org.springframework.beans.factory.annotation.Autowired;
import org.springframework.web.bind.annotation.RequestMapping;
import org.springframework.web.bind.annotation.RestController;
@RestController
public class OrderController {

    @Autowired
    RabbitmqMessageSend rabbitmqMessageSend;

    @RequestMapping("/order.do")
    public  Object order(String exchange,String routingKey,String message){
        rabbitmqMessageSend.sendMessage(exchange,routingKey,message);
        return "下单成功";
    }
}
- 3.订单服务运行结果如下(连续调用两次接口)

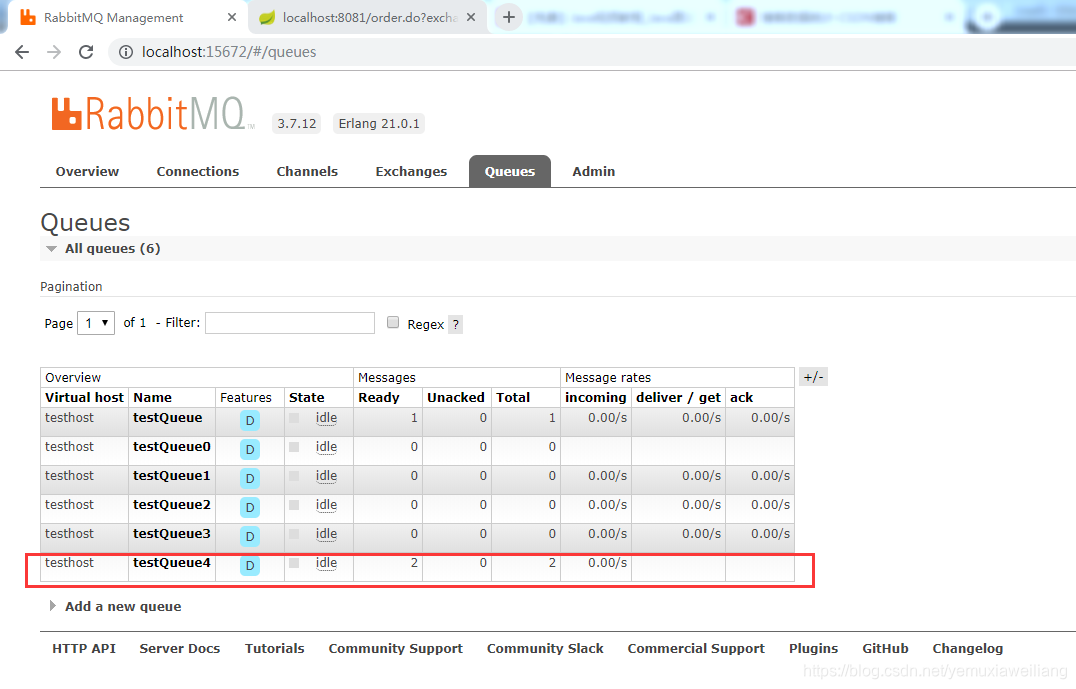
- 4库存服务代码如下(AppConfig和订单服务类似)
package com.example.util;
import org.springframework.amqp.core.Message;
import org.springframework.amqp.rabbit.annotation.RabbitListener;
import org.springframework.stereotype.Component;
@Component
public class RabbitmqUtil {
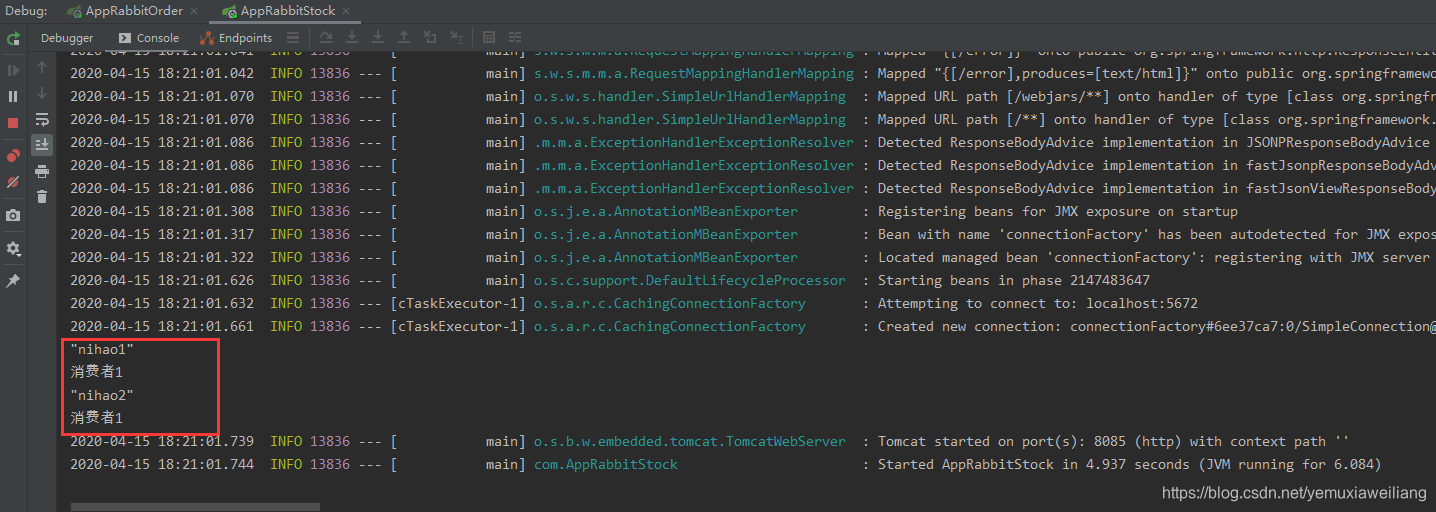
@RabbitListener(queues = "testQueue4")
public void get(Message message) throws Exception{
System.out.println(new String(message.getBody(),"UTF-8"));
System.out.println("消费者1");
}
}
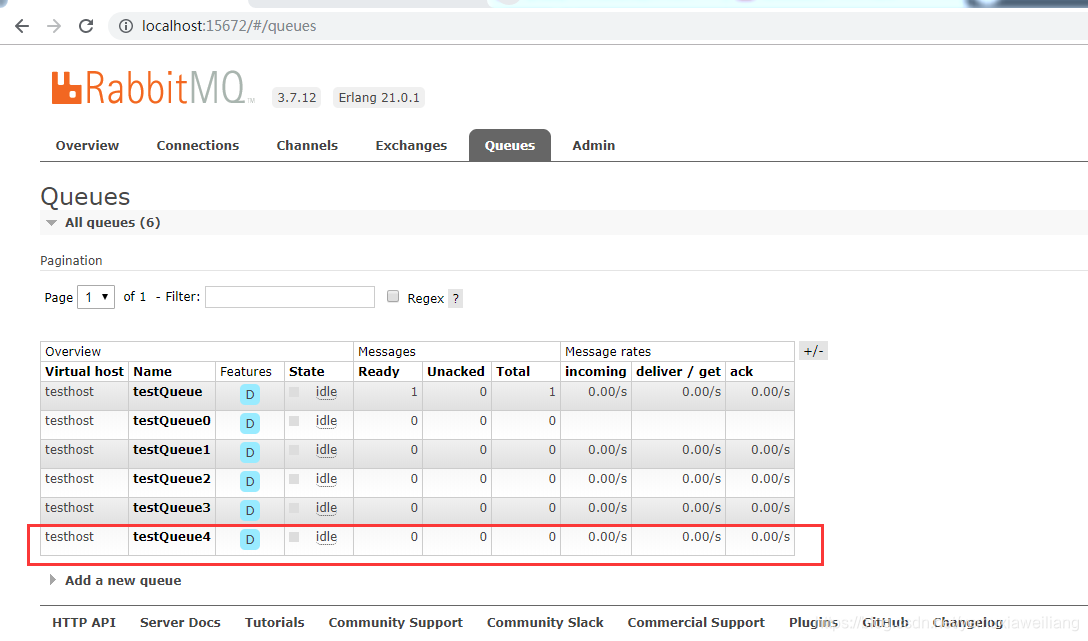
- 5.库存服务运行结果如下
总结
RabbitMQ如何解决重复消费的问题
思路:给业务数据增加“是否消费”的字段。消费者在消费数据之前先查询业务数据进行判断该业务数据是否被消费过,如果未消费,则进行消费。如果已消费,则丢弃该消息。
例如:订单数据记录表增加state字段状态,0表示未消费,1表示已消费
RabbitMQ什么时候选择消费端自动确认,什么时候选择手动确认
根据应用场景选择
例如:如果使用rabbitMQ处理日志的话,不影响系统的正常使用,可以使用消费端自动确认。
如果使用rabbitMQ处理减库存的业务操作,则需要手动确认。订单服务,库存服务。先处理订单服务,再处理减库存服务。
